
Welcome to my ABC Holiday 2019 Series! Throughout this series I will be sharing all kinds of cards, gifts, and ideas to help make your holidays as easy as ABC! I love the sentiments, different fonts, and there’s even some inside greetings in the Itty Bitty Christmas Stamp Set! There’s something for every type of Christmas project, from tags to cards and more! I don’t know how they picked the name because there’s nothing itty bitty about the number of greetings in the Itty Bitty Christmas Stamp Set! See for yourself.

Several years ago a student of mine gave me a beautiful wreath. (I thought it was real!) I collect different sentiment ornaments to decorate my trees, mantel, and throughout our home. I even added a few on the wreath which provided the inspiration for today’s card. Here’s a picture of the wreath.

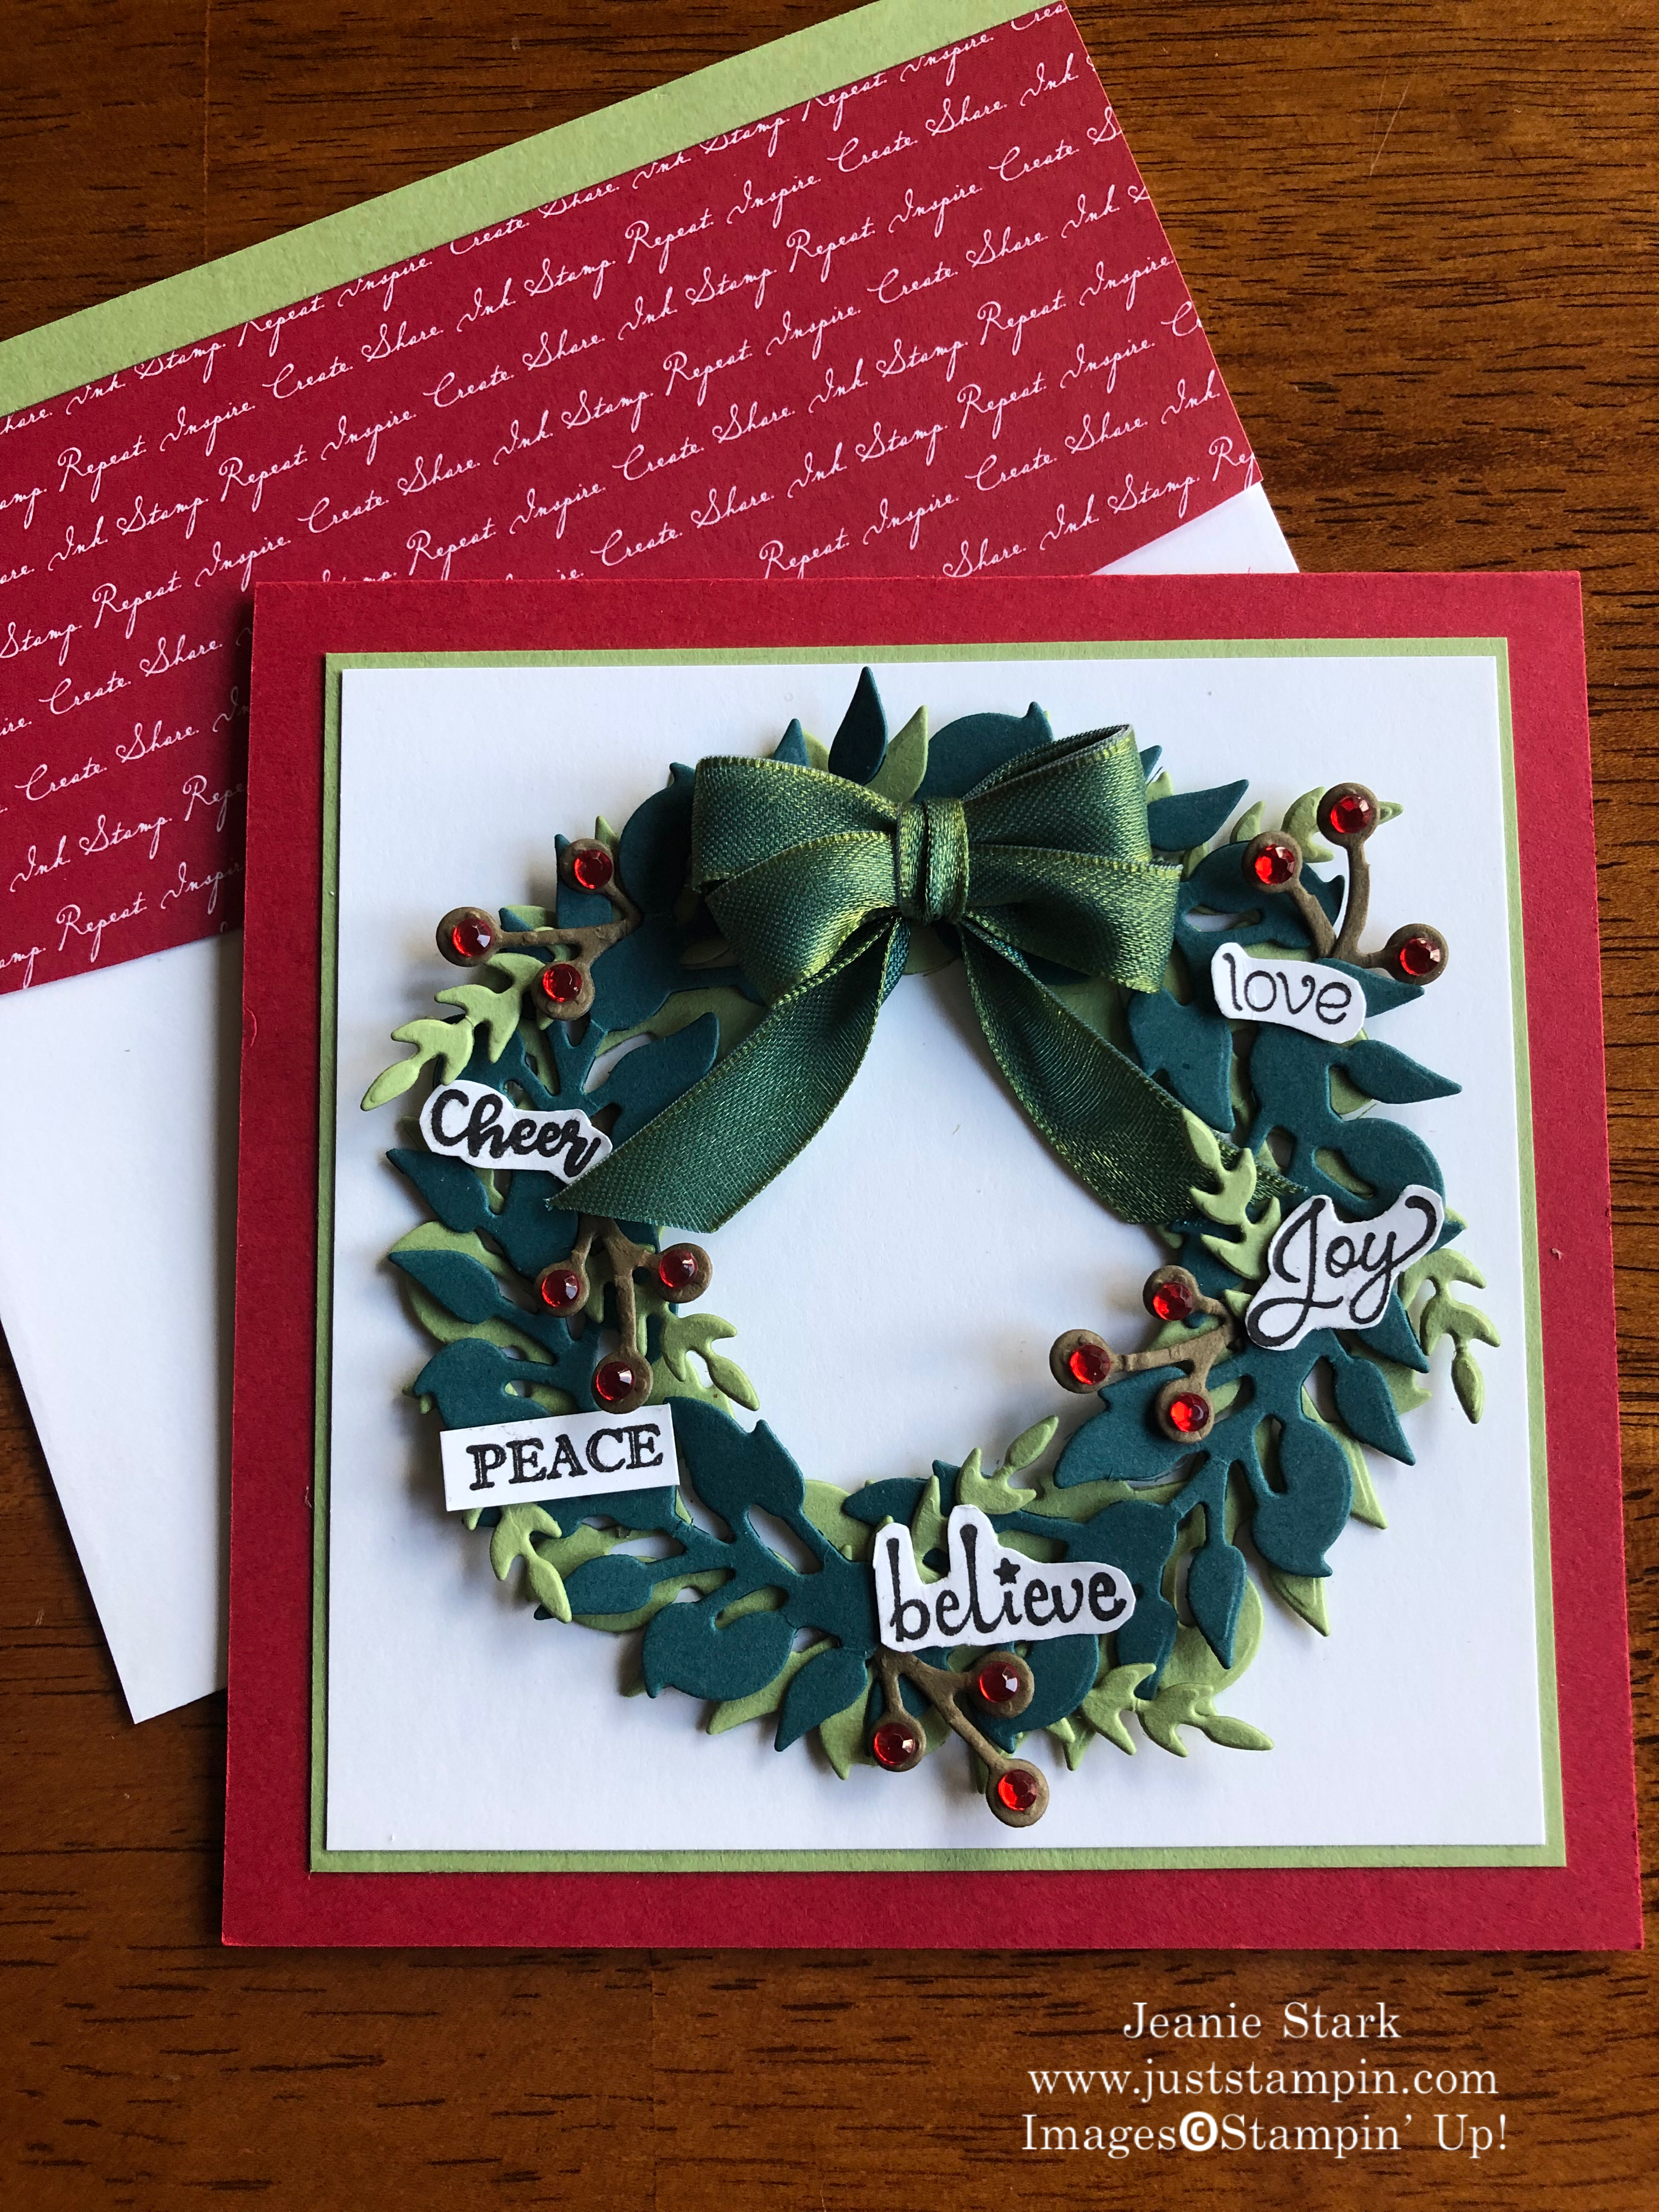
And here’s my card.

I stamped several sentiments from the Itty Bitty Christmas Stamp Set and fussy cut around them to decorate my wreath. I love the All-Around Wreath Dies and have cut them out in all different colors to play with! I chose Pretty Peacock and Old Olive for this wreath as I wanted to use the Old Olive/Pretty Peacock Reversible Ribbon. It has a sheen similar to the bow on my inspiration wreath. (Plus it’s just gorgeous!)
Here’s the details for today’s card:
Materials & Measurements
- Real Red card base: 4 1/4″ x 8 1/2″, scored at 4 1/4″ for a square card
- Old Olive: 2 cut at 3 3/4 x 3 3/4, 4 x 4 to cut wreath, 1/4 x 6, scraps to cut 8 sprigs
- Whisper White: 2 cut at 3 5/8″ x 3 5/8″ scraps to stamp sentiments
- Pretty Peacock: 4 x 4 to cut wreath
- Soft Suede: scraps to cut 5 twigs
- Regals 6 x 6 DSP: Real Red 2 x 6 for envelope flap
- Pretty Peacock/Old Olive Reversible Ribbon: 18″
Directions
- Adhere the Whisper White to Old Olive and then adhere to front and inside of card.
- Cut wreaths in Old Olive and Pretty Peacock and adhere together (a little off centered) with a few Glue Dots. Adhere to Whisper White panel with a few more Glue Dots.
- Cut sprigs (from All-Around Wreath Dies) in Old Olive and twigs (from Flourish Dies) in Soft Suede.
- Tie a bow with ribbon and adhere to top of wreath with a Glue Dot.
- Stamp sentiments, fussy cut, and adhere around wreath with Glue Dots.
- Use liquid glue to tuck in sprigs and twigs around wreath.
- Add Red Rhinestones on twigs.

- Stamp sentiment in Real Red on inside card.

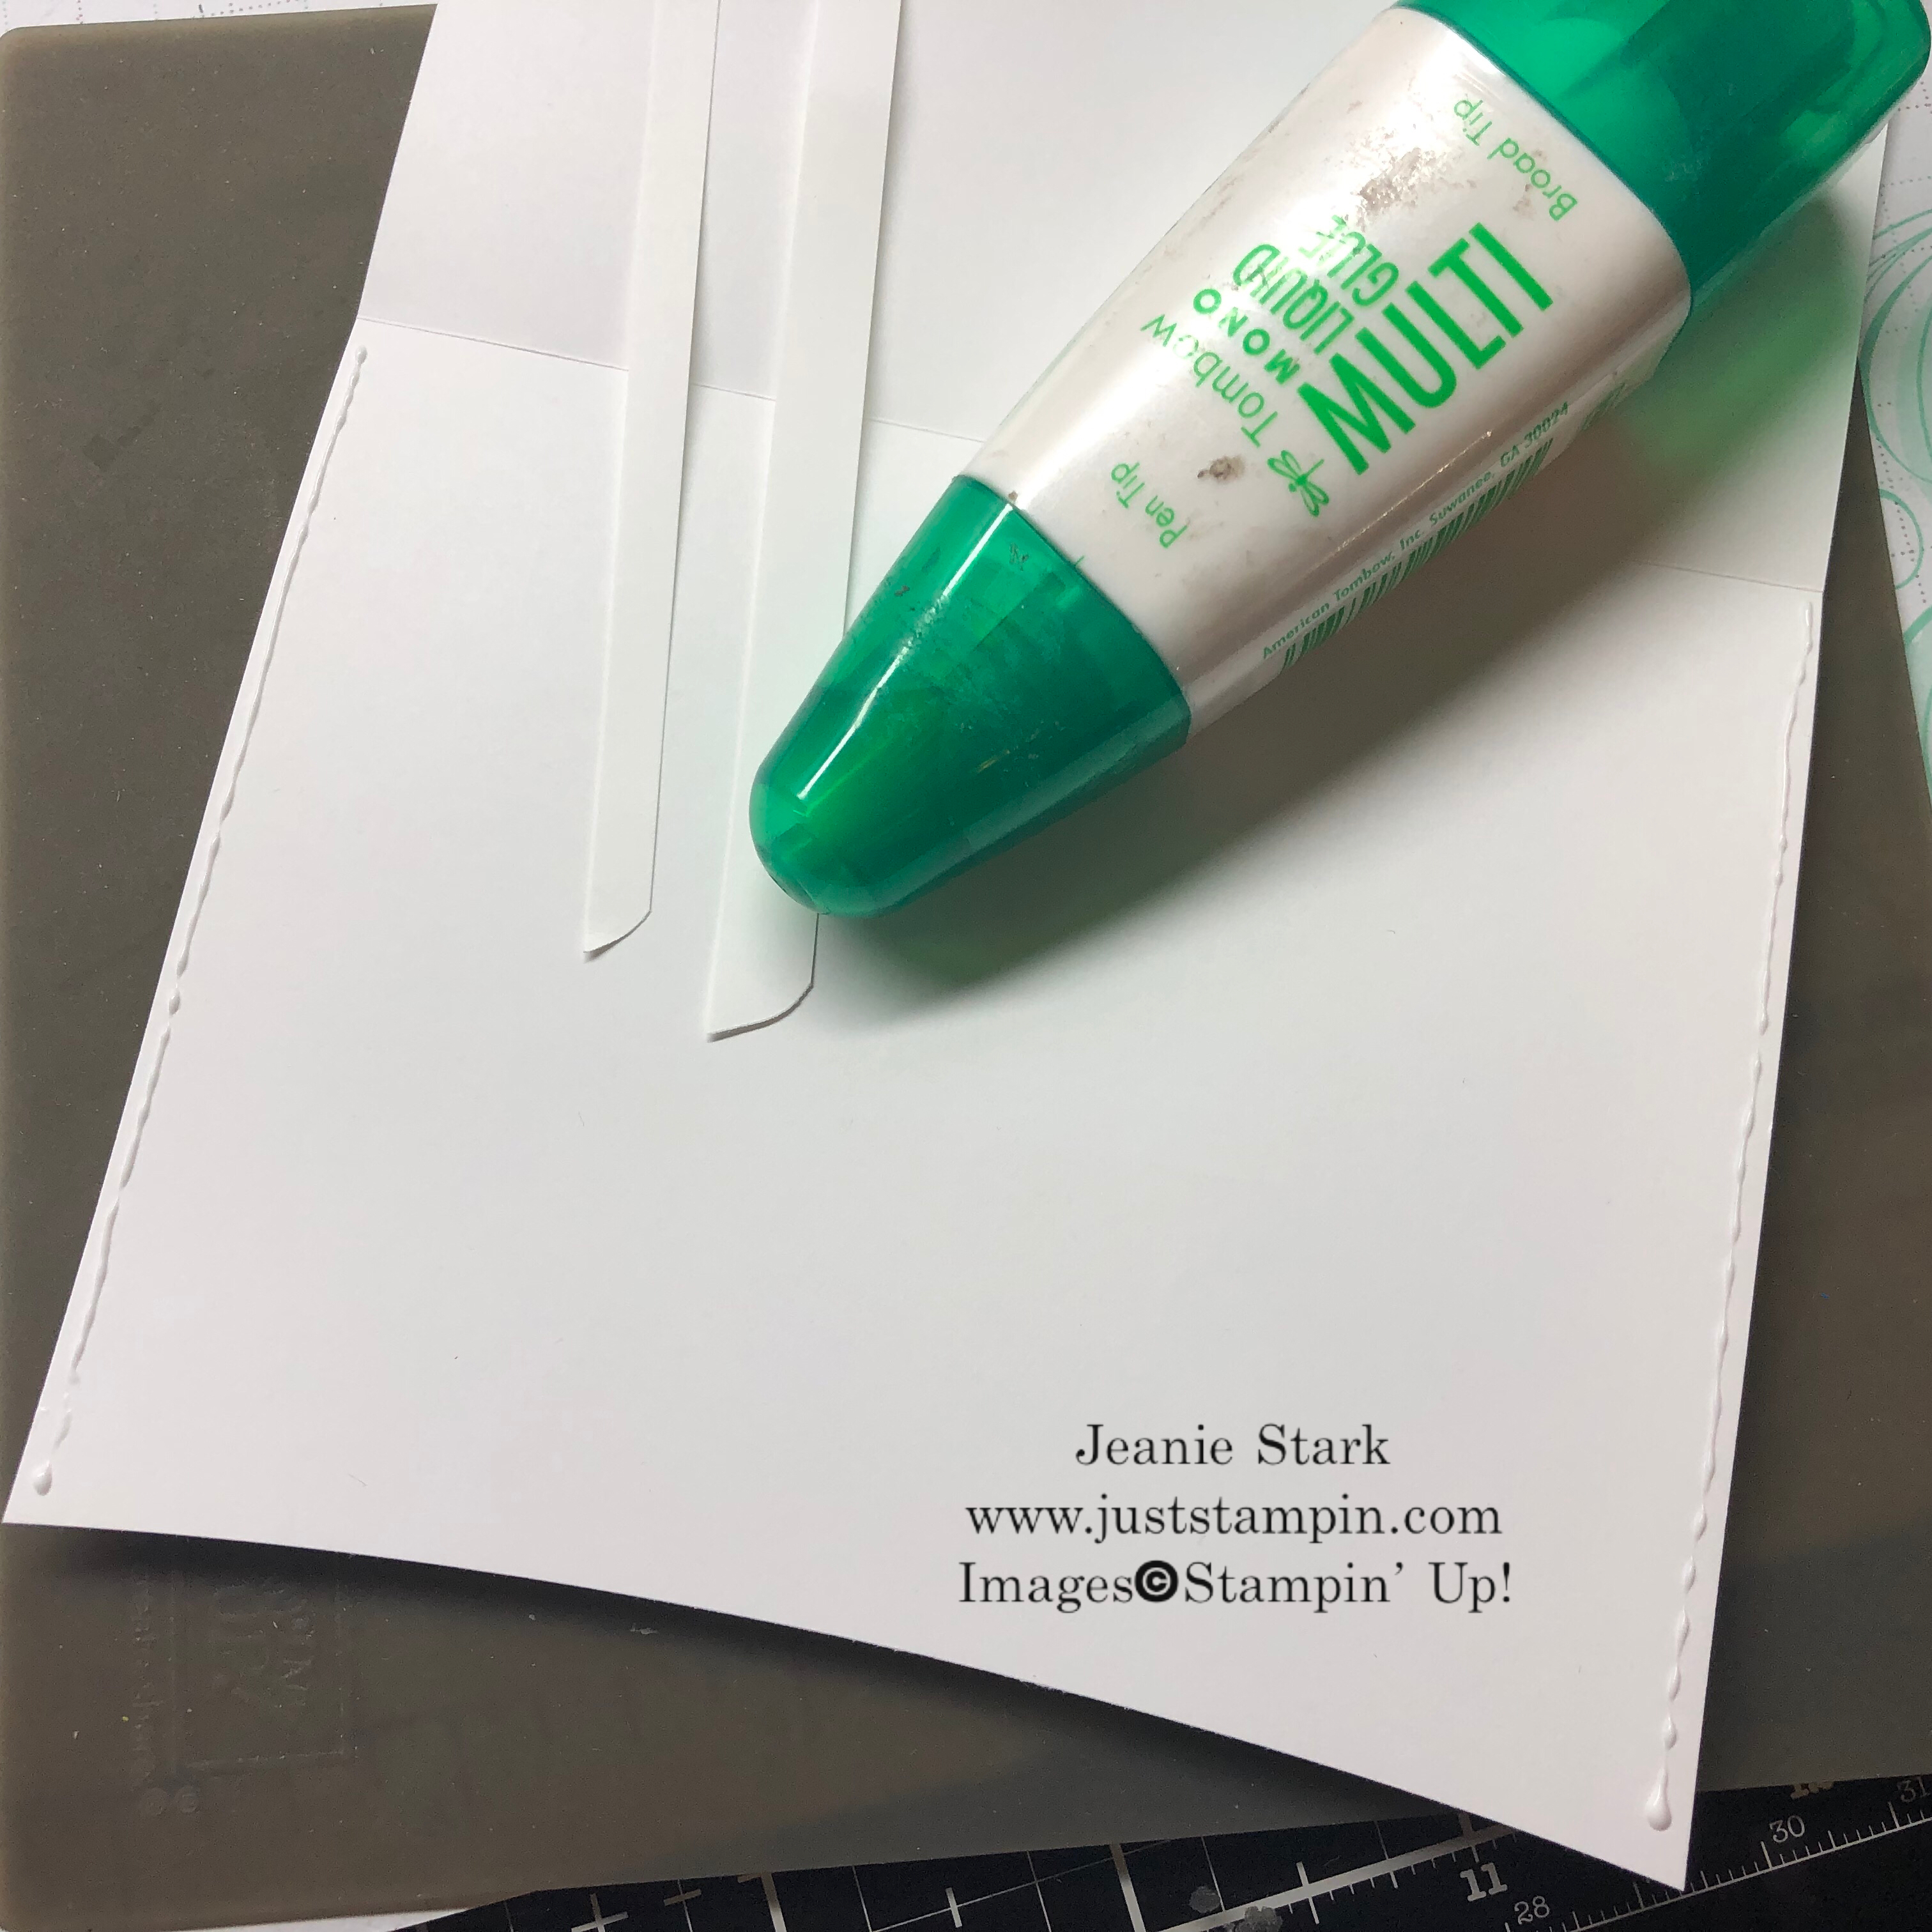
- This card will fit in a standard envelope to mail. To make a custom square envelope like mine, simply cut 1/2″ off each side of the standard envelope. Remove the inside scraps and add a thin line of liquid glue along the inside and seal closed. So simple! *Note- the post office does charge extra for square packages. I don’t do this all the time and let’s face it…this is a special card. It’s worth it!
- Adhere the Old Olive strip and DSP to the envelope flap and trim.
So, how do you think it compares to my inspiration?

I make (and sell) custom cards. If you would like to purchase this card (or any you see on my blog) email me (j.stark@myactv.net). To order the supplies to make this card yourself just click on the images below.
This month I am offering 3 Exclusive card tutorials using the All Around Wreath Dies and coordinating stamp sets. You can get these tutorials FREE with a purchase of $40 or more from my online store. In addition, you will receive a handmade thank you card from me along with a card kit for any order each month! I love to make and send cards and I appreciate your support!
If you would like ideas how to use the Basic Pattern Decorative Masks (shown on page 35 in the Holiday catalog), I am offering a Class Kit To Go this month with photo tutorials to complete 4 cards (using each of the patterns). Click HERE for a sample and all the details.
Have a great day! I hope you find inspiration to create!
Just Stampin’
Jeanie
If you like this project and want to order the supplies needed to make it yourself, please visit my online store or click on the images below. For orders under $150 please use the host code. October Host Code: FG7M24JM
Product List
")
|

|
")
|
|

|
|||

|

|
||

|

|

|
|

|

|
")


 Reversible Ribbon")
Orders of $40 or more receive EXCLUSIVE monthly tutorials (via email) featuring the Tidings All Around Bundle and the Seasonal Wreaths Stamp Set (Oct.)
Are you celebrating your birthday this month? I offer FREE shipping (and a birthday card) on any Stampin’ Up! product purchase of $50 or more placed through my online store during your birthday month (in addition to my monthly thank you gift!) Please use the current host code.

Perfect representation of your wreath! Just beautiful!
Thanks Karen!
I like the card a lot, but that is the prettiest bow I have ever seen!
You are so sweet! Thank you! Here’s link to a post I did with a picture of how I make bows.
https://juststampin.com/2017/02/24/how-to-make-a-triple-bow/
Absolutely stunning!! Clever way to showcase this amazing stamp set, too. And I agree~the bow is perfection.
Thanks Linda! I am having so much fun making wreaths!
LOVE IT….and you are also the Queen Bow Maker…..just stunning and I am sure it makes you smile thinking of your students!
Yes it does!
Irresistible to not love! Your imagination amazes me how you get it all pulled together and look amazing. Just beautiful, both the reminder of your students and the final card and envelope. That bow is just the icing on the cake. Love it.
Thanks Chris! I enjoyed creating it! Wish I had this set years ago (for that matter I wish I started stamping years ago!!!). I know she would have appreciated a thank you card like this!
Okay ,ditto on all of the above comments ! My comment is THANKS for the envelope tip !! Also I may have to break down and get Itty Bitty stamps . Aren`t they the cutest ?
Thanks Sonny! Those stamps are the cutest! The envelope idea I learned from Gina K (Gina K Designs). I went to a workshop of hers and she demonstrated how to do it! I love my envelope punch board too and still use that to make custom envelopes.
I love your posts! For some reason the pictures in your posts are only opening a small slit. Is it something between my computer and how the posts are sent? Everything else downloads but I miss seeing the pictures.
Oh dear! Try clicking on the title of the post and it will take you online rather than trying to read it in an email and see if that works. I’m sure it’s not pretty without the photos!
Super clever!,
Thanks! I like the challenge of seeing something and trying to recreate it with stamps and paper!
Wow…loved seeing the “real” wreath next to your paper wreath. You are so creative and this card is awesome!
Thanks Rosanne! It’s fun to try to recreate something I see.