With a Little Help From My Friends

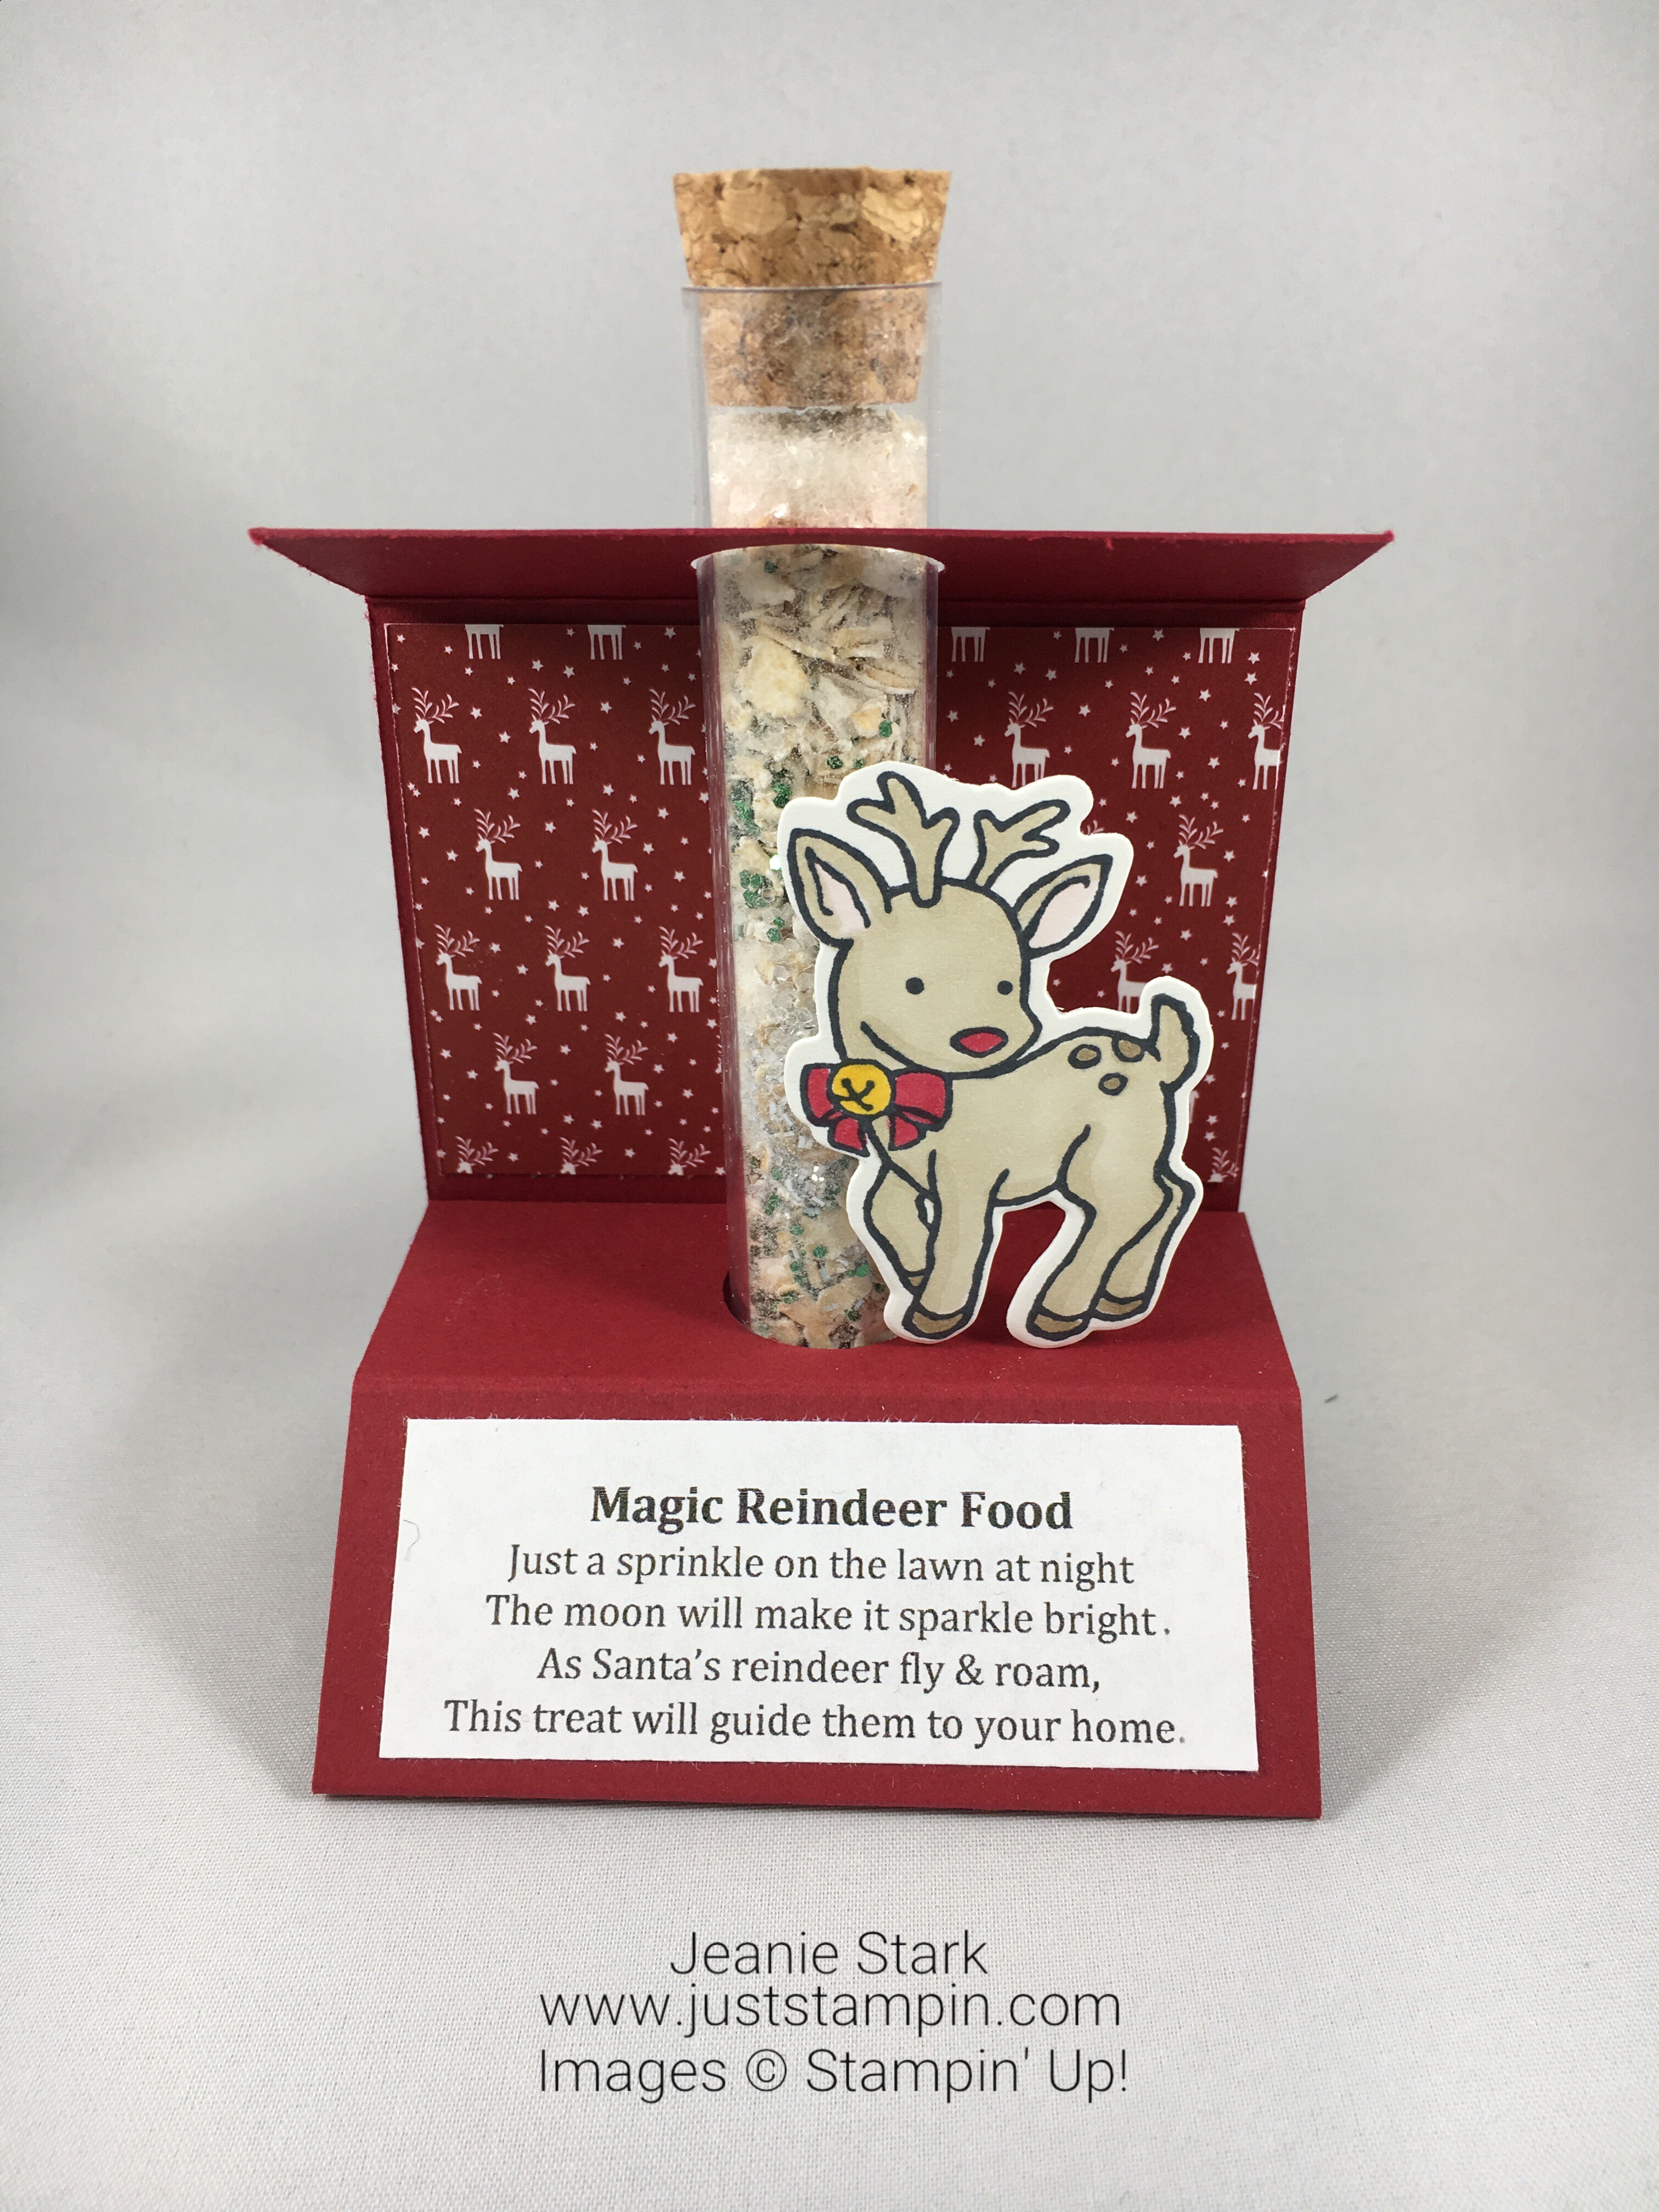
I have said this before…I am blessed with a wonderful family and the best friends! Many have called; stopped by; sent cards, flowers, and meals; driven me to doctor appointments and physical therapy; made post office deliveries, and helped with so many other things…including crafting!  It’s hard for me to ask for help and I have been touched by such an outpouring of kindness and support since I dislocated and fractured my elbow. Many friends offered to help cut, label, and assemble my kits so I could get them out last month. My friend Susan spent the day with me earlier this week putting together Valentines for my Pre-K students. (I miss them!) We had so much fun making these!  Laughter (and crafting) is the best therapy! Look at these stinkin’ cute fish!

Stampin Up Painted with Love Valentine treats - Jeanie Stark StampinUp For inspiration, project details, ordering, and more, visit www.juststampin.com

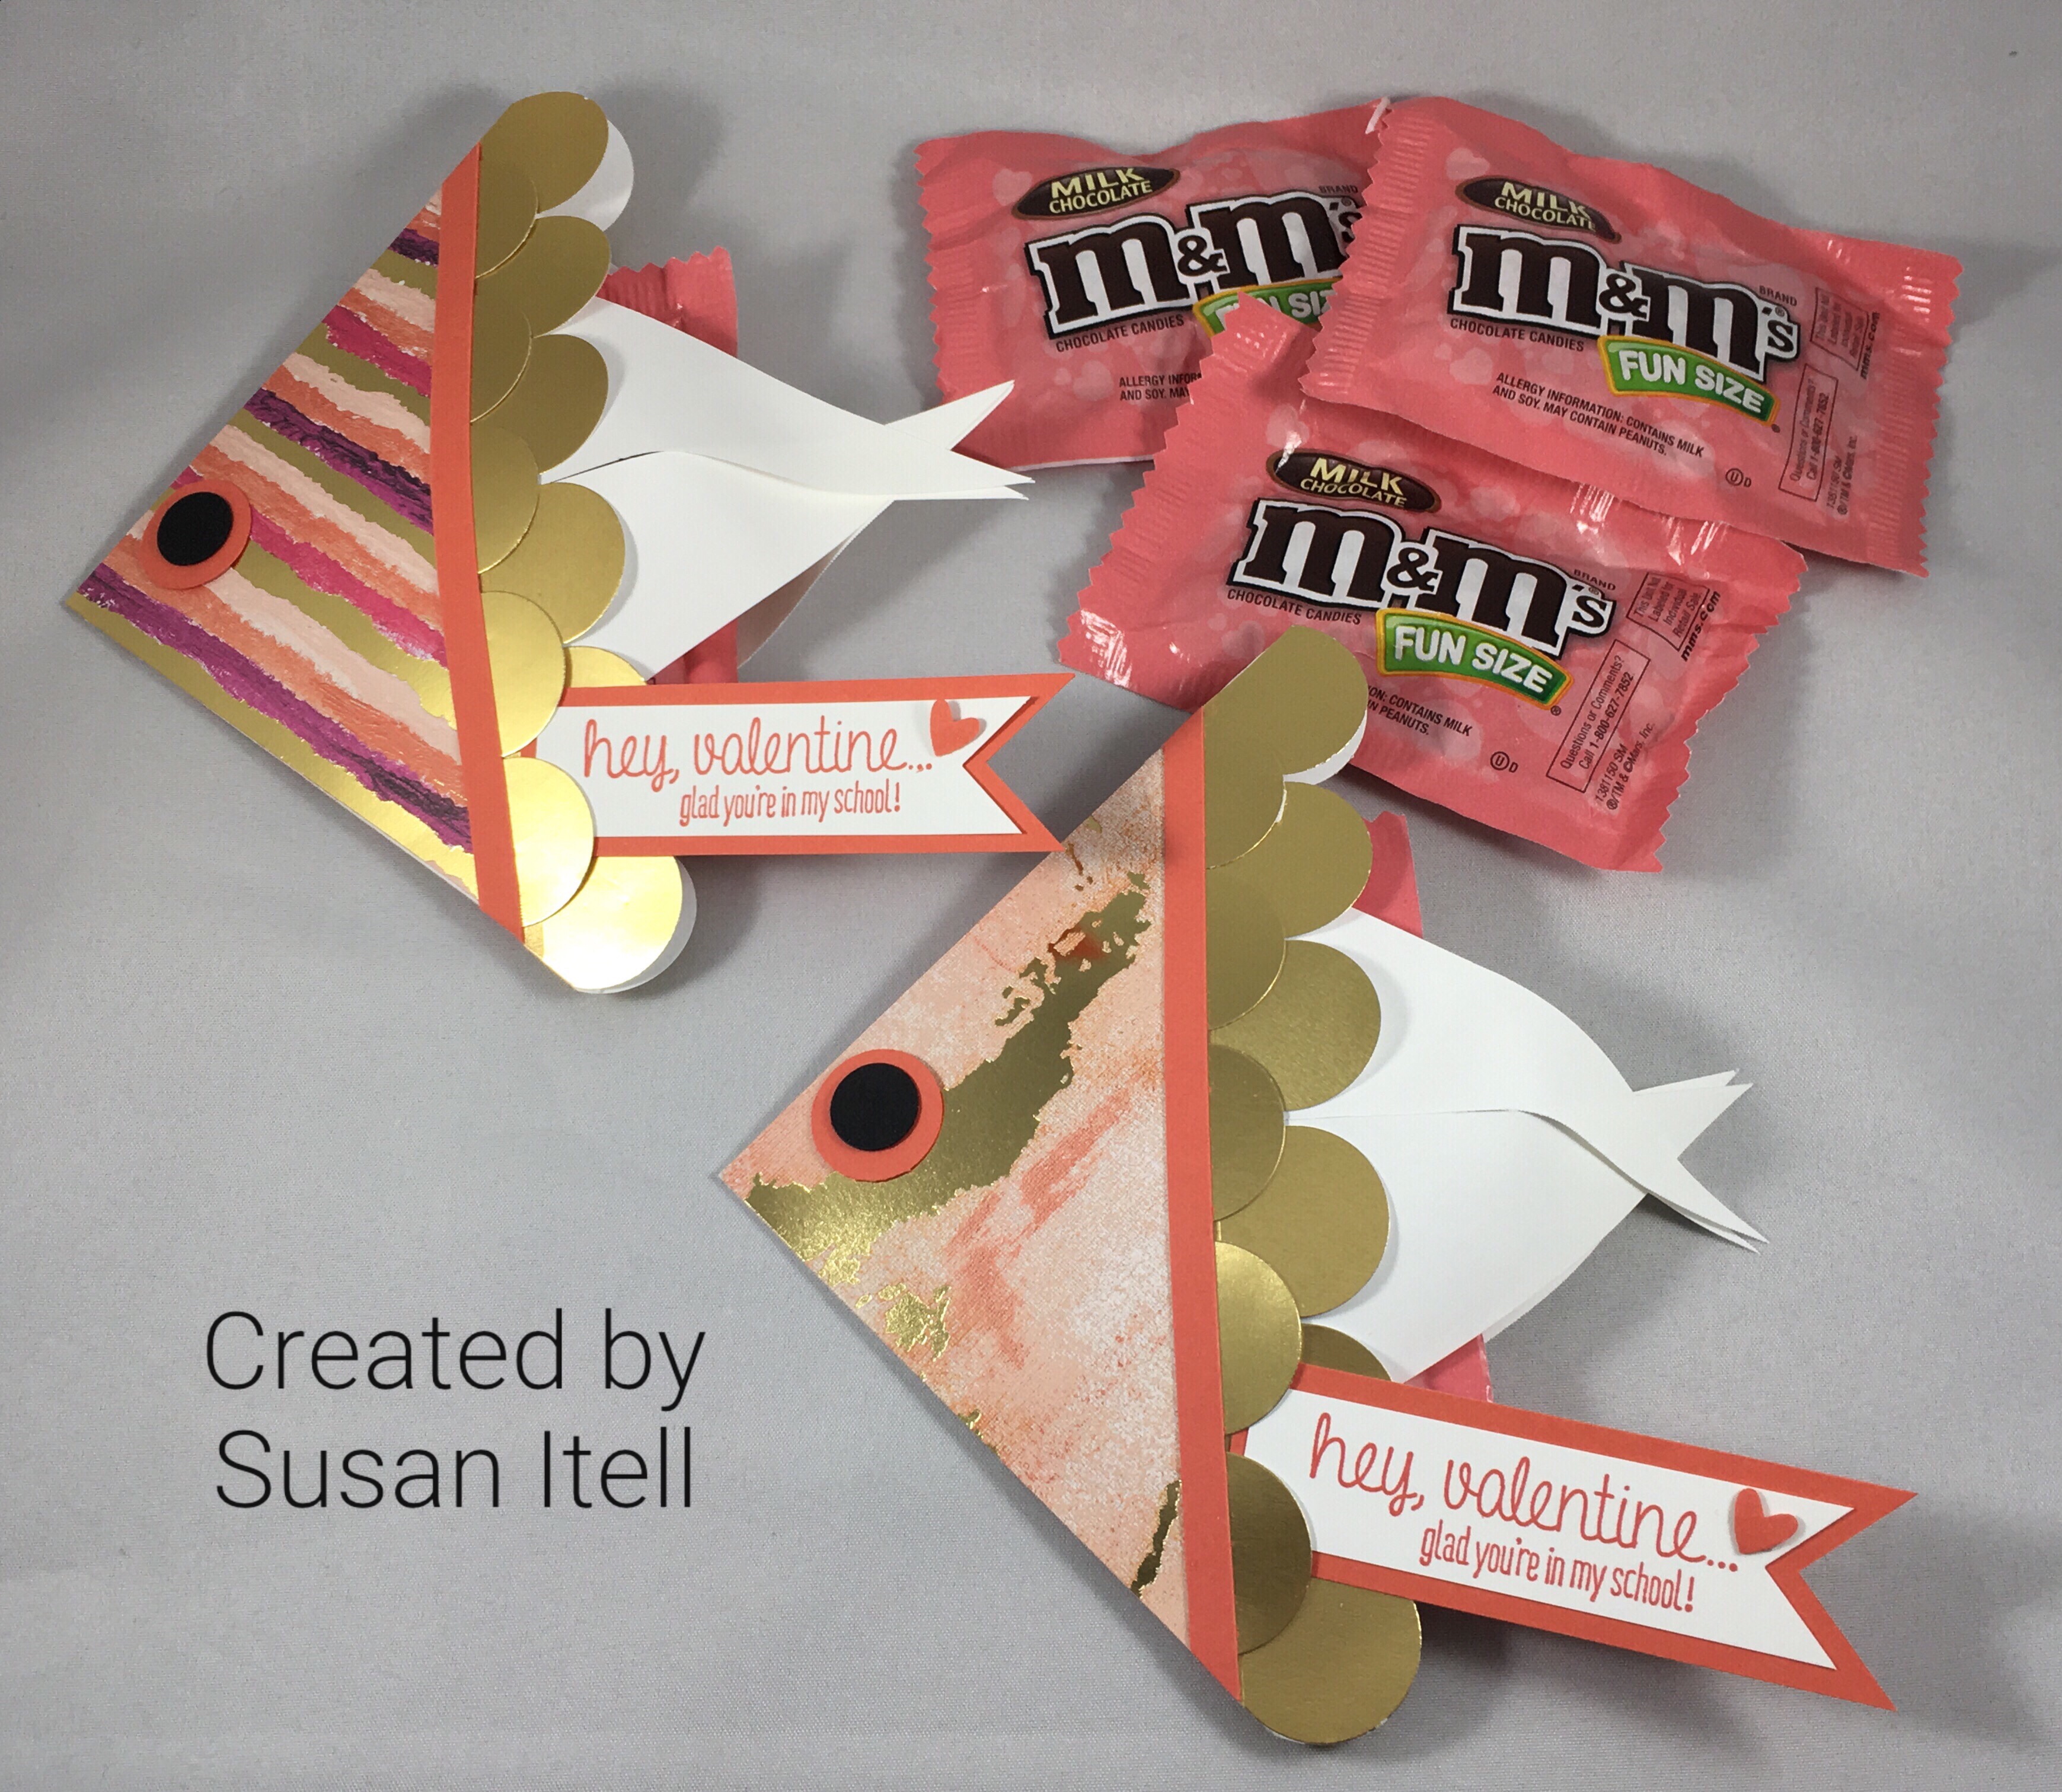
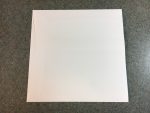
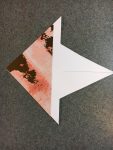
This idea came from Rachel Tessman.  The fish are made from envelopes! We used the Stampin Up! medium envelopes. Simply lick and stick the envelope shut then cut the long side at 4 3/8″ so it is square.

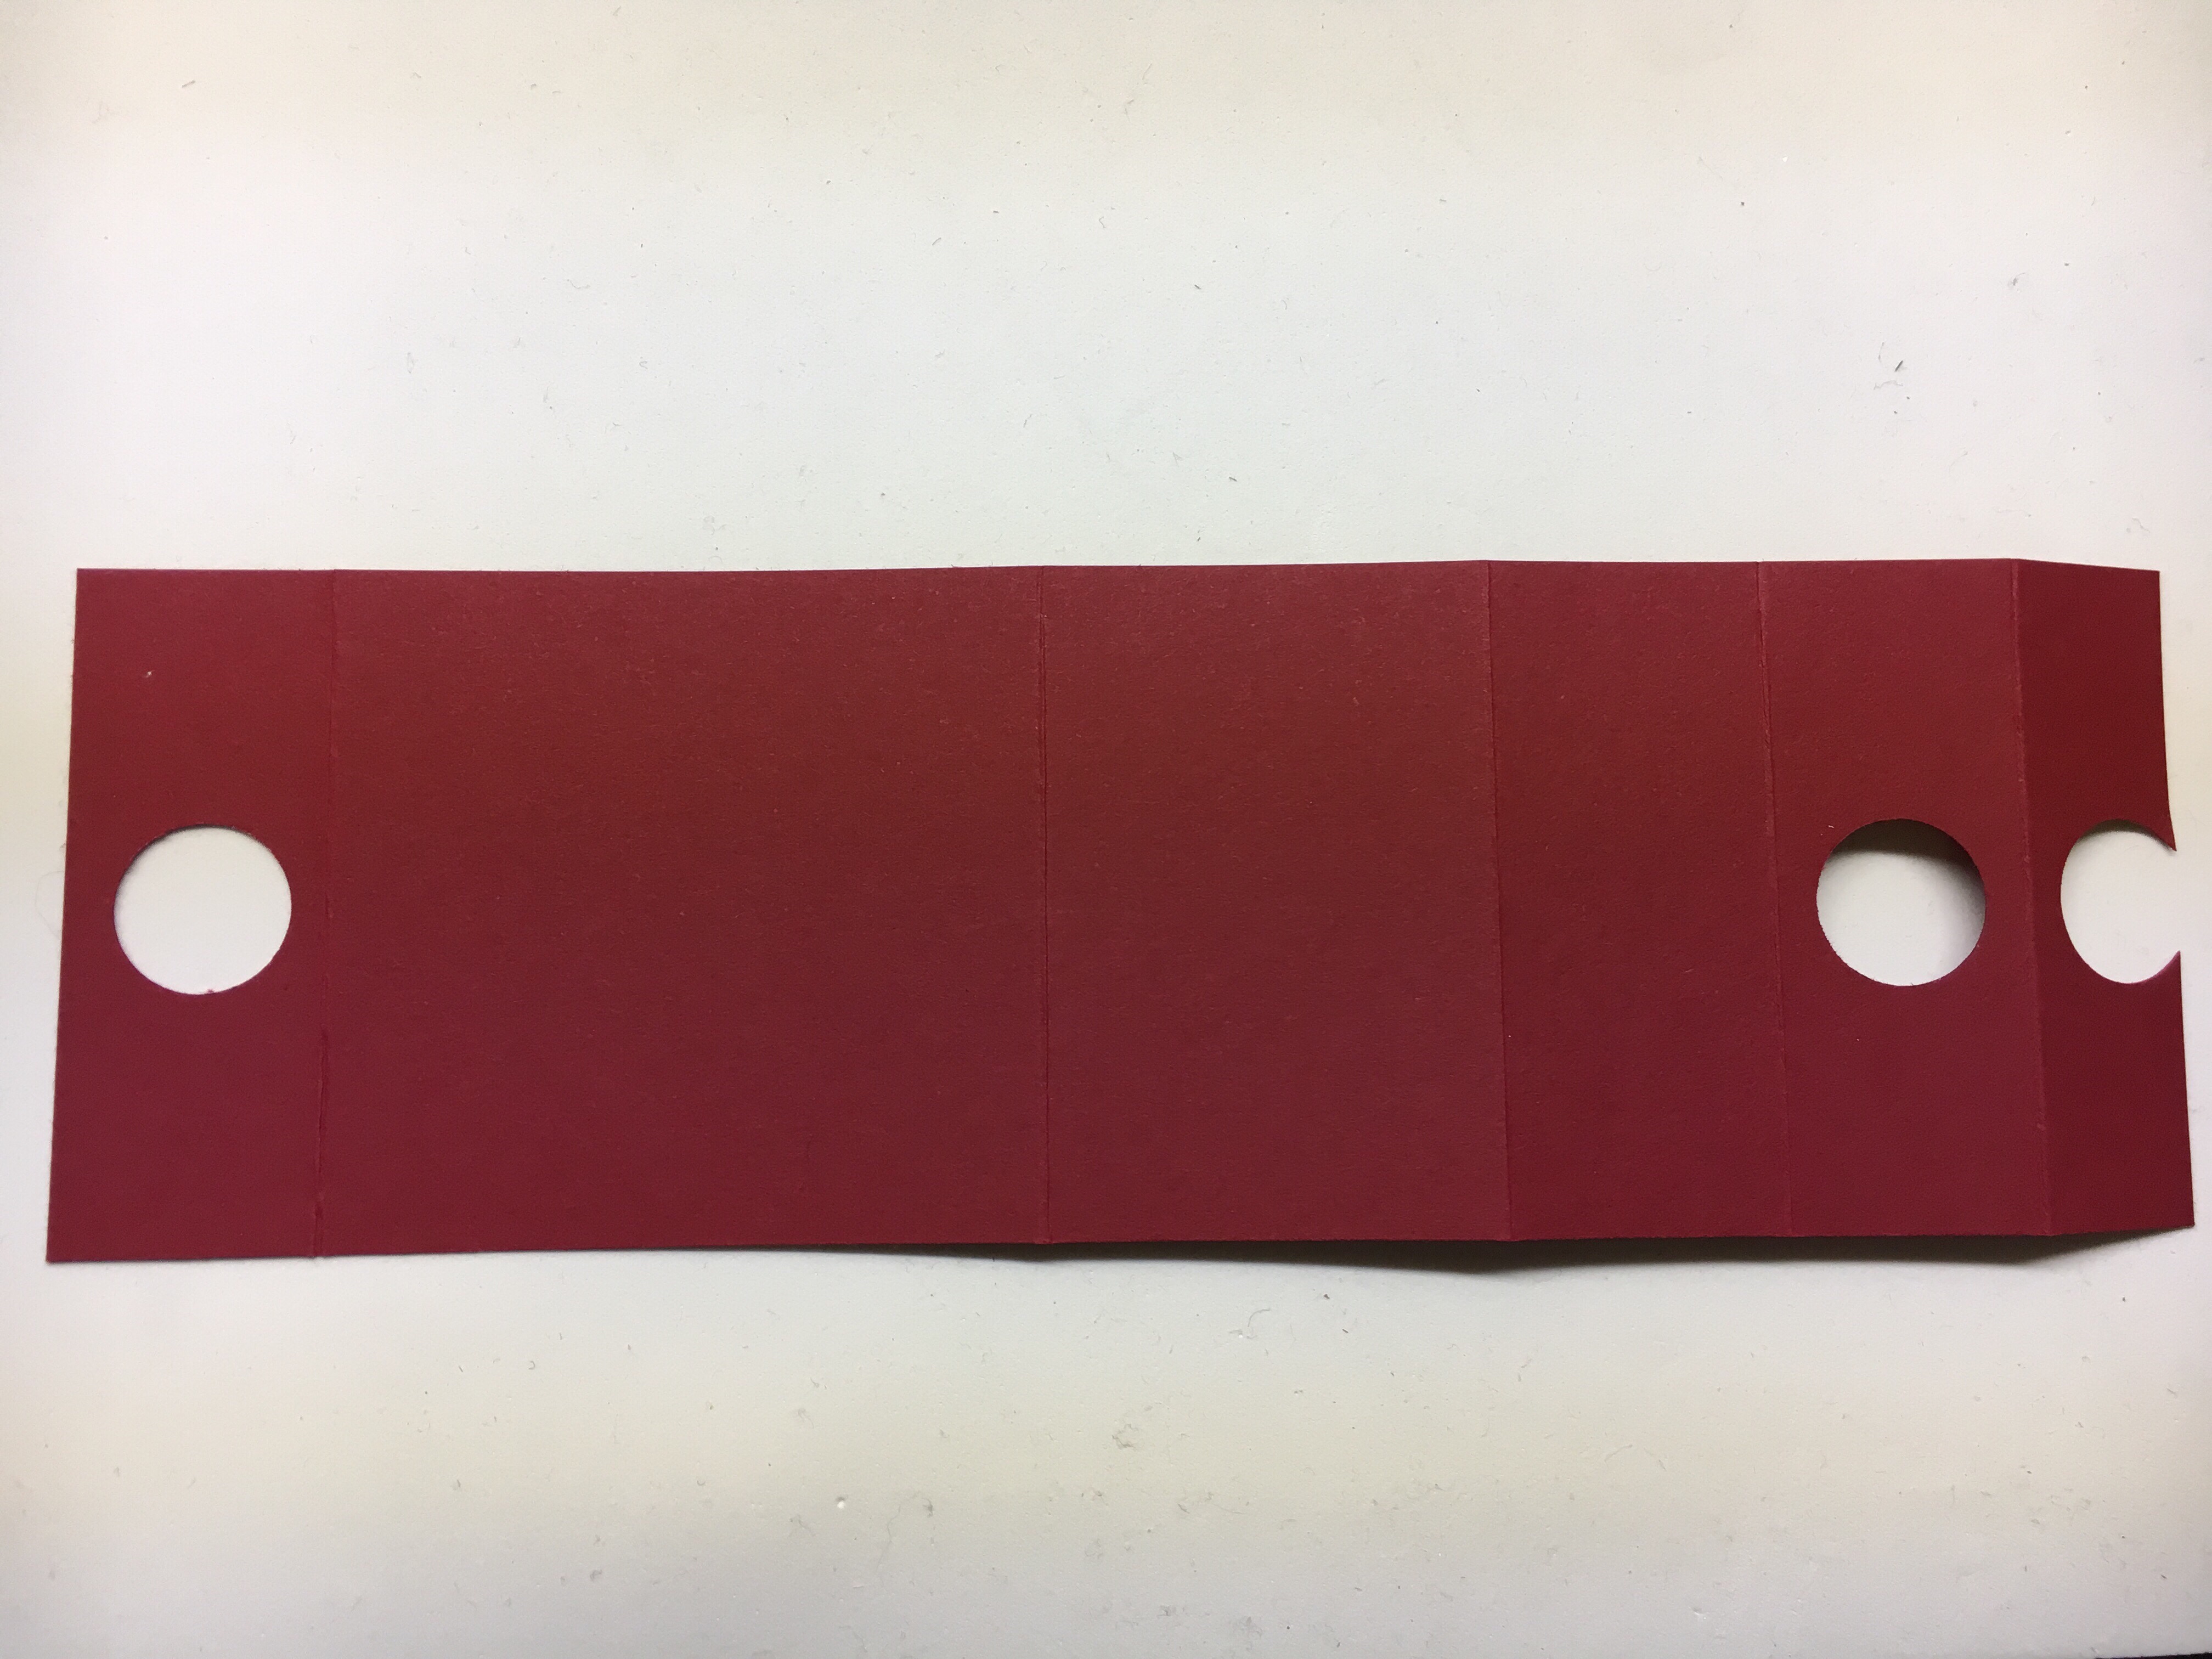
Score on the diagonal with the open side on the right. Measure and mark 1 1/2″ along the score line from the top and the bottom.  Cut from each corner along the score line to each point.

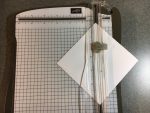
Using the trimmer, line up the envelope from the other points and cut from the score line in the middle to the point on the open end of the envelope.

Use the trimmer (or scissors) to cut from the middle to the marked points along the score line as shown in the photo.

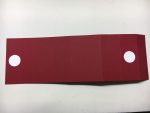
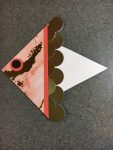
Cut a 3 3/4″ square of Designer Series Paper then cut it in half from point to point.  Adhere to the front and back of the envelope as shown.

Apply Tear & Tape Adhesive along the score line.  Adhere a 1/4 x 6 1/2 strip of coordinating color cardstock against the DSP.

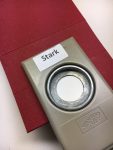
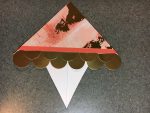
Punch 17 gold foil stickers using the 1″ Circle Punch.  Start in the center and adhere on each side of the center cut. Adhere 6 circles.  Cut 5 of the circles in 1/2 and overlap the full circles adhering with glue dots. Repeat on other side.

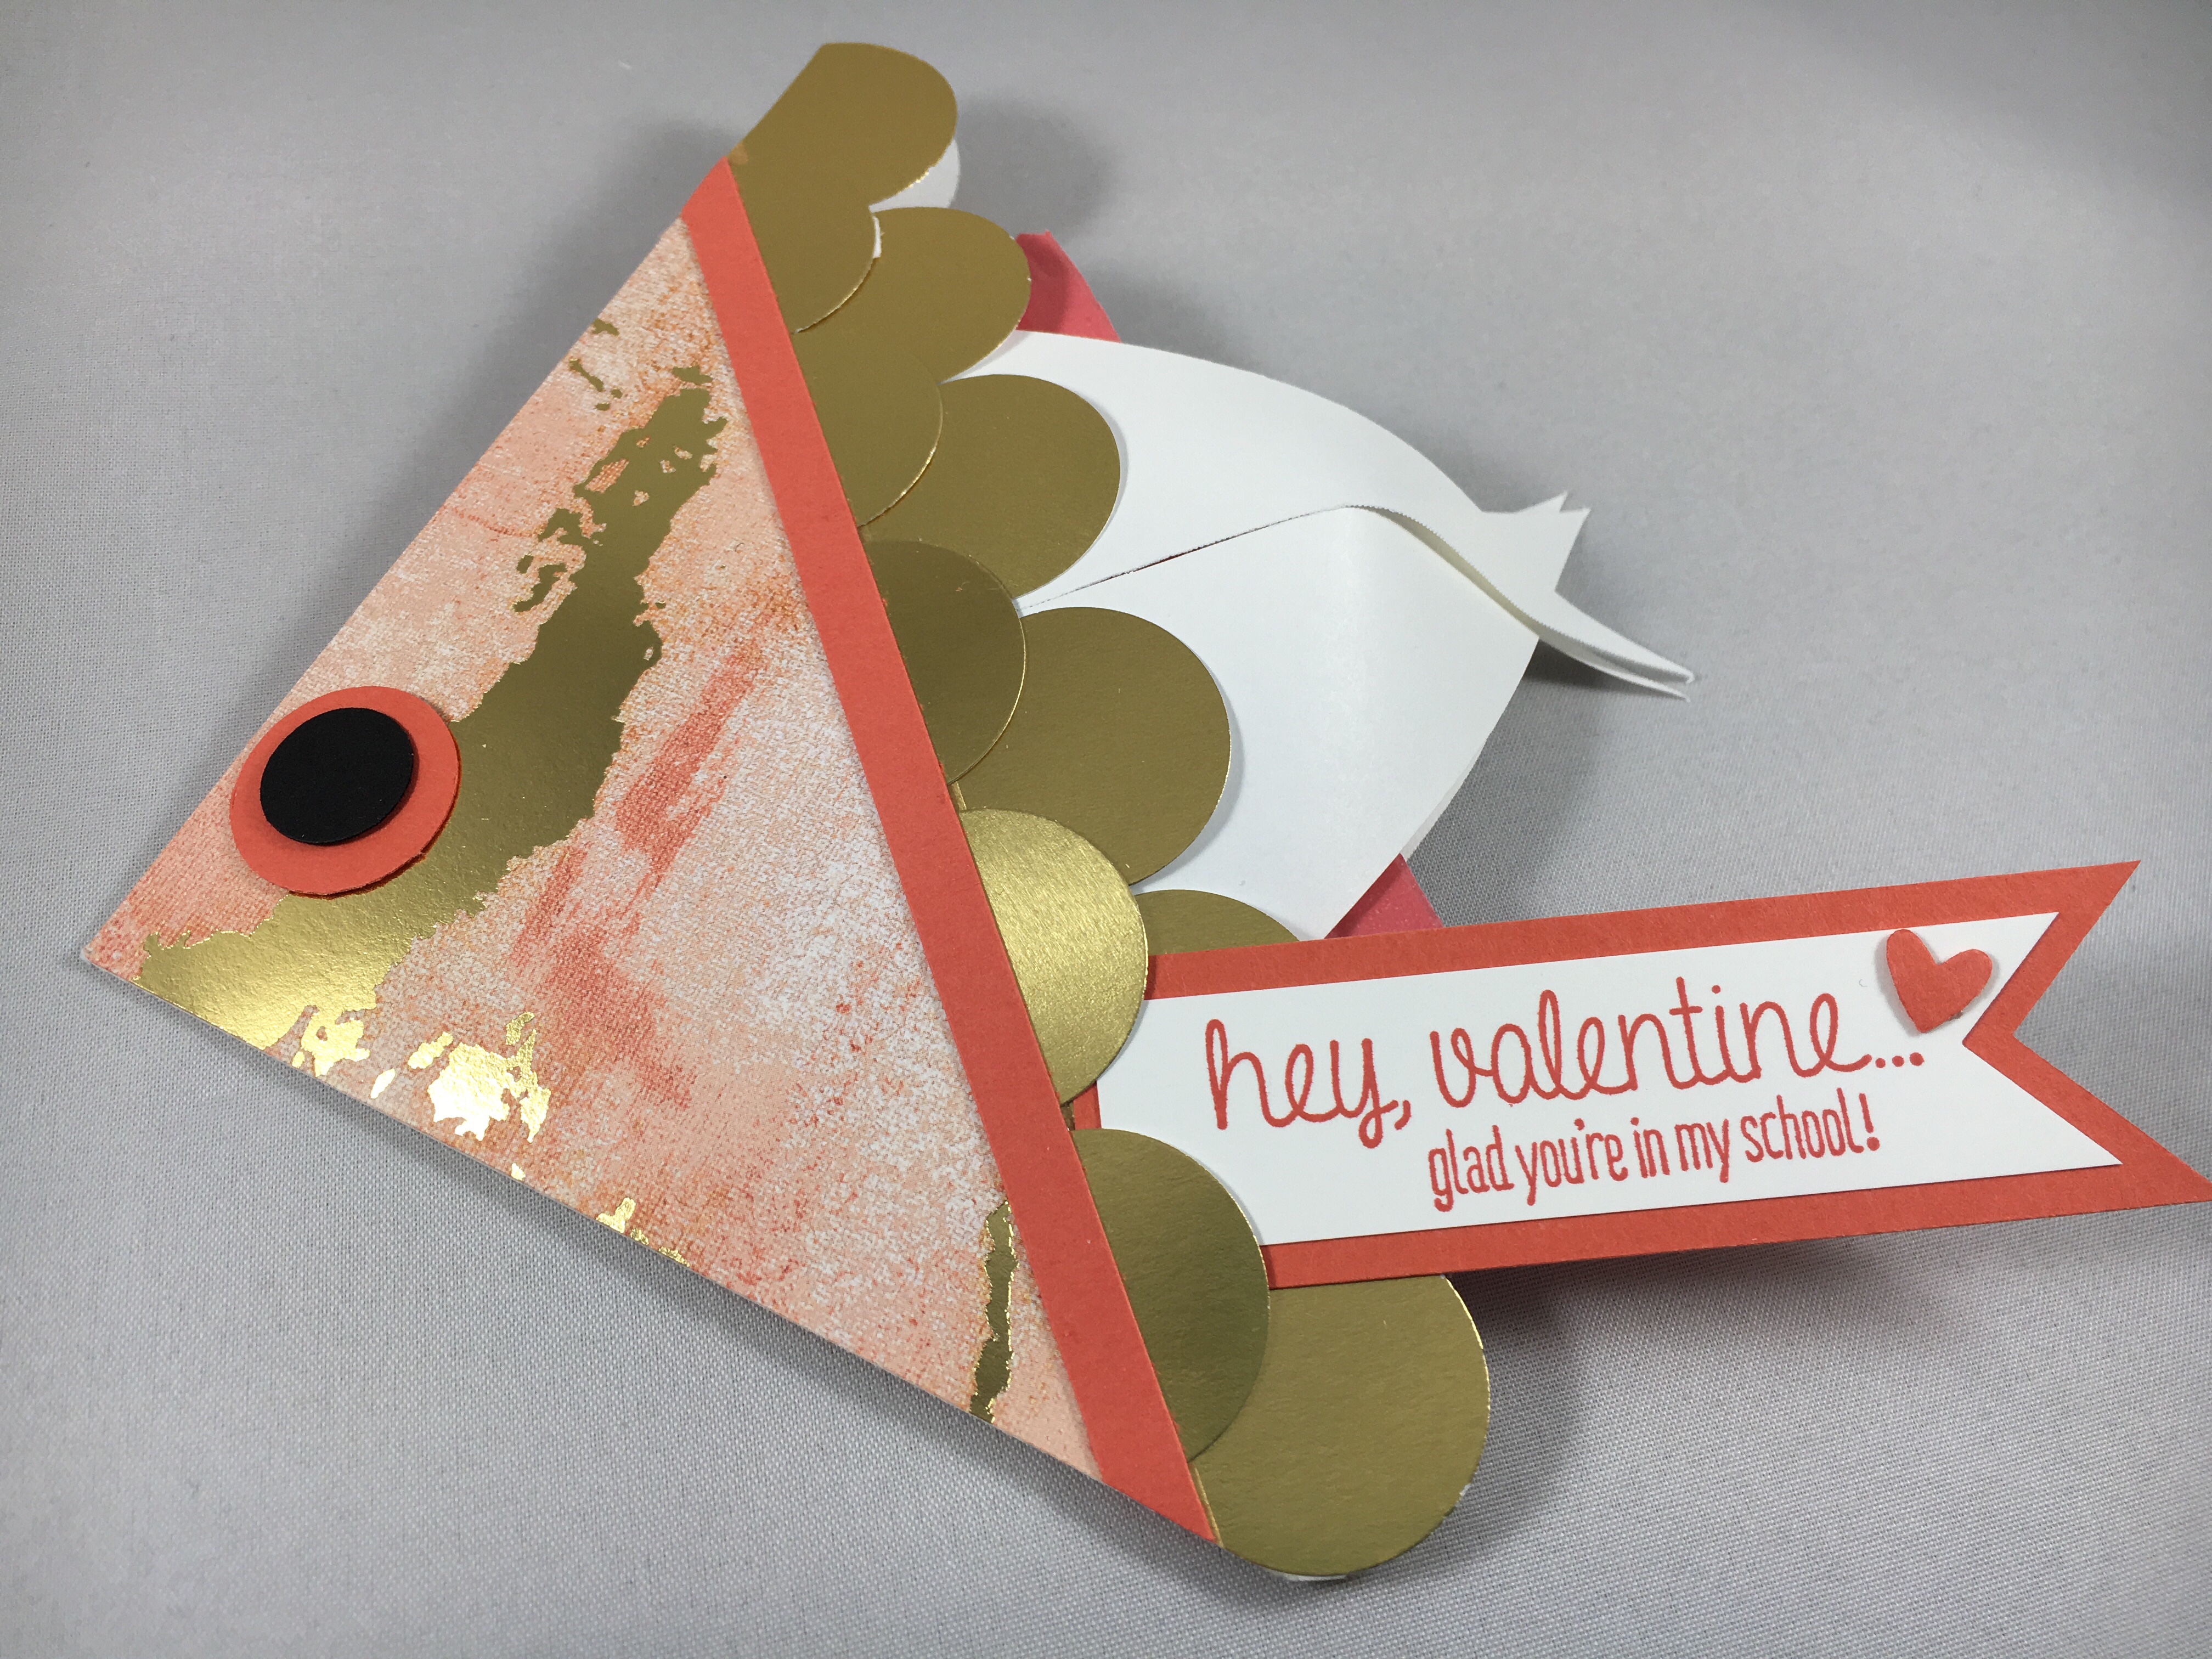
Cut the eyes from black and calypso coral cardstock using the 1/2″ and 3/4″ circle punches.  Adhere with glue dots. Cross over the ends of the envelope and adhere with a glue dot to form the tail of the fish.

You can easily slide a treat inside the fish. The Valentine M&M’s are the perfect color to coordinate with the Painted With Love Specialty Designer Series Paper we used. Even though I won’t be back to school for Valentine’s Day, I want my students to know I’m thinking of them.

Stampin Up Painted with Love Valentine treats - Jeanie Stark StampinUp For inspiration, project details, ordering, and more, visit www.juststampin.com
Created by Susan Itell

The fish reminds me of a beautiful story I read to my Pre-K students every year, The Rainbow Fish by Marcus Pfister . If you have young children or grandchildren, I highly recommend this book! (It’s available from Amazon.)

The Rainbow Fish                                      “The Rainbow Fish is an international best-seller and a modern classic. Eye-catching foil stamping, glittering on every page, offers instant child appeal, but it is the universal message at the heart of this simple story about a beautiful fish who learns to make friends by sharing his most prized possessions that gives the book its lasting value.”

I always gave my children a book for Valentine’s Day when they were younger. I would write a message inside the book, sign, and date it.  Someday when they have their own children I hope they will enjoy rereading these books.

You can purchase the products used to make today’s project from my online store. Click HERE to shop or click on the images below to order!

Use the host code  SUMCMQRW (if your order is under $150).
*All orders qualify for my monthly thank you gifts!

Have a great day!

Just Stampin’

Jeanie

Product List 


1/2

$6.00
3/4

$13.00
1

$13.00
Glue Dots

$5.25


Here’s more great ways to shop and save on Stampin’ Up! in February:
SAB 2018 Banner

  • For every $50 you spend, you earn a FREE Sale-A-Bration product.  New $100 level!
  • Earn FREE Sale-A-Bration products with Paper Pumpkin Prepaid Subscriptions! Click HERE for details. *Order by the 10th to receive this month’s kit!
  • Say hello to colorful creativity with Stampin’ Blends Markers.  Click HERE for ideas and more.
  • Save 10% on Occasions & Annual Catalog Bundles
  • Spend $150 or more and earn FREE products with Host Rewards.  Get a $25 rewards bonus when you spend $250 or more during Sale-A-Bration.
  • Host Code Exclusive!  Earn Free gifts from me (card kits and more) with your order. Simply enter the host code at checkout.  Host Code: SUMCMQRW   Click HERE to shop. 
  • Join the Fun and choose 2 FREE stamp sets as a bonus Jan. 3 – March 31!  The $99 Starter Kit is the best deal of ALL.  At a minimum, enjoy 20% off  Stampin’ Up! products through July 31 (or longer).  I welcome hobby demonstrators! Click HERE to learn more or contact me and let’s chat!
SAB FREE with $50

SAB FREE with $100

R is for Reindeer

Welcome to my ABC Holiday Series! When my kids were little we always sprinkled food for Santa’s reindeer on Christmas Eve. Even though my kids are grown I still make magic reindeer food for my students.  The Seasonal Chums Stamp Set and coordinating Framelits make it quick & easy to make these adorable little gifts. I had so much fun coloring them with my Stampin’ Blends.

Stampin Up Seasonal Chums Treat Holder - Jeanie Stark StampinUp

I made this free standing holder for the treat tube when Paper Pumpkin had the tubes last year.  I love that Stampin’ Up! brought them back but they will be retiring with the holiday catalog at the end of the month so stock up now!!! You can fill these tubes with so many things…bath salts, candy, money, etc. The holder idea was from Ellen Hutson and I adapted it for my “Magic Reindeer Food”.  It is quick & easy to make! Start with a 3 x 9 1/2 strip of cardstock.  I used 12 x 12 Cherry Cobbler from the Be Merry Cardstock Pack in the annual catalog.  (You can get 4 from a sheet which is great if you are making them for a classroom.) Use the Simply Scored Scoring Tool and score along the 9 1/2″ side at 1 1/8, 4 1/4, 6 1/4, 7 1/2, and 8 5/8.

Stampin Up Simply Scored Scoring Tool - TO order visit www.juststampin.com Jeanie Stark StampinUp

Fold along the score lines.  Next, punch 2 circles from scrap paper using the 3/4″ circle punch.  Adhere these where to the cardstock where you need to punch the holes for the treat tube.  (See photo below.) *When punching the hole on the right side you will need to fold the end under and punch through both layers because the punch will not reach far enough.  Here’s some photos to show you.

img_0050

 The part on the end will get tucked under when you adhere the holder.  Apply adhesive on the back of the end piece and fold up and under to form the stand.

I added a piece of 2 7/8 x 2 Reindeer DSP from the Be Merry Designer Series Paper.

Stampin Up Be Merry treat holder - Jeanie Stark StampinUp

I love the adorable Seasonal Chums Stamp Set and coordinating Seasonal Tags Framelits. Both the stamp set and dies will carry over after the holiday catalog retires but you will no longer get to save 10% when you purchase the bundle. So if this is something you’ve been thinking about ordering, get it now and save 10%! You can use these for tags, treat toppers, cards, etc.  I know it is something I will use year after year because I love to give little treats! (I haven’t even played with the snowman yet!!!)

I filled my treat tubes with oatmeal and glitter. I colored the reindeer with the new Stampin’ Blends.  I love to color and these markers just glide and do all the work for you! I used Crumb Cake, Daffodil Delight, Pink Pirouette, and Cherry Cobbler Blends to color then cut out the reindeer with the matching framelit.  I attached it to the treat tube with a glue dot and I was done! My students are going to love these!!!

Stampin Up Seasonal Chums Treat Holder - Jeanie Stark StampinUp

You can purchase the products used to make today’s treat holder from my online store. Click HERE to shop or click on any of the images below.

Have a wonderful day!
Just Stampin’

Jeanie

I appreciate each and every order. To get a FREE thank you gift from me, simply enter the host code below at checkout. *If you have an order over $150, DON’T USE THE HOST CODE, but get your Stampin’ Rewards AND the free thank you gifts from me!

December Host Code: 7H3KGTSS

Product List

Big Shot

$110.00
Glue Dots

$5.25

Stampin’ Up! Clearance Rack Has Been Updated!!

Stampin’ Up! has updated the Clearance Rack with new product up to 70% off (available while supplies last)! Click HERE to shop now!

Envelope Punch Board Projects

Yesterday I shared a fun treat holder for Lindt Chocolate balls made with the Envelope Punch Board and Year of Cheer Specialty Designer Series Paper.  If you missed that post you can click HERE to view.

I promised to share with you some other projects made with the Envelope Punch Board. Last week I had a class with several local gals who wanted to make “crackers”. The Envelope Punch Board is so versatile and useful for so much more than just making envelopes!  We made crackers plus 3 more fun projects…a Ghirardelli Chocolate treat holder, a Santa gift card holder, and a “Peppermint Patty” standing snowman treat.  I found so many ideas on Pinterest and just “tweaked” them to use what I had.  Here’s a few pictures from the event.

img_9764-1

img_9756

img_9757

img_9766-1

Here’s a close up of each of the projects.

Stampin' Up! More Than Chocolate Ghirardelli Treat Holder idea - Jeanie Stark StampinUp

Stampin Up Envelope Punch Board Gift Card Holder idea - Jeanie Stark StampinUp

Stampin Up Envelope Punch Board Gift Card Holder idea with Merry Little Labels Stamp Set - Jeanie Stark StampinUp

Stampin Up Envelope Punch Board Snowman Treat Holder idea - Jeanie Stark StampinUp

Stampin Up Christmas Around the World cracker box made with the Envelope Punch Board - Jeanie Stark StampinUp

They loved the projects and had so much fun making them that they want to meet again for another class to make more projects using the envelope punch board.  There are so many things you can make with this handy tool from envelopes and candy treats to boxes and more! More ideas coming soon!!!

**If you purchase the Envelope Punch Board from my online store I will email you the directions to make each of these projects and send you the “kit” in the mail.

Have a wonderful day!
Just Stampin’

Jeanie

I appreciate each and every order. To get a FREE thank you gift from me, simply enter the host code below at checkout. *If you have an order over $150, DON’T USE THE HOST CODE, but get your Stampin’ Rewards AND the free thank you gifts from me!

December Host Code: 7H3KGTSS

  You need:

Stampin’ Up! has announced it’s list of retiring merchandise from the Holiday Catalog.  In addition, they have discounted select retiring and surplus products.

Year End Sales Event

Click for the list of Retiring Holiday Products (PDF)

Stampin Up discounted year end sales event - Jeanie Stark StampinUp

Click to view discounted retiring holiday products

Retiring Favorites

Click to view retiring holiday products 

stamparatus contact me

Reserve your Stamparatus today! Click HERE for more information.