
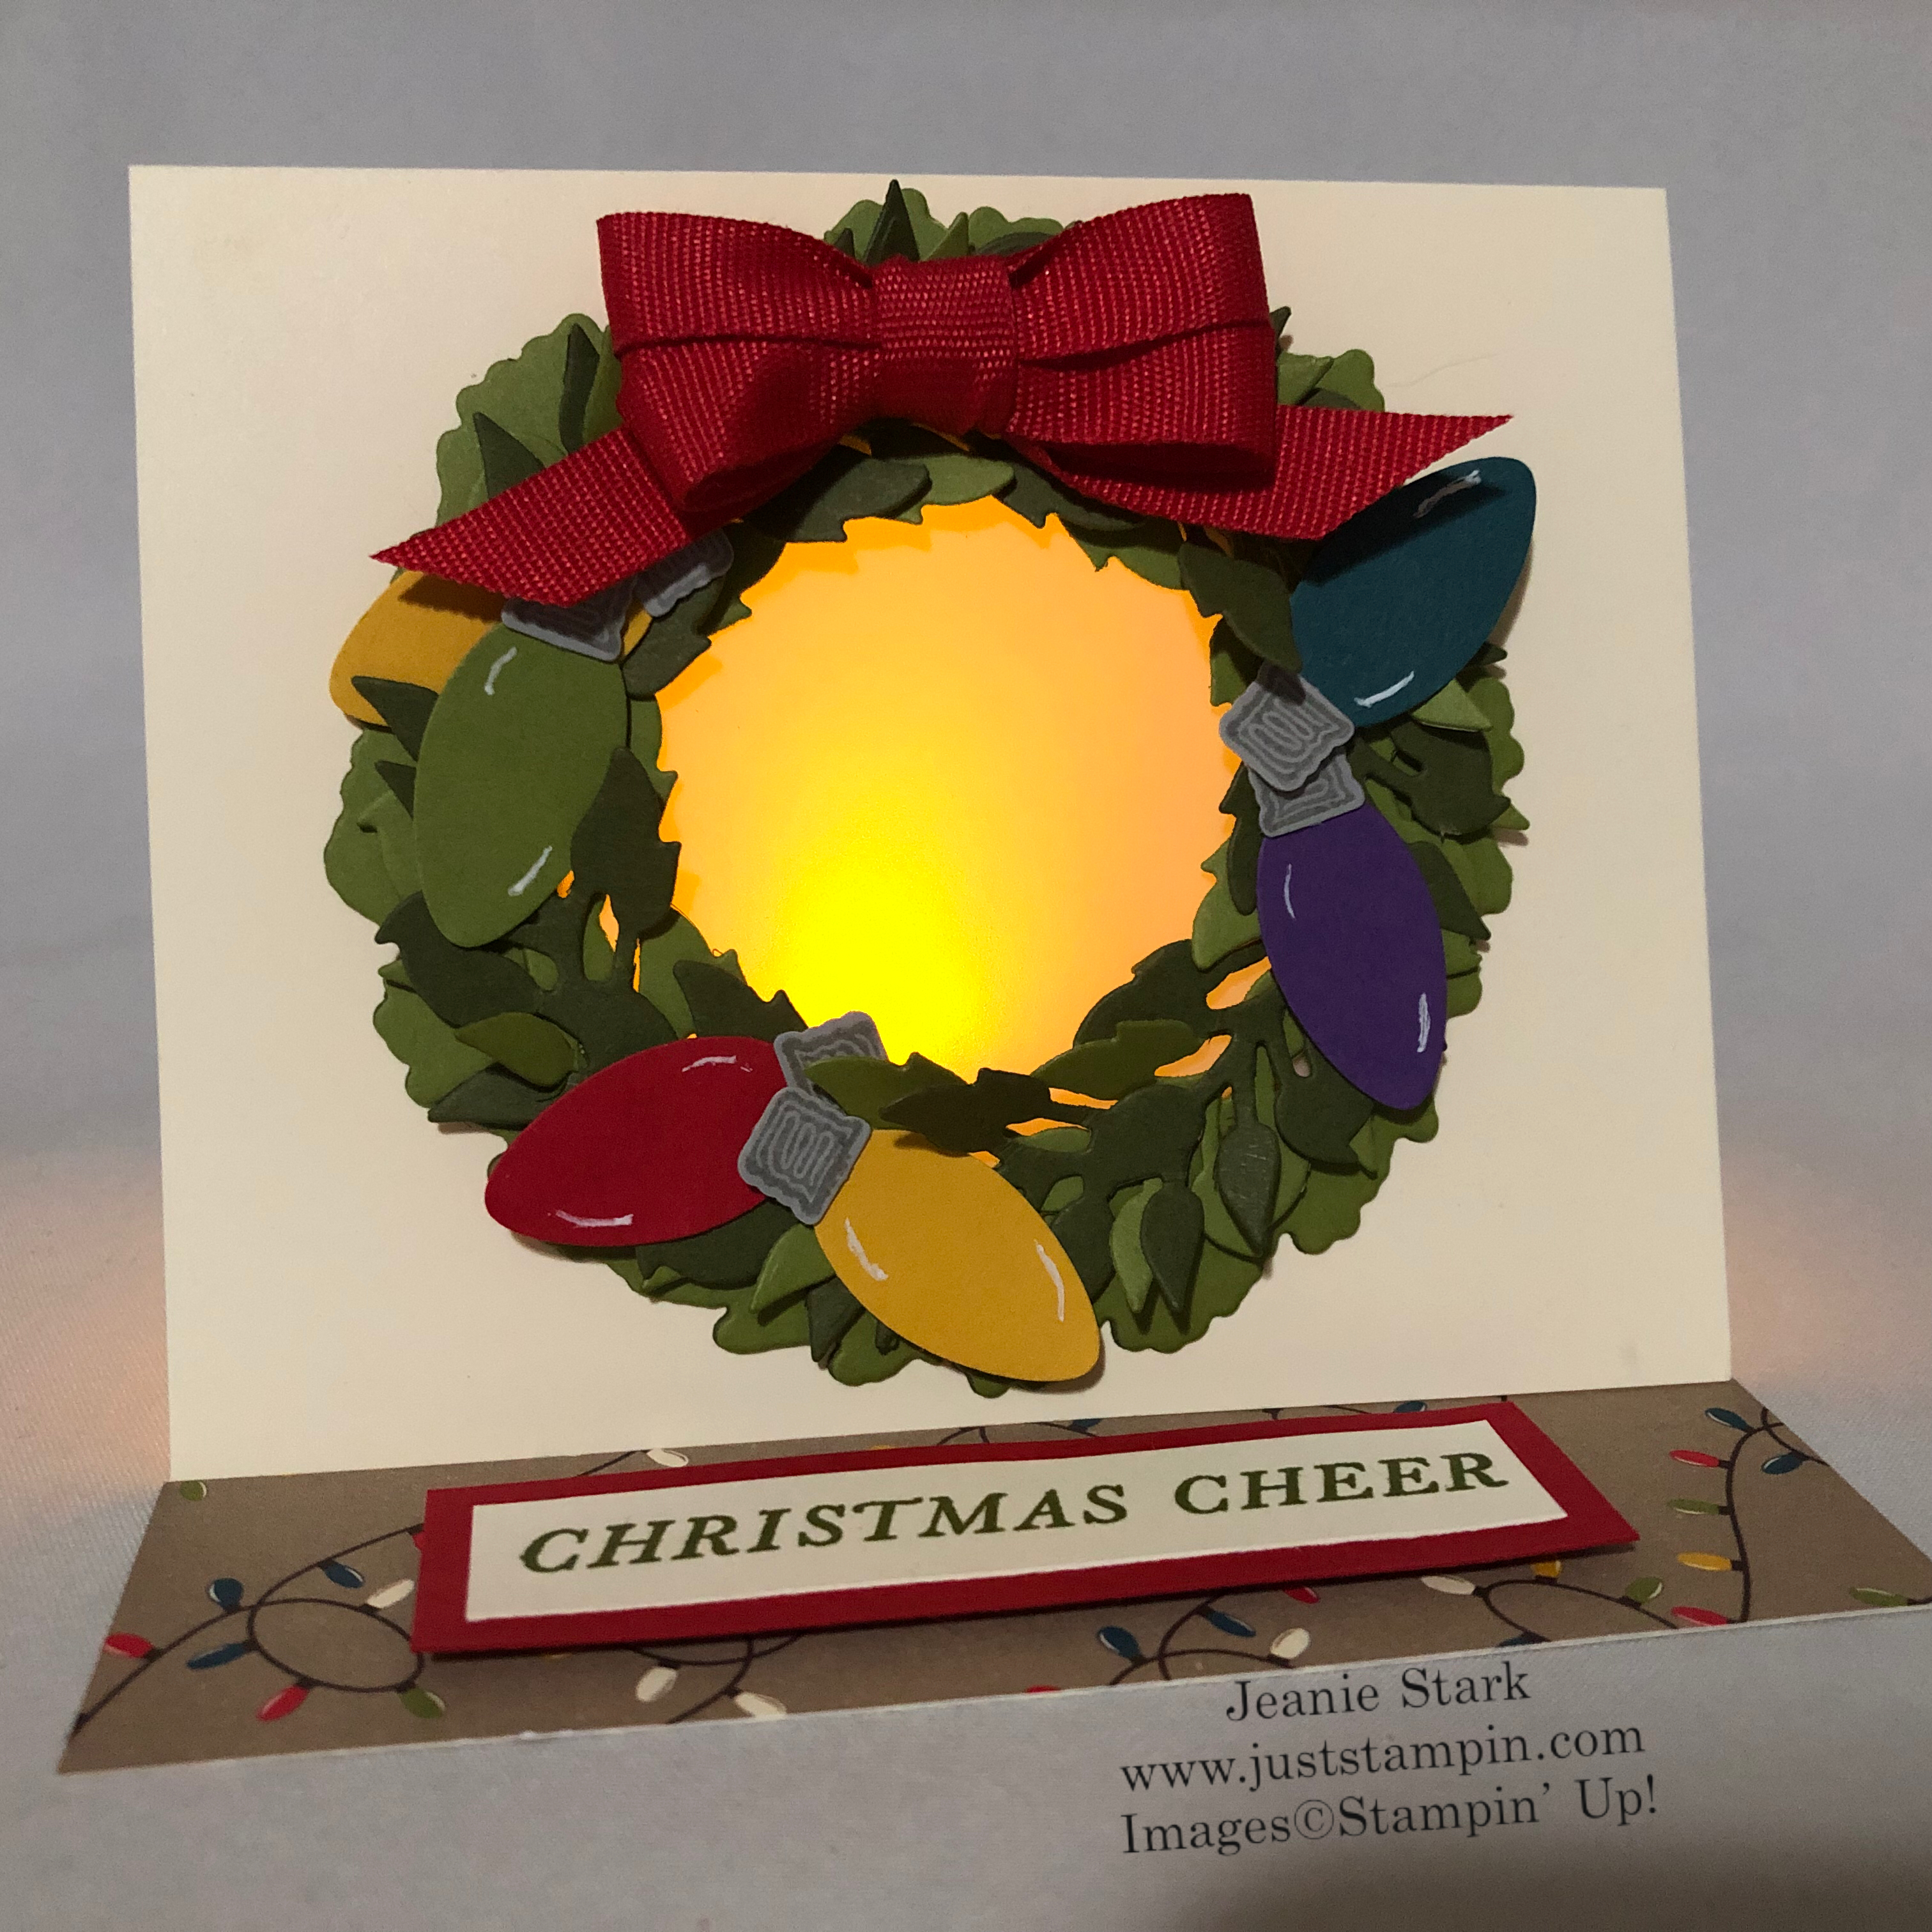
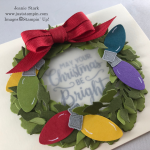
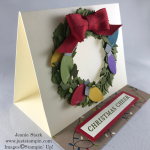
Yesterday I shared a fun fold lighted wreath card using the All-Around Wreath Die and Tidings All Around Stamp set. These are available as a bundle (Save 10%) and are so versatile for year round use! I have been making so many wreath projects and they all look so very different! Not only that, they are just plain fun and the dies are so easy to use to create! Here’s a look at the lighted fun fold card.
Here’s the details if you would like to make this fun fold card…
Measurements
- Very Vanilla card base: 4 1/2″ x 10 3/4″ scored at 3 5/8″ and 7 1/4″, 1/2″ x 2 3/4″ for sentiment
- Mossy Meadow: 2 pieces 4″ x 4″ each to cut wreath dies
- Old Olive: 2 pieces 4″ x 4″ each to cut wreath dies
- Vellum: 4″ x 4″ to cut 3″ Circle Die
- Scraps of Crushed Curry, Real Red, Pretty Peacock, Gorgeous Grape, Old Olive, and Smokey Slate to punch bulbs
- DSP: Night Before Christmas 1 1/4″ x 4 1/2″
Directions
- Fold and burnish score lines on card base. Fold bottom up and top down for a trifold card. The bottom piece is slightly smaller than the top so it closes easily.
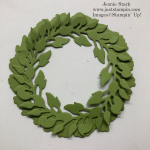
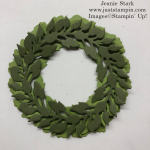
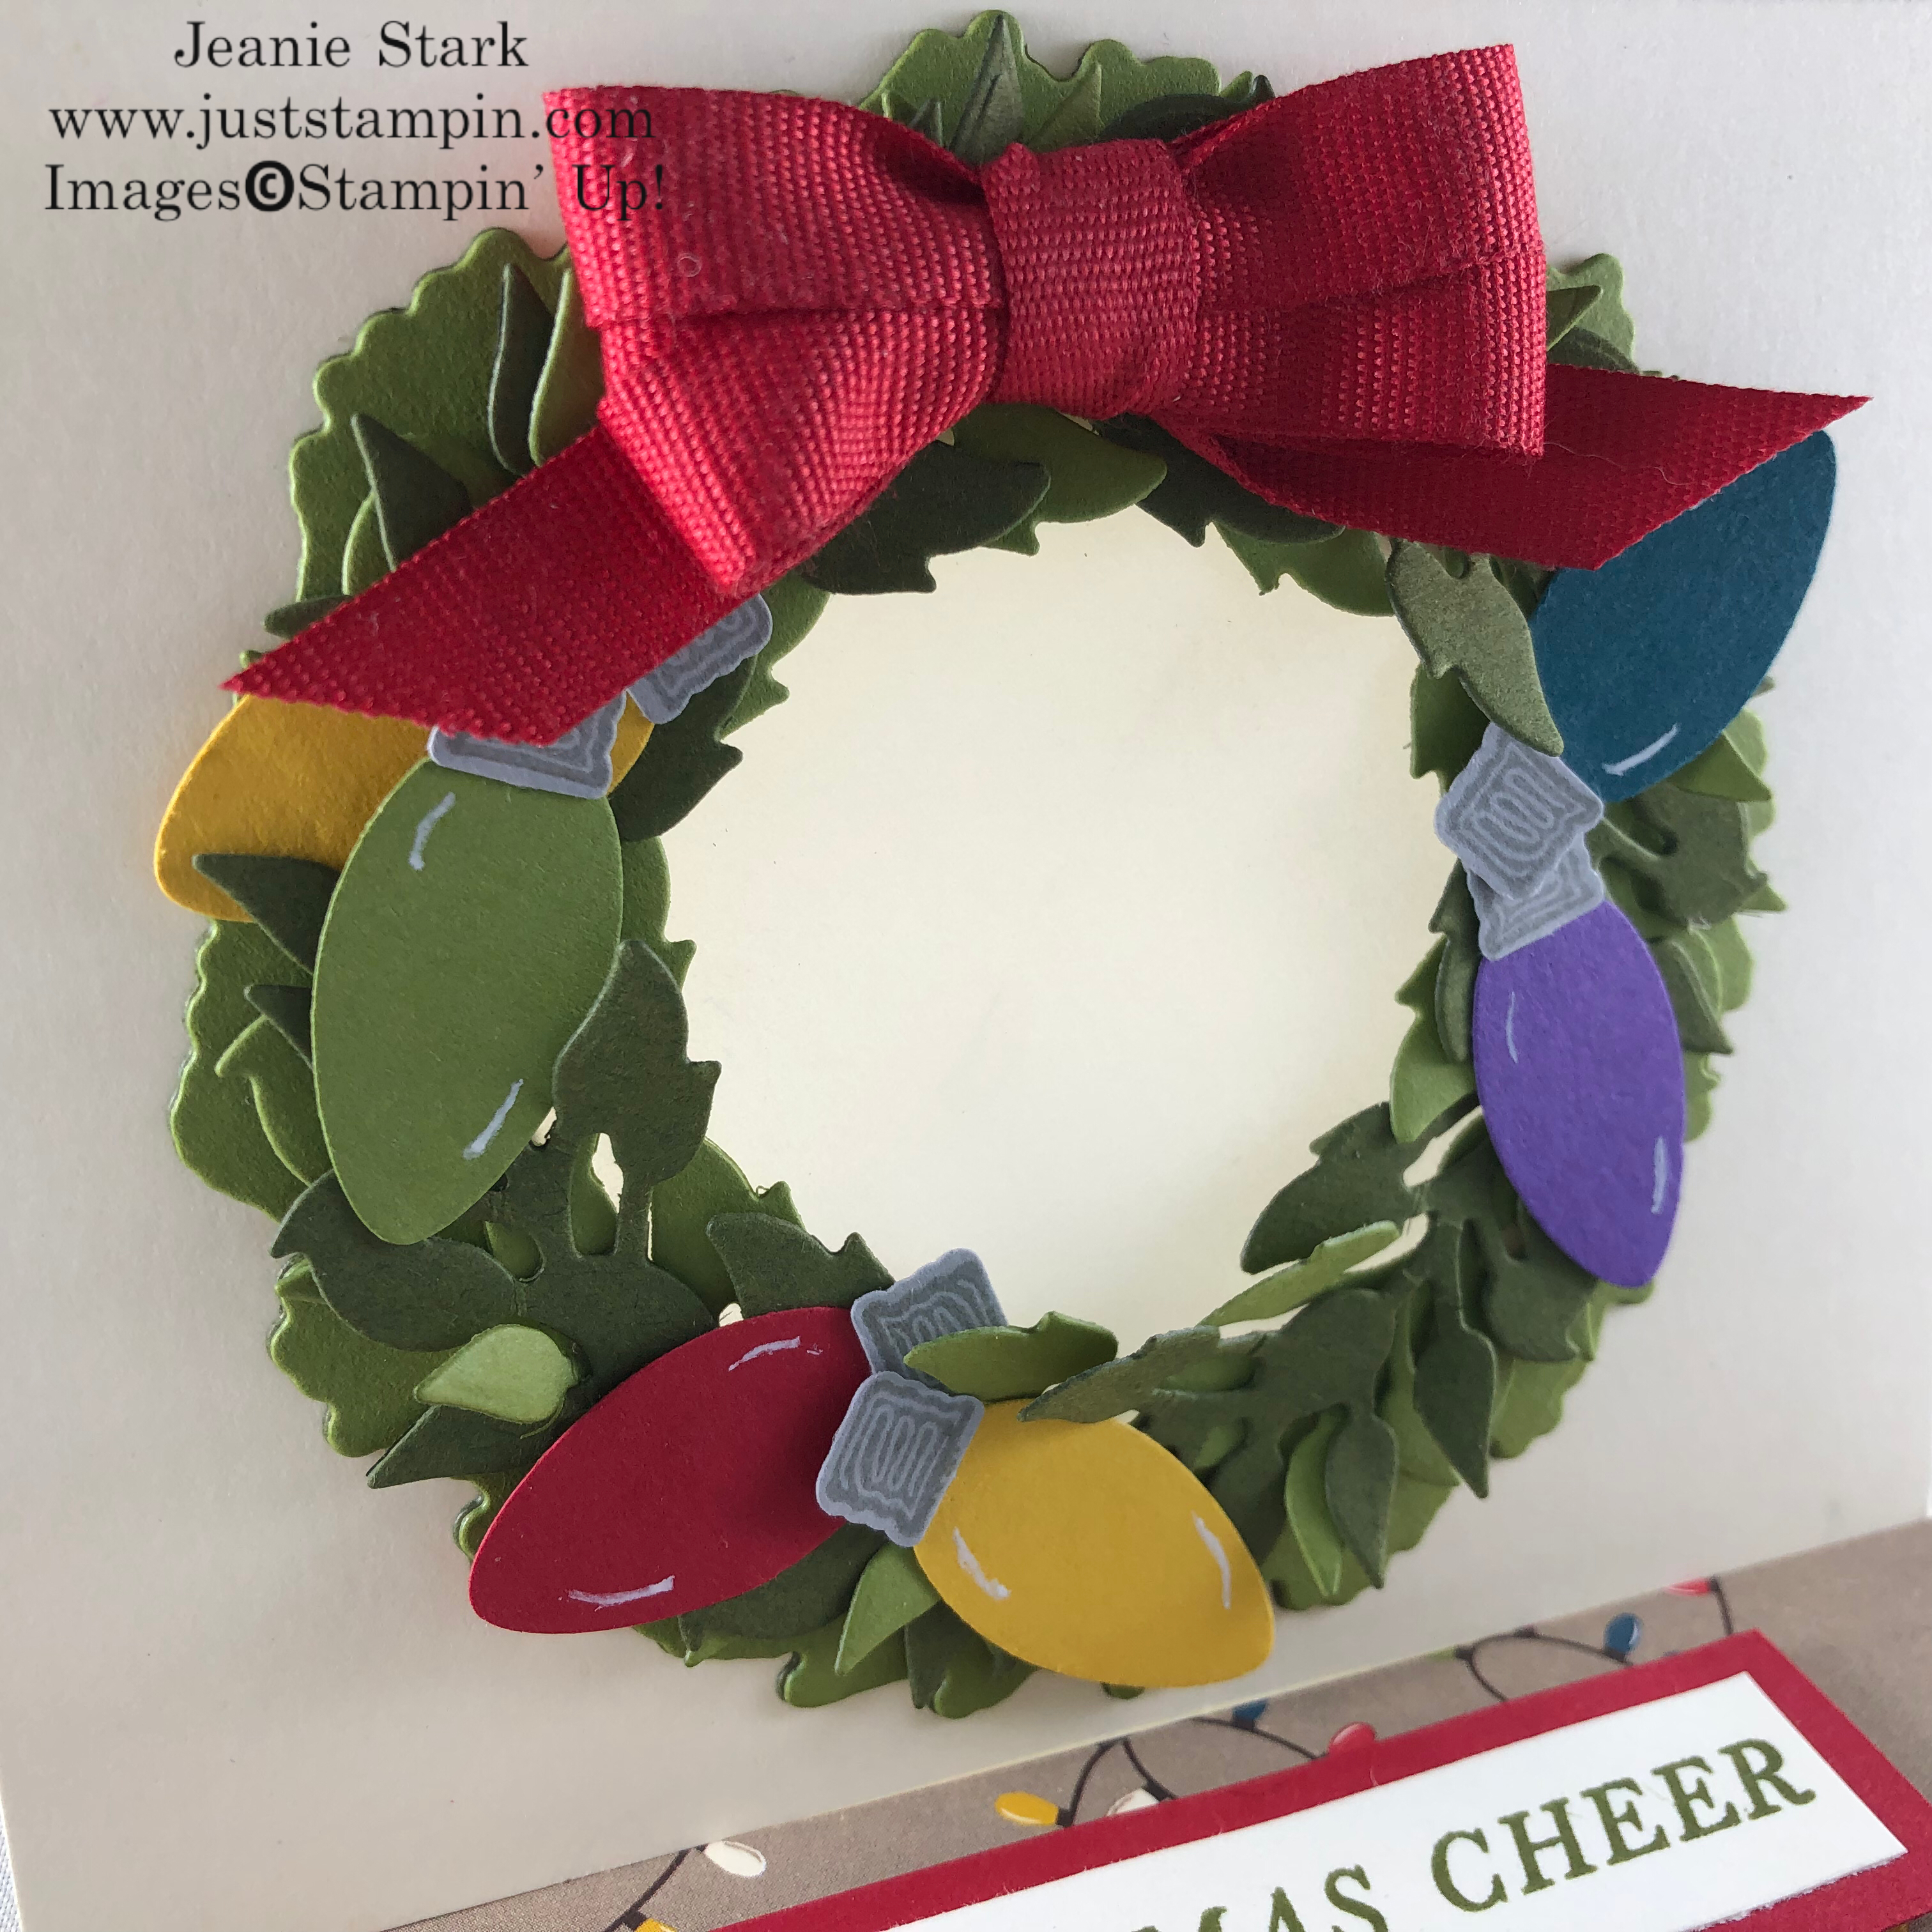
- Cut a solid and leaf wreath in Mossy Meadow and Old Olive. Layer the Old Olive leaf wreath on top of the solid base wreath with a few Glue Dots. Layer the Mossy Meadow leaf on top of Old Olive off setting it a little so the leaves don’t line up and the wreath looks fuller.
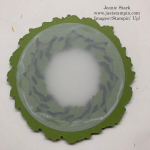
- Cut a 3″ Circle using the Layering Circle Dies. Glue to the back of the wreath then add the Mossy Meadow solid wreath to give it a finished look and add depth.

- Using the 2 1/4″ Circle Punch, center the punch along the top piece and push it in as far as it will go and punch.

- Center wreath over the circle opening and adhere to the front panel with liquid glue.
- Make a bow with Real Red Cotton Ribbon and attach to the wreath with Glue Dots.
- Stamp tops to bulbs with Smokey slate ink on ~1/2 ” strip of Smokey Slate cardstock. Punch with Bulb Builder Punch.
- Punch assorted colors of cardstock with Bulb Builder Punch. Adhere tops to bulbs with Liquid Glue and adhere to wreath with Glue Dots. Add highlights with a white gel pen.
- Open the top of the card and fold the bottom piece up. Center and stamp sentiment in Black ink. * You will only see this sentiment through the front of the wreath when the card is closed. When the card is open and displayed the sentiment is actually on the bottom of the card.

- Fold the sentiment piece down and add the strip of DSP along the edge. Stamp greeting on Very Vanilla cardstock and layer with Real Red cardstock. Adhere to DSP with Stampin’ Dimensionals. *The popped up greeting will hold the card in place when it is displayed. Add a battery operated tea light behind the wreath so it glows. You have plenty of space inside for a handwritten note or other sentiment.

FREE Tutorials…This month I am offering 3 Exclusive PDF card tutorials using the All Around Wreath Dies and coordinating stamp sets. You can get these tutorials FREE with a purchase of $40 or more from my online store. (These ideas will not be shared on my blog.) In addition, you will receive a handmade thank you card from me along with a card kit for any order each month! I love to make and send cards and I appreciate your support!
Today is the last day to sign up for my “Decorative Masks Kit To Go”! You will receive the 4 NEW Decorative Masks (found in the Holiday catalog on page 35) along with a photo tutorial and kit to make 4 cards (using each of the different masks). You don’t want to miss out on these fun techniques! Order my kit by Oct. 10th! Click HERE or on the card below for all the details.

What’s better than creating a handmade card? Sending it of course! That’s why Stampin’ Up! is excited to announce the first annual World Card Sending Week from Sunday, October 6 to Saturday, October 12. We’re setting a goal to send 50,000 cards that week! I would love your help in reaching our goal. I hope you will find some time to create this week. Then keep track of how many cards you send from Oct. 6 – 12. On October 12th I will ask that you to leave a comment on my blog with how many cards you sent. Let’s work together and send smiles across the world!
Have a wonderful day! Check back tomorrow for the next project in my ABC Holiday 2019 Series! M is for…?????? Any guesses?
Just Stampin’
Jeanie
*Host Code Exclusive! All orders placed through my online store are eligible for my FREE monthly gifts (Exclusive tutorials, card kits and more!). Please use the current host code below. *If your order is $150 or more, do not use this code as You become the hostess and get the Rewards! Don’t forget to check out the Clearance Rack and SAVE $! Click HERE to shop.
October Host Code: FG7M24JM
Product List for Fun Fold Wreath (Click on image to shop my online store.)
|
|
|
||
|
|
|
||
|
|
|
|
|
|
|
|
|
")
")


Today is the last day to subscribe to Paper Pumpkin to get the Christmas cards kit for October! Click HERE to subscribe!

Paper Pumpkin is offering back-to-back coordinating kits in October and November, one with Christmas cards, the other with Christmas tags. Both kits make it easy for you to add a handmade, personal touch to your holiday giving—without a lot of fuss. It’s Christmas made easy with Paper Pumpkin! Here’s the details about the Holiday Kits:
October Kit
Kit details: Makes 10 cards and envelopes
Card size: 4 1/4″ x 5-1/2″ (10.8 x 14 cm)
Envelope size: 4-1/2″ x 5-3/4″ (11.4 x 14.6 cm)
Coordinating colors: Early Espresso, Pool Party, Poppy Parade, and Shaded Spruce
November Kit
Kit details: Makes 24 holiday-themed gift tags of 4 various sizes and designs.
Coordinating colors: Early Espresso, Pool Party, Poppy Parade, and Shaded Spruce
*The October and November kits coordinate; however, each kit is all-inclusive and can stand alone.
Click HERE to subscribe today! *Order by Oct. 10th to receive the October card kit

i love this gorgeous card, Jeanie. Thanks so much for the tutorial and all your tips. This will be a special “present” for a few people this year. Have a lovely day!
Wonderful. Thanks for the tutorial, photos and tips.