Merry Christmas…More Cards & Gifts!

Merry Christmas!
www.juststampin.com
Today Bo and I are sharing the last few Christmas cards I made this year. Usually I choose one design, create multiple cards, and send everyone the same Christmas card. This year was different!

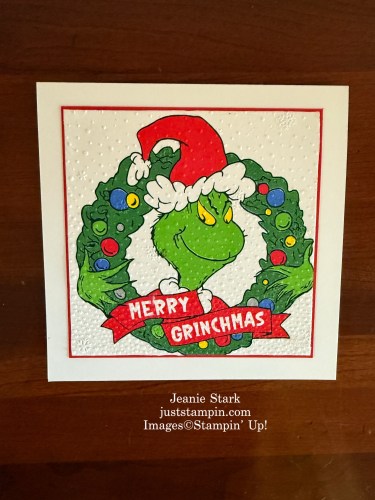
I always enjoy looking for fun ways to coordinate my cards and packaging with the gifts for a special presentation. A friend of mine claims she is “the Grinch” this year and I couldn’t resist sending her this card & gift set.
Stampin' Up! Scalloped gift card Grinch box with Hang an Ornament Dies-Jeanie Stark StampinUp
I used the “napkin technique” Laura Seki (Southridge Studio) shared to create my “Grinchmas” card. The card is 5 1/2 x 11 scored at 5 1/2 for a square card. The napkin is adhered to a piece of white cardstock using Multipurpose Liquid Glue (or a glue stick). I used the wide end of the liquid glue to add a thin layer of glue on the cardstock (which is cut smaller than the napkin). Lay the napkin on top and add glue around the edges on the back and fold the ends over to secure. Then emboss the napkin to help it adhere. I layered the embossed piece on red cardstock before adhering to the card base. I can’t wait to try this technique again with different napkins and embossing folders!!
Stampin' Up! Grinch card created using the napkin technique with the Snowflake Sky 3D embossing folder-Jeanie Stark StampinUp
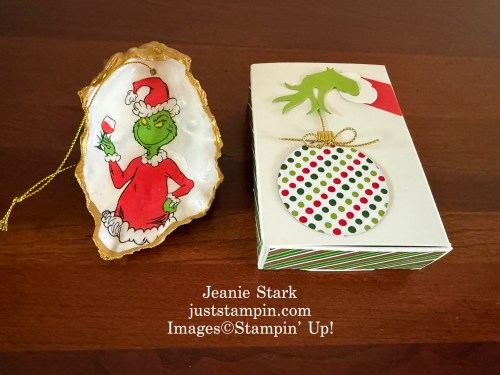
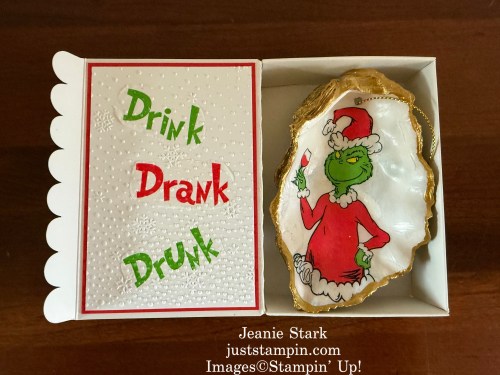
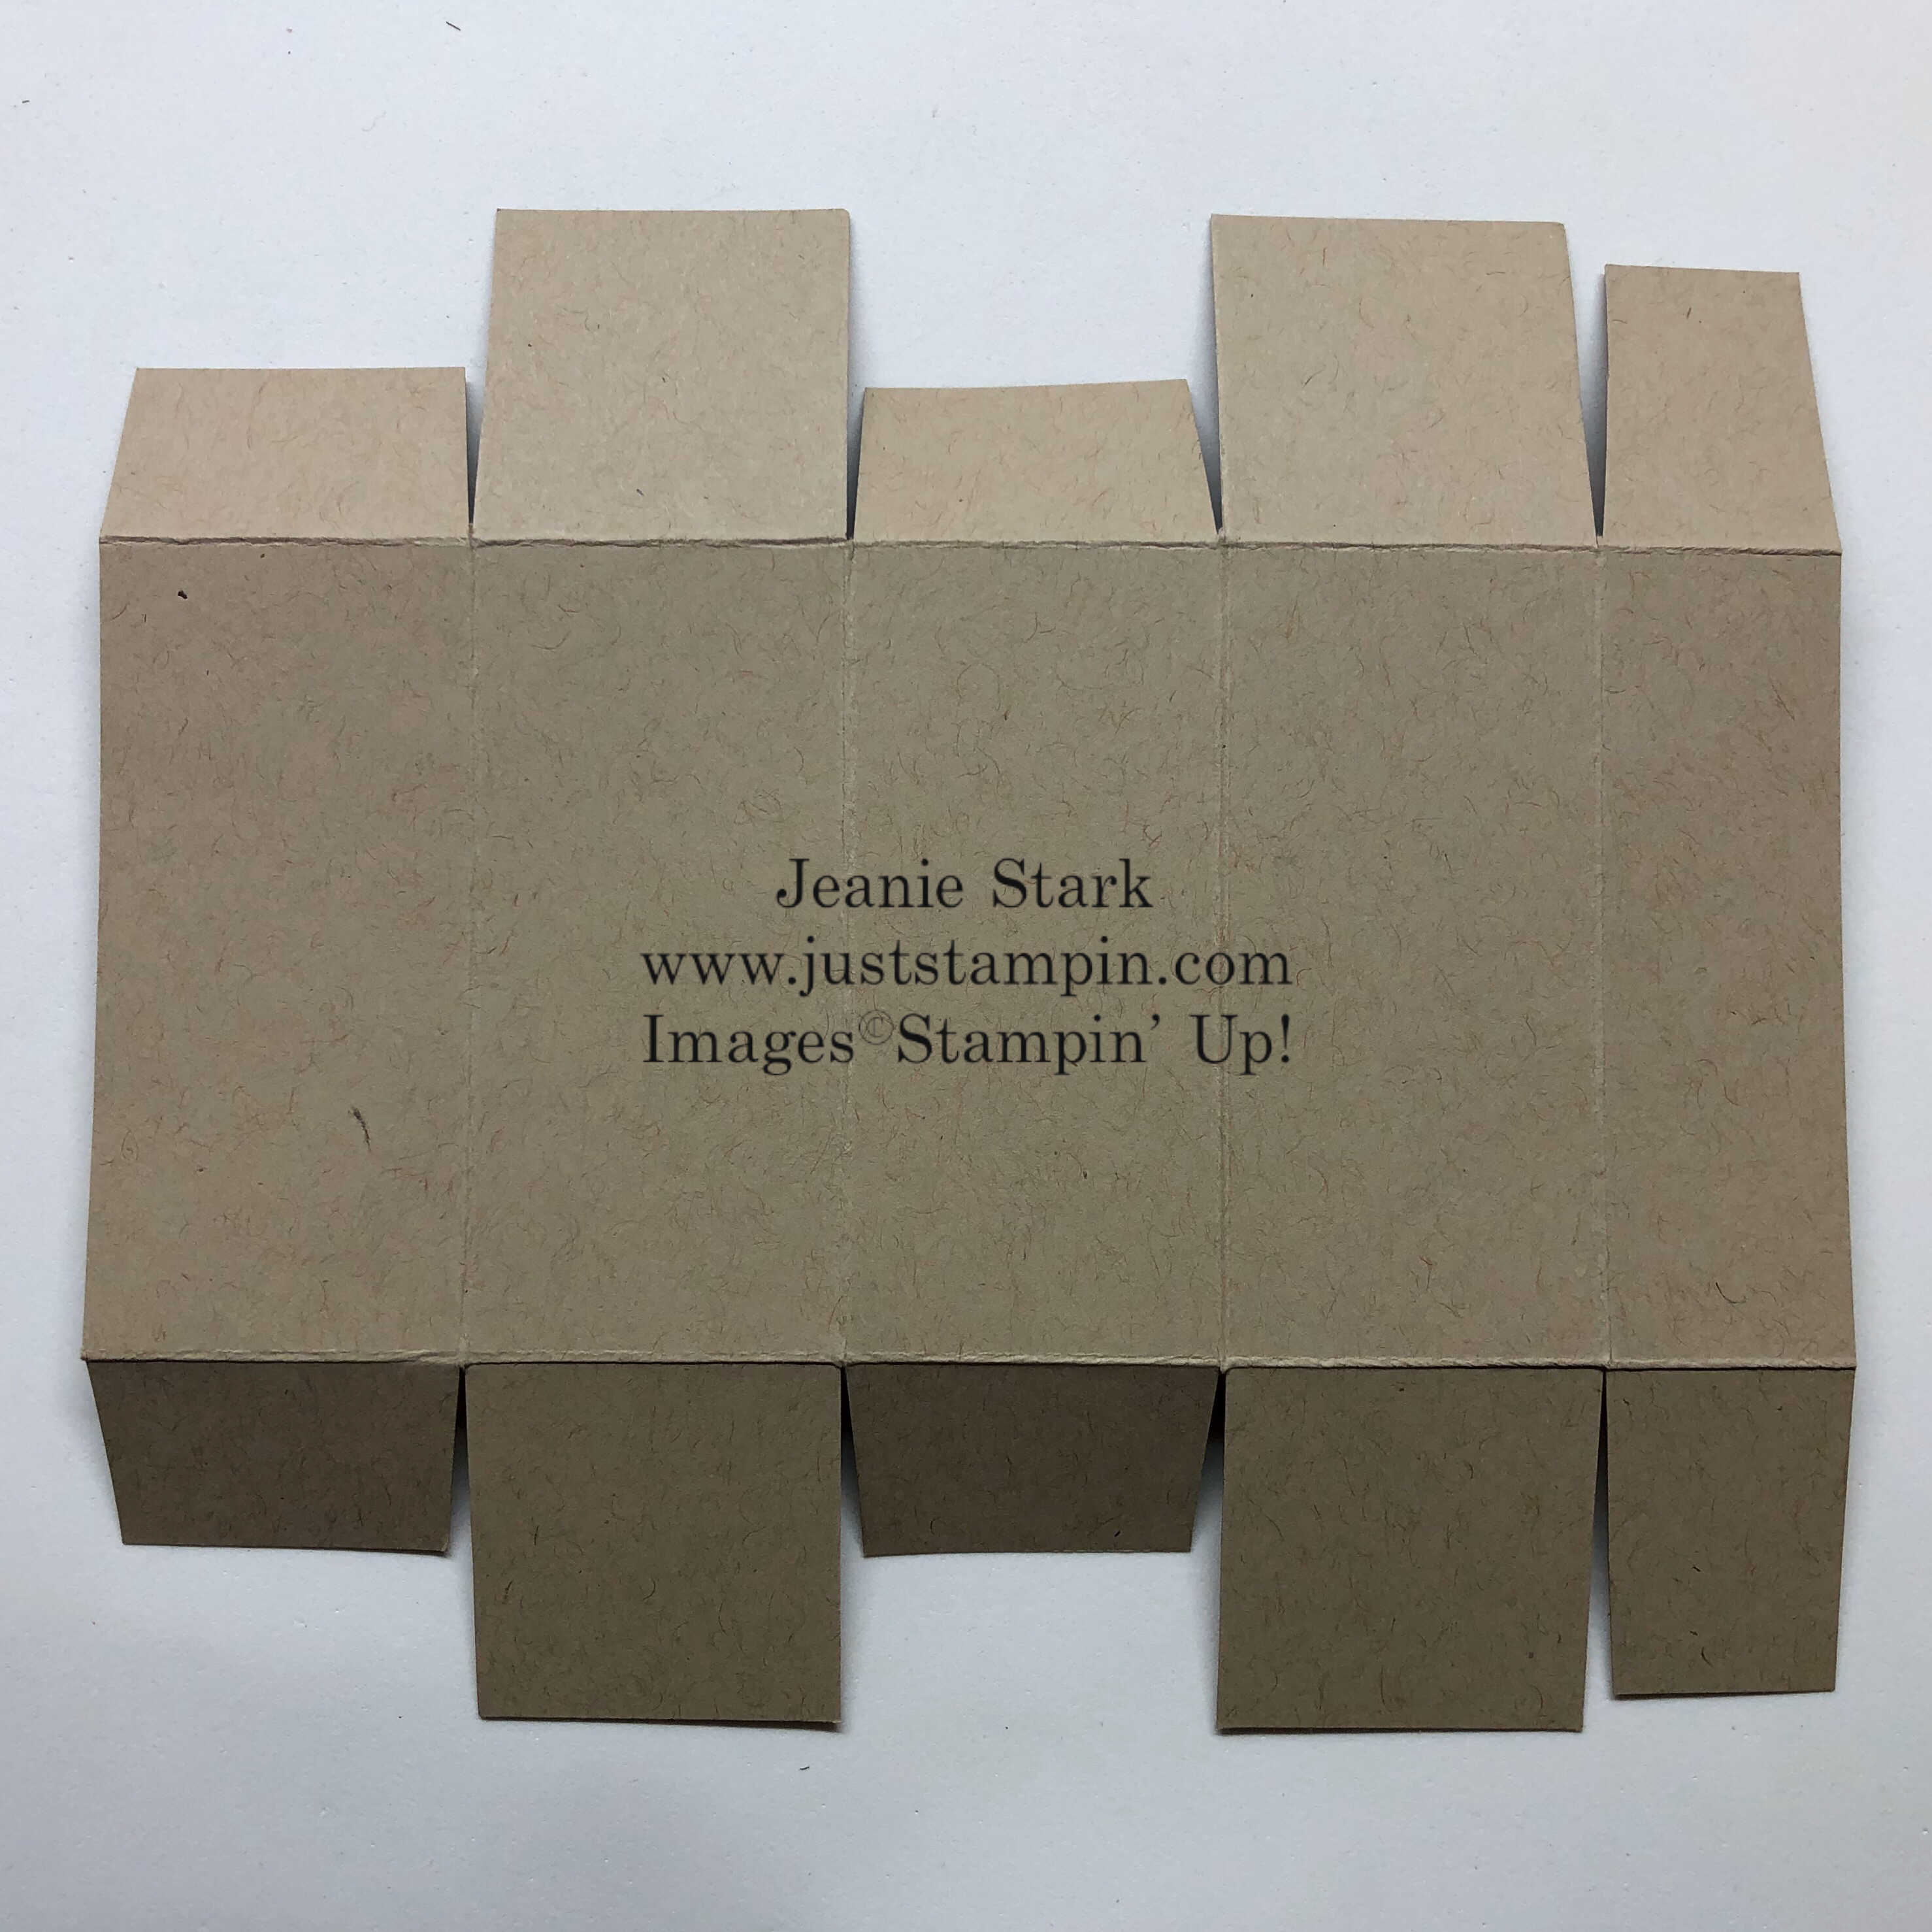
One of my favorite products this season has been the Hang An Ornament Dies. I decorated the Scalloped Gift Card Box to hold the Grinch oyster shell ornament I created.
Stampin' Up! Scalloped gift card Grinch box with Hang an Ornament Dies-Jeanie Stark StampinUp
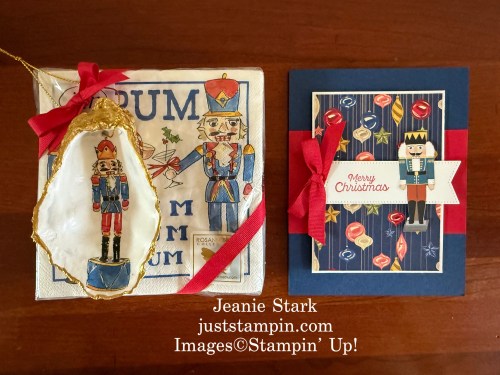
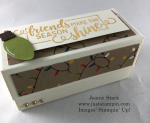
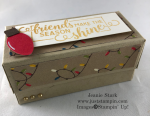
Another gift set I created uses some retired DSP but you could easily create it using what you have. I love it when I can use from my “stash” to find the perfect pattern and/or colors to coordinate with a gift.
Stampin' Up! Night Before Christmas and Christmas Around the World Designer Series Paper simple card idea with Stitched Shapes Dies-Jeanie Stark StampinUp
This card layout is one of my “go to” designs. It is quick & easy to create with cardstock and patterned paper.
Stampin' Up! Night Before Christmas and Christmas Around the World Designer Series Paper simple card idea with Stitched Shapes Dies-Jeanie Stark StampinUp
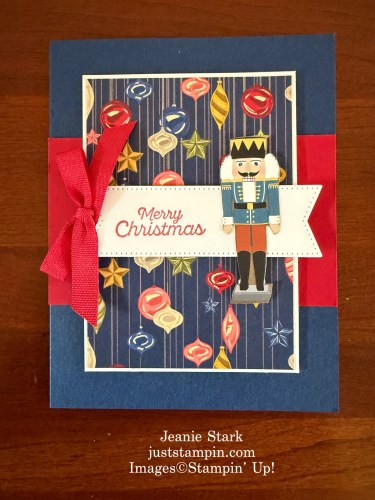
You can change up the sentiment layer with any shape. I often grab the Stitched Shapes Dies (one of my favorites!) or a punch for quick & easy! The nutcracker is fussy cut from a piece of DSP and adhered with Stampin’ Dimensionals. I love how he coordinates with with the cocktail napkins and ornament I made.
Stampin' Up! Night Before Christmas and Christmas Around the World Designer Series Paper simple card idea with Stitched Shapes Dies-Jeanie Stark StampinUp
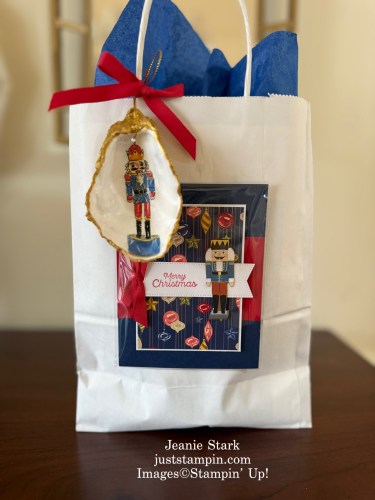
I like to recycle gift bags from stores. It is so easy to adhere a Stampin’ Up! clear envelope to the front of the bag and slide the card inside for a pretty presentation. (Great idea for kids birthday parties so the card doesn’t get lost!)
Stampin' Up! Night Before Christmas and Christmas Around the World Designer Series Paper simple card idea with Stitched Shapes Dies-Jeanie Stark StampinUp
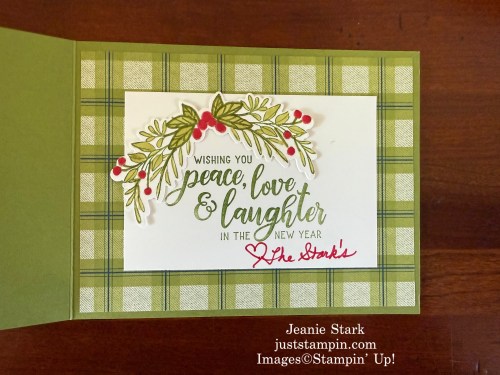
My last card today showcases the beautiful cardinals from one of my favorite bundles, Winterly Tree Tops. (Once again, I grabbed DSP and ribbon from my retired stash.)
Stampin' Up! Winterly Tree Tops Christmas card idea-jeanie Stark StampinUp
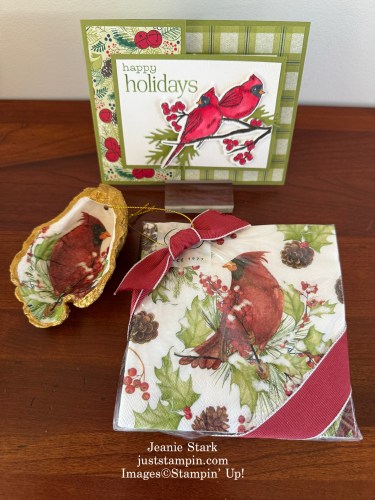
Some people believe cardinals appear when angels are near. I made this gift set for a friend who lost a family member recently. The card is a simple fun fold design.
Stampin' Up! Winterly Tree Tops fun fold Christmas card idea-jeanie Stark StampinUp
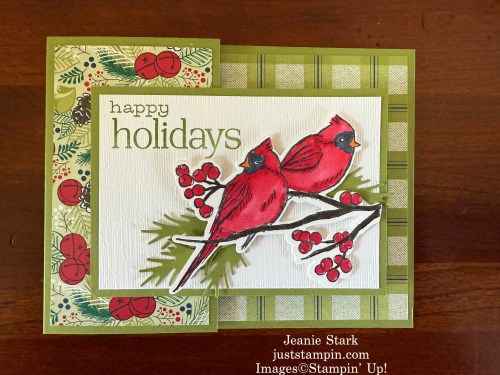
I used Stampin’ Blends to color the cardinals, berries, and branch then cut them out with the coordinating dies. I used another stamp and die from the bundle on the inside of the card.
Stampin' Up! Winterly Tree Tops Christmas card idea-jeanie Stark StampinUp
I hope you enjoyed today’s projects. I love to decoupage shells to create ornaments, trinket dishes, and many other gifts. You can check out some of the different projects I create on my facebook page HERE.

Do you have a favorite project from today? I’d love to hear from you! Leave a comment below.

From my family to yours, may your holidays be filled with peace, love, & laughter.
www.juststampin.com
Just Stampin’
Jeanie

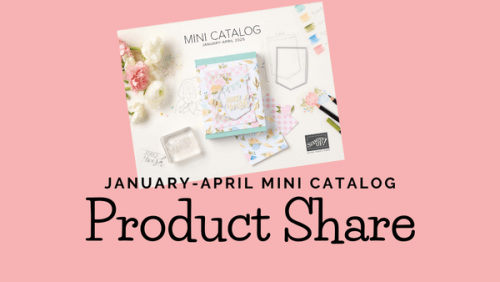
NEW PRODUCTS COMING IN JANUARY….I am offering product shares for the new Mini Catalog and Online Exclusives! Click HERE or on the image below for sneak peeks and all the details to reserve your product share NOW.
Visit juststampin.com for details-Jeanie Stark StampinUp

CLICK HERE TO SHOP MY ONLINE STORE or click on the images below.
*If your order is under $150 please add the current host code to your order.
Host Code: YHMBWKAW

Product List

Don’t forget to check out the Last Chance Products and Save up to 70%!!!!!!
www.juststampin.com

N is for Night Before Christmas

Welcome to my ABC Holiday 2019 Series! Throughout this series I will be sharing all kinds of cards, gifts, and ideas to help make your holidays as easy as ABC! Today I am showcasing the Night Before Christmas Suite. Check out what Santa is up to in this fun video…

The Night Before Christmas Suite is showcased on pages 24-26 in the Holiday Catalog. You can use the Night Before Christmas Memories & More Cards & Envelopes with the Night Before Christmas Memories & More Card Pack and have instant Christmas Cards! Talk about quick & easy!  Today I’m sharing how I used the Night Before Christmas 6 x 6 Designer Series Paper to make some fun little Christmas treats.

Stampin' Up! Night Before Christmas Designer Series Paper sweet treat gift ideas - Jeanie Stark StampinUp

Take a look at all the different fun patterns in this short video!

This candy cane treat is quick & easy! The DSP makes a nice presentation for a sweet little holiday treat. (You could even put it on a gift as a tag!)

Stampin' Up! Tiny Keepsakes Bundle sweet candy cane treat idea- Jeanie Stark StampinUp

The DSP measures 2 x 6 and is adhered to a Real Red 2 x 7 layer. I use a hole punch to punch two tiny holes on either side of the candy cane to thread the ribbon through and tie a bow. I added a couple of glue dots to secure the candy cane in place. The tag is from the Tiny Keepsakes Bundle. I stamped the sentiment in Pretty Peacock and cut it out with the Mini Curvy Keepsakes Box Dies. I used White Bakers Twine to thread a jingle bell and tag and tied it around the candy cane. Quick & easy!

For my next project I made a fold over box.

Stampin' Up! Making Christmas Bright fold over box gift idea for friends - Jeanie Stark StampinUp

The sentiment I used is from the stamp set, Making Christmas Bright (in the annual catalog). I got the dimensions for the box from Sam Donald (Pootles.com). The light bulbs pattern from the Night Before Christmas DSP was perfect to go with what I put inside the box.

Stampin' Up! Making Christmas Bright fold over box gift idea for friends - Jeanie Stark StampinUp

I host a cookie exchange with my friends every year and these will be perfect for their table favors. I got the bulbs from Hobby Lobby and filled them with mini M&M’s for a little treat or ornament to hang on their tree as a reminder of our special friendship!

Stampin' Up! Making Christmas Bright fold over box gift idea for friends - Jeanie Stark StampinUp

Here’s the measurements to make the box:

  • Very Vanilla or Crumb Cake cardstock: 7 x 6 1/4, score ont he long side at 1 1/2, 3, 4 1/2, 6. Score on the short side at 1 1/2 and 4 3/4.
  • DSP Panels: (2) 3 x 1 1/4, (2) 3/4 x 1 1/4, (1) 3/4 x 3
  • Very Vanilla: 1 x 2 3/4 to stamp sentiment in Delicata Golden Glitz
  • Scraps of Real Red, Old Olive, and Early Espresso to punch bulbs with Christmas Bulb Builder Punch

Fold and burnish the score lines. Cut, notch, and trim as shown below.

Stampin' Up! fold over box template - Jeanie Stark StampinUp

Add adhesive to the notched pieces on each end and in the middle on both sides and assemble the box. (You can view the video from Pootles.com to see how to put the box together HERE. *She put tealights in the box.)

I can’t decide which color box I like better, Very Vanilla or Crumb Cake? I need to make 10 more. Leave me a comment and let me know which color you think I should make for the rest of them.

So what do you do the Night Before Christmas? Every year our family gets together at my sister’s (~24 people ) for dinner on Christmas Eve.  (I love making the table favors for everyone!) After dinner we play “Yankee Swap”. Everyone brings a wrapped gift (~$25) and we draw numbers to see who goes first and so on. The first person opens a gift and then the next person can choose to take their gift or open a different one and it continues on so you never know what gift you will end up with til the very end.  It is always so much fun and every year there seems to be a “hot gift” that everyone wants. As our family has grown it is a fun way to have a little gift exchange without breaking the bank!  The best gift of all is just being together as a family and remembering the reason for the season!

Have a wonderful day!

Just Stampin’

Jeanie

Product List for Boxes (Click on any image to view in my online store.)

Product List for Candy Cane Treats


*Host Code Exclusive! All orders placed through my online store are eligible for my FREE monthly gifts (Exclusive tutorials, card kits and more!). Please use the current host code below. *If your order is $150 or more, do not use this code as You become the hostess and get the Rewards! Don’t forget to check out the Clearance Rack and SAVE! Click HERE to shop. 

October Host Code:  FG7M24JM

FREE Tutorials…This month I am offering 3 Exclusive PDF card tutorials using the All Around Wreath Dies and coordinating stamp sets. You can get these tutorials FREE with a purchase of $40 or more from my online store. (These ideas will not be shared on my blog.) In addition, you will receive a handmade thank you card from me along with a card kit for any order each month! I love to make and send cards and I appreciate your support!

Did you miss out on the Exclusive monthly tutorials in September featuring the Gather Together Bundle? Order the bundle from my online store and I’ll send you the tutorials for FREE!

Click on the bundle to order!

Lighted Wreath Tutorial

Yesterday I shared a fun fold lighted wreath card using the All-Around Wreath Die and Tidings All Around Stamp set.  These are available as a bundle (Save 10%) and are so versatile for year round use! I have been making so many wreath projects and they all look so very different! Not only that, they are just plain fun and the dies are so easy to use to create! Here’s a look at the lighted fun fold card.

Stampin' Up! TIdings All Around Bundle and Christmas Bulb Builder Punch fun fold Christmas wreath card idea - Jeanie Stark StampinUp

Here’s the details if you would like to make this fun fold card…

Measurements

  • Very Vanilla card base:  4 1/2″ x 10 3/4″ scored at 3 5/8″ and 7 1/4″, 1/2″ x 2 3/4″ for sentiment
  • Mossy Meadow: 2 pieces 4″ x 4″ each to cut wreath dies
  • Old Olive: 2 pieces 4″ x 4″ each to cut wreath dies
  • Vellum: 4″ x 4″ to cut 3″ Circle Die
  • Scraps of Crushed Curry, Real Red, Pretty Peacock, Gorgeous Grape, Old Olive, and Smokey Slate to punch bulbs
  • DSP: Night Before Christmas 1 1/4″ x 4 1/2″

Directions

  • Fold and burnish score lines on card base.  Fold bottom up and top down for a trifold card.  The bottom piece is slightly smaller than the top so it closes easily.
  • Cut a solid and leaf wreath in Mossy Meadow and Old Olive. Layer the Old Olive leaf wreath on top of the solid base wreath with a few Glue Dots. Layer the Mossy Meadow leaf on top of Old Olive off setting it a little so the leaves don’t line up and the wreath looks fuller.
  • Cut a 3″ Circle using the Layering Circle Dies. Glue to the back of the wreath then add the Mossy Meadow solid wreath to give it a finished look and add depth.
  • Using the 2 1/4″ Circle Punch, center the punch along the top piece and push it in as far as it will go and punch.Tutorial to make fun fold lighted wreath - Jeanie Stark Stampin' Up!
  • Center wreath over the circle opening and adhere to the front panel with liquid glue.
  • Make a bow with Real Red Cotton Ribbon and attach to the wreath with Glue Dots.
  • Stamp tops to bulbs with Smokey slate ink on ~1/2 ” strip of Smokey Slate cardstock.  Punch with Bulb Builder Punch.
  • Punch assorted colors of cardstock with Bulb Builder Punch. Adhere tops to bulbs with Liquid Glue and adhere to wreath with Glue Dots. Add highlights with a white gel pen.
  • savingpng-3
  • Open the top of the card and fold the bottom piece up.  Center and stamp sentiment in Black ink. * You will only see this sentiment through the front of the wreath when the card is closed.  When the card is open and displayed the sentiment is actually on the bottom of the card.
  • Fold the sentiment piece down and add the strip of DSP along the edge.  Stamp greeting on Very Vanilla cardstock and layer with Real Red cardstock.  Adhere to DSP with Stampin’ Dimensionals. *The popped up greeting will hold the card in place when it is displayed.  Add a battery operated tea light behind the wreath so it glows. You have plenty of space inside for a handwritten note or other sentiment.

Stampin' Up! TIdings All Around Bundle and Christmas Bulb Builder Punch fun fold Christmas wreath card idea - Jeanie Stark StampinUp

FREE Tutorials…This month I am offering 3 Exclusive PDF card tutorials using the All Around Wreath Dies and coordinating stamp sets. You can get these tutorials FREE with a purchase of $40 or more from my online store. (These ideas will not be shared on my blog.) In addition, you will receive a handmade thank you card from me along with a card kit for any order each month! I love to make and send cards and I appreciate your support!

Today is the last day to sign up for my “Decorative Masks Kit To Go”! You will receive the 4 NEW Decorative Masks (found in the Holiday catalog on page 35) along with a photo tutorial and kit to make 4 cards (using each of the different masks). You don’t want to miss out on these fun techniques! Order my kit by Oct. 10th! Click HERE or on the card below for all the details.

Stampin' Up Gather Together Bundle with Decorative Mask technique Thanksgiving or Thank You card idea - Jeanie Stark StampinUp

What’s better than creating a handmade card? Sending it of course! That’s why Stampin’ Up! is excited to announce the first annual World Card Sending Week from Sunday, October 6 to Saturday, October 12. We’re setting a goal to send 50,000 cards that week! I would love your help in reaching our goal. I hope you will find some time to create this week. Then keep track of how many cards you send from Oct. 6 – 12.  On October 12th I will ask that you to leave a comment on my blog with how many cards you sent.  Let’s work together and send smiles across the world!

Have a wonderful day! Check back tomorrow for the next project in my ABC Holiday 2019 Series! M is for…?????? Any guesses?

Just Stampin’

Jeanie

*Host Code Exclusive! All orders placed through my online store are eligible for my FREE monthly gifts (Exclusive tutorials, card kits and more!). Please use the current host code below. *If your order is $150 or more, do not use this code as You become the hostess and get the Rewards! Don’t forget to check out the Clearance Rack and SAVE $! Click HERE to shop. 

October Host Code:  FG7M24JM

Product List for Fun Fold Wreath (Click on image to shop my online store.)

Today is the last day to subscribe to Paper Pumpkin to get the Christmas cards kit for October! Click HERE to subscribe!

Paper Pumpkin Winter Wonders

Paper Pumpkin is offering back-to-back coordinating kits in October and November, one with Christmas cards, the other with Christmas tags. Both kits make it easy for you to add a handmade, personal touch to your holiday giving—without a lot of fuss. It’s Christmas made easy with Paper Pumpkin! Here’s the details about the Holiday Kits:

October Kit

Kit details: Makes 10 cards and envelopes

Card size: 4 1/4″ x 5-1/2″ (10.8 x 14 cm)

Envelope size: 4-1/2″ x 5-3/4″ (11.4 x 14.6 cm)

Coordinating colors: Early Espresso, Pool Party, Poppy Parade, and Shaded Spruce

November Kit

Kit details: Makes 24 holiday-themed gift tags of 4 various sizes and designs.

Coordinating colors: Early Espresso, Pool Party, Poppy Parade, and Shaded Spruce

*The October and November kits coordinate; however, each kit is all-inclusive and can stand alone.

Click HERE to subscribe today! *Order by Oct. 10th to receive the October card kit