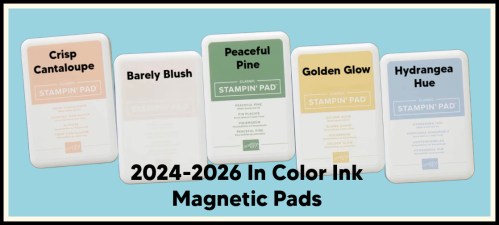
NEW MAGNETIC INK PADS
Beginning May 5, 2026, Stampin’ Up! will debut the NEW 2026–2028 In Colors along with a new magnetic, felt ink pad design. Existing ink pads will remain fully usable, with the updated design rolling out gradually through 2027 as part of a planned color transition.
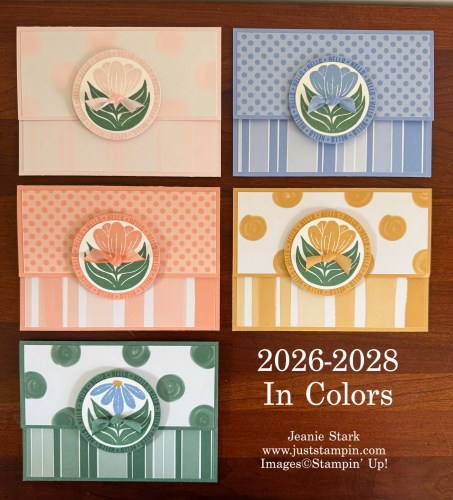
Upcoming New 2026-2028 In Colors:
- Crisp Cantaloupe
- Barely Blush
- Peaceful Pine
- Golden Glow
- Hydrangea Hue
Check out this video from Stampin’ Up! introducing the new colors and magnetic pads as well as some tips and techniques.
*Tip: It is really important to always “season” your new stamps. There are many ways to do this. You saw one way in the video above. I usually ink my new stamps with Versamark and stamp on my grid paper a few times to remove any residue. Another way is to use a Hi-Polymer (non-abrasive) eraser and gently rub on your new photopolymer stamps. I love these erasers and keep a clean one for stamps and another which I use when I’m crafting. Any of these techniques will help you get a better overall stamped image! Do you currently season your new stamps? Which technique do you like/use? I’d love to hear from you! Leave a comment below and share your experience.
To give you an idea of the new colors check out these color comparisons.
*The background color for each is the new In Color cardstock.
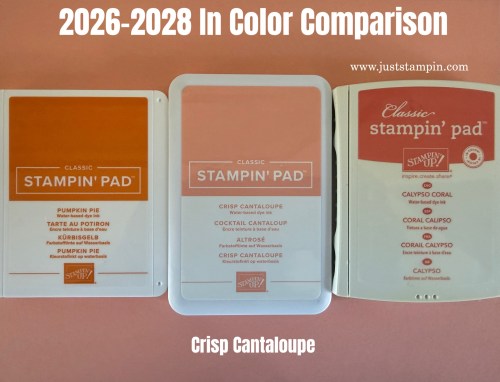
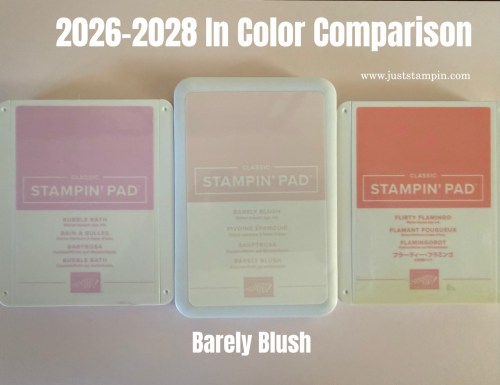
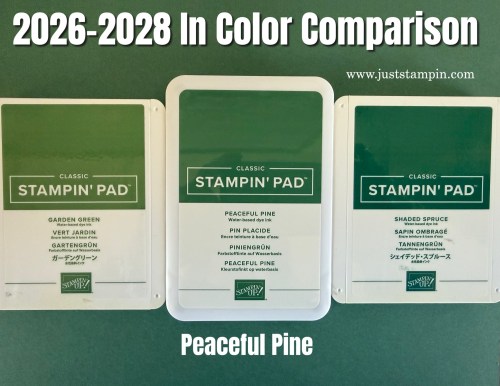

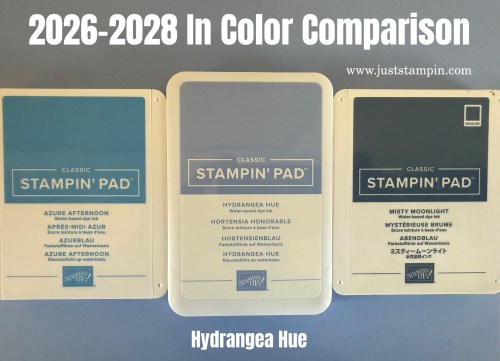
* The photos also show the size differences with the new ink pads vs. the current ink pads. All my different style/size Stampin’ Up! ink pads fit together in my Ink Pad Holder from Stamp-N-Storage (which I LOVE).
I am having so much fun creating with these new In Colors! Peaceful Pine is my absolute favorite green ever! It’s a toss up between Peaceful Pine and Hydrangea Hue for my new favorite In Color! What do you think? Which color(s) are you excited about?
You can get your hands on these new In Colors with my Just Stampin’ Special Edition 2026-2028 In Color Card Kit. I posted all the details yesterday.
Click HERE or on the photo below for more information.
I am also offering product shares where you can get a taste of the New In Colors and/or new Designer Series Papers, ribbon, & embellishments coming in May. Sign Up Now to reserve your share!

Click HERE to Reserve your Product Share!
Double Rewards End Today!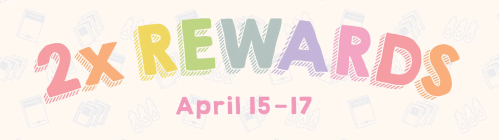
If you’ve been eyeing something in the Stampin’ Up! online store — NOW is the time to grab it! Today is the last day you can earn double Stampin’ Rewards on your orders. That means 20% in rewards on everything you purchase!
Have a great day! Thanks for stopping by!
Just Stampin’
Jeanie
CLICK HERE TO SHOP STAMPIN’ UP!

My Just Stampin’ Rewards:
I appreciate each and every order! Here are the things you can expect when you place an online order with me:
- Shop and earn 10% back in Stampin’ Rewards on orders of $20 or more. Use them on your next order or save them up to 1 year for something special!
- All orders will receive a handmade thank you card from me.
(*You can choose to remove the sticky note inside and reuse the card.) - With a $50 order you will receive the Fun Fold PDF’s from my Mystery Stampin’ cards. *You will receive that month’s PDF’s on the first of the following month.
- With an order of $75 (or more) I will send you the PDF’s and thank you card as well as a card kit or Stampin’ Up Product of my choosing – this varies monthly.
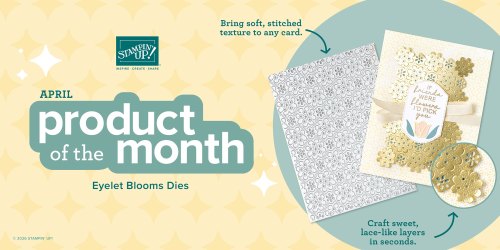
- Orders of $75 (or more) qualify for the Product of the Month! For just $5 you can add-on the New April Product of the Month or any of the previous Products of the Month. AWSL
CLICK HERE TO SHOP STAMPIN’ UP!
CLICK HERE TO SHOP NEW ONLINE EXCLUSIVES
CLICK HERE FOR PRODUCT OF THE MONTH
Click HERE TO SHOP KITS COLLECTION
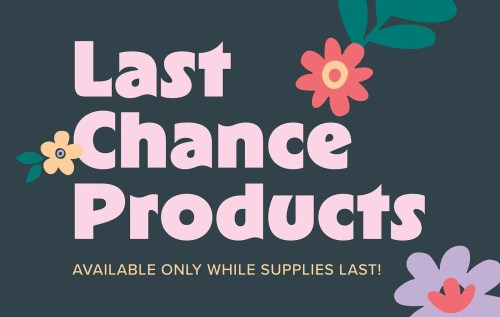
CLICK HERE to SHOP LAST CHANCE PRODUCTS
You can see photos of how I organize my craft room HERE.
Click HERE to shop Stamp N Storage products!