Let’s Celebrate

I had an amazing fun filled weekend at the Stampin’ Up! OnStage event in Richmond, Virginia! I will be sharing sneak peeks with you just as soon as I can. (Check back this afternoon for a sneak peek at this month’s Paper Pumpkin!)


What I can share with you is the card I made for the card swap. Stampin’ Up! Demonstrators love to share cards and projects to inspire you and each other.  Here are the cards I made.

img_1201

I love to make fun fold cards!  This one is a free standing triple panel card and not only is it really quite easy to make, it’s also useful for many different occasions…birthday, anniversary, graduation, retirement, new baby, or any event you want to celebrate.  I made 50 of these (the day before I left). When I make multiple cards I do it assembly line style. I cut everything, then score, emboss, stamp, and finally assemble. Most of the time I use the Stampin’ Trimmer to score my cards. However, for this project I used the Simply Scored Scoring Tool and quickly scored 26 pieces of cardstock.

img_0902

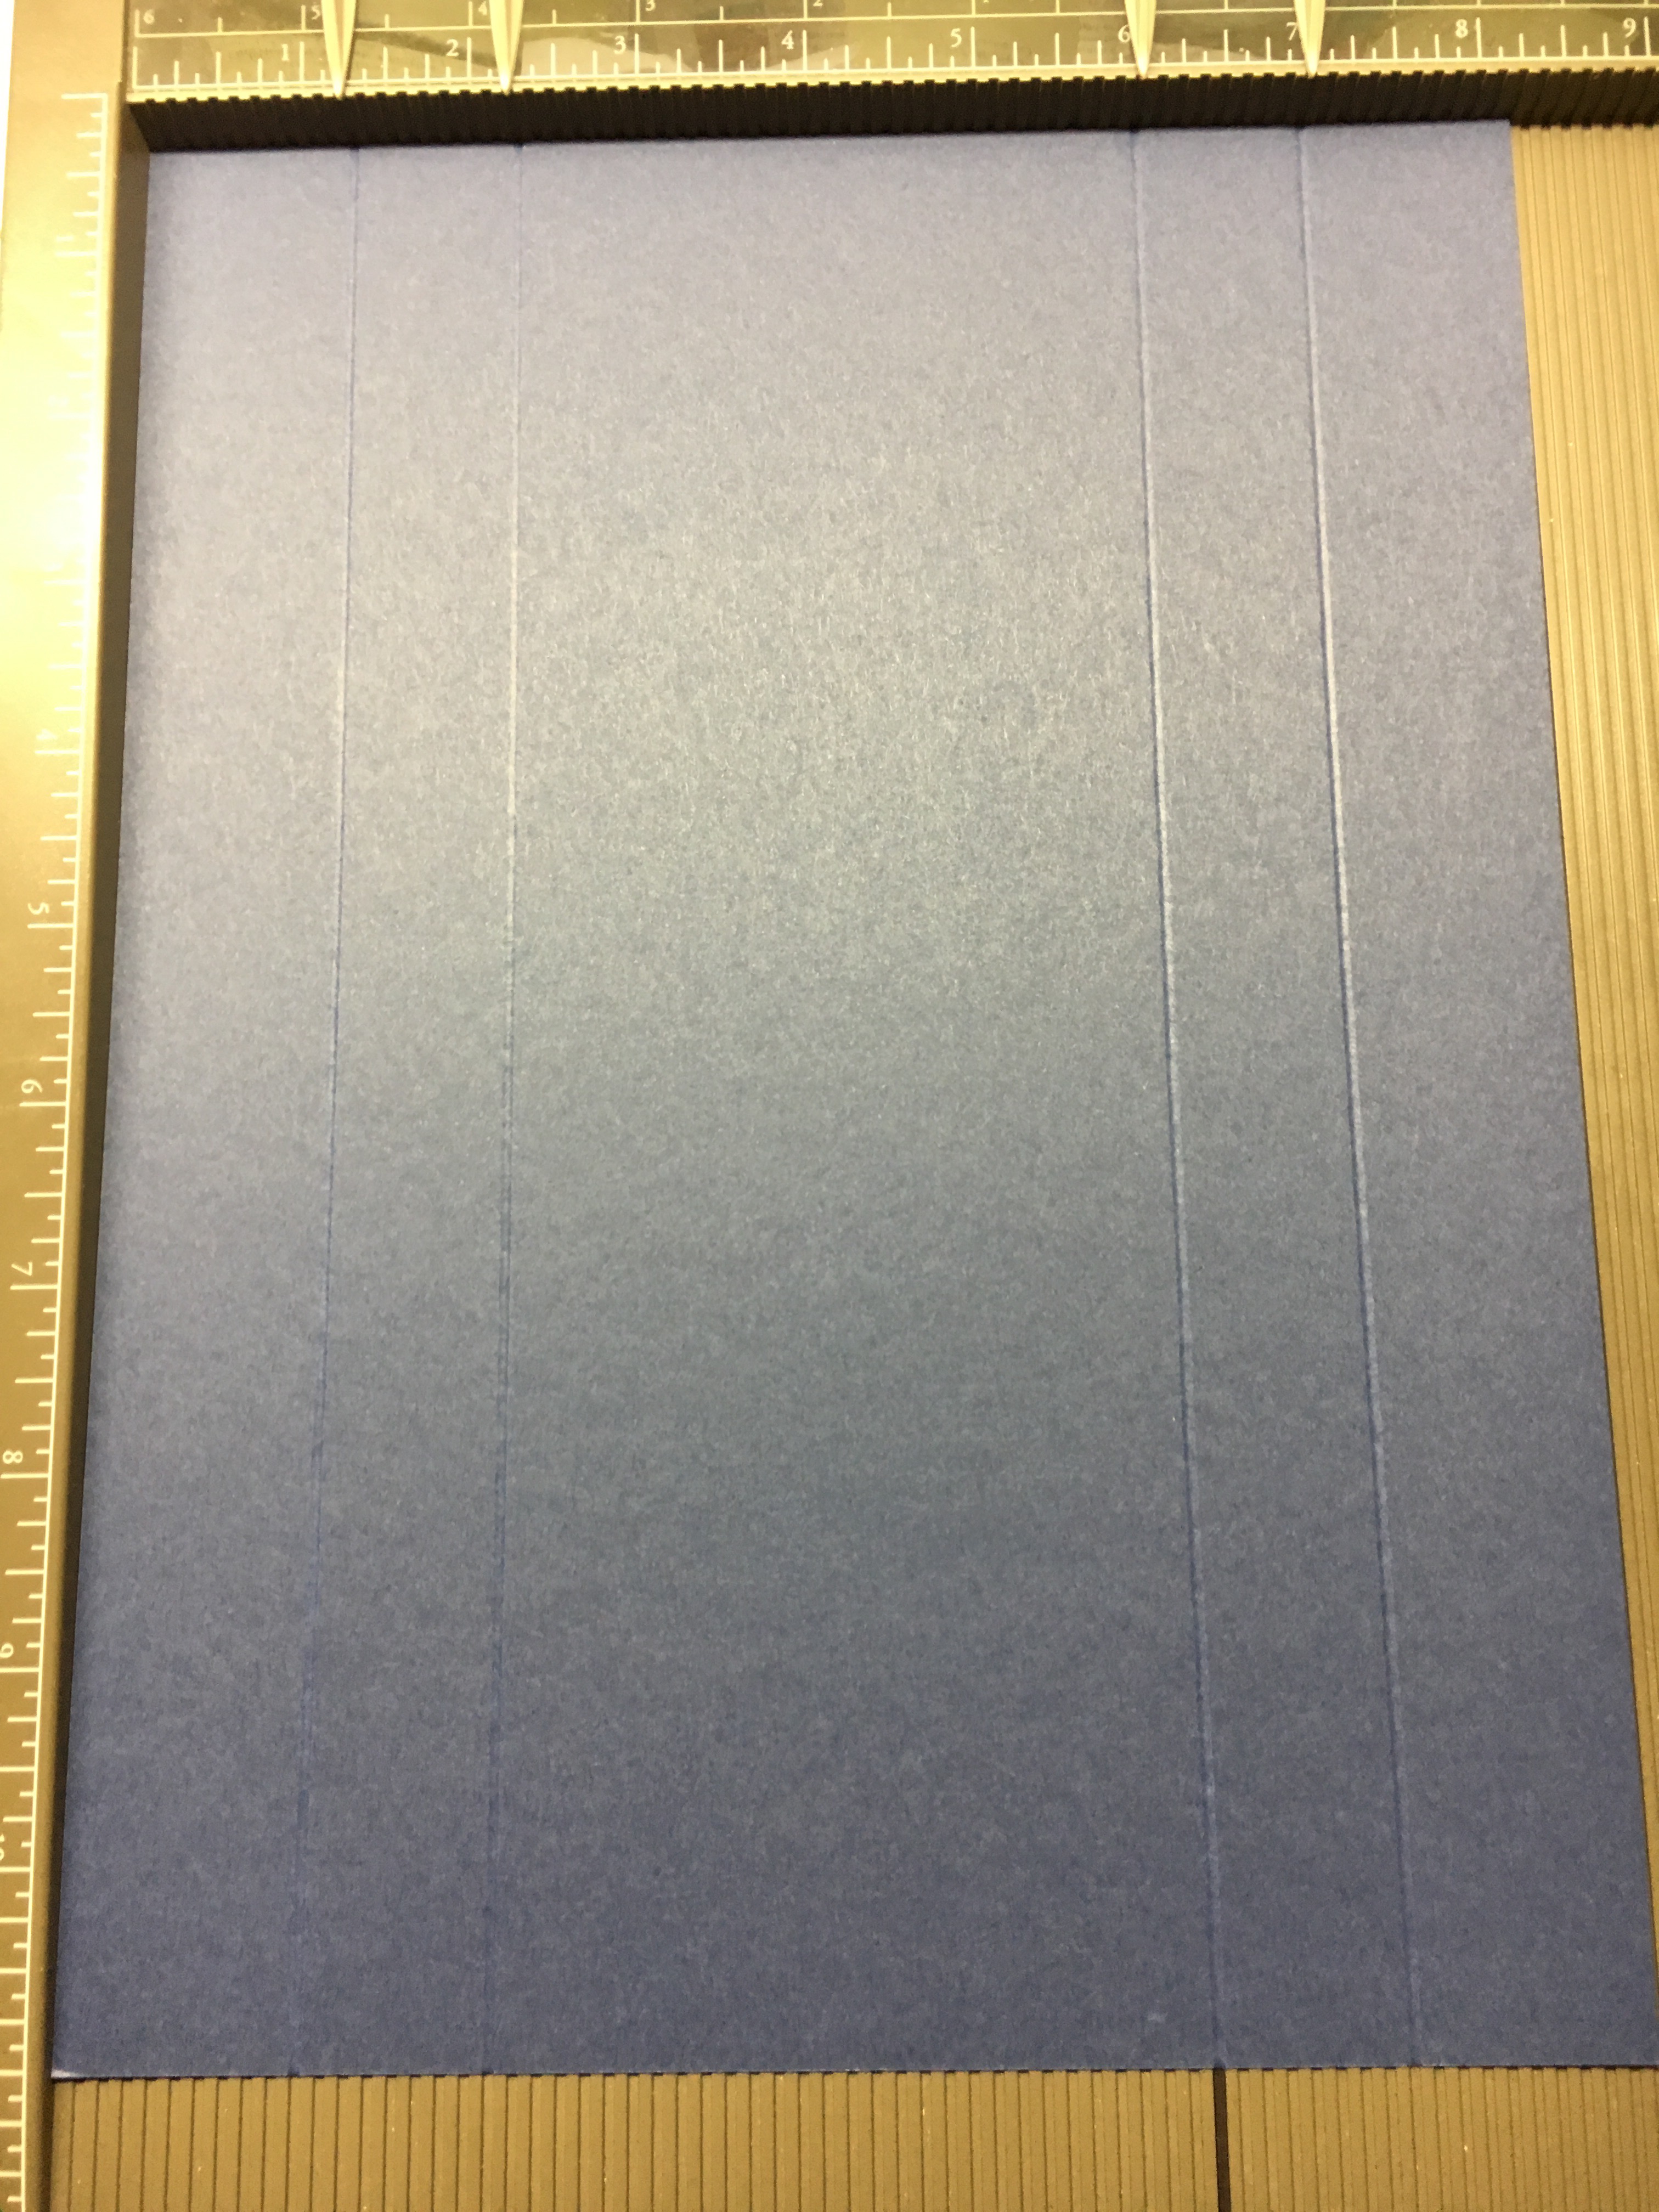
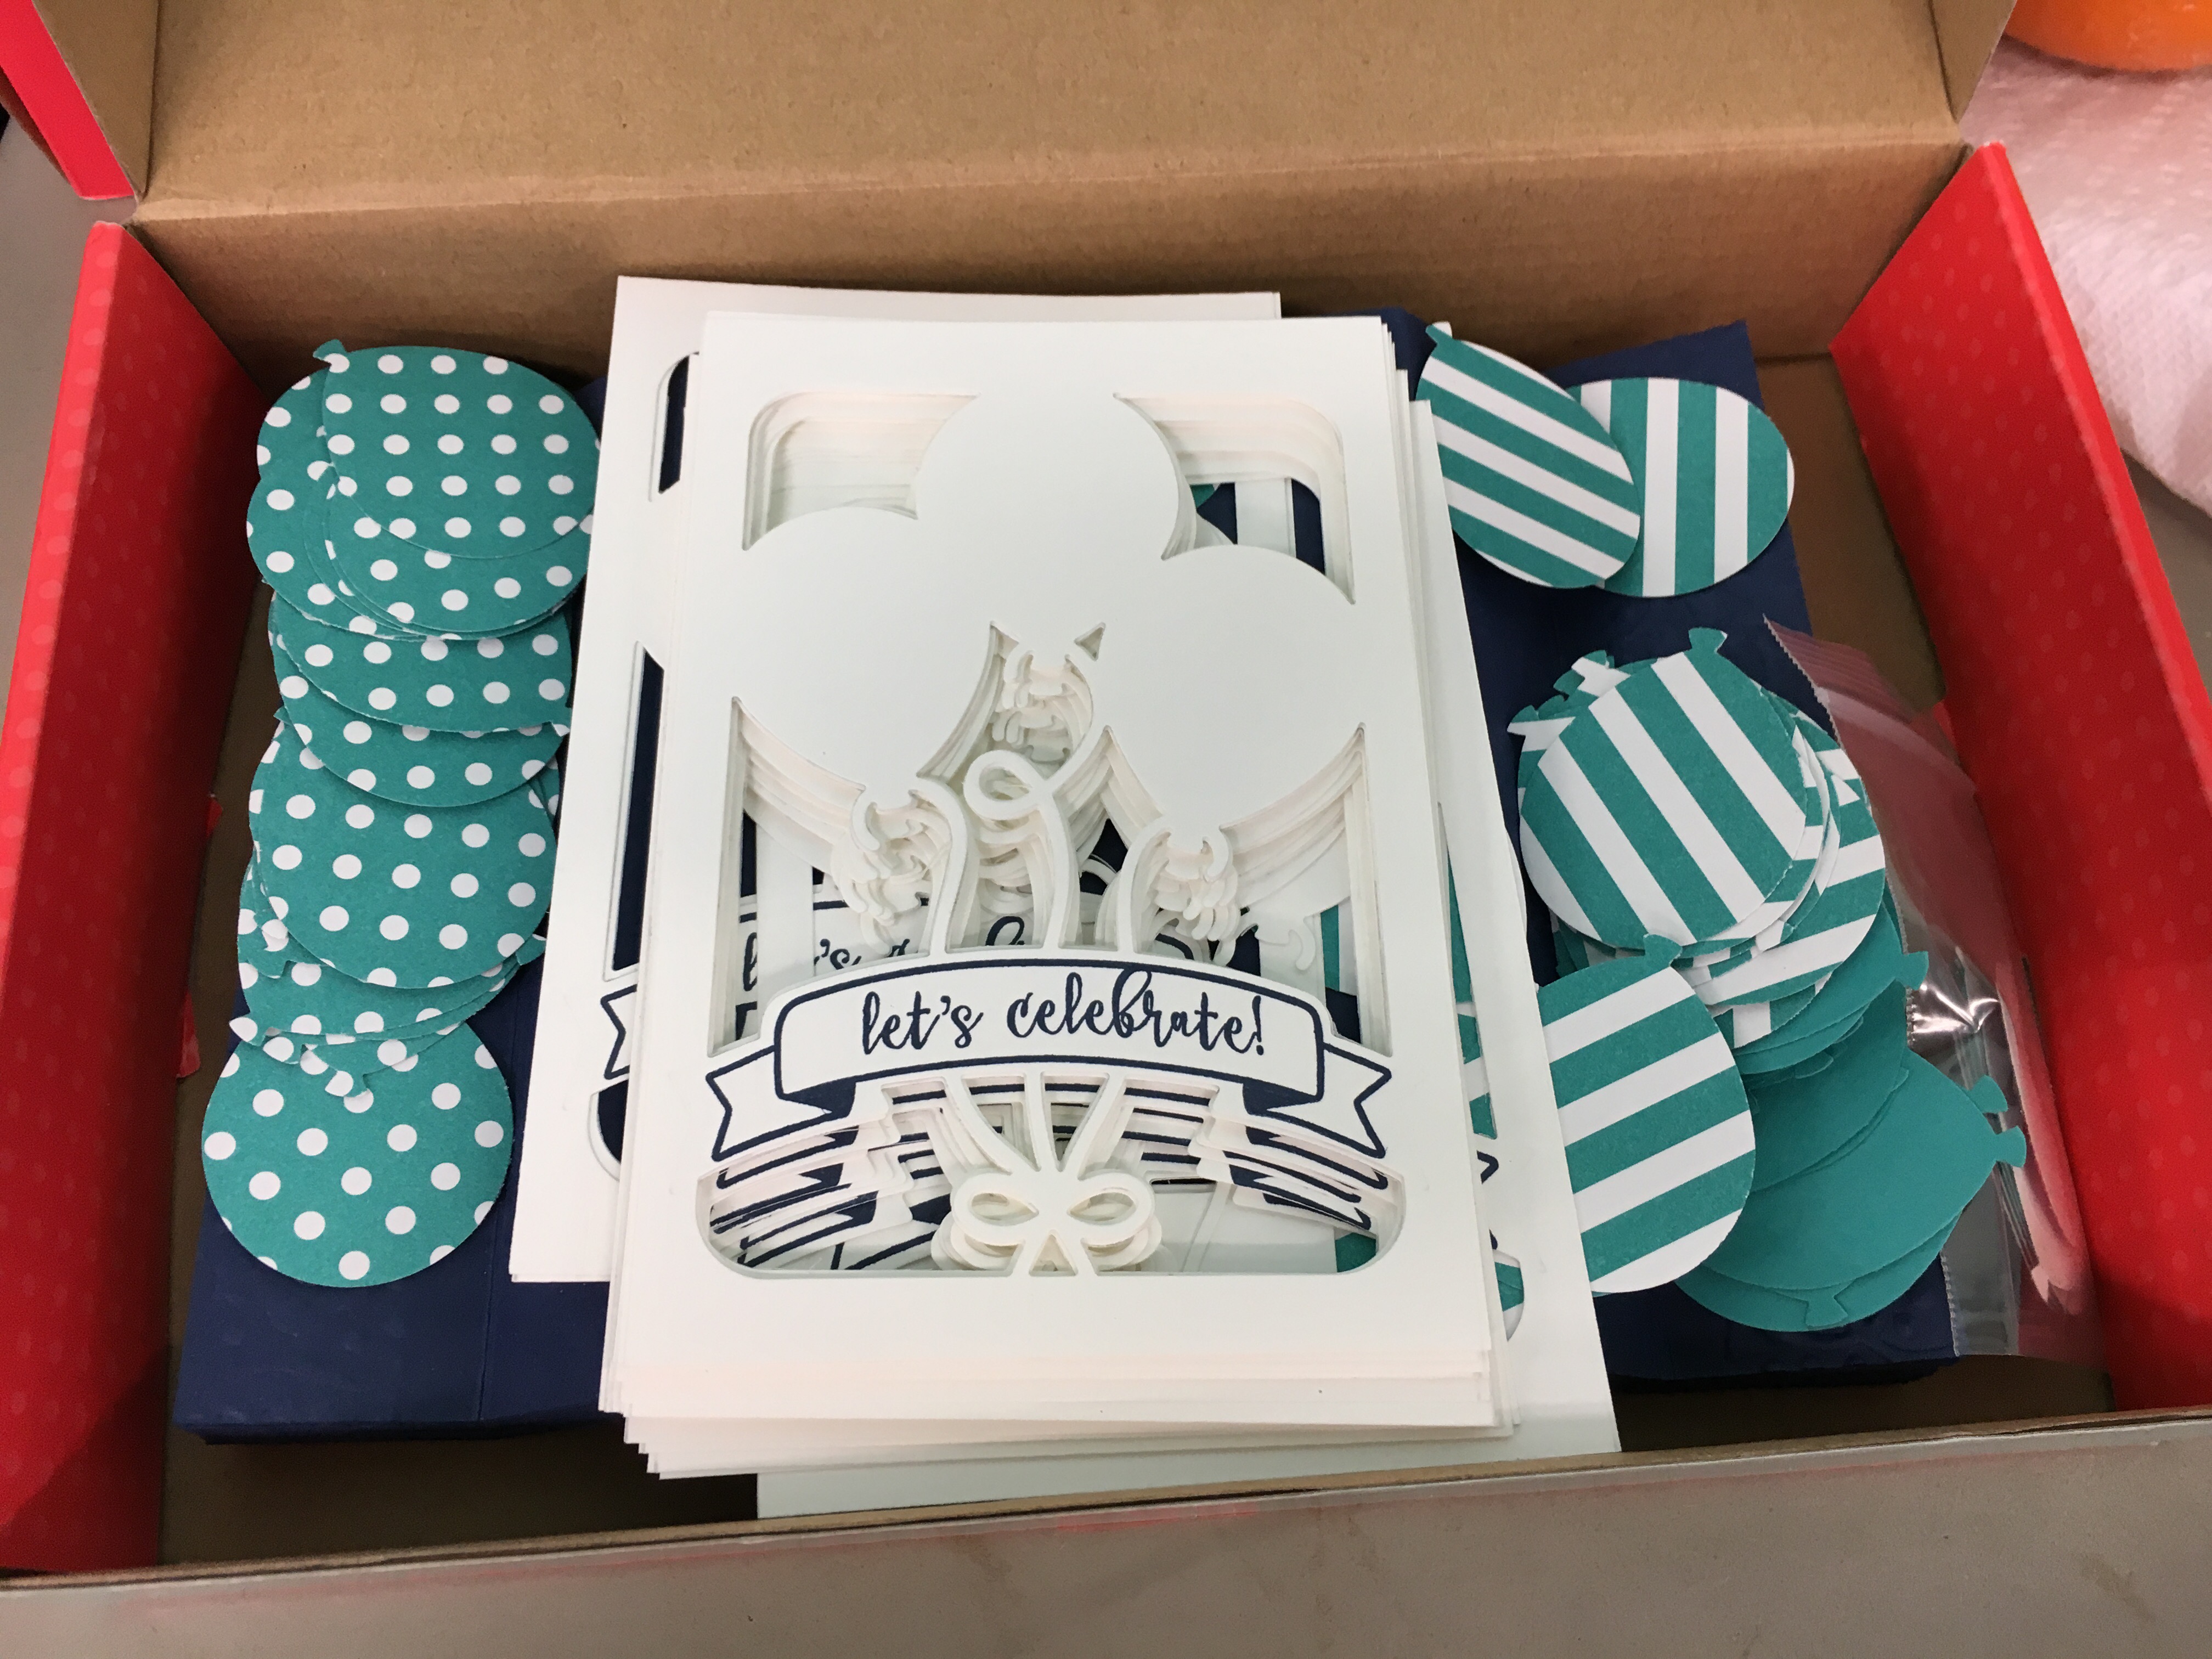
My cardstock measures 8 1/4 x 11.  With the 8 1/4″ length across the top, I scored it at 1 1/4, 2 1/4, 6, and 7.  ThenI  cut it in half to make 2 pieces measuring 5 1/2 x 8 1/4.  I folded the sides back and forth along the score lines to create the panels then I embossed the ends using the Confetti Embossing Folder. I used the Balloon Pop-Up Thinlits Dies (and the Precision Base Plate) to cut the center panel from a piece of 3 1/2 x 5 1/4 piece of whisper white. I stamped the sentiment and banner from the Balloon Adventures Stamp Set using Night of Navy ink. (The photopolymer stamps make it so easy to see exactly where you are stamping.) I used the Balloon Bouquet Punch to punch the balloons from the Brights Designer Series Paper Stack as well as Melon Mambo and Bermuda Bay cardstock.  I attached the balloons using Multipurpose Liquid Glue then adhered the center piece to the card using Stampin’ Dimensionals.  I used a glue dot to attach the bow.  (I wish I had a picture of me making the bows and attaching the Stampin’ Dimensionals in the back seat of the car during the drive to Richmond Friday afternoon. Nothing like last minute! LOL)

img_0913

Here’s a look at the finished projects.  Which color do you prefer?

img_1212

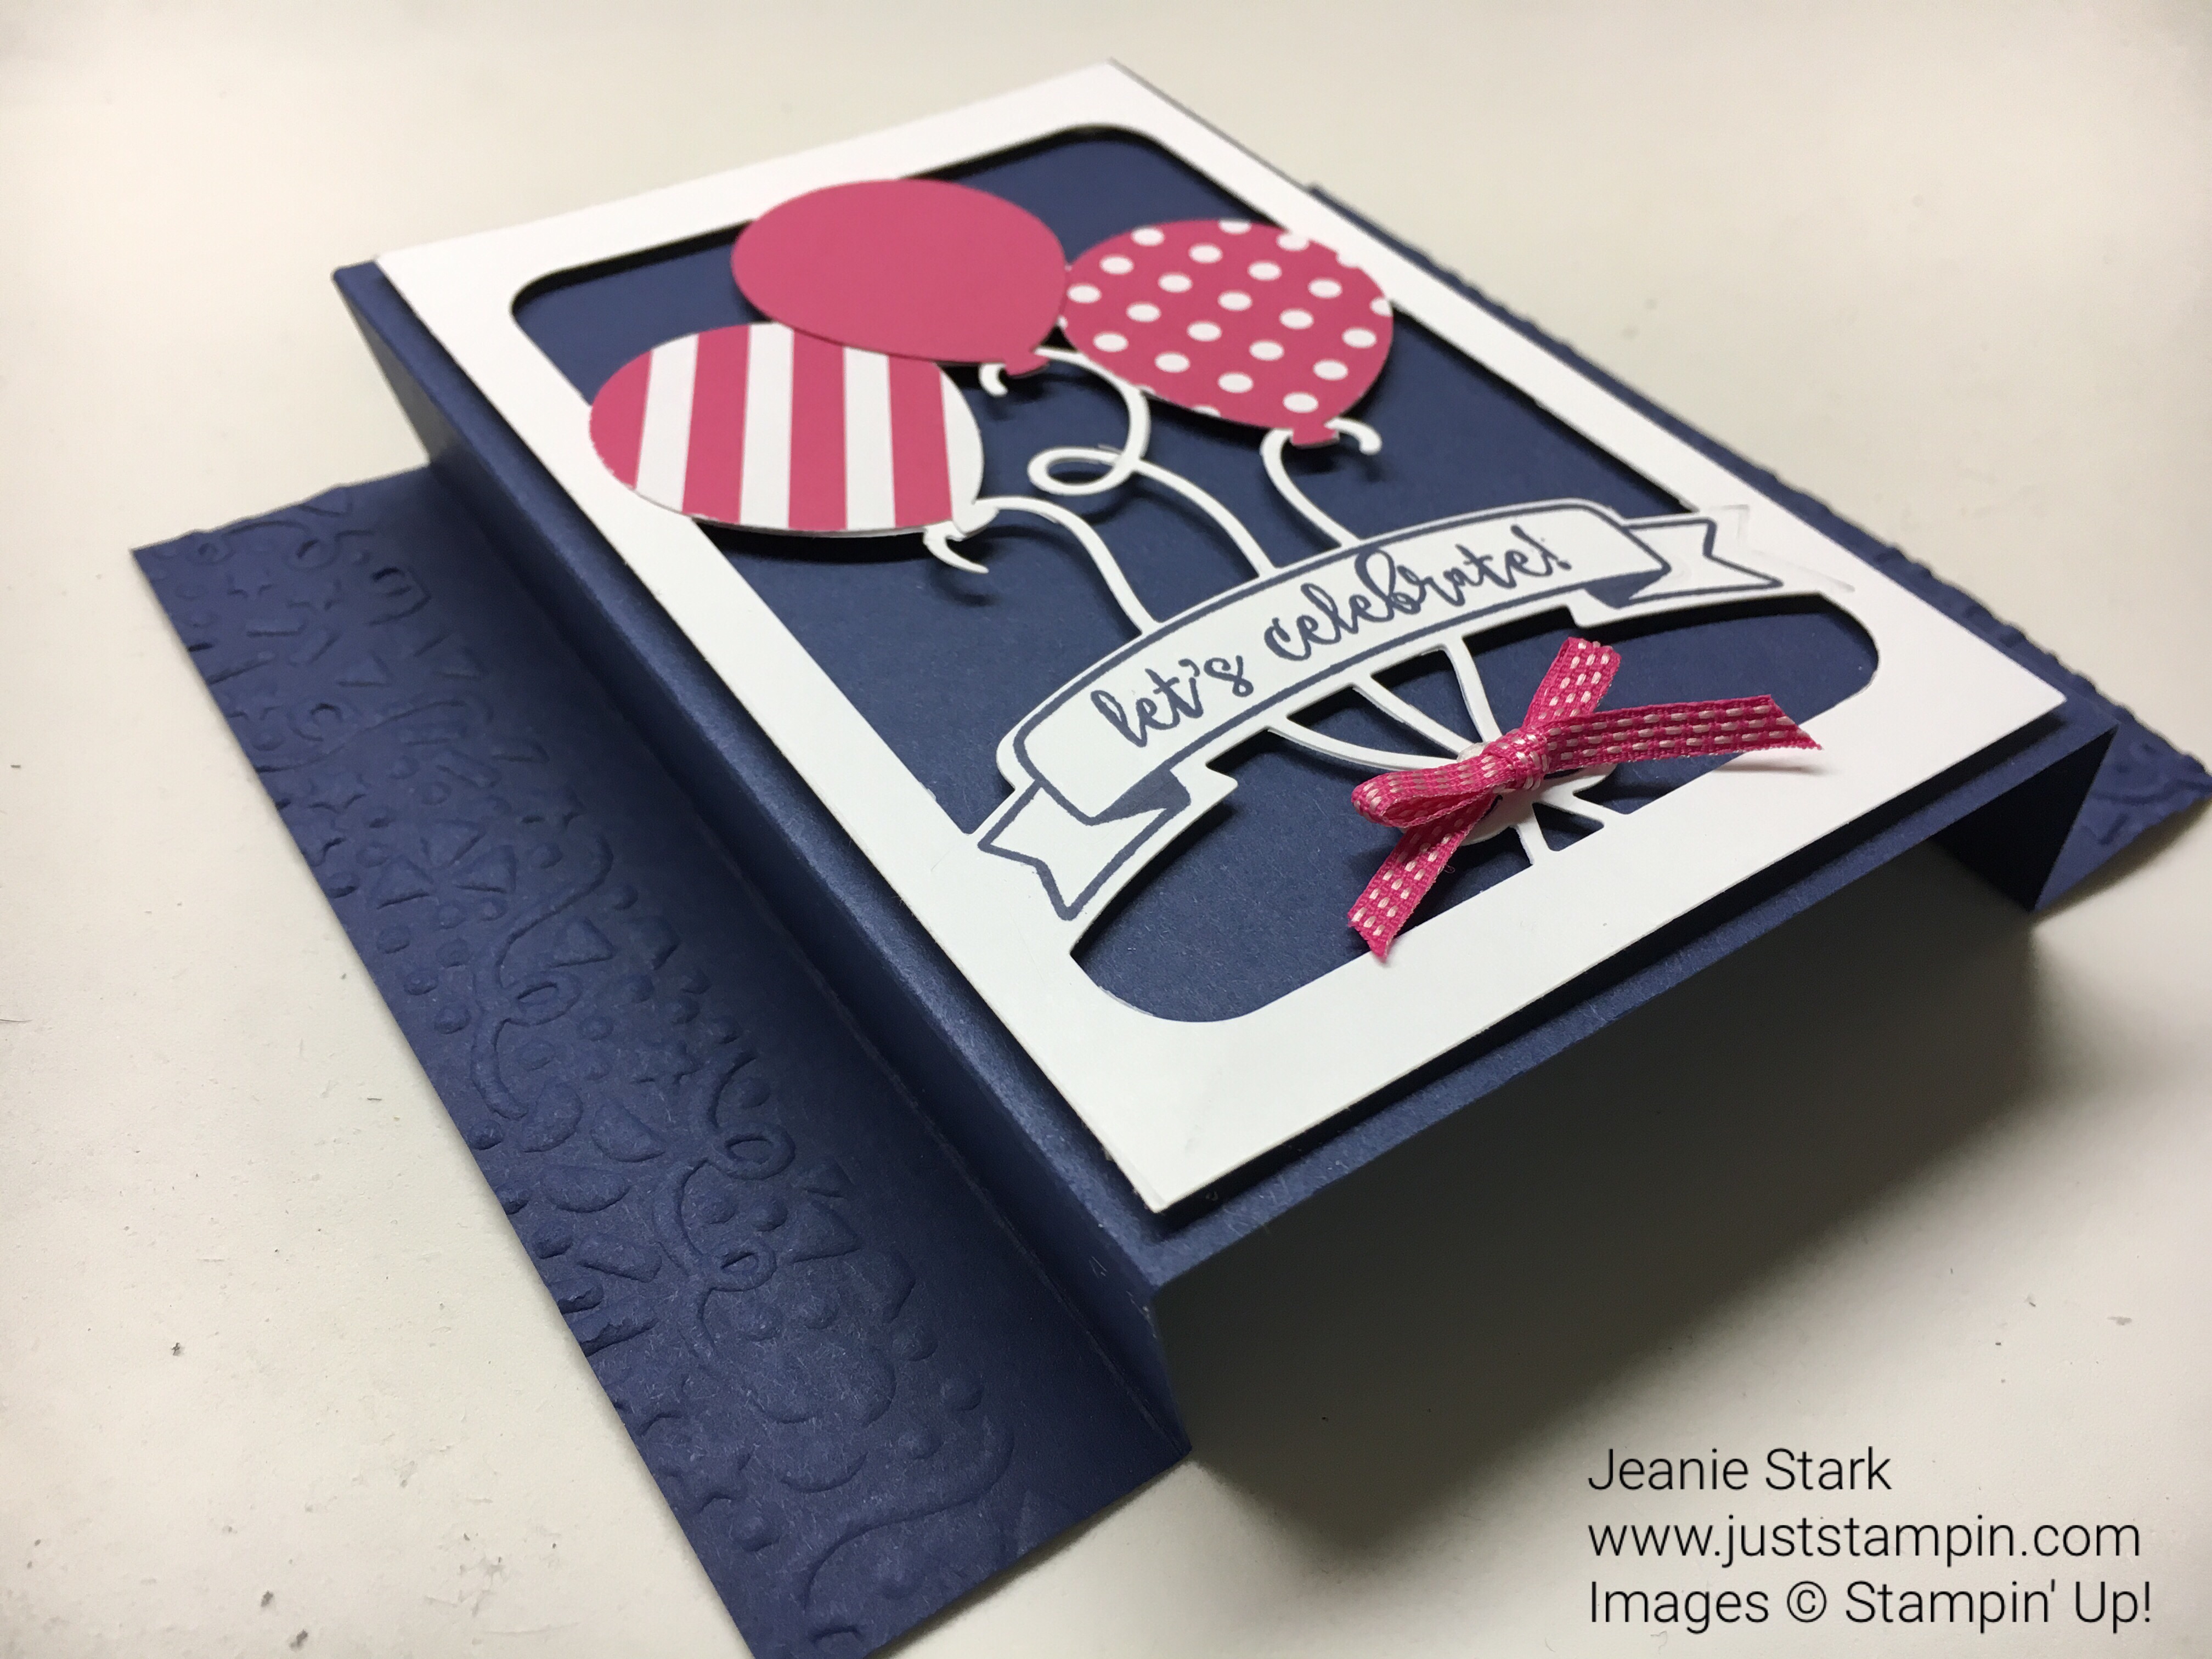
Melon Mambo with Night of Navy

img_1202

Bermuda Bay with Night of Navy

The cards fold flat and fit in a standard envelope.  I packaged each in a clear envelope for swapping.

img_1204


img_1203

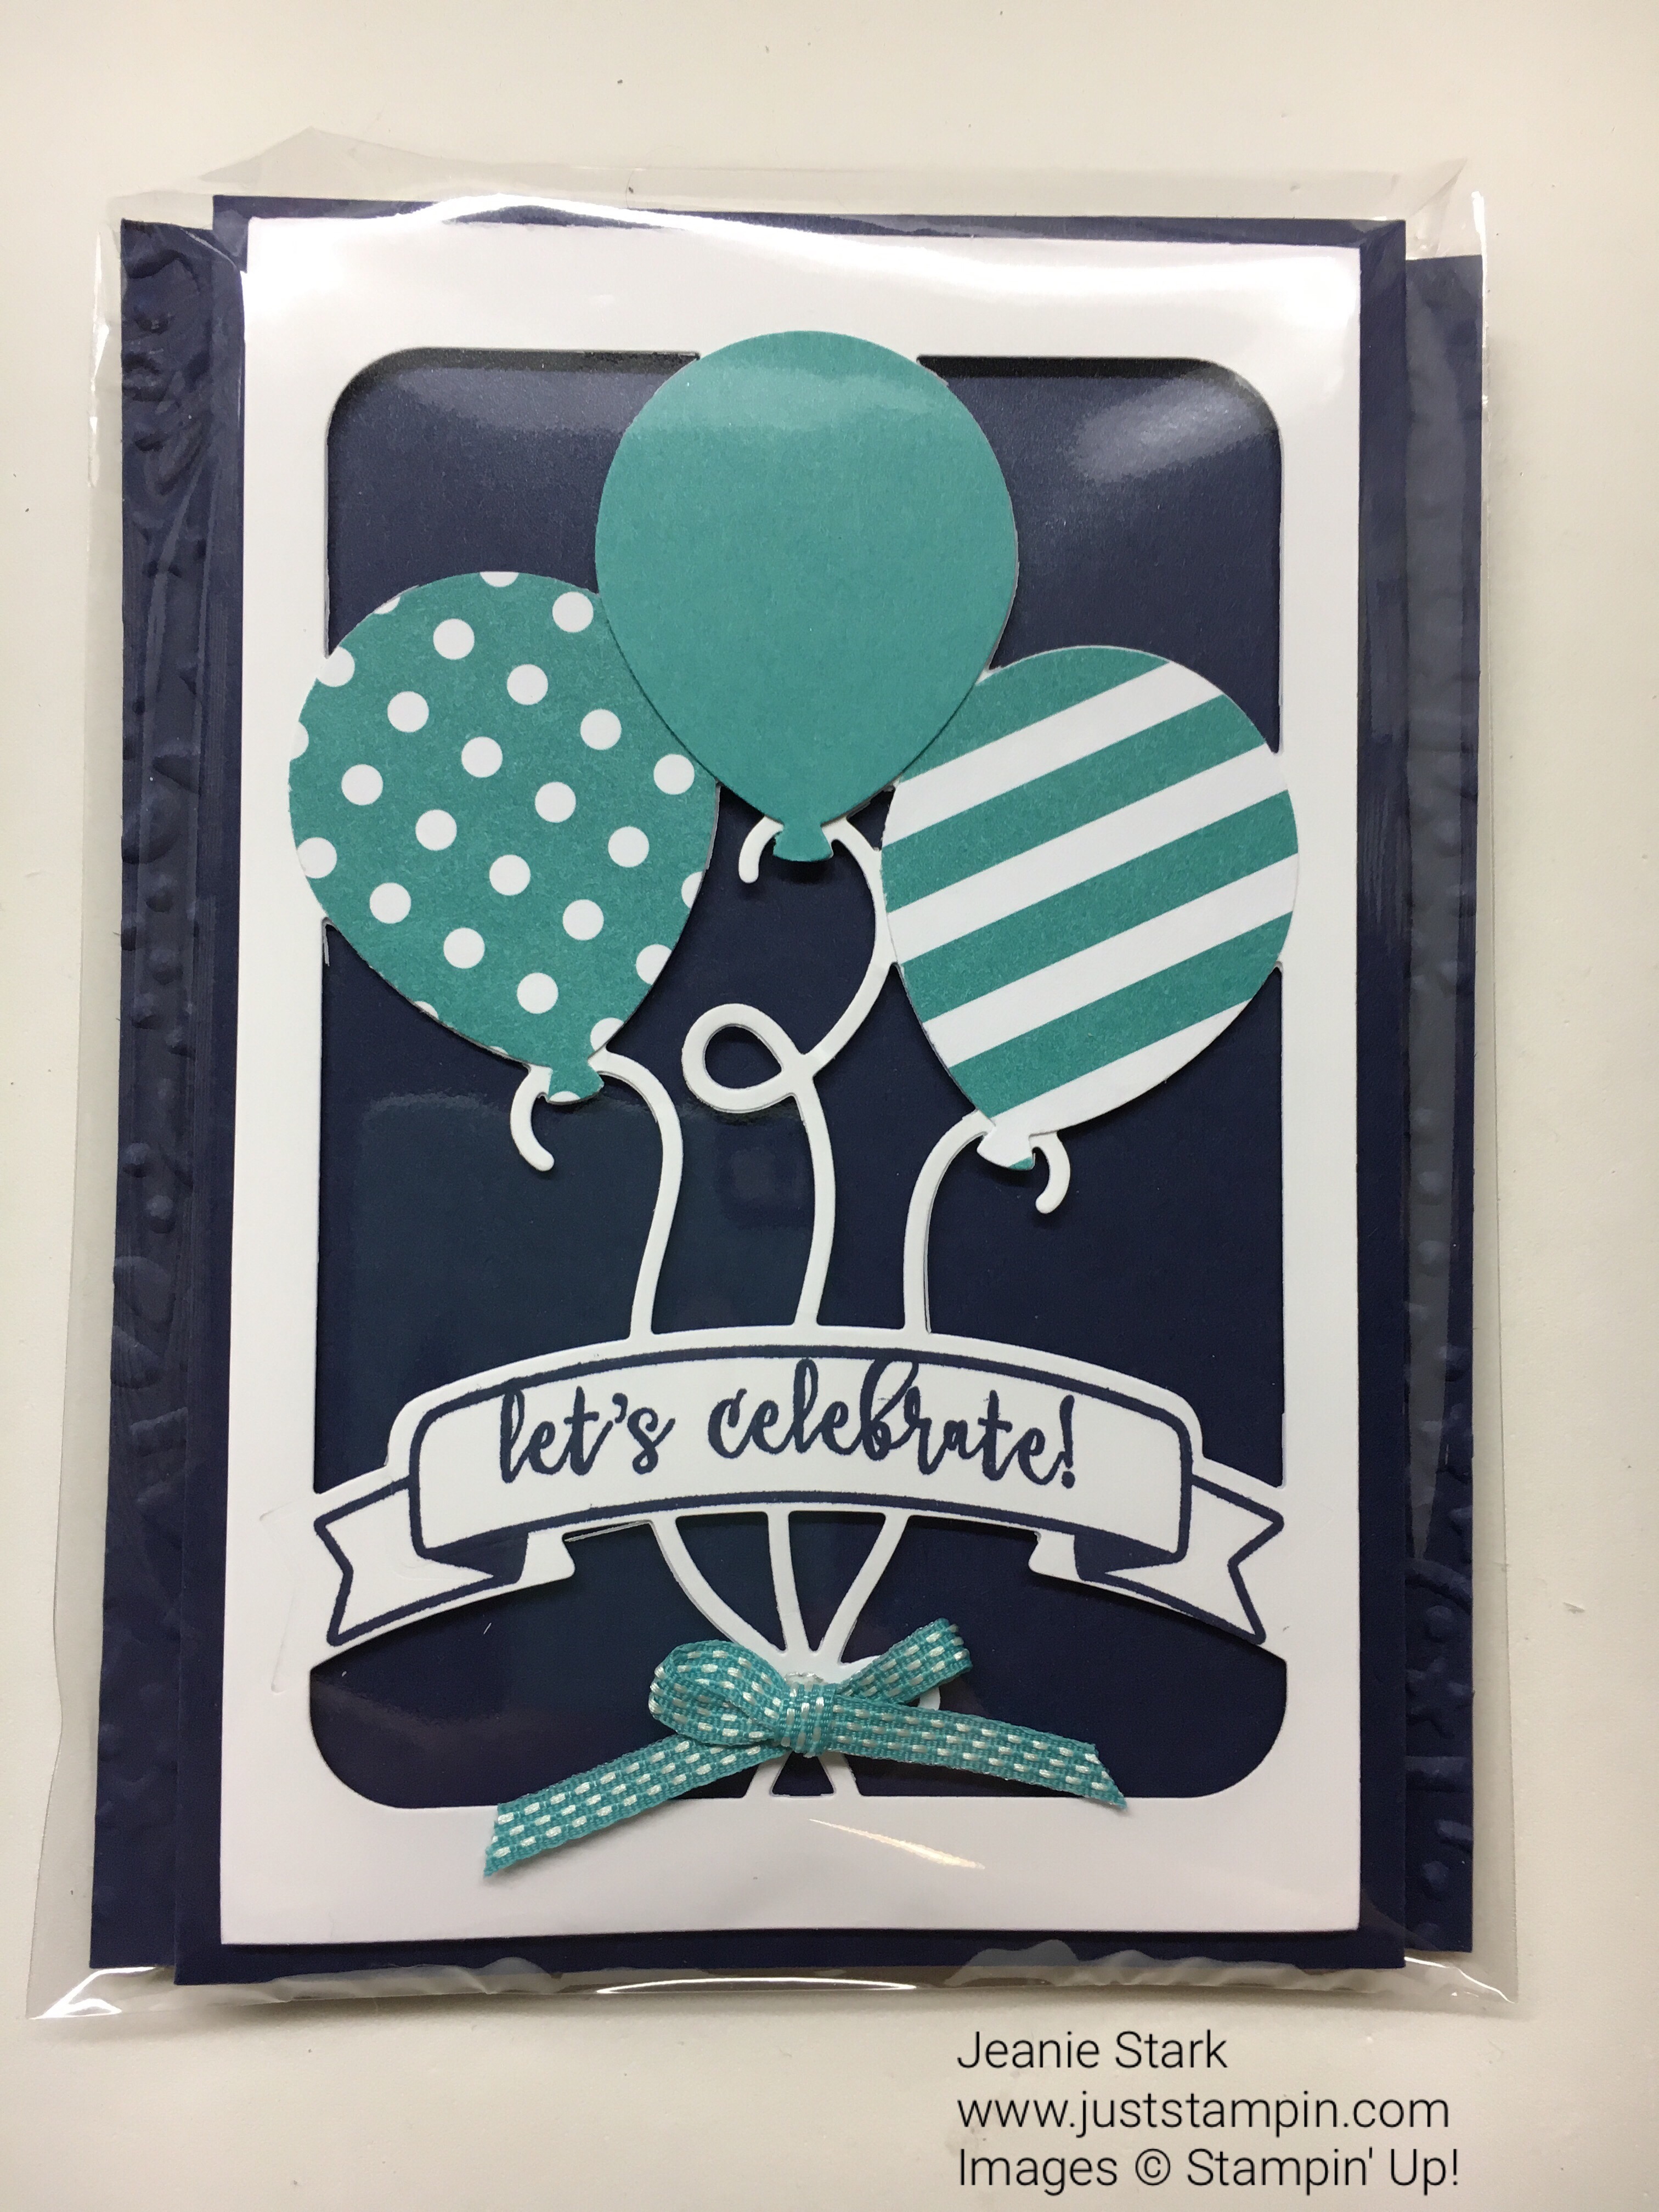
Stamp Set: Balloon Adventure  Ink: Night of Navy Papers: Night of Navy, Melon Mambo, Bermuda Bay, Brights Designer Series Paper Stack, Whisper White  Tools & Accessories: Balloon Pop-Up Thinlits Dies, Precision Base Plate, Big Shot, Confetti Embossing Folder, Stampin’ Trimmer, Simply Scored Scoring Tool, Balloon Bouquet Punch, Melon Mambo and Bermuda Bay 1/8″ Stitched Ribbon, Multipurpose Liquid Glue, Glue Dots, Stampin’ Dimensionals

*UPDATE: The Balloon Pop-Up Thinlit Dies I used on this card is retiring and is now 50% off while supplies last! Click HERE to add this to your shopping cart before they sell out!

Balloon Pop Up thinlits dies

I had so much fun celebrating all weekend…driving down and back with team members, dinner Friday and Saturday nights with several other PALS, prizes, inspiration, make & takes, training, and other events all day Saturday, and more! Here’s a photo of some us having dinner Friday night at Tarrant’s Cafe in Richmond.

img_0922-1

Deb Echelmeyer, Me, Nancy Gleason, Vikki Byers and her hubby, Bridget Trefethen, and Ramsey Alexander.

img_1164

I will continue to share the celebration, card swaps, and new product sneak peeks with you all week long.  I hope you will check back and join the celebration. Would you like to receive one of my swap cards? Just leave me a comment and I will pick a winner using random.org.

If you need any stamping supplies, I would love to be your demonstrator. Click HERE to shop my online store.  *FYI…The Retiring List comes out today! Many items will sell out fast. Don’t miss out!  Also, today is the last day to sign up for Paper Pumpkin to get the April kit.  I will post a sneak peek later today…trust me…you want to Sign Up NOW!!!

Click to SHOP PAPER PUMPKIN from my online store.  You will get an email with a subscription code.  *Make sure you click below to sign up and enter the code.

Click HERE to sign up for Paper Pumpkin.

Paper Pumpkin with Sara

Have a wonderful day!

Just Stampin’

Jeanie

*All orders placed through my online store are eligible for my FREE monthly gifts (card kits and more!).  Click HERE to shop. Please use the current host code below.

April Host Code CBUMGZ7E


Spring Has Sprung for the PALS Blog Hop

2017badge-cucumber

Welcome to the Pals Blog Hop for March 2017. We are thankful you stopped by to take a look at our 2017 Blog Hop monthly themes.  This month we are featuring Spring or Spring related projects. We hope you enjoy our creations.

You may just be starting the Blog Hop or may have come from the previous link from the Line-up on the Pals Blog Hop listing shown below.  The full lineup will help you move along from blog to blog so you may see all the projects.

img_0089

The inspiration for my card today came from the beautiful spring wreath my sister made me for my birthday.  We celebrated a little early this year and I couldn’t wait to hang it on my front door.

img_0044

I love the way she personalized my wreath with the big monogrammed letter.  To recreate this beautiful wreath, I used the Large Letter Framelits to cut the letter S from Daffodil Delight cardstock. I stamped the wreath from Wondrous Wreath in Old Olive and then turned it slightly and stamped it again without reinking. I cut it out with the Wonderful Wreath Framelits. I punched flowers from Melon Mambo and Daffodil Delight cardstock using the Tree Builder Punch and Wonderful Wreath Framelits.  I curled the flowers using the end of my stylus to give them some dimension. I added a little Pear Pizzazz ink to the center of the yellow flowers using my blender pen.  I used the Everyday Jar Framelits to cut some stems from Always Artichoke and Old Olive  cardstock to add some more greenery to my wreath.  I popped up the wreath and monogram with Stampin’ Dimensionals and attached the greenery and flowers with glue dots.img_0087

My sister has made me several wreaths before and every year a bird builds a nest in our wreath and lays eggs. This wreath came complete with a bird and eggs so perhaps we will get to use our front door this year.  I made my nest with linen thread and just wrapped it around my finger and attached it with glue dots.  The “eggs” are punched from the Tree Builder Punch.  I tucked the tips of the “leaves” into the nest so you just see the rounded end.  I used Melon Mambo Thick Bakers Twine and Old Olive Bakers Twine to make my bow and attached it with a glue dot.

My card base is a 4 1/4″ square from Sahara Sand cardstock.  I cut a 4″ square and scored it at 1/2″ on all four sides using my Simply Scored Scoring Tool. I like the way the scoring highlights and frames the wreath.  I used the Envelope Punch Board to make a matching custom envelope for my card. The Envelope Punch Board (133774) is one of my favorite tools and it’s a bargain for just $20! Not only is is so easy to use to make custom envelopes but it also makes great treat holders and other 3D items. Check out this video and see just how easy it is to use!


Another favorite of mine is embossing folders…they make it quick and easy to add depth and texture.  I used the Floral Affection Embossing Folder to add some texture and fun to the envelope flap.

img_0097

Stamps: Wondrous Wreath  Ink: Old Olive, Pear Pizzazz  Papers: Sahara Sand, Melon Mambo, Daffodil Delight, Old Olive, Always Artichoke, Whisper White  Tools & Accessories: Wonderful Wreath, Large Letters, and Everyday Jar Framelits, Tree Builder Punch, Floral Affection Embossing Folder, Envelope Punch Board, Simply Scored Scoring Tool, Blender Pen, Linen Thread, Melon Mambo Thick Bakers Twine, Old Olive Bakers Twine, Glue Dots, Stampin’ Dimensionals

Here’a a final look at my wreaths side by side.

Thanks for visiting. To continue with the hop, please refer to the Blog Hop Line-up below. We hope to see you on next month’s Pals Blog Hop! 

Have a wonderful day!

Just Stampin’

Jeanie

Blog Hop Line-up:  

  1. Mary Fish at Stampin’ Pretty
  2. Beth McCullough at Stamping Mom
  3. Sue Becker at RnR Stamping
  4. Wendy Klein at Doggone Delightful Stampin’
  5. Peggy Noe at Pretty Paper Cards
  6. Debbie Mageed at Secret Stamper
  7. Becky Retzer at Just in Thyme by Becky Retzer
  8. Patti MacLeith at Papercrafts by Patti
  9. Jennifer Michalski at Stamping Serenity
  10. Debbie Crowley at expressivelydeb…
  11. Amy Hoptay at Craft Carnivore
  12. Mary Hanson at Up North Stampin’
  13. Susan Itell at Simple Stampin’
  14. Rae Harper-Burnet at Wild West Paper Arts
  15. Karen Hallam at Karen’s Stampin’ Habit!
  16. Jeanie Stark at Just Stampin’
  17. Lynn Tague at Beyond Beaches & Blessings
  18. Brian King at Stamp with Brian
  19. Lisa Pretto at InkBig Academy Stamps
  20. Pamela Sadler at Stampin Pink Rose
  21. Lisa Ann Bernard at Queen B Creations

Stampin’ Up!’s Sale-A-Bration 2017 is going on now through March 31!!

sab-paper-pumpkin

Be a Paper Pumpkin subscriber.

Click HERE to shop my online store.  March Hostess Code:  MDETS7YZ 

Use the Hostess code when placing your online order to receive your monthly gift from me.

Stampin’ Up!’s Sale-A-Bration 2017 is going on now through March 31!!

img_8820

Shop!

For every $50 you spend (before tax and shipping), you get a FREE Sale-A-Bration product. That means it’s the perfect time to purchase those products you’ve had your eye on while earning more products for free.  As an added bonus, Stampin’ Up! added three new Sale-a-bration products on February 21!

VIEW: Sale-A-Bration  – release 1
VIEW: Sale-A-Bration – release 2 (new)

Host!

You can earn Host Rewards with sales of $150. Place an order of $250 or greater or host a party with at least $250 in sales during Sale-A-Bration and you’ll earn $25 more in Stampin’ Rewards/Host Cash!!  You can even apply your Stampin’ Rewards toward a Starter Kit and become a demonstrator yourself!

Join!

It’s the best time of year to join Stampin’ Up! During Sale-A-Bration, you can become a demonstrator for just $99 and choose TWO additional stamp sets for your Starter Kit—any stamp set, any price! (Excludes Sale-A-Bration sets and bundles.) Plus, the kit ships for free! Send me an email at j.stark@myactv.net if you have any questions or want to plan a time to chat. Click HERE and HERE for more information or click below to Join the Fun!

join-now


Happy New Year!

img_7991
Start a new family tradition!

A friend of mine posted this idea on Facebook and I knew this was something I could do and enjoy with my family. It’s quick & easy!  I decided to spruce up my jar to make it part of my decor so I could set it out and be reminded to do it throughout the year.

IMG_8284

I had a Longaberger mason jar in my pantry and decided to use that.  I love and use Longaberger baskets throughout my home and craft space to keep things organized. My husband buys the tree trimming basket for me every year and I put those on a tree in our kitchen for the holidays. You can see in the photos that I chose the colors for my jar and paper holder to match the table runner and curtains in my kitchen.

IMG_8270

img_8271
My Longaberger basket tree.  I fill the baskets with candy for the holidays.

I made a belly band for the mason jar using a 2 inch strip of soft suede cardstock. I used the Scalloped Tag Topper to punch each end and threaded mint macaron mini striped ribbon through the ends and tied a bow. I heat embossed the sentiment from Paisleys and Posies with clear embossing powder.  To emboss any color all you have to do is ink your stamp in VersaMark first, then ink it in whatever color you want and stamp it on your cardstock. Add clear embossing powder and heat it.  I used mint macaron ink for the sentiment.  I used the Layering Circles Framelits to cut a piece of Mint Macaron cardstock for the lid.  I stamped the flower from Flower Shop Stamp Set with soft suede ink and punched it out with the pansy punch.  I also punched a mint macaron flower and attached both to the top of my jar with Stampin’ Dimensionals.  I can’t wait to start adding wonderful memories to the jar!

IMG_8273

I found a pad of paper in my desk drawer that was the perfect size to fit in a business card holder.  You can click HERE for directions how to make the business card holder.  You can easily cut copy paper to size (2 x 3 1/2) to fit in the holder or just use any little paper pack.

IMG_8281

I used soft suede cardstock and ink for my paper holder along with the same mint macaron ribbon I used on my jar.  I love how the flower from Flower Shop Stamp Set matches the flower in my material.  I punched the flower out with the pansy punch and attached it with a dimensional.  I used the date stamp on the rotary punch from the December Paper Pumpkin kit to stamp my paper.

img_8265
Rotary stamp from the December 2016 Paper Pumpkin kit

I am going to send my daughter back to college with some of these papers in a stamped envelope for her to write on and then send home when she has them completed.  I am hoping I can get my son and husband to add their good blessings to the jar too! What fun this will be to share a year from now.

IMG_8284

Stamps Sets: Flower Shop, Paisleys & Posies, December 2016 Paper Pumpkin Rotary Stamp  Inks: Mint Macaron, Soft Suede, VersaMark  Papers: Soft Suede, Mint Macaron, Very Vanilla  Tools & Accessories: Pansy Punch, Scalloped Tag Topper Punch, Layering Circles Framelits, Mint Macaron Mini Striped Ribbon, Clear Embossing Powder, Heat Tool, Simply Scored Scoring Tool, Stampin’ Dimensionals

I am not one to make new year resolutions.  Mainly because I never seem to be able to keep them. This is something I know I can do and I love that it is a wonderful way to reflect upon and remember the many blessings. I hope this has inspired you to use what colors you have to create one for yourself or as a gift. If you would like to purchase any of the products I used you can Click HERE to shop my online store.

Last night we rang in the new year doing something we’d never done before. We usually travel over the holidays and visit family in Massachusetts.  This year our plans changed and we stayed home. We decided to check out the local celebration that has become a New Year’s Eve tradition in our small town. New York City may have the ball dropping at midnight but, here in Hagerstown, Maryland we have a Donut Drop.  A local family owned business, Krumpe’s, makes the most delicious donuts and they gave away 6,000 free donuts last night to everyone who assembled downtown to watch the annual Donut Drop countdown. I am all about trying new things and we had a fun time with my daughter and her friend.

Thanks for stopping by!  I wish you and your family a happy, healthy New Year filled with many blessings!

Just Stampin’

Jeanie