
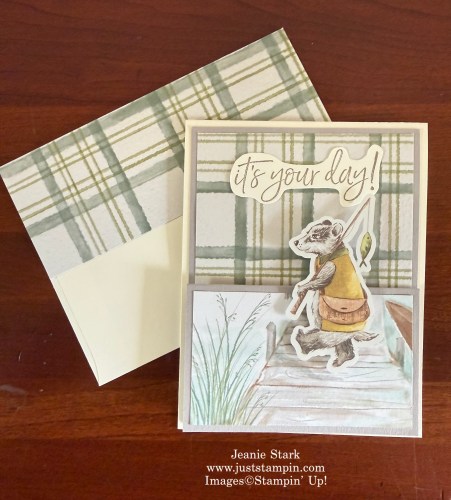
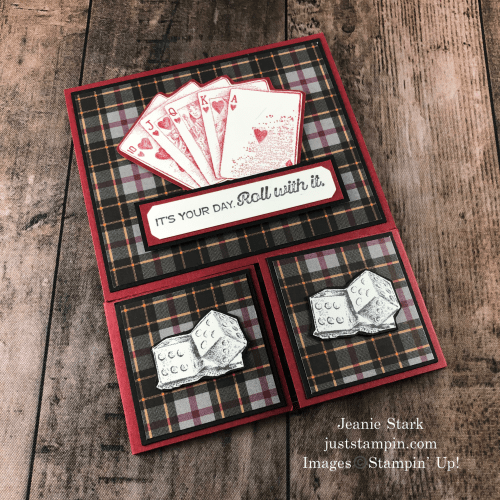
Did you play along with my Mystery Monday Stampin’? If you followed the clues you would have created a Front Step Easel Card similar to this.
Mystery Solved!
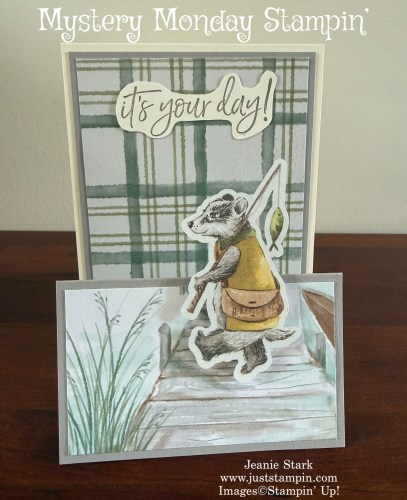
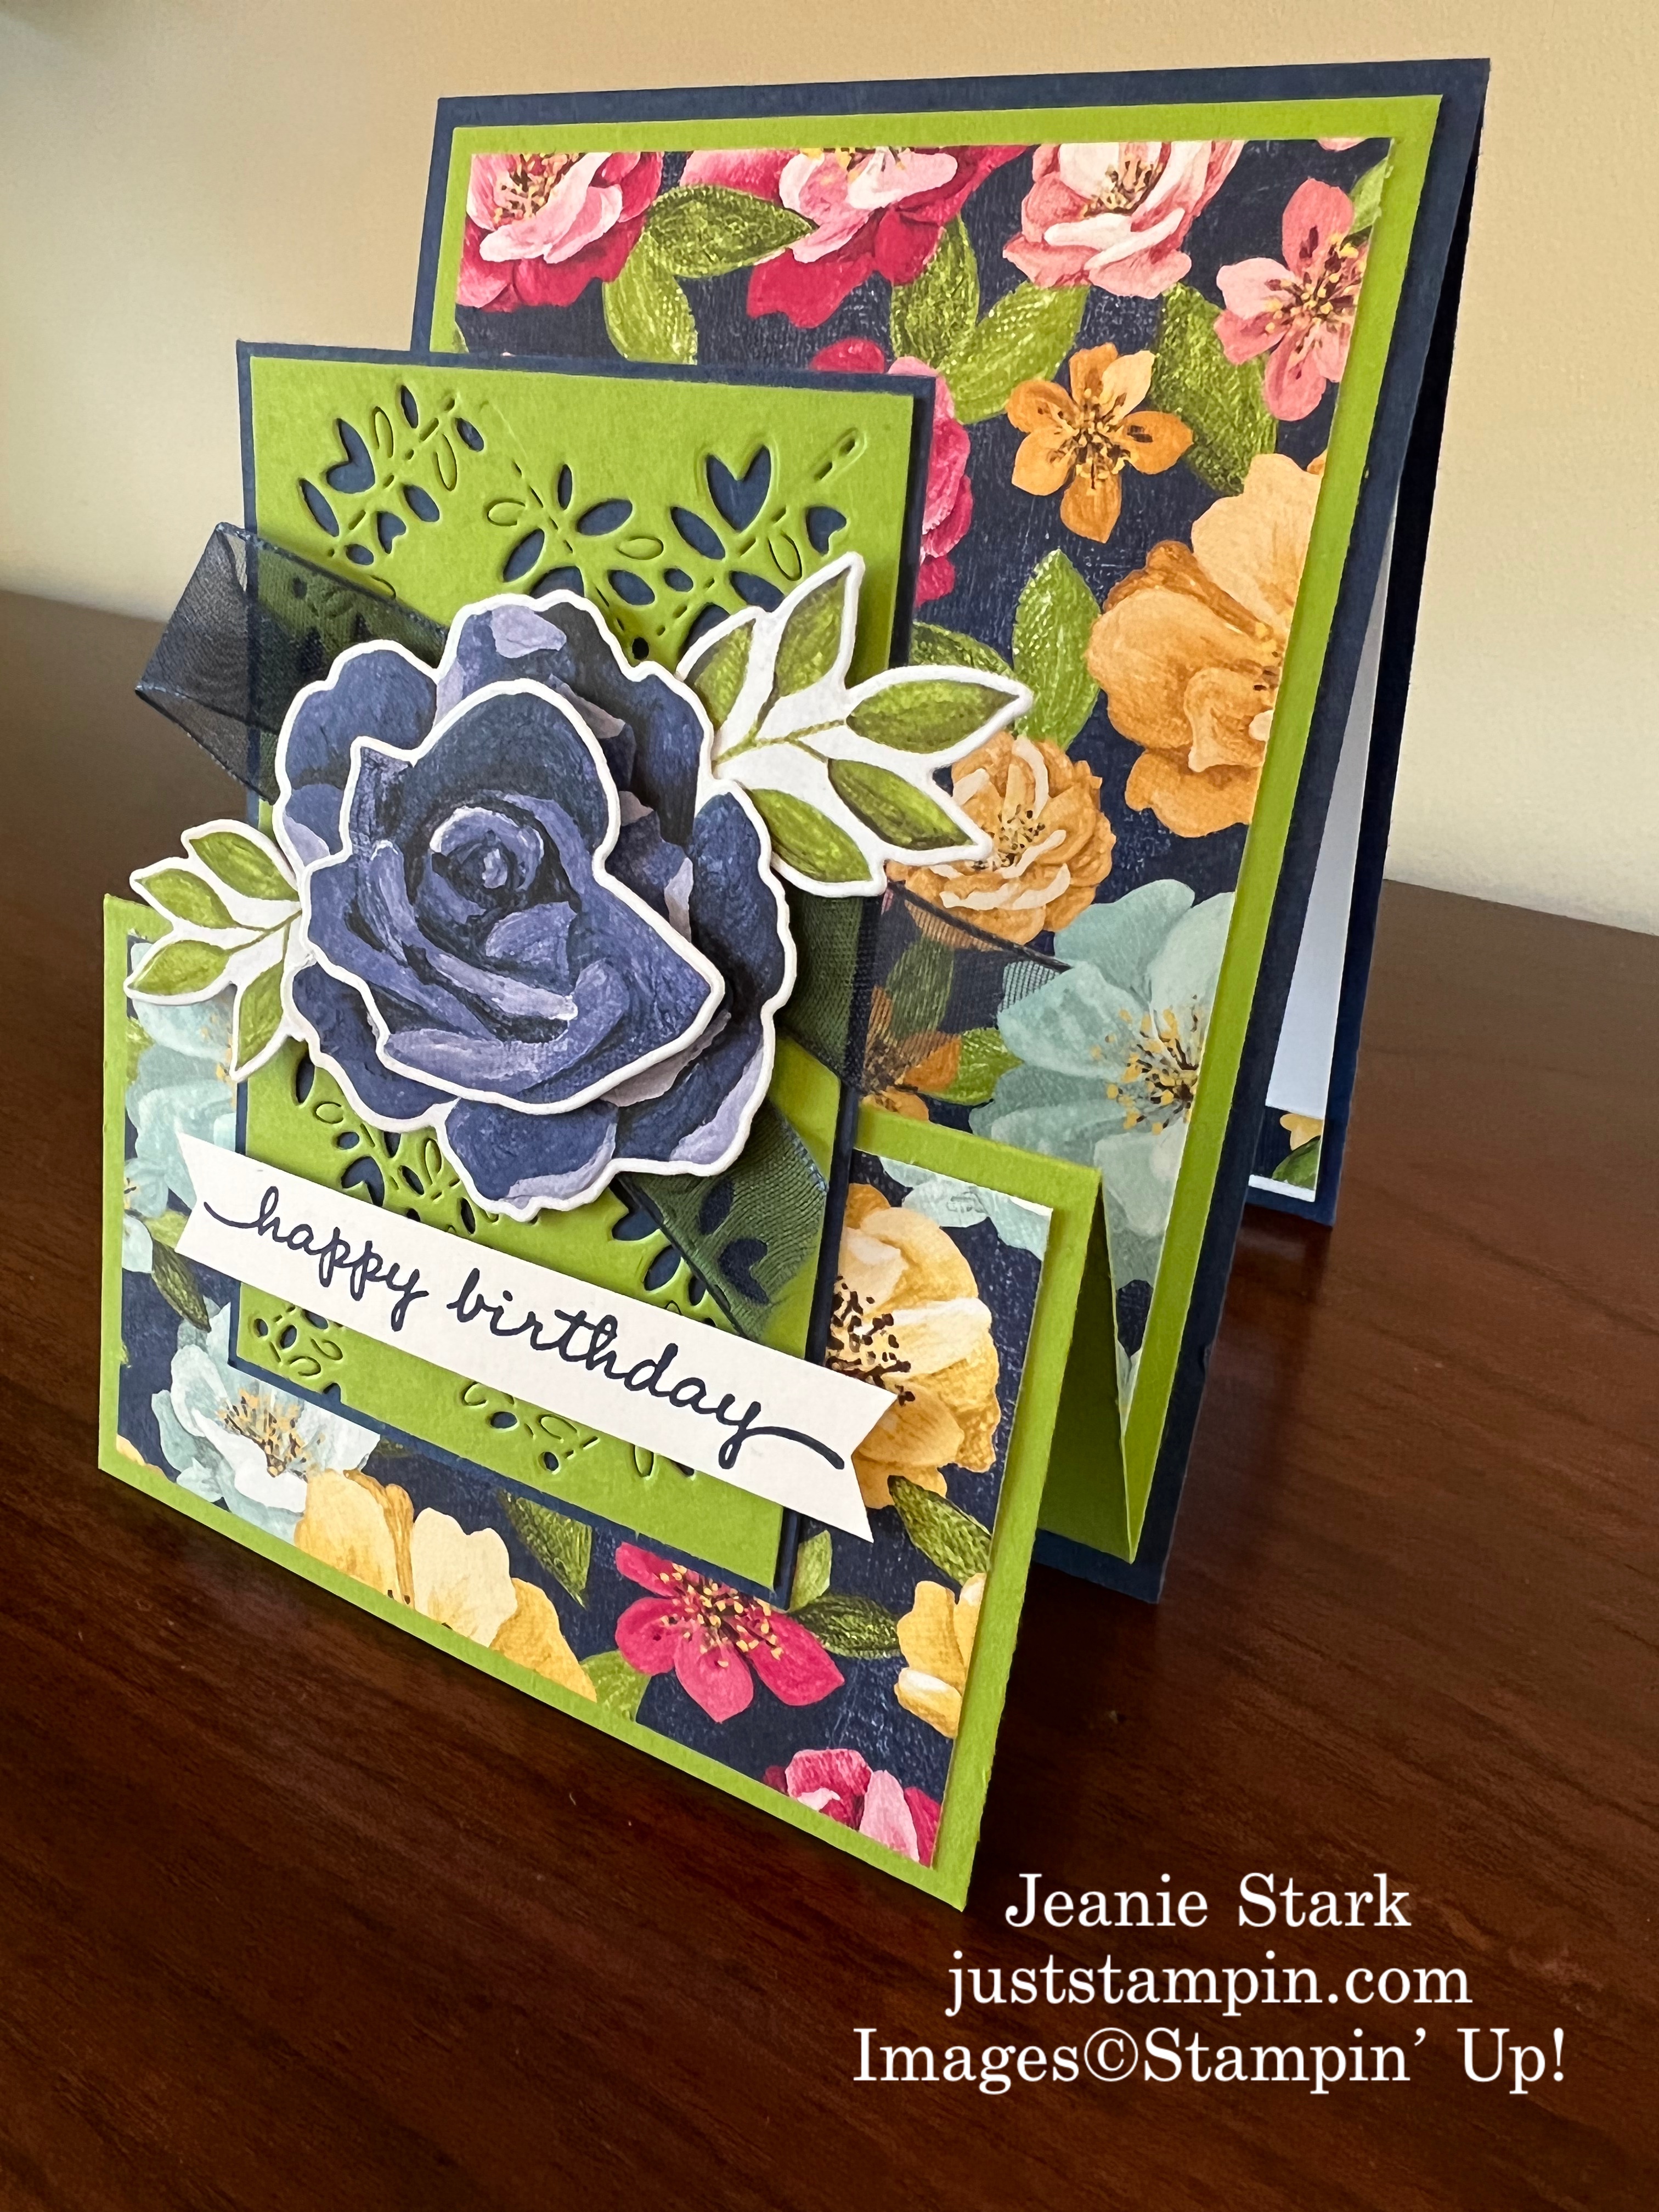
Today’s card is a sneak peek of some new designer series paper coming out May 5th.
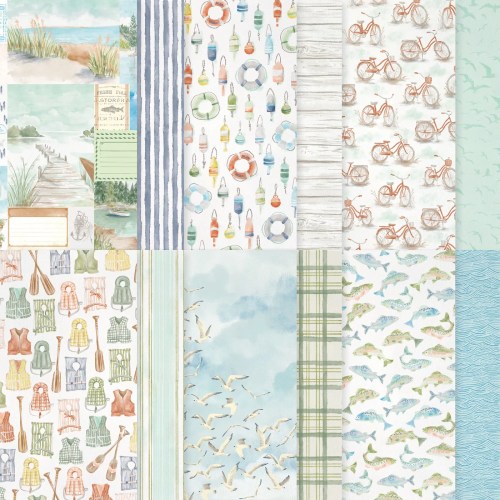
Drift into calm creativity with the Waterside Retreat 12″ x 12″ Designer Series Paper. Soft, painterly images and sun-faded hues evoke the laid-back days of a lakeside getaway. From life vests and oars to buoys and bicycles, each sheet of this beautifully designed paper captures a beloved element of lake life. The two cut-apart sheets offer the perfect opportunity to add scenic touches to your handmade cards, scrapbook pages, and more!
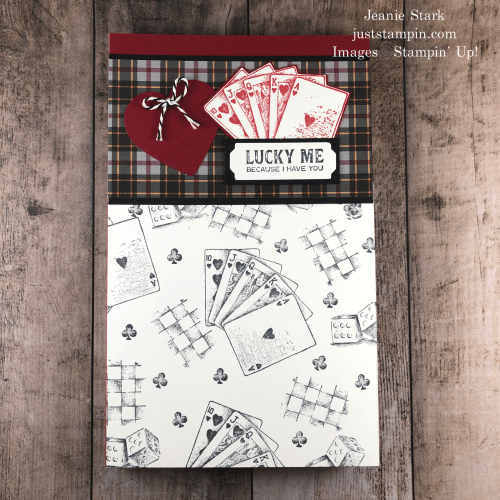
I created this card for a friend’s birthday today! I usually struggle with masculine cards; however, this DSP and fun fold design made it so simple!!! I used one of the “cut-apart” images on the bottom “step” of my card. Here’s a look at the side view of this card.
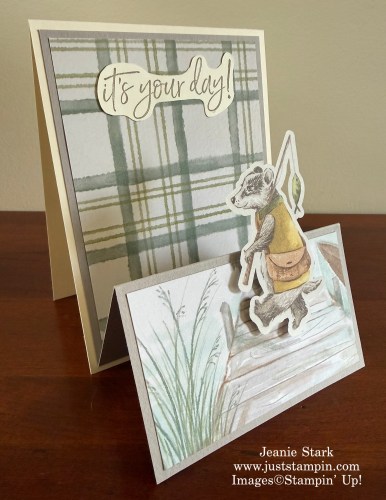
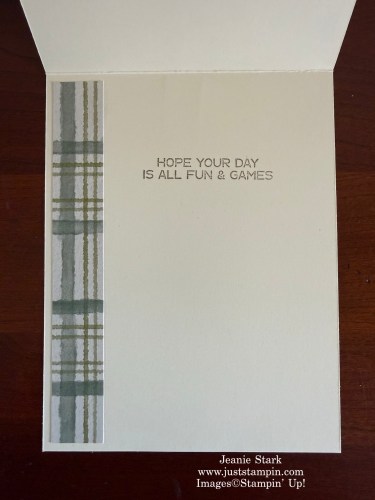
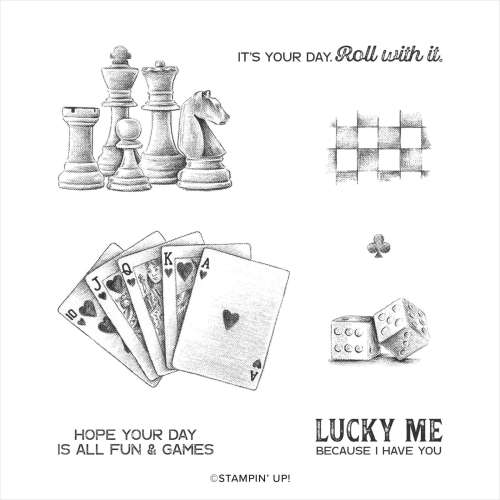
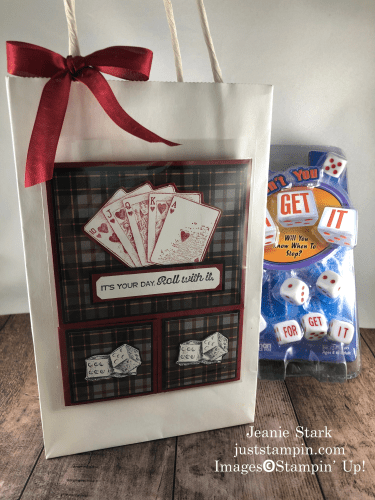
My friend, John, loves to go fishing and he has a dock just like this leading out to his boat. *The punched out image is from the retired Storybook Moments Specialty Designer Series Paper. We get together a couple of times a week to play Mahjong. I chose a sentiment from the retired Game On! Stamp Set for the inside. It was perfect for him!!!
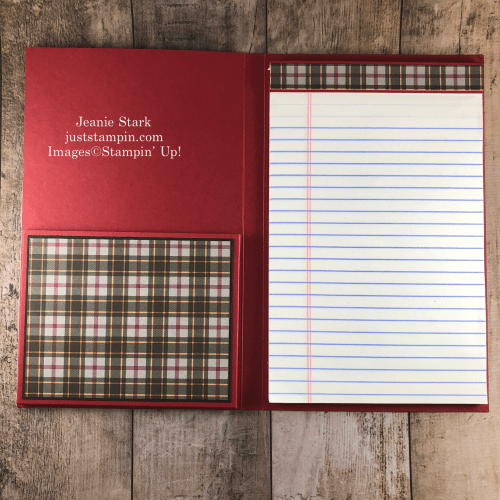
Even this plaid DSP was perfect as these are the colors of his home office! I love it when everything comes together for a special personalized card! (This is why I love handmade cards!!!)
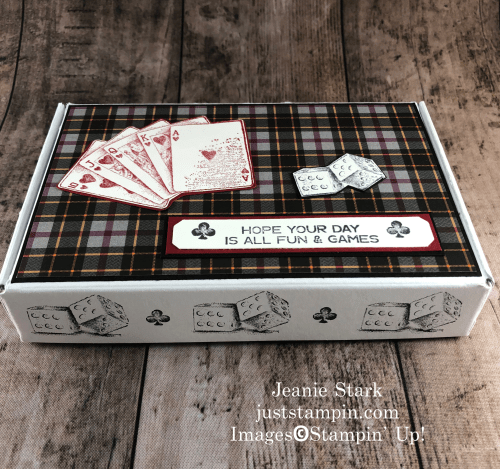
I only created one card this week because I have made this fun fold before. You can click on the images below to view the original post for each of the cards. You can use the same DSP pattern on this style card or choose two different patterns. It’s a great way to use left over pieces! The cards below have a slight variation in the measurement for the “step” in front. You can make them shorter or taller. There are endless possibilities! *There’s no right or wrong way to do Mystery Stampin’!!!


*This was one of my FAVORITE Designer Series Paper!!!
I would love for you to play along with my mystery stamping! Click on the link below and follow the clues. Use what you have and create this front step easel card. Then take a photo of your card and send an attachment to my email (j.stark@goeaston.net). I’ll share your works of art on my Sunday Showcase!
*Everyone who shares their card with me receives a Free PDF!!!!
Feel free to contact me if you have any questions.
Click HERE for the Mystery Monday Clues
You can get a sample of the Waterside Retreat Designer Series Paper and more with my New Catalog Product Shares!

New catalog and new papers, ribbons, and embellishments. Get a taste of what’s new with my May 2026 Catalog & Online Exclusives Product Share.
Click HERE for all the details to reserve your Product Share!
Have a great day! Thanks for stopping by!
(*I’m hosting Mahjong this afternoon and celebrating John’s birthday!!!)
Just Stampin’
Jeanie
Product List
|
|
|
|
|
|
|
|
|
|
|
|
![Happiest Of Birthdays Cling Stamp Set (English) [ 152539 ]](https://assets1.tamsnetwork.com/images/EC042017NF/152539s.jpg "Happiest Of Birthdays Cling Stamp Set (English) [ 152539 ]")
![Game On Cling Stamp Set (English) [ 152646 ]](https://assets1.tamsnetwork.com/images/EC042017NF/152646s.jpg "Game On Cling Stamp Set (English) [ 152646 ]")
![Gray Granite 8-1/2" X 11" Cardstock [ 146983 ]](https://assets1.tamsnetwork.com/images/EC042017NF/146983s.jpg "Gray Granite 8-1/2\" X 11\" Cardstock [ 146983 ]")
![Very Vanilla 8 1/2" X 11" Cardstock [ 166784 ]](https://assets1.tamsnetwork.com/images/EC042017NF/166784s.jpg "Very Vanilla 8 1/2\" X 11\" Cardstock [ 166784 ]")
![Stampin' Seal [ 152813 ]](https://assets1.tamsnetwork.com/images/EC042017NF/152813s.jpg "Stampin' Seal [ 152813 ]")
![Stampin' Dimensionals [ 104430 ]](https://assets1.tamsnetwork.com/images/EC042017NF/104430s.jpg "Stampin' Dimensionals [ 104430 ]")
![Gray Granite Classic Stampin' Pad [ 147118 ]](https://assets1.tamsnetwork.com/images/EC042017NF/147118s.jpg "Gray Granite Classic Stampin' Pad [ 147118 ]")
![Bone Folder [ 102300 ]](https://assets1.tamsnetwork.com/images/EC042017NF/102300s.jpg "Bone Folder [ 102300 ]")
![Paper Trimmer [ 152392 ]](https://assets1.tamsnetwork.com/images/EC042017NF/152392s.jpg "Paper Trimmer [ 152392 ]")
![Simply Scored [ 122334 ]](https://assets1.tamsnetwork.com/images/EC042017NF/122334s.jpg "Simply Scored [ 122334 ]")

My Just Stampin’ Rewards:
I appreciate each and every order! Here are the things you can expect when you place an online order with me:
- Shop and earn 10% back in Stampin’ Rewards on orders of $20 or more. Use them on your next order or save them up to 1 year for something special!
- All orders will receive a handmade thank you card from me.
(*You can choose to remove the sticky note inside and reuse the card.) - With a $50 order you will receive the Fun Fold PDF’s from my Mystery Stampin’ cards. *You will receive that month’s PDF’s on the first of the following month.
- With an order of $75 (or more) I will send you the PDF’s and thank you card as well as a card kit or Stampin’ Up Product of my choosing – this varies monthly.
- Orders of $75 (or more) qualify for the Product of the Month! For just $5 you can add-on the New April Product of the Month or any of the previous Products of the Month. AWSL


")
")


 Gorgeous Grape Sheer Ribbon")


 Designer Series Paper")


")