W is for Washi Tape

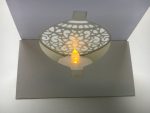
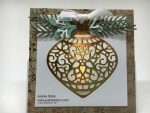
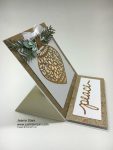
Welcome to my ABC’s of Stampin’ series.  Today we’re going to have some fun with Washi Tape. There are so many different ways you can use washi tape.  I will cover just a few different ideas today. Yesterday I posted this light up card made with vellum and a battery operated votive candle.  You can see that post here. I covered the candle for the card in matching washi tape from the Affectionately Yours Designer Washi Tape. It has copper in it just like the Designer Series Paper I used.

If you follow my blog, you know how I like everything to match. I think it makes a nice presentation especially when giving as a gift.  Here is a matching gift tag and birthday card made with the Floral Boutique Designer Washi Tape.  There are so many possiblities!  I even made 2 different gift tags to choose from. The sentiment is from Birthday Banners and the banner on the tag is cut from the Bunch of Banners Framelits Dies.

Stampin Up birthday card and tag idea using washi tape - Jeanie Stark StampinUp

I love this washi tape card.  I CASed the card design from Pinterest (PiasCreativeWorld.blogspot.com) and made it in the classic navy and white.  I use a cutting mat with grids to help keep the washi tape straight when sticking it on the cardstock.  It is easy to lift off and just fold the ends back for a nice clean edge.

Stampin Up Bow Builder Punch Birthday card idea using washi tape - Jeanie Stark StampinUp

The washi tape makes quick and easy birthday candles.  I used the Festive Flower Builder Punch to make the flames and the Bow Builder Punch to make the bow.

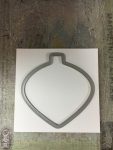
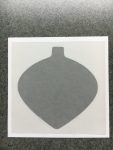
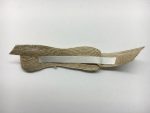
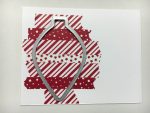
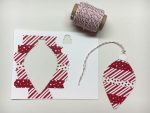
You can also make quick & easy tags with dies.  Here I placed washi tape from Candy Cane Lane Designer Washi Tape on to my cardstock then cut it out with an ornament from the Delicate Ornament Thinlits. I added some Candy Cane Lane Baker’s Twine and it’s ready for you to write on the back or just stamp to: and from: using the Candy Cane Christmas Stamp Set.

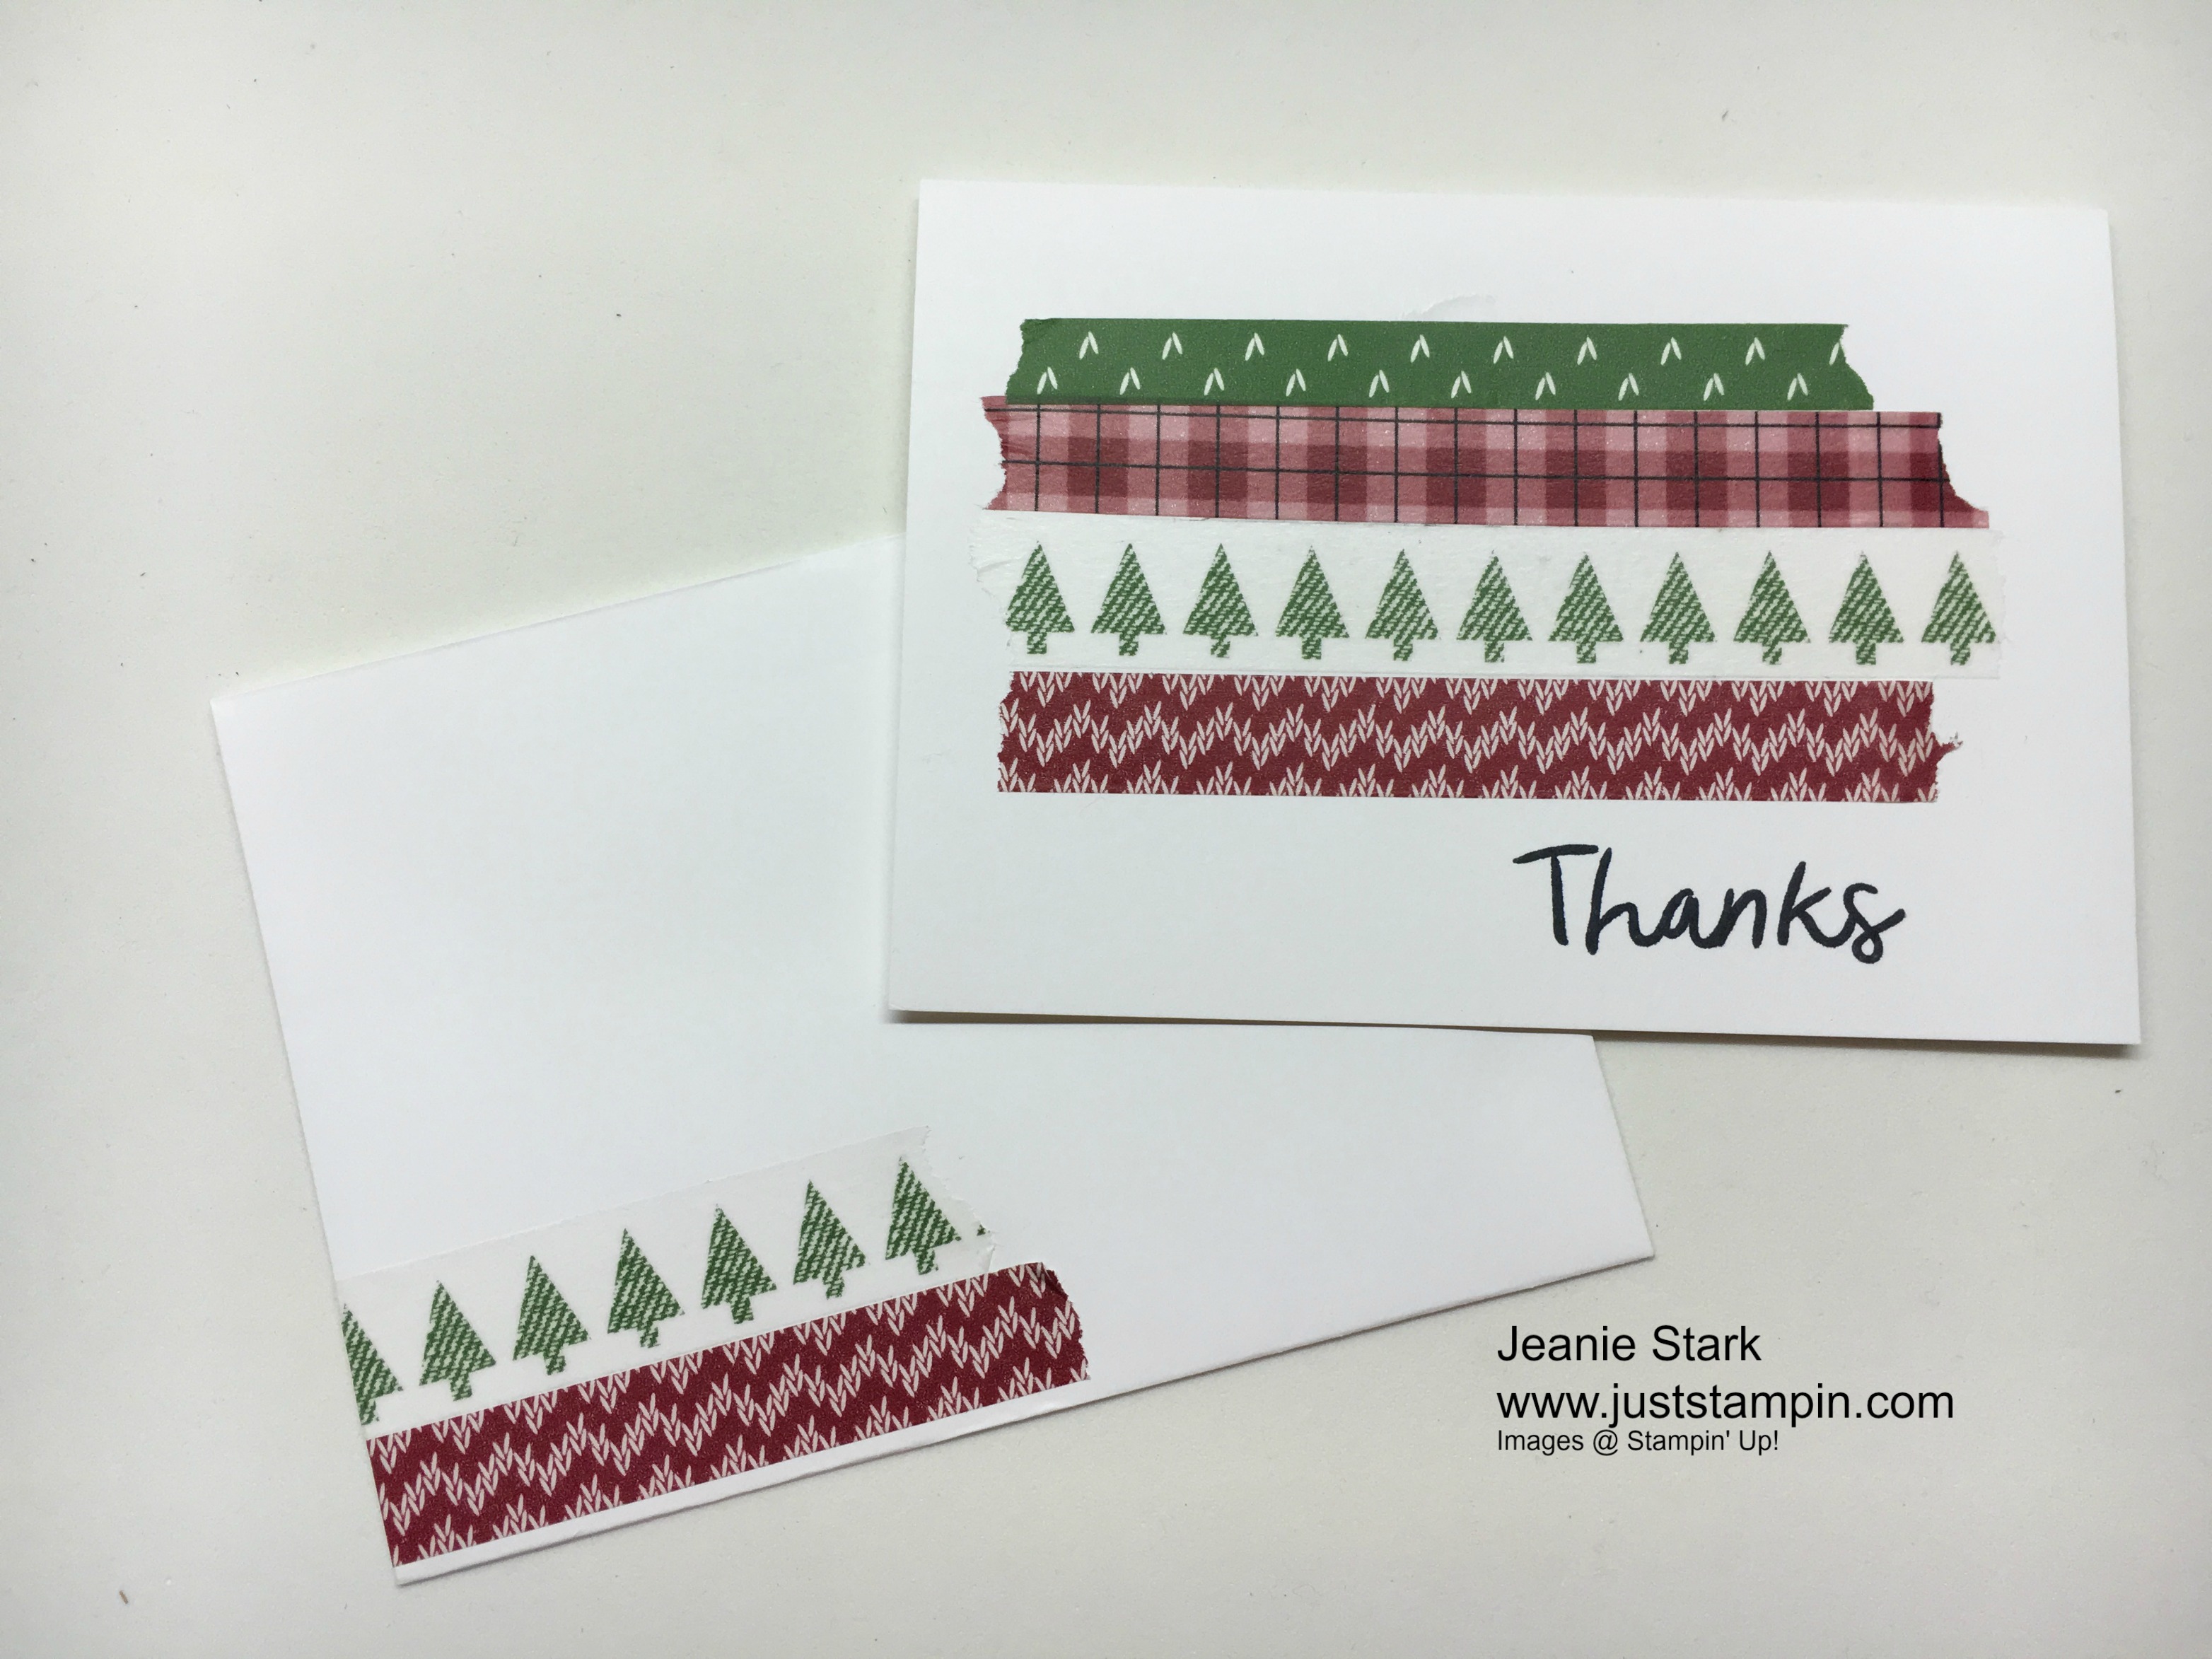
This next project is a great one to do with kids to make thank you notes for Christmas.  I used the Warmth & Cheer Designer Washi Tape for this project.  The sentiment is from the Thankful Thoughts stamp set. You can even use washi tape on the envelopes!

img_4622

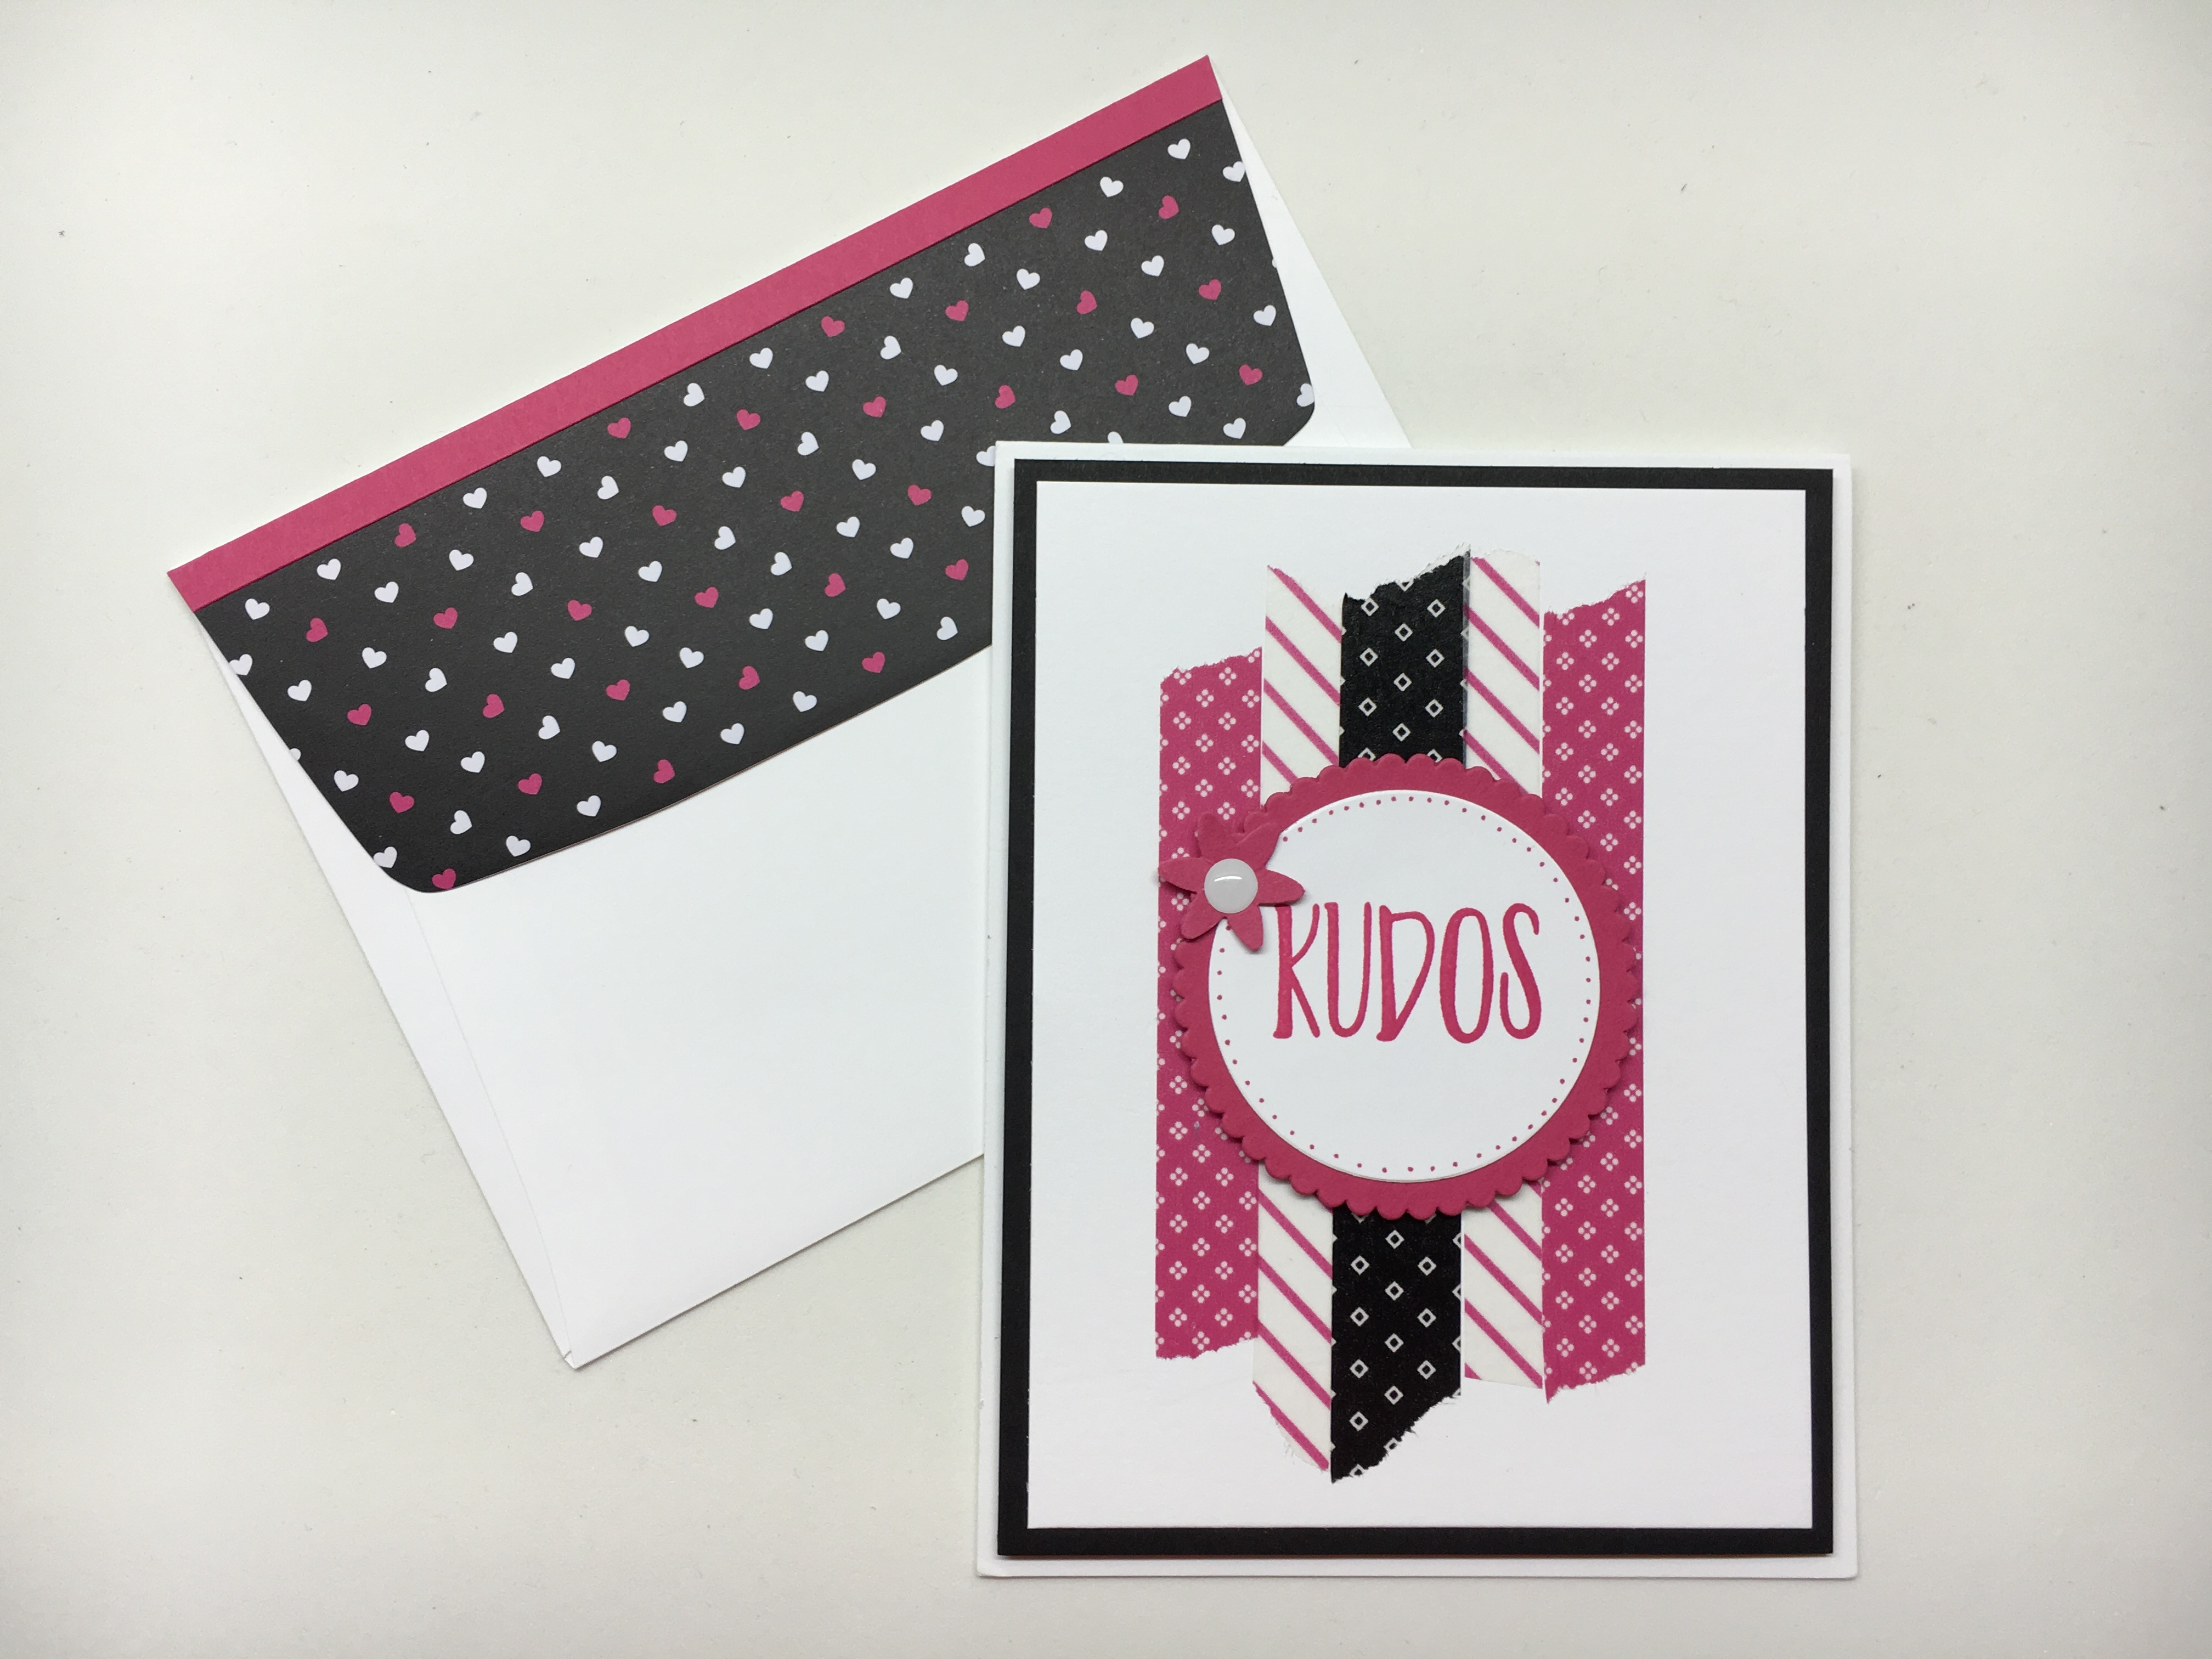
This next card was sent to me from my upline, Susan Itell.  She used Pop of Pink Designer Washi Tape on this card.

img_4613

As you can see there are lots of ways to use washi tape and lots of choices too!  Click Here to see all the different Designer Washi Tape. I store my washi tape in a clear container intended for eye glasses that I purchased from Amazon.  I like that I can see exactly what I have so I’ll remember to use it.

img_4620

Sometimes I cut my envelopes down if I make a square card.  Washi tape works great to seal the sides. Here’s a card I shared previously where I showed how I did that.  You can click on the photo to see the post with all the details.

img_4614

Yesterday I shared that I was having visitors for lunch and some stamping fun. Here’s a picture of me with Ramsey and Susan…The Three Stampateers!  LOL

img_4607
The “Three Stampateers”

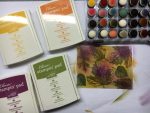
Here’s my Back to School Special for today…With the purchase of $25 or more from my online store I will send you a roll of washi tape so you can have some fun and start creating. Be sure to enter the Hostess Code 7CNZAUYM when you check out. (I’ve included a visual below.)

Have a Wonderful day!

Just Stampin’

Jeanie

V is for Vellum

Welcome to my ABC’s of Stampin’ series. Today I am going to share with you 2 projects I made using vellum.  Every time I work with vellum I wonder why I don’t use it more!  My first project is a square card for you that shines bright. It would look lovely sitting on an end table or mantle.  It is one of those projects for someone very special.

Stampin Up Delicate Ornament Fun Fold Easel Christmas card idea - Jeanie Stark Stmapin Up

I used vellum behind the ornament to let the light shine through from the battery operated votive candle sitting in this easel card.  The ornament is from the Delicate Ornament Thinlits Dies and cut out from Copper Foil. I have lots of photos and measurements to share with you today. I started with 4 1/4 x 8 1/2 thick whisper white cardstock.  I scored it at 2 1/8 and 4 1/4. The copper foil Designer Series Paper is from Affectionately Yours and measures 4 1/8 x 4 1/8.  I adhered the DSP to the bottom of the card base (below the score line) and cut out the ornament shape. Then I centered the ornament die on a piece of 3 1/2 x 3 1/2 thick whisper white and cut it out again.

Next I adhered a piece of vellum behind the whisper white and adhered that to the DSP making sure to line up the openings.  The vellum is sandwiched between the whisper white and the DSP.  Then I cut out the detailed ornament from a piece of 3 1/2 x 3 1/2 copper foil using the Big Shot with the Precision Base Plate.

I used the fine-tip glue pen to adhere the copper ornament on top of the vellum. The greenery is from the Pretty Pines Thinlits and cut from Always Artichoke, Mint Macaron, and Whisper White cardstock. I attached these to the ornament with glue dots.  I added some pearls for berries.  The easel card rests on a strip of DSP measuring 4 1/8 x 1 3/4.  The sentiment from Christmas Greetings Thinlits was cut from copper foil and adhered to a piece of 3 1/2 x 1 1/4 whisper white using the fine-tip glue pen. The DSP panel was popped up with Foam Adhesive Strips to allow the card to rest against it when open.  I added a white organza bow with a glue dot.  Here’s some photos showing different views.

Stampin Up Delicate Ornament Fun Fold Easel Christmas card idea - Jeanie Stark Stmapin Up

I was thrilled when Stampin’ Up! came out with the copper foil in the Holiday catalog.  I like to decorate with copper accents and one of our Christmas trees has many copper ornaments.  I absolutely LOVE the Christmas season and set up trees in nearly every room throughout our home. Here is a peek at my copper accent tree.

img_7201

As much as I love the Christmas season I don’t start decorating the trees until after Thanksgiving. So let’s get to my card for Thanksgiving…

The ornament on the easel card used just a plain piece of vellum; however, there are many ways to color on vellum. You can use your ink and a brayer, color with markers (on the back on your stamped image), or sponge (also on the back) like I did on this card.

Stampin Up Paisleys & Posies and Vintage Leaves Thankful card idea - Jeanie Stark StampinUp

I love how this card turned out!  I started with a piece of 5 1/4 x 4 piece of vellum.  I stamped images from the Vintage Leaves stamp set using Memento Black ink.  I sponged on the back with Rich Razzleberry, Crushed Curry, Pumpkin Pie, and Old Olive ink.  I adhered it to the Very Vanilla card with a strip of Fast Fuse in the middle (hidden behind the sentiment and burlap ribbon). I also added a glue dot in each corner behind a leaf image. The sentiment from Paisleys & Posies is stamped on Very Vanilla with Back Memento ink and layered with a piece of Old Olive.  I attached the burlap ribbon with glue dots (to hold the shape I wanted) and a strip of Tear and Tape.  The sentiment is attached with Stampin’ Dimensionals.

Stampin Up Vintage Leaves Thankful card idea - Jeanie Stark StampinUp

Stamp Sets: Vintage Leaves, Paisleys & Petals (sentiment)  Inks: Memento Black, Rich Razzleberry, Pumpkin Pie, Crushed Curry  Papers: Very Vanilla, Vellum, Old Olive  Tools & Accessories:  Burlap Ribbon, Stampin’ Sponges or Sponge Daubers, Glue Dots, Tear& Tape

I am taking preorders for my Merry Medley kit from now through September 29th. The kit includes the Merry Medley stamp, Cherry Cobbler & Garden Green Stampin’ Write Markers, and all the supplies…card bases, envelopes, ribbon, cardstock, Designer Series Paper, die cuts, and embossed pieces (precut and ready to stamp and assemble) to make 5 cards and a 3D project (a mini notebook)!  You can see the full post HERE.

img_4537

Merry Medley Card Kit   October 2016

The cost of the Merry Medley Stamp Kit is $40 (Merry Medley clear mount stamp and set of 2 Stampin’ Write Markers are included with the kit).  Note: If you prefer the wood mount Merry Medley stamp the cost is $45. Email me (j.stark@myactv.net) by September 29th  with “Merry Medley Kit” in the subject and I will send you a PayPal invoice.  Be sure to include your shipping address!

Here’s my Back to School Special for today…With an online purchase of $25 or more I will send you a vellum card kit with a Stampin’ Sponge so you can give this technique a try. Be sure to enter the Hostess Code 7CNZAUYM when you check out. (I’ve included a visual below.) Click HERE to go to my online store.

I’m excited as I have some special visitors coming for lunch and perhaps a little stamping or apple picking.  Such a variety of activities to choose from!

Hope you have a Very good day!

Just Stampin’

Jeanie


U is for Uninked Stampin’ Spots

Welcome to my ABC’s of Stampin’ series. Today I am going to share a new item from Stampin’ Up! that I think has been overlooked in the catalog…Uninked Stampin’ Spots. It’s on the page with lots of coloring tools (page 180).


You may be wondering why would anyone buy uninked Stampin’ Spots??  Well, the beauty is they can become whatever color you need! These felt Stampin’ Spots are used with ink refills.  If you are just starting out stamping, these would be a way to get a variety of colors.  I subscribe to Paper Pumpkin and each month I get 1 or more ink spots in my kit and I love these little guys.  They store easily in my paper pumpkin box and it’s what I grab for “stamping on the go” (vacations, stamping with friends, etc.). If you don’t have a lot of space to craft these would be great as they are very compact! Here’s a picture of my “box of color”.

img_4542

Unfortunately that is all I have for today.  I hope you understand that there’s not a whole lot happening with U.  LOL

Yesterday I shared a Stamp Kit I am offering using the Merry Medley Stamp. If you missed it, you can see that post HERE.  I am taking preorders for this  kit from now through September 29th. The kit includes the Merry Medley stamp, Cherry Cobbler & Garden Green Stampin’ Write Markers, and all the supplies…card bases, envelopes, ribbon, cardstock, Designer Series Paper, die cuts, and embossed pieces (precut and ready to stamp and assemble) to make 5 cards and a 3D project (a mini notebook)!

img_4537
Merry Medley Card Kit   October 2016

Isn’t it Unbelievable that you can get all these different sentiments from one stamp?!  I’d say it’s probably a little Unusual. 🙂 The cost of the Merry Medley Stamp Kit is $40 (Merry Medley clear mount stamp and set of 2 Stampin’ Write Markers are included with the kit).  Note: If you prefer the wood mount Merry Medley stamp the cost is $45. Email me (j.stark@myactv.net) by September 29th  with “Merry Medley Kit” in the subject and I will send you a PayPal invoice.  Be sure to include your shipping address! If you have any unanswered questions, just email me.  I am looking forward to undertaking the task of putting your kit together and shipping it to you in October.

Here’s my Back to School Special for today…With a purchase of $25 or more from my online store I will send you a Stampin’ Spot as my thanks to you for shopping with me. Be sure to enter the Hostess Code 7CNZAUYM when you check out. (I’ve included a visual below.) Click HERE to start shopping!

Hope your day is Unbelievable!

Just Stampin’

Jeanie