

Welcome back for another Mystery Monday Stampin’! I am so glad you are here! Are you ready to solve the mystery and unleash the crafting possibilities? I hope so! The last two weeks have been so much fun!
Yesterday I shared your first clue. If you missed that post (with the list of supplies), CLICK HERE FOR CLUE #1
Now that you have your cardstock, designer series paper, and other supplies, it’s time to create! Simply follow the clues step by step to create a beautiful card. Feel free to add your own twist…there is no right or wrong way to do Mystery Monday Stampin’! Here are the rest of the clues:
CLUE #2
Score 5 1/2” x 11” card base @ 2 1/2″ and 6 3/4″. Fold and burnish card with bone folder. The 2 1/2 section will fold back onto the front of the card (to create a pocket). This is an A2 portrait card measuring 4 1/4 x 5 1/2 when folded.
CLUE #3
To create the pocket you need to cut a diagonal. Put the top of the 2 1/2″ score line in the cutting track on the trimmer. Trim a diagonal to cut off ~ 2 1/2″. This does not have to be exact! You just need an angle to create a pocket. *You will cut off a small triangle piece.
CLUE #4
Emboss the front of the pocket. Line up the edge of the 2 1/2″ score line inside the embossing folder and run through an embossing machine. *Reminder- you can go rogue if you want….Emboss or Don’t Emboss? There is no right or wrong way to do Mystery Monday Stampin’! (I love to add texture!!!)
CLUE #5
Important- Before gluing the pocket shut, you need to adhere the 4 x 5 1/4 piece of DSP to the front of the card. *Keep in mind, the pocket will fold back on top of this paper so some of it will be hidden under the pocket.
CLUE #6
Use Multipurpose Liquid Glue to adhere pocket. Add a thin line of glue along the outside edge of the pocket (from where you cut the angle) and along the bottom. Fold pocket and press to adhere.
CLUE #7
Create a bookmark. Stamp/decorate the 1 7/8 x 4 3/4 white cardstock. Adhere to 2 1/8 x 5 cardstock. Punch a hole at top. Fold a (~5″) piece of ribbon in 1/2 and thread folded piece through hole then open the loop and pull the ends of ribbon through. Trim ends. Slide bookmark in pocket on front of card.
CLUE #8
Use extra white (or other) cardstock to create a focal piece for the front of your card: Stamp sentiment or image/die cut or punch/layer/color/embellish however you want! Adhere with Dimensionals to front of card below the angle on the pocket.
CLUE #9
Stamp image and/or sentiment on the 4 x 5 1/2 white cardstock and adhere inside card.
CLUE #10
If your card needs anything else add that now.
Decorate your envelope (stamp/emboss/add DSP) to coordinate with your card.
Have fun creating! I can’t wait to see what you create! Take a photo of your card and send as an attachment to my email (j.stark@goeaston.net).
Check back tomorrow to see my mystery card revealed.
Have you seen the NEW Hole Punch Assortment in the Online Exclusives?
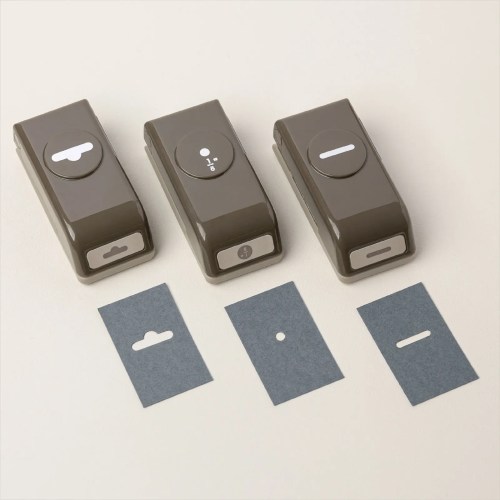
The Hole Punch Assortment is the ultimate paper crafting tool. With one shape per punch, these mini—but mighty!—hole punches make it easy to thread ribbon through tags, cards and bellybands, paper ornaments, and more.
Unfortunately, these have been so popular they are currently unavailable. *You can Click on the image below to go to my online store to be notified when they are back in stock!
Product List
|
|
![Hole Punch Assortment [ 165409 ]](https://assets1.tamsnetwork.com/images/EC042017NF/165409s.jpg "Hole Punch Assortment [ 165409 ]")
Have a great day! Thanks for stopping by!
Just Stampin’
Jeanie

SHOP & EARN
With the NEW Stampin’ Rewards Program, just shop and earn 10% back in Stampin’ Rewards on orders of $20 or more. Use them on your next order or save them up to 1 year for something special!
Click HERE for more details.
My Just Stampin’ Rewards:
I appreciate each and every order! Here are the things you can expect when you place an online order with me:
- All orders will continue to receive a handmade thank you card from me.
(*You can choose to remove the sticky note inside and reuse the card.) - With a $50 order you will receive a “Just Stampin” PDF Tutorial showcasing card designs that you can use with any stamp set. This is a great resource! (*You can collect new design tutorials each month!)
- With an order of $75 (or more) I will send you the tutorial and thank you card as well as a card kit or Stampin’ Up Product of my choosing – this varies monthly.
CLICK HERE TO SHOP STAMPIN’ UP!
CLICK HERE to SHOP LAST CHANCE PRODUCTS
Click HERE TO SHOP KITS COLLECTION
CLICK HERE TO VIEW CURRENT ONLINE EXCLUSIVES
CLICK HERE TO SUBSCRIBE TO PAPER PUMPKIN
CLICK HERE TO VIEW MY TUTORIALS

Stampin’ Up! is having an amazing Starter Kit Promotion! Between May 6–31, anyone who signs up to be a demonstrator can pack their Starter Kit with $165 USD worth of products for only $99 USD. That’s an extra $66 USD in products! You’ll start getting a 20% discount on your future orders. Email me (j.stark@goeaston.net) or click on the link below if you want to know more!
CLICK HERE FOR INFORMATION ABOUT JOINING STAMPIN’ UP!
CLICK HERE TO JOIN MY STAMPIN’ UP! Team
FYI… Mother’s Day Sale Ends Today!
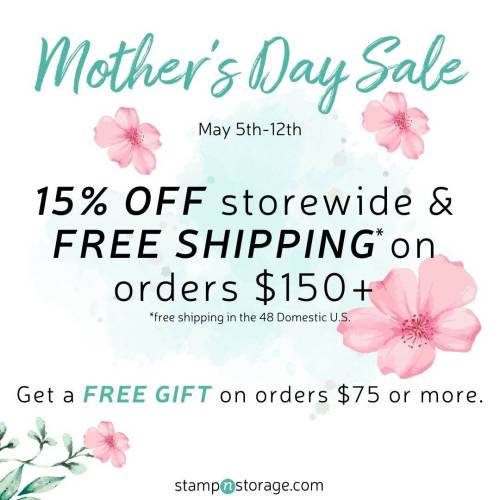
- May 5 – May 12!
- 15% OFF STOREWIDE & Free Shipping on Orders $150+ in the 48 Domestic US!
Click HERE to shop Stamp N Storage products!
You can see photos of how I organize my craft room HERE.

Looking to see this card opened. I must have done something wrong.
Oooopppps . . . I didn’t start with the correct size cardstock!!!