Sunday Showcase…Standing Z Fold Cards from Mystery Monday Stampin’

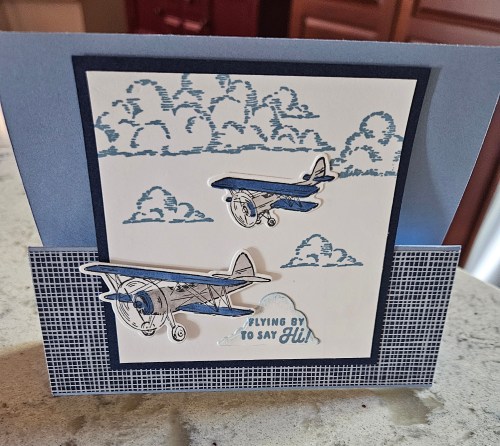
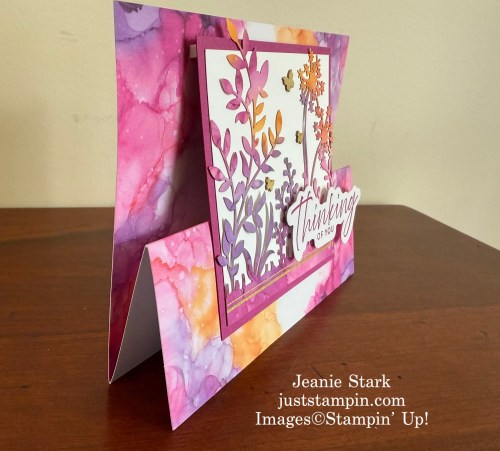
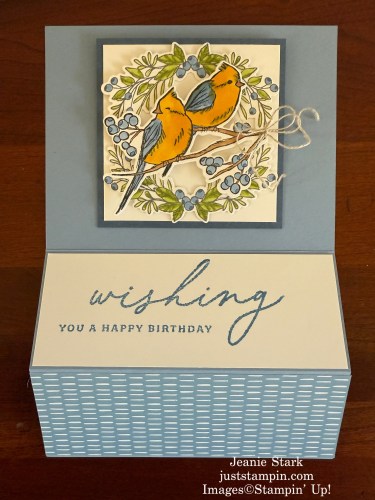
Happy Mother’s Day! I hope this amazing showcase of creativity will bring a smile to your face. These cards were created by stamping friends using my Mystery Monday Stamping clues to create a Standing Z Fold card.
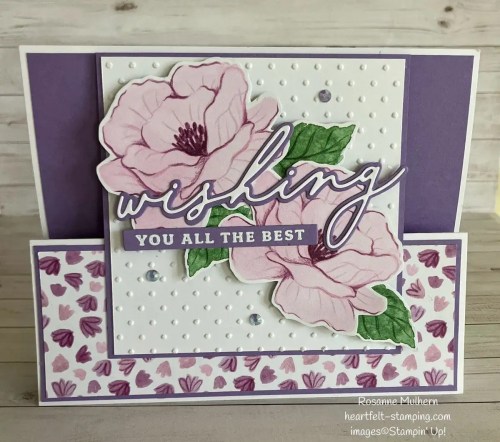
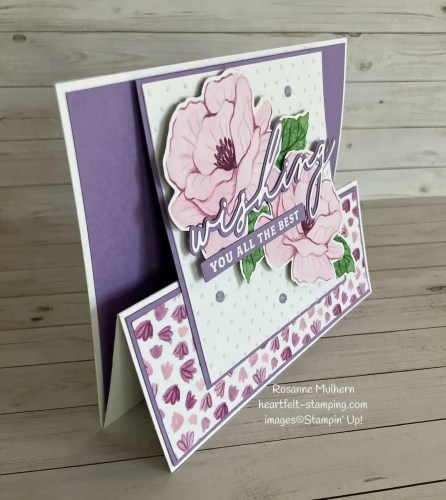
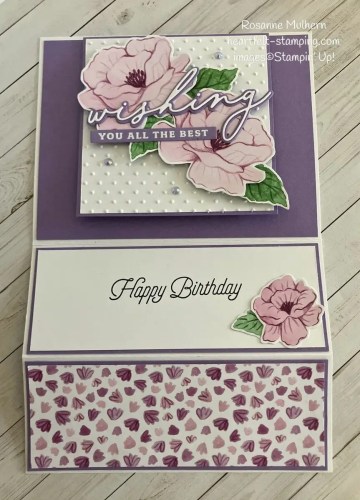
Stampin' Up! Florals in Bloom Designer Series paper and the Delightful Wishes bundle fun fold birthday card idea-visit juststampin.com for more handmade inspiration and ordering information-Jeanie stark StampinUp
Created by Rosanne Mulhern
Stampin' Up! Florals in Bloom Designer Series paper and the Delightful Wishes bundle fun fold birthday card idea-visit juststampin.com for more handmade inspiration and ordering information-Jeanie stark StampinUp
Created by Rosanne Mulhern
Stampin' Up! Florals in Bloom Designer Series paper and the Delightful Wishes bundle fun fold birthday card idea-visit juststampin.com for more handmade inspiration and ordering information-Jeanie stark StampinUp
Created by Rosanne Mulhern
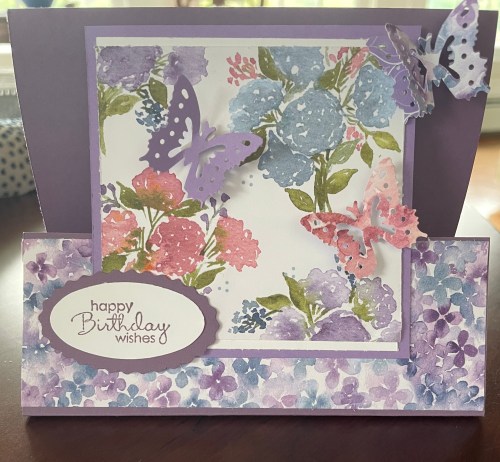
Stampin' Up! fun fold birthday card idea with Hydrangea Hill Designer Series Paper-visit juststampin.com for more handmade inspiration and ordering information-Jeanie stark StampinUp
Created by Cindy Thompson
Stampin' Up! With You in Mind fun fold birthday card idea with Floral Delight Designer Series Paper-visit juststampin.com for more handmade inspiration and ordering information-Jeanie stark StampinUp
Created by Ramsey Alexander
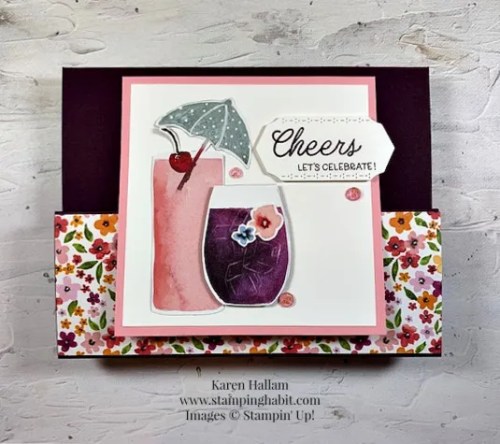
Stampin' Up! fun fold birthday card idea with Celebratory Sips Designer Series paper and Cheers & Sips bundle-visit juststampin.com for more handmade inspiration and ordering information-Jeanie stark StampinUp
Created by karen Hallam
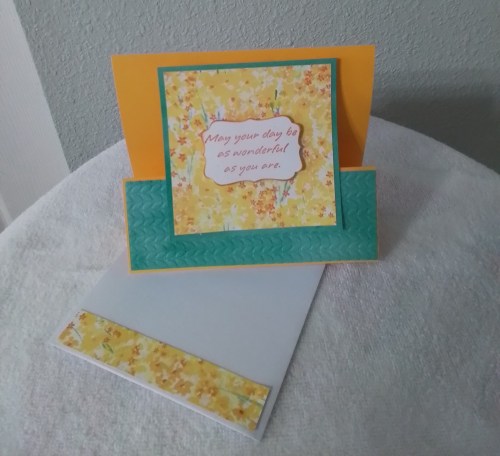
Stampin' Up! fun fold birthday card idea -visit juststampin.com for more handmade inspiration and ordering information-Jeanie stark StampinUp
Created by Ruth Mowry
Stampin' Up! fun fold masculine birthday card idea -visit juststampin.com for more handmade inspiration and ordering information-Jeanie stark StampinUp
Created by Carol Blackwell

WOW, right?! Please leave a comment below and show these creative ladies some love!  It’s amazing how each one is unique! You can CLICK HERE to get last week’s PDF and give this fun fold a try. You’ll also get the details on the cards I created below.
Stampin' Up! Mystery Stamping fun fold card ideas for a friend with Ocean Friends and Spring Corners-Jeanie Stark StampinUp
I can’t stop making these cards! Here’s a Paper Pumpkin alternative card I created this week with the April Inked Occasions Kit.
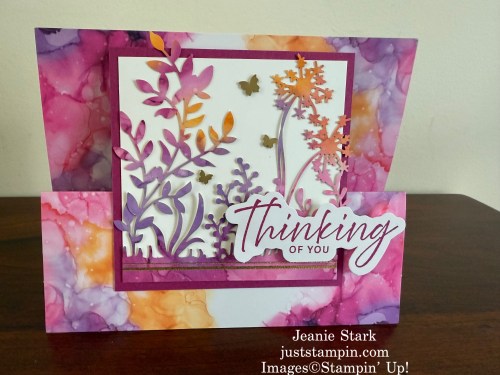
Stampin' Up! Paper Pumpkin Inked Occasions alternative fun fold card idea-Jeanie Stark StampinUp
Here’s another one I created using the Winterly Treetops Stamp Set and Dies (Last Chance Products).
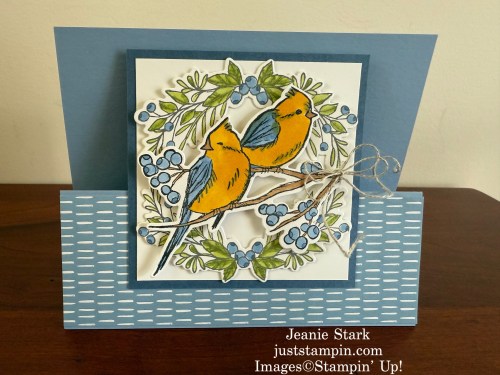
Stampin' Up! Winterly Treetops Standing Z Fold Birthday card idea-Jeanie Stark StampinUp
Stampin' Up! Winterly Treetops and Delightful Wishes Standing Z Fold Birthday card idea-Jeanie Stark StampinUp
And here’s two more I shared previously. *You can click on the image to view the original post.
Stampin' Up! Irresistible Blooms fun fold birthday, congratulations, graduation card idea- Jeanie Stark StampinUp
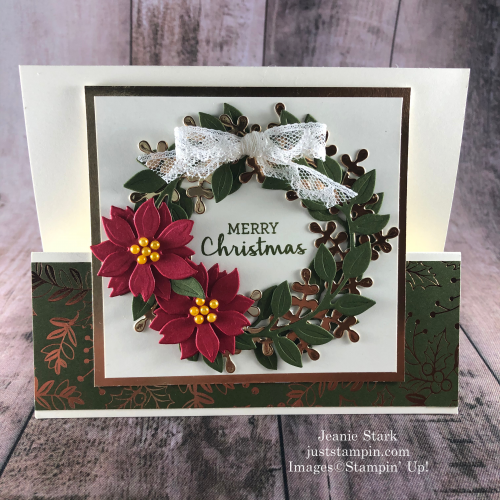
Stampin' Up! Arrange A Wreath fun fold Christmas card idea - Jeanie Stark StampinUp
Are you ready to play along with this week’s Mystery Monday Stampin’?
It’s really fun and easy! You’ll use the supplies you already have in your craft stash!  On Sunday (today), I will give you the first clue which is the list of supplies you’ll need. Then on Monday I will post the clues on my blog. You follow the clues to make a card. It’s as simple as that!  There is no right or wrong way to do Mystery Monday Stampin’! On Tuesday, I’ll post the mystery card(s) I created along with the PDF tutorial. Sunday is the mystery card showcase where I post the cards people sent via email. Make sure you subscribe to my blog so you don’t miss out!

This week’s card is a different fold. Sound mysterious???
Get ready to solve the mystery.

CLUE #1 -Gather your supplies to be ready to play Mystery Monday Stampin’

  • Cardstock– 5 1/2 ” x 11” for card base
  • Designer Series Paper- 4 x 5 1/4, plus extra if decorating envelope
  • Cardstock (Coordinating color)- 2 1/8 x 5
  • Basic White – 1 7/8 x 4 3/4, 4 x 5 1/4, scrap for sentiment, and extra for stamping/punching/die cutting if desired
  • Ink
  • Stamps
  • Hole punch (or stapler)
  • Ribbon
  • Adhesive – Multipurpose Liquid Glue, Mini Glue Dots, and other if desired
  • Envelope
  • Tools – Trimmer/Score Board, Bone Folder, scissors
  • *Optional – Cut & Emboss machine, die cut/punch, embossing folder, etc. to decorate

Check back tomorrow for Mystery Monday Stampin’.  I’ll share the rest of the clues. It will be up to you to create and solve the mystery!!  I hope you will play along. I’d love to see and showcase your creativity!

Have a great day! Thanks for stopping by!
Just Stampin’
Jeanie

www.juststampin.com
SHOP & EARN
With the NEW Stampin’ Rewards Program, just shop and earn 10% back in Stampin’ Rewards on orders of $20 or more. Use them on your next order or save them up to 1 year for something special!
Click HERE for more details.

My Just Stampin’ Rewards:
I appreciate each and every order!  Here are the things you can expect when you place an online order with me:

  • All orders will continue to receive a handmade thank you card from me.
    (*You can choose to remove the sticky note inside and reuse the card.)
  • With a $50 order you will receive a “Just Stampin” PDF Tutorial showcasing card designs that you can use with any stamp set. This is a great resource! (*You can collect new design tutorials each month!)
  • With an order of $75 (or more) I will send you the tutorial and thank you card as well as a card kit or Stampin’ Up Product of my choosing – this varies monthly.

CLICK HERE TO SHOP STAMPIN’ UP!
CLICK HERE to SHOP LAST CHANCE PRODUCTS
Click HERE TO SHOP KITS COLLECTION
CLICK HERE TO VIEW CURRENT ONLINE EXCLUSIVES
CLICK HERE TO SUBSCRIBE TO PAPER PUMPKIN
CLICK HERE FOR INFORMATION ABOUT JOINING STAMPIN’ UP! 
CLICK HERE TO JOIN MY STAMPIN’ UP! Team
CLICK HERE TO VIEW MY TUTORIALS FOR SALE
stamp-n-Storage Mothers Day Sale-visit juststampin.com for more details-Jeanie Stark Stampin' Up!

Mother’s Day is around the corner- Now’s the perfect time to gift yourself the space you deserve!
  • May 5 – May 12!
  • 15% OFF STOREWIDE & Free Shipping on Orders $150+ in the 48 Domestic US!

Click HERE to shop Stamp N Storage products!
You can see photos of how I organize my craft room HERE.

Merry Christmas…More Cards & Gifts!

Merry Christmas!
www.juststampin.com
Today Bo and I are sharing the last few Christmas cards I made this year. Usually I choose one design, create multiple cards, and send everyone the same Christmas card. This year was different!

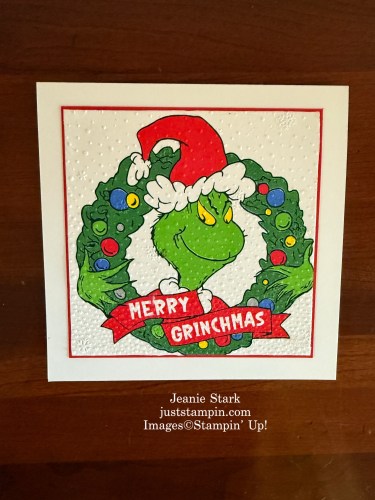
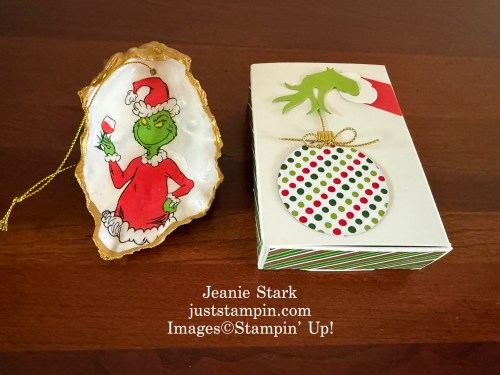
I always enjoy looking for fun ways to coordinate my cards and packaging with the gifts for a special presentation. A friend of mine claims she is “the Grinch” this year and I couldn’t resist sending her this card & gift set.
Stampin' Up! Scalloped gift card Grinch box with Hang an Ornament Dies-Jeanie Stark StampinUp
I used the “napkin technique” Laura Seki (Southridge Studio) shared to create my “Grinchmas” card. The card is 5 1/2 x 11 scored at 5 1/2 for a square card. The napkin is adhered to a piece of white cardstock using Multipurpose Liquid Glue (or a glue stick). I used the wide end of the liquid glue to add a thin layer of glue on the cardstock (which is cut smaller than the napkin). Lay the napkin on top and add glue around the edges on the back and fold the ends over to secure. Then emboss the napkin to help it adhere. I layered the embossed piece on red cardstock before adhering to the card base. I can’t wait to try this technique again with different napkins and embossing folders!!
Stampin' Up! Grinch card created using the napkin technique with the Snowflake Sky 3D embossing folder-Jeanie Stark StampinUp
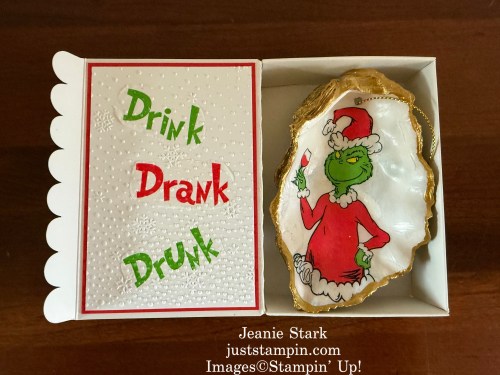
One of my favorite products this season has been the Hang An Ornament Dies. I decorated the Scalloped Gift Card Box to hold the Grinch oyster shell ornament I created.
Stampin' Up! Scalloped gift card Grinch box with Hang an Ornament Dies-Jeanie Stark StampinUp
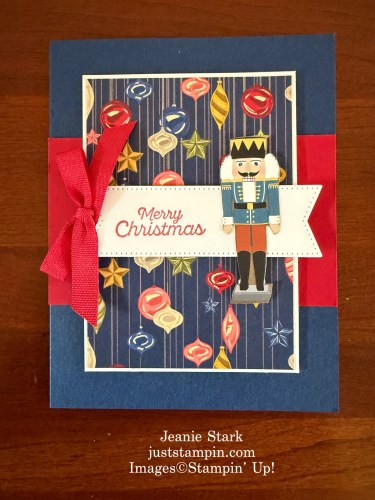
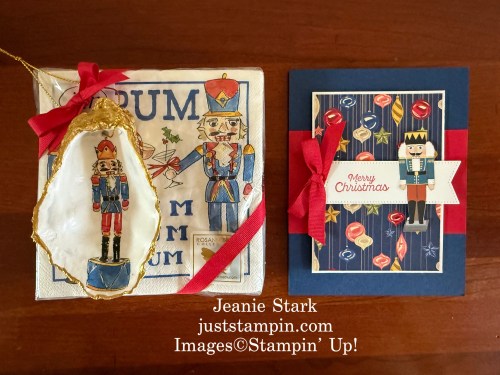
Another gift set I created uses some retired DSP but you could easily create it using what you have. I love it when I can use from my “stash” to find the perfect pattern and/or colors to coordinate with a gift.
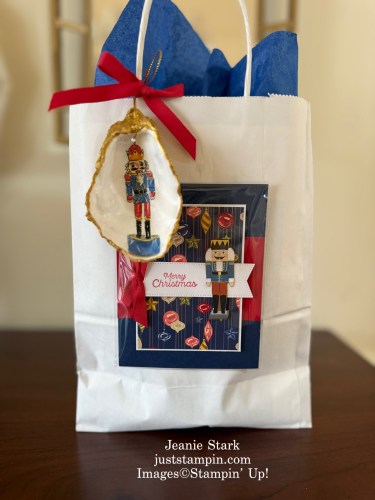
Stampin' Up! Night Before Christmas and Christmas Around the World Designer Series Paper simple card idea with Stitched Shapes Dies-Jeanie Stark StampinUp
This card layout is one of my “go to” designs. It is quick & easy to create with cardstock and patterned paper.
Stampin' Up! Night Before Christmas and Christmas Around the World Designer Series Paper simple card idea with Stitched Shapes Dies-Jeanie Stark StampinUp
You can change up the sentiment layer with any shape. I often grab the Stitched Shapes Dies (one of my favorites!) or a punch for quick & easy! The nutcracker is fussy cut from a piece of DSP and adhered with Stampin’ Dimensionals. I love how he coordinates with with the cocktail napkins and ornament I made.
Stampin' Up! Night Before Christmas and Christmas Around the World Designer Series Paper simple card idea with Stitched Shapes Dies-Jeanie Stark StampinUp
I like to recycle gift bags from stores. It is so easy to adhere a Stampin’ Up! clear envelope to the front of the bag and slide the card inside for a pretty presentation. (Great idea for kids birthday parties so the card doesn’t get lost!)
Stampin' Up! Night Before Christmas and Christmas Around the World Designer Series Paper simple card idea with Stitched Shapes Dies-Jeanie Stark StampinUp
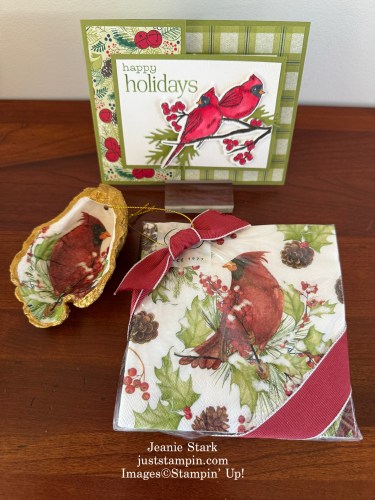
My last card today showcases the beautiful cardinals from one of my favorite bundles, Winterly Tree Tops. (Once again, I grabbed DSP and ribbon from my retired stash.)
Stampin' Up! Winterly Tree Tops Christmas card idea-jeanie Stark StampinUp
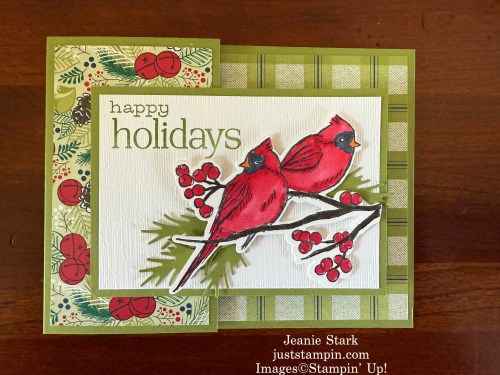
Some people believe cardinals appear when angels are near. I made this gift set for a friend who lost a family member recently. The card is a simple fun fold design.
Stampin' Up! Winterly Tree Tops fun fold Christmas card idea-jeanie Stark StampinUp
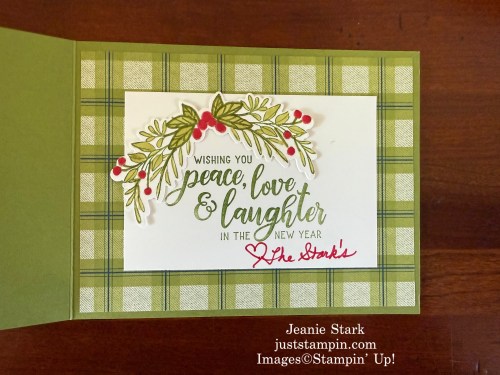
I used Stampin’ Blends to color the cardinals, berries, and branch then cut them out with the coordinating dies. I used another stamp and die from the bundle on the inside of the card.
Stampin' Up! Winterly Tree Tops Christmas card idea-jeanie Stark StampinUp
I hope you enjoyed today’s projects. I love to decoupage shells to create ornaments, trinket dishes, and many other gifts. You can check out some of the different projects I create on my facebook page HERE.

Do you have a favorite project from today? I’d love to hear from you! Leave a comment below.

From my family to yours, may your holidays be filled with peace, love, & laughter.
www.juststampin.com
Just Stampin’
Jeanie

NEW PRODUCTS COMING IN JANUARY….I am offering product shares for the new Mini Catalog and Online Exclusives! Click HERE or on the image below for sneak peeks and all the details to reserve your product share NOW.
Visit juststampin.com for details-Jeanie Stark StampinUp

CLICK HERE TO SHOP MY ONLINE STORE or click on the images below.
*If your order is under $150 please add the current host code to your order.
Host Code: YHMBWKAW

Product List

Don’t forget to check out the Last Chance Products and Save up to 70%!!!!!!
www.juststampin.com

12 Days of Christmas Day 11… Winterly Tree Tops Card Box

visit juststampin.com for craft projects delivered to your door-Jeanie Stark Independent Stampin' Up! demonstrator
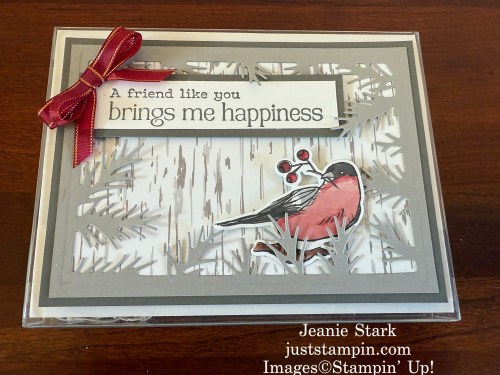
Welcome to Day 11 of my 12 Days of Christmas. Today’s project is a great gift idea for just about anyone! Grab 5 or more cards you’ve created and gift them to a friend, family member, coworker, hostess, etc. Everyone can use a set of all occasion cards, birthday cards, and/or thank you cards! Today we will be creating/decorating the holder for those cards. Stampin’ Up! used to carry different boxes for cards; however, our current product line does not have any. I purchased clear acetate card boxes from Amazon and decorated them using The Winterly Tree Tops Bundle.Stampin' Up! Winterly Tree Tops and Nests of Winter card box for gifts-Jeanie Stark StampinUp
If you ordered my 12 Days of Christmas Kit to Go you received everything you need to craft along with me. Here’s a look at what was included in the kit for today’s project. (*Oops…forgot the ribbon in the photo.)

Stampin' Up! Winterly Tree Tops and Nests of Winter card box kit-Jeanie Stark StampinUp

To Create this Project

  • Clear Acetate card box (purchased from Amazon)
  •  Pebbled Path Cardstock: 4 x 5 1⁄2, 1 1⁄4 x 4
  • Gray Granite Cardstock: 3 3⁄4 x 5 1⁄4 die cut with Winterly Tree Tops Die
  • DSP (Nests of Winter): 5 1/8 x 3 5/8, die cut bird
  • Basic White: 1 x 3 3⁄4 to stamp sentiment
  • Cherry Cobbler and Gold Satin Ribbon
  • Winterly Tree Tops Bundle

    Directions:

    1. Adhere Birch DSP and Winterly Tree Tops Die cut layer to Pebbled Path cardstock.
    2. Adhere die cu tbird with Stampin’ Dimensionals.
    3. Stamp sentiment on basic white cardstock.Cut to size. Adhere to Pebbled Path layer and add to cardstock layers with Stampin’ Dimensionals.
    4. Tie a double bow and add to layer with Mini Glue Dot.
    5. Adhere to acetate box filled with cards or gift.
      *Card box coordinates with fun fold card from Day 10.

Stampin' Up! Winterly Tree Tops and Nests of Winter card box and coordinating card gift set-Jeanie Stark StampinUp
I can’t believe tomorrow is Day 12! Any guess what the last project will be? I’d love to hear from you. Leave a comment below.

Have a great day!!! Thanks for stopping by!
Just Stampin’
Jeanie

Today is the LAST DAY to take advantage of Stampin Up!’s FREE SHIPPING (on orders of $75 or more)!
visit juststampin.com for details, handmade inspiration, and more-Jeanie Stark StampinUp
*If your order is under $150 please add the current host code to your order.
 Host Code: YHMBWKAW
CLICK HERE TO SHOP or click on the product images below.
Here is your shopping list for today’s project: