Something Old, Something New

img_7113
Stampin’ Up! So in Love Bundle (available Jan. 4th)

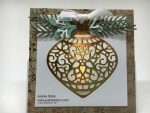
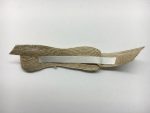
I made this card and gift card holder for my niece who is getting married in February.  Her bridal shower was earlier this month and even though I was unable to attend, I wanted to make her something special. I used something “old” (Gift Card Envelope & Trims Thinlits) and something “new”(products from the Falling in Love Suite: So in Love Stamp Set, So Detailed Thinlits Dies, Falling in Love Designer Series Paper, Very Vanilla Satin Ribbon, Falling in Love Embellishments).

I made the card at the Stampin’ Up On Stage Convention earlier this month. We did several Make ‘n Takes using some of the new product that will be in the 2017 Occasions catalog.  The Falling in Love Designer Series Paper features bokeh patterns-a blurred look created by out-of-focus, clustered shapes. I love the different patterns!

so-in-love-dsp


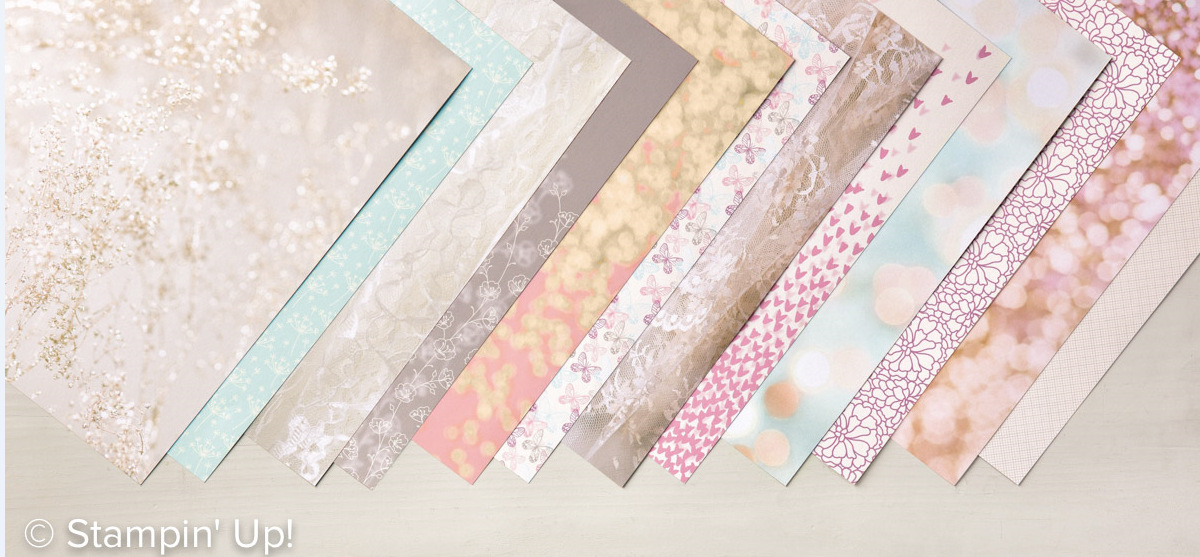
This suite is really gorgeous! You will be able to purchase the stamp set and dies as a bundle and save 10%.

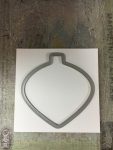
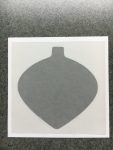
I used the die to make a matching belly band for my gift card holder. I cut my die, wrapped it around my envelope, and adhered it to a 1 3/8 x 4 inch strip of Very Vanilla cardstock. I left it a little loose so it will be able to slide on and off.  I stamped the flowers (to match the DSP) in Sweet Sugarplum ink on a piece of Very Vanilla that measures 2 5/8 x 3 3/4. I stamped the sentiment from the B.Y.O.P. Stamp Set in Sahara Sand ink and used the Sahara Sand marker to personalize the front of the gift card holder.

I love the way it all coordinates and makes a nice gift presentation.

img_7113
Stampin’ Up! Falling in Love Suite with matching Gift Card Envelope

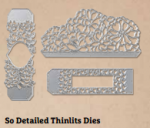
Stamp Sets: So in Love, B.Y.O.P.  Inks: Sweet Sugarplum, Sahara Sand (including marker)  Papers: Soft Sky, Very Vanilla, Falling in Love DSP  Tools & Accessories: Gift Card Envelope & Trims Thinlits, So Detailed Thinlits Dies, Falling in Love Embellishments, Very Vanilla 1/4″ Satin Ribbon, Big Shot, Precision Base Plate, Die Brush

Here’s some Stampin’ Up! news with Something Old, Something New…

Something OldTODAY is the LAST DAY that you can take advantage of the Stitched from the Heart 25% off opportunity that has been going on all month. There are some great stamps on sale! (Click on the image to view the stamp sets on sale.)

stitched-pic

Something New…Starting tomorrow (Dec. 1), Stampin’ Up! will be offering up to 60% off on Year-End Closeouts.  I’ll post more information tomorrow (once it becomes available) including a list of retiring holiday products (available while supplies last).


YearEndCloseout_DemoHeader_NA

Here’s the details:

  • Retiring List.  Stampin’ Up! will release its “retiring list” of items in the Holiday Catalog on December 1st…the items that will no longer be available after they are sold out.
    • Retiring stamp sets are guaranteed available until December 21, after which they will only be available while supplies last.
    • Retiring accessories will only be available while supplies last.
    • Retiring items will only be available while supplies last.  All retiring items will be discontinued after January 3.
  • Closeout Sale.  Many of the retiring items and high-inventory items will be offered at a discount between December 1 and January 3.

Have a wonderful day!

Just Stampin’

Jeanie

V is for Vellum

Welcome to my ABC’s of Stampin’ series. Today I am going to share with you 2 projects I made using vellum.  Every time I work with vellum I wonder why I don’t use it more!  My first project is a square card for you that shines bright. It would look lovely sitting on an end table or mantle.  It is one of those projects for someone very special.

Stampin Up Delicate Ornament Fun Fold Easel Christmas card idea - Jeanie Stark Stmapin Up

I used vellum behind the ornament to let the light shine through from the battery operated votive candle sitting in this easel card.  The ornament is from the Delicate Ornament Thinlits Dies and cut out from Copper Foil. I have lots of photos and measurements to share with you today. I started with 4 1/4 x 8 1/2 thick whisper white cardstock.  I scored it at 2 1/8 and 4 1/4. The copper foil Designer Series Paper is from Affectionately Yours and measures 4 1/8 x 4 1/8.  I adhered the DSP to the bottom of the card base (below the score line) and cut out the ornament shape. Then I centered the ornament die on a piece of 3 1/2 x 3 1/2 thick whisper white and cut it out again.

Next I adhered a piece of vellum behind the whisper white and adhered that to the DSP making sure to line up the openings.  The vellum is sandwiched between the whisper white and the DSP.  Then I cut out the detailed ornament from a piece of 3 1/2 x 3 1/2 copper foil using the Big Shot with the Precision Base Plate.

I used the fine-tip glue pen to adhere the copper ornament on top of the vellum. The greenery is from the Pretty Pines Thinlits and cut from Always Artichoke, Mint Macaron, and Whisper White cardstock. I attached these to the ornament with glue dots.  I added some pearls for berries.  The easel card rests on a strip of DSP measuring 4 1/8 x 1 3/4.  The sentiment from Christmas Greetings Thinlits was cut from copper foil and adhered to a piece of 3 1/2 x 1 1/4 whisper white using the fine-tip glue pen. The DSP panel was popped up with Foam Adhesive Strips to allow the card to rest against it when open.  I added a white organza bow with a glue dot.  Here’s some photos showing different views.

Stampin Up Delicate Ornament Fun Fold Easel Christmas card idea - Jeanie Stark Stmapin Up

I was thrilled when Stampin’ Up! came out with the copper foil in the Holiday catalog.  I like to decorate with copper accents and one of our Christmas trees has many copper ornaments.  I absolutely LOVE the Christmas season and set up trees in nearly every room throughout our home. Here is a peek at my copper accent tree.

img_7201

As much as I love the Christmas season I don’t start decorating the trees until after Thanksgiving. So let’s get to my card for Thanksgiving…

The ornament on the easel card used just a plain piece of vellum; however, there are many ways to color on vellum. You can use your ink and a brayer, color with markers (on the back on your stamped image), or sponge (also on the back) like I did on this card.

Stampin Up Paisleys & Posies and Vintage Leaves Thankful card idea - Jeanie Stark StampinUp

I love how this card turned out!  I started with a piece of 5 1/4 x 4 piece of vellum.  I stamped images from the Vintage Leaves stamp set using Memento Black ink.  I sponged on the back with Rich Razzleberry, Crushed Curry, Pumpkin Pie, and Old Olive ink.  I adhered it to the Very Vanilla card with a strip of Fast Fuse in the middle (hidden behind the sentiment and burlap ribbon). I also added a glue dot in each corner behind a leaf image. The sentiment from Paisleys & Posies is stamped on Very Vanilla with Back Memento ink and layered with a piece of Old Olive.  I attached the burlap ribbon with glue dots (to hold the shape I wanted) and a strip of Tear and Tape.  The sentiment is attached with Stampin’ Dimensionals.

Stampin Up Vintage Leaves Thankful card idea - Jeanie Stark StampinUp

Stamp Sets: Vintage Leaves, Paisleys & Petals (sentiment)  Inks: Memento Black, Rich Razzleberry, Pumpkin Pie, Crushed Curry  Papers: Very Vanilla, Vellum, Old Olive  Tools & Accessories:  Burlap Ribbon, Stampin’ Sponges or Sponge Daubers, Glue Dots, Tear& Tape

I am taking preorders for my Merry Medley kit from now through September 29th. The kit includes the Merry Medley stamp, Cherry Cobbler & Garden Green Stampin’ Write Markers, and all the supplies…card bases, envelopes, ribbon, cardstock, Designer Series Paper, die cuts, and embossed pieces (precut and ready to stamp and assemble) to make 5 cards and a 3D project (a mini notebook)!  You can see the full post HERE.

img_4537

Merry Medley Card Kit   October 2016

The cost of the Merry Medley Stamp Kit is $40 (Merry Medley clear mount stamp and set of 2 Stampin’ Write Markers are included with the kit).  Note: If you prefer the wood mount Merry Medley stamp the cost is $45. Email me (j.stark@myactv.net) by September 29th  with “Merry Medley Kit” in the subject and I will send you a PayPal invoice.  Be sure to include your shipping address!

Here’s my Back to School Special for today…With an online purchase of $25 or more I will send you a vellum card kit with a Stampin’ Sponge so you can give this technique a try. Be sure to enter the Hostess Code 7CNZAUYM when you check out. (I’ve included a visual below.) Click HERE to go to my online store.

I’m excited as I have some special visitors coming for lunch and perhaps a little stamping or apple picking.  Such a variety of activities to choose from!

Hope you have a Very good day!

Just Stampin’

Jeanie


B is for the Big Shot

Welcome to my ABC’s of Stampin’ series! Each day I will focus on some of the basics of stamping and share some tips, tutorials, and exclusive Back to School Specials as I share cards and projects.

I LOVE and use my Big Shot every day! It cuts, scores, and embosses! You can create boxes, bags, bows, and more! The Stampin’ Up! Big Shot comes with an EXCLUSIVE  base plate that is GREAT!!! Here’s a video showing you all the basics.

Click HERE to see and print a flyer for how to make your “sandwich” for the Big Shot when using Intricate Dies,  Thinlits & Framelits, and Textured Impressions Embossing Folders. You can keep it as a reference by your Big Shot.

Today is my mom’s birthday! She loves the fall colors. Our home was always decorated in shades of red, orange, gold, and tan.  We had orange woodwork in our kitchen and textured wallpaper in our living room and dining room (Think late 70’s).  I saw a card by Diane Barnes using these flowers and die and it reminded me of my bedroom curtains when I was a kid.  They had these bold, bright flowers in orange and yellow. I used my Big Shot and the Precision Base Plate to make this childhood memory inspired birthday card for my mom.

Stampin Up Birthday card idea using Bloomin Heart THinlints, Botanical Builder Framelits, Bunch of Banners Framlelits - Jeanie Stark StampinUp

Here are some tips and tricks for using the Precision Base Plate with your Big Shot for when you need to cut detailed dies.

You will love what the Big Shot can do for you. It’s a MUST HAVE for any crafter.

I admit, the Big Shot Die-Cutting Machine is an investment. (But well worth it!)  Here are some suggestions to get it at a savings…

1) Sign up to be a Stampin’ Up! Demonstrator and order it with your starter kit.  You get $125 in product of your choice for $99 (shipping & handling is included). Plus you will get a FREE Paper Pumpkin kit, business supplies, and more to get you started. I’d love to chat with you if you are interested or have questions. There’s no pressure or obligation. Stampin’ Up! welcomes hobby demonstrators who just want to get product at a discount. Why not join?

2) Host a get together or virtual party and earn hostess dollars toward your purchase.  I will set up a hostess code so you and your friends and family can order online and you will get the rewards.

3) Just go ahead and order it from my website today and take advantage of today’s Back to School Special… With the purchase of the Big Shot I will send you a Free set of Replacement Cutting Pads (I have 2 sets I use all the time…1 just for embossing and 1 for cutting.  If you missed my previous post about this you can click HERE ). NOTE: You can only get the new updated base plate through Stampin’ Up! It comes with your Big Shot.

If you already have the Big Shot you can order just the new updated platform ($26). Therefore, I am offering a second Back to School Special for today…If you already own the Big Shot and want to purchase the new platform from me today, I will send you a sampling of precut framelits, thinlits, and embossed cardstock pieces.  Oh the possibilities! This way you can see and create with some of the different options that are available.  What fun!  (I will also send a sampling along with the cutting pads to anyone who purchases the Big Shot from me.) Remember to use the Hostess Code VS23B4FP  when you check out.

img_4056

Here’s another look at today’s Birthday card for my mom. I used lots of tools that begin with B as well as the stamp set and banner.  🙂

Stampin Up Birthday card idea using Bloomin Heart THinlints, Botanical Builder Framelits, Bunch of Banners Framlelits - Jeanie Stark StampinUp

Stamp set: Birthday Banners  Ink:  Calypso Coral, Old Olive Papers: Whisper White, Calypso Coral, Daffodil Delight, Old Olive, Pear Pizzazz, Soft Suede  Tools & Accessories: Bloomin’ Heart Thinlits, Botanical Builder Framelits, Bunch of Banners Framelits, Big Shot, Precision Base Plate, Stampin’ Dimensionals, Glue Dots, Fine-Tip Glue Pen, Fast Fuse Adhesive, Soft Suede Candy Dots (Retired)

Have a Beautiful day!

Just Stampin’

Jeanie