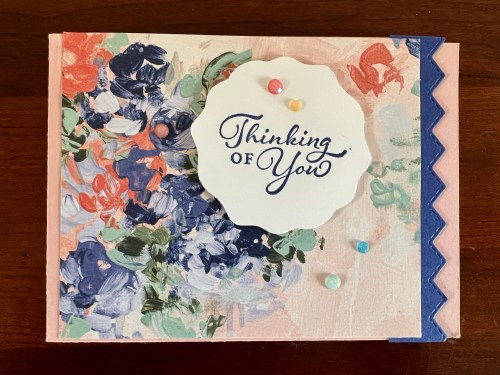
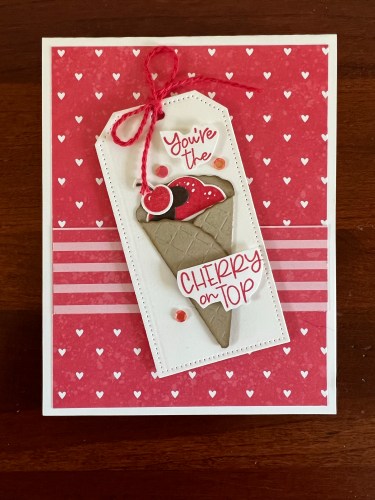
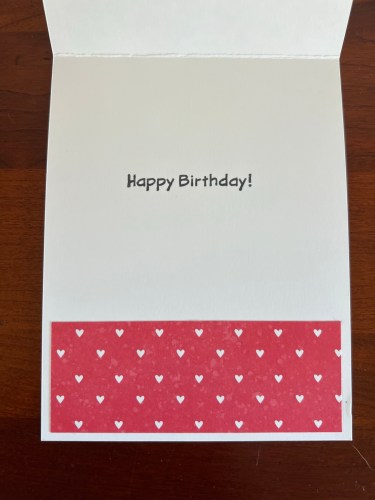
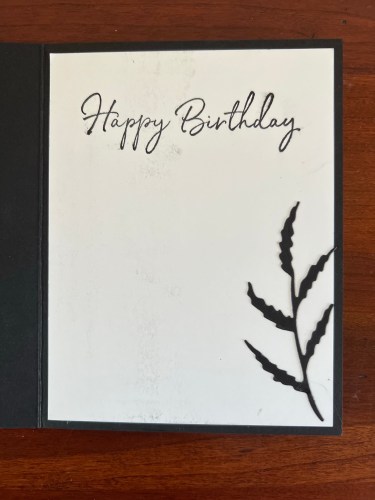
I’m excited to share some of the beautiful cards from my Birthday Card Swap! You are in for a treat with some fun folds and lovely layers. The collection of cards I’ll be sharing over the next few days might not all have current Stampin’ Up! products, but every card gives good ideas for color combinations, layouts, and techniques. Let the inspiration begin…
Created by Carol BusbyCreated by Carol BusbyCreated by Pat StewartCreated by Judy HoffmanCreated by Judy HoffmanCreated by Dawne McIntoshCreated by Dawne McIntoshCreated by Denise WekwertCreated by Denise WekwertCreated by Elizabeth Beamer
Please leave a comment below to let these artists know how much you love their creations. If you participated in the swap and don’t see the card you received here, please wait to comment about that card when it is showcased. That way, the creator of that card will be sure to see your comments. Thank you to everyone who participated! It was so much fun getting “Happy Mail”! Check back tomorrow for more card swap inspiration.
Have a wonderful day!
Just Stampin’
Jeanie
Stamp Sets/Bundles Showcased (Click on any image to view in my online store.)
Host Code Exclusive Offer! All orders placed through my online store are eligible for my FREE monthly gifts. Please use the current host code. *If your order is $150 or more, do not use the host code. You will earn Stampin’ Rewards to spend as well as my thank you gift. All orders receive a handmade card in the mail from me. Click HERE to Shop 24/7
Current Host Code: SEZV3BF3
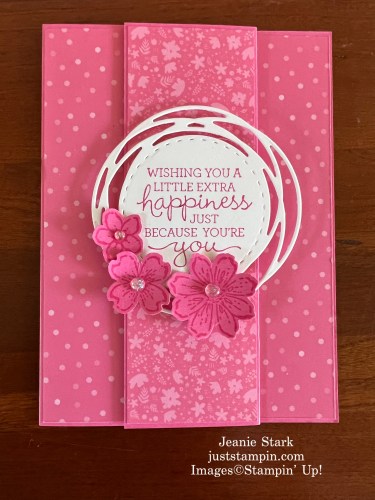
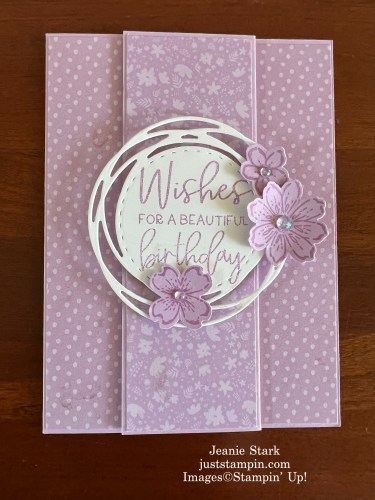
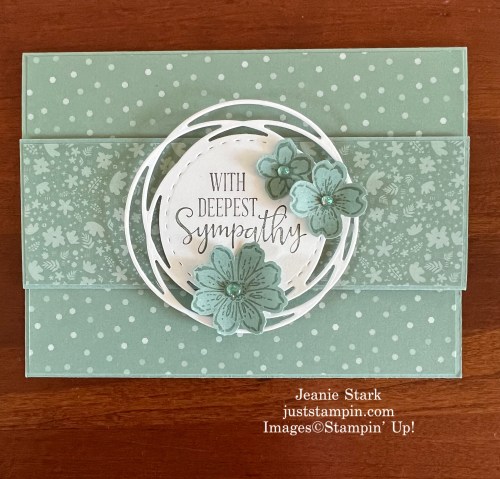
Thanks for stopping by and helping me celebrate my 10th anniversary as a Stampin’ Up! Demonstrator this month. Don’t forget to leave a comment to enter my 10 Days of Giveaways! I love sharing some of my favorite products, exclusive tutorials, card kits and more! Welcome to Day 8! Today’s project is a favorite fun fold design (that can be vertical or horizontal) using the retiring 2021-2023 In Colors.
Here’s my original project that provided the inspiration for today’s card…the 2018-2020 In Colors.
This fun fold was one of the cards that was included in my Just Stampin’ Card Kit To Go back in May 2020. I always include at least one fun fold card in each of my monthly kits. I made 5 different versions to show the versatility of my card kits. I create them so that you can use any stamp set you already have to add a sentiment. There’s so many possibilities for adding the flower depending on whatever sentiment you use. All you have to do it stamp and adhere! My card kits include everything you need to create…all cut, scored, and ready to assemble. Plus you can refer to the tutorials to create more on your own!
Here’s a look at each of the 2021-2023 In Colors (which will be retiring in April).
Make sure you have ink refills, and your favorite color cardstock so you can keep creating with these colors before they retire! *These usually sell out fast!!!!
Which color will you miss the most? Leave a comment below to enter today’s drawing. You could be the next winner in my 10 Days of Giveaways!
Let’s get to today’s random winner…. Chris from Pella! Congratulations Chris! Email me your address and I will mail you an assortment of 10 Stampin’ Up! note cards & envelopes.
Here are our winners so far!
Day 1- Dawne– Hello, Irresistible card kit & tutorial
Day 2 – Mary Hopfner – bay window fun fold card kit
Day 3 –Nancy H. – Paper Pumpkin Box
Day 4 – EVERYONE who participates in my birthday card swap! Click HERE for details. *Please leave a comment if you plan to participate so I can make a card for you. Reminder…If you signed up to participate, it’s time to get your card made and in the mail to me.
Day 5 – Pat V.- 3D embossing folder and ribbon
Day 6 – Carol Busby – Just Stampin’ Fun Fold Card Kit & 3D Project Buffet
Day 7- Chris from Pella- 10 note cards & envelopes (to create cards like those shown HERE).
Want to receive my Just Stampin’ Fun Fold Card Kit and 3D Project Buffet to go this month? Click HERE for all the details. I have just a few spots remaining for this month’s kit!
Just Stampin’ Rewards I appreciate each and every order! Here are the things you can expect when you place an online order with me in March:
Handmade thank you card in the mail with any order.
10 FREE Tutorials (in honor of my 10th anniversary as a Stampin’ Up! Demonstrator) featuring the Hello, Irresistible Bundle when you purchase the bundle from me in March. You’ll have 10 project ideas to start creating right away! You will also receive a card kit to create one of the cards featured in the tutorial.*Remember to add the current host code when you check out. Current Host Code: BQC9CMAR *Click on the image below to purchase.
Mystery Box– This is a gift from me to you when you place a $100 order with me (before tax and shipping) using the host code. Mystery boxes are filled with retired Stampin’ Up! products like stamps, dies, paper, punches, accessories, and more. You’ll also receive a handmade party favor (in honor of my birthday this month).I am de-stashing my craft area and this is a way to celebrate and share my retired products with you!
SPECIAL OFFER!!! Make sure you have the right “tools” for the job! Just Stampin’ Adhesive Tote I’ve included my most used “go to” adhesives that I use for my card and 3D projects! This zipper tote includes:
Stampin’ Dimensionals
Tear & Tape
Mini Glue Dots
Multipurpose Liquid Glue
Stampin’ SEAL
Stampin’ SEAL refill
My Favorite Precision Tip Applicator (Non Stampin Up!) *Just fill with Multipurpose Liquid Glue for your fine-tip projects (adhering small embellishments and detailed die cuts).
Cost: $45 (*Includes shipping & handling plus FREE zipper tote and 12 sheets of 6×6 Dandy Designs Designer Series Paper shown below.) Put your adhesives to use right away making fun projects with this DSP!
Email me (j.stark@goeaston.net) with “Adhesive Tote” in the subject line. *Make sure you include your mailing address! Then send payment through PayPal. To do this, go to paypal.com, sign in or register for an account, click “Send” and fill in my email address (j.stark@goeaston.net). Fill in the amount ($45 which includes shipping), and Continue. If you do not use PayPal, you may send me a check.
Stamp Sets shown: Irresistible Blooms, Pansy Patch, Framed Florets, Peaceful Moments, Petal Park (flowers)
Product List (Click on any image below to shop my online store.)
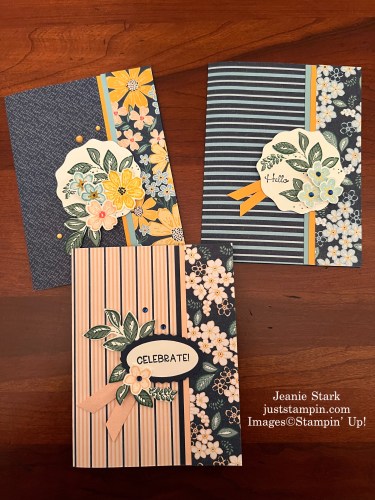
I got together with my friend and teammate, Rosanne Mulhern, last week for some stamping fun! Truth be told we did more chatting than stamping but we did manage to create a few cards and I LOVE them!!!
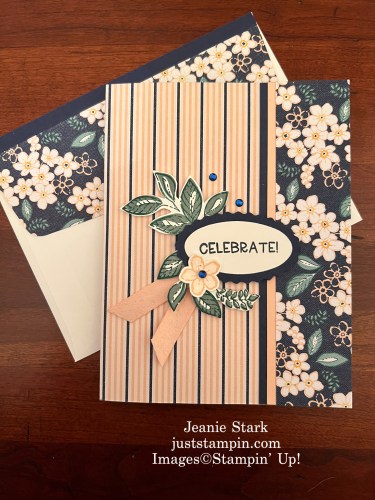
We got this card fold idea from Rachel Tessman and decided to try it out with different DSP. I’ll share my measurements as I changed it a bit. First, let’s take a look at each of the double-sided cards I made with the gorgeous Regency Park Designer Series Paper!
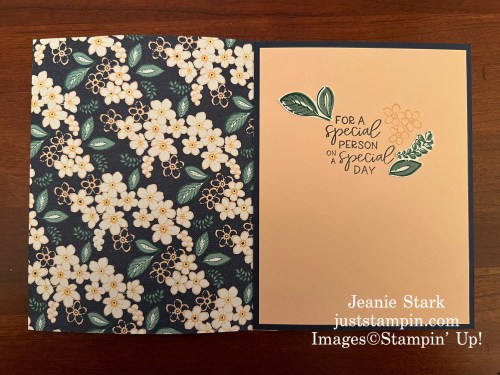
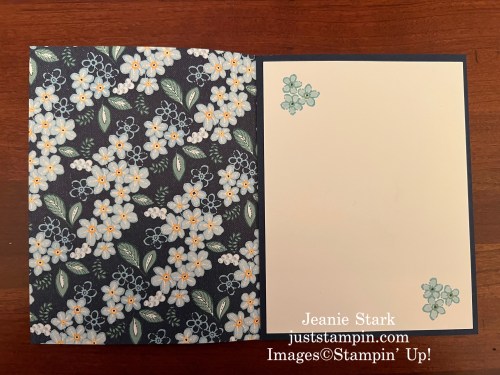
I love the surprise you get when you open the card and see the patterned paper on the inside! Regency Park is my favorite DSP in the Mini Catalog! There’s so many more designs to love! I had fun playing with the different patterns and trying something a little different on each card. Are you ready for the details to create these cards?
Measurements
Card Base (Night of Navy): 4 3/16 x 5 1/2
DSP (Regency Park): Cut 1/2 off the bottom of the 6 x 6 DSP (so it is 5 1/2 x 6). Then score at 1/2, and 4 3/4.
Cardstock strips in coordinating colors: Need 2 strips. 1 1/2 x 5 1/2, 1/2 x 5 1/2
Basic White cardstock: to stamp & punch flowers and leaves. Need Decorative Circle Punch, Petal Builder Punch, Double Oval Punch
Cardstock for inside card: 4 x 5 1/4
DSP for envelope: 2 1/4 x 6 or 2 x 6 with 1/4 x 6 cardstock strip
Directions
Fold DSP along score lines. Adhere the 1/2 fold on the back of the cardstock piece that is your card base. This is what the back of the card will look like.
Fold the other side of the DSP forward. This will create your card front.Adhere 1/2 x 5 1/2 strip along the DSP flap on the front of the card. Then adhere the 1 1/2 x 5 1/2 piece against the score line on the right side of the DSP. This will create a strong piece to open the card. Adhere the front flap with Stampin’ Seal. Here’s what the underside of the flap looks like before it’s adhered.
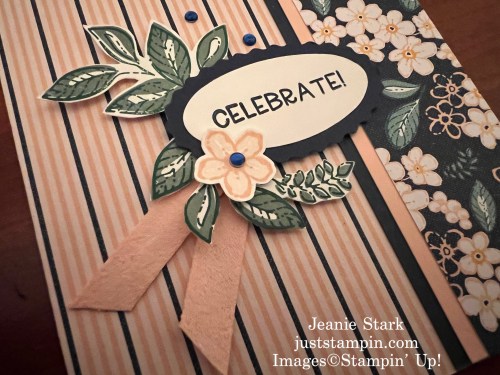
Stamp leaves from Petal Park on Basic White cardstock with Soft Succulent and Shaded Spruce Ink. This is a two step stamp. Stamp the sold image first in Soft Succulent then stamp outline/detail stamp in Shaded Spruce.
Punch with Decorative Circle Punch and/or fussy cut leaves to embellish front of card.
Stamp sentiment on Decorative Circle using Night of Navy Ink. (Or stamp sentiment and punch with Double Oval Punch.) Adhere to card with Stampin’ Dimensionals.
Stamp flowers from Petal Park in ink to coordinate with colors in the DSP. This is a two step stamp. I inked the solid flowers first, stamped off, then stamped on Basic White piece. Stamp the outline/detail flower on top. Punch with Petal Builder Punch. Add details with Stampin’ Write Markers in colors to match flowers in DSP.
Curl the ends of the flowers with a bone folder and adhere to Decorative Circle with Mini Glue Dots.
Embellish with Adhesive-backed Milky Dots and ribbon or cardstock banners.
Stamp and adhere cardstock to inside of card. Add extra punched flowers and/or fussy cut leaves if desired.
Adhere DSP to envelope flap and trim with Paper Snips.
You can view the complete list of products used to create today’s cards below. Do you have a favorite card? I’d love to hear from you! Leave a comment below!
I’m excited for you to head over to Rosanne’s blog HERE to see her card design using different designer series paper. I know you’ll enjoy it!
SPECIAL OFFER!!! Make sure you have the right “tools” for the job!
Just Stampin’ Adhesive Tote
I’ve included my most used “go to” adhesives that I use for my card and 3D projects! This zipper tote includes:
Stampin’ Dimensionals
Tear & Tape
Mini Glue Dots
Multipurpose Liquid Glue
Stampin’ SEAL
Stampin’ SEAL refill
My Favorite Precision Tip Applicator (Non Stampin Up!) *Just fill with Multipurpose Liquid Glue for your fine-tip projects (adhering small embellishments and detailed die cuts).
This Precision -Tip Applicator is my choice for a fine-tip glue! Fill with Stampin’ Up! Multipurpose Liquid Glue. *Included with my Adhesive Tote!
Cost: $45 (*Includes shipping & handling plus FREE zipper tote and 12 sheets of 6×6 Dandy Designs Designer Series Paper shown below.) Put your adhesives to use right away making fun projects with this DSP! This adhesive tote will hold all your adhesive supplies and is easy to grab for stamping on the go!
Email me (j.stark@goeaston.net) with “Adhesive Tote” in the subject line. *Make sure you include your mailing address! Then send payment through PayPal. To do this, go to paypal.com, sign in or register for an account, click “Send” and fill in my email address (j.stark@goeaston.net). Fill in the amount ($45 which includes shipping), and Continue. If you do not use PayPal, you may send me a check.
Have a great day!
Just Stampin’
Jeanie
Host Code Exclusive Offer! All orders placed through my online store are eligible for my FREE monthly gifts. Please use the current host code. *If your order is $150 or more, do not use this code as You become the hostess and get the Rewards!
Current Host Code:C744KKNU
Shop and earn FREE products with your purchases during Stampin’ Up!’s Sale-A-Bration event!! (Don’t wait…ends tomorrow, February 28th!)
If you are shopping today, make sure you check out the Clearance Rack before you checkout! Great deals up to 60% off! For the first time, they have added stamp sets!! Click HERE to Shop or Click on the images below.


")


")
")


")
")


")


 Designer Series Paper")


")
")

 Designer Series Paper")


 Soft Polyester Ribbon")


