
Today is my husband’s birthday! We are a huge game family! I grew up with 4 sisters and a brother and we were always playing cards and games. When I moved away after college I missed having someone to play games with so when I got married and had kids we played games! We have been playing more than ever during this pandemic! I have been using the Game On Stamp set to make all kinds of cards and gifts. Here’s what I made for my husband.

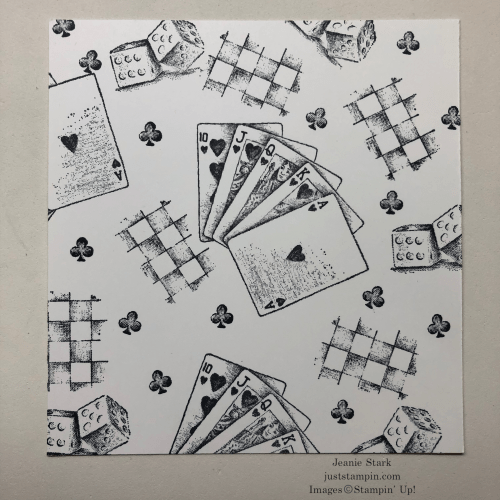
I think I used almost every stamp image and sentiment in this gift set! Here’s a look at the Game On stamp set.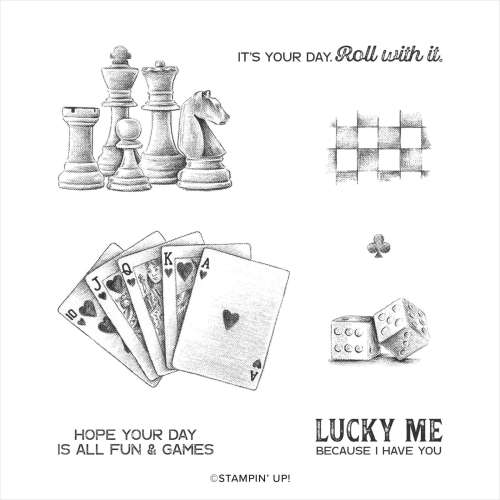
I love this stamp set! The sentiments and images are great for all kinds of gifts and masculine cards. I used it to make my fun fold card, notebook cover, and Mini Paper Pumpkin gift box. Here’s a look at each starting with the card.
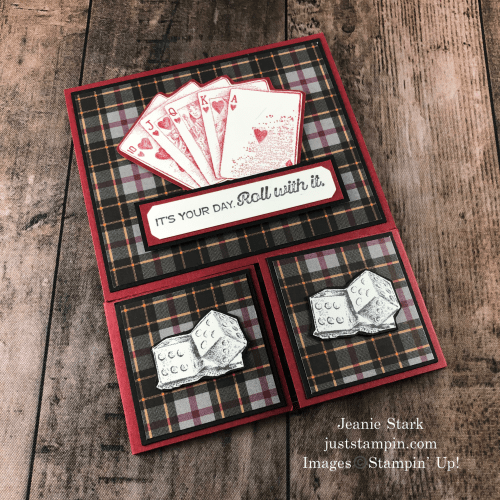
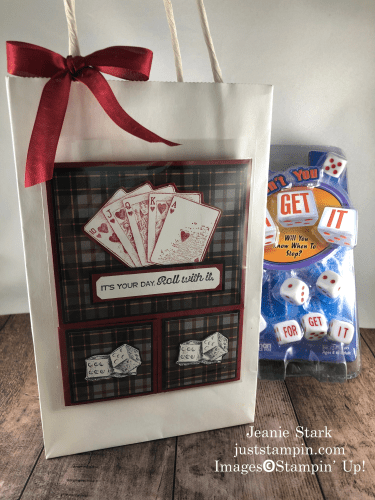
This plaid from the Plaid Tidings Designer Series Paper pack is so my husband! (I think he may actually have a shirt with this plaid.) You will see below the new game I bought for his birthday and this sentiment couldn’t be more perfect! This card is a Dutch Door Fun Fold. You know how I love fun fold cards and I can’t believe this is the first time I’ve made one of these! It is so stinkin’ easy too!!! I love how it looks standing up.

Here’s the details:
Measurements:
- Cherry Cobbler (Card Base): 9 x 4 1/4 scored at 5 1/2, 2 x 8 1/2 scored at 2 1/8 on each end, 5/8 x 2 7/8, scrap to fussy cut layer around cards
- Basic Black: 4 x 3 1/4, 2 pieces cut 1 7/8 x 1 7/8, 3/4 x 3 (to layer sentiment strip), scraps to fussy cut layer around dice
- DSP (Plaid Tidings): 3 7/8x 3 1/8, Cut 2 pieces 1 3/4 x 1 3/4, 1 3/4 x 4 (inside)
- Whisper White: 1/2 x 3 to stamp sentiment then punch each end with Lovely Labels Pick A Punch, 4 x 5 1/4 (inside piece), 1 full sheet to stamp images in Real Red and Memento Black Ink. *I stamped everything for all 3 projects at once and fussy cut out.
Directions:
- Fold and burnish both pieces for the card base. Use Multipurpose Liquid Glue between the score lines on the 2 x 8 1/2 piece and lay the other card piece on top to adhere. The liquid glue gives you a little wiggle room to make sure the bottom is lined up straight and the sides fold in easily.

- Adhere DSP pieces to black layers and adhere to card front.
- Stamp images and fussy cut. Layer with cardstock and fussy cut leaving a little border. This creates a shadow and gives it a 3D look. Adhere to card.
- Stamp sentiment and punch each end with Lovely Labels Pick A Punch. Add cardstock layers and adhere to card.
- Stamp sentiment on Whisper White layer and adhere inside card. *I added the DSP strip on the inside because I liked the look better when the card was on display. I only adhered it on the bottom and sides and left the top open so I could add a gift card. I Love this sentiment. I told my husband it must be why I win all the time. HAhaha

Next I decorated a Mini Paper Pumpkin Box to coordinate.
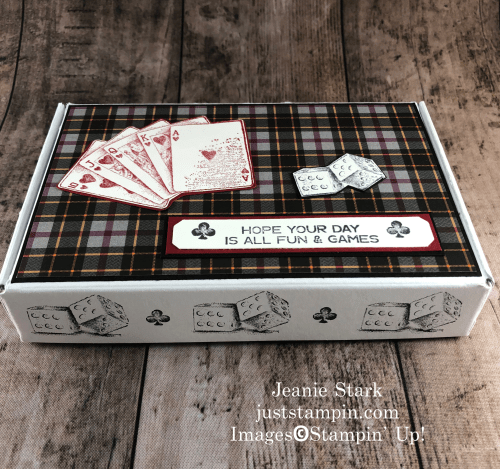
I stamped all around the box. I’m going to be totally honest here and tell you it took me 3 tries to get this right! LOL I didn’t realize when you folded the box the dice and “club” images would be upside down. I plan to just cover those “mistakes” with DSP to use on a future project. To make sure you don’t make the same mistake, here’s a picture showing how to stamp the images to they will look right when you assemble the box. (You’re welcome!)

This box is the perfect size to fit two decks of cards!

We completely wore out our cards playing Sequence and will use these to replace them! Sequence is one of our favorite games!
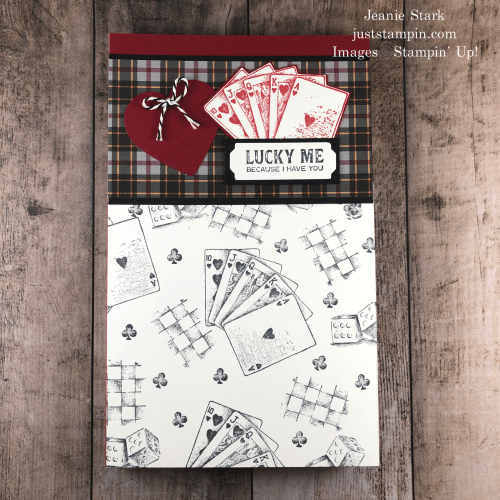
My last project is a notepad cover (to keep score of course!)
My husband and I are very competitive when it comes to playing games! When our kids were little we would play games to decide who had to clean up after dinner, pick up the kids from sports, etc. It always made the game a little more interesting! When we play dominoes we each put in 50 cents (kids too!) and the winner would get to keep the money. I thought of it as teaching my kids finance! LOL
This notepad cover is easy to make! Brandy Cox did a video back in 2014 and I’ve been making these ever since! You need an 8 1/2 x 11 piece of cardstock scored at 5 1/4, 5 3/4. I stamped the images on a piece of 5 1/4 x 5 1/2 Whisper White to create my own “DSP”.
I adhered this to the front of the notebook and then added a 3 x 5 1/4 piece of black cardstock and a 2 3/4 x 5 1/4 piece of the same Plaid Tidings DSP I used on the other projects. The heart is punched from a heart in the Heart Punch Pack. I added a bow using the twine in the Playful Pets Trim Combo Pack.
Inside I created a pocket to hold a pen, game directions, scores (who owes who LOL), etc.
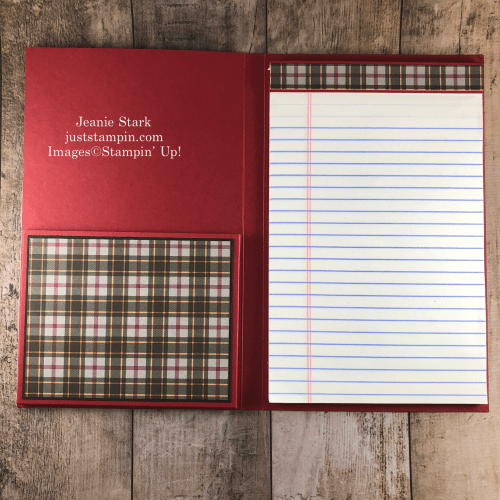
The pocket measures 4 3/4 x 6 1/2. Score on the long side at 1/2, 3/4, 5 3/4, 6. Score on the short side at 1/2, 3/4. Snip the little scored rectangles on each side, fold and burnish along the score lines, and glue the 3 sides on left side. I got my notepads at Sam’s Club. The notepad binding cover is 2 x 5 scored at 1 and 1 1/4. Glue over the top of the pad and adhere the pad on the right side using Multipurpose Liquid Glue for a strong hold. I had a leftover strip of DSP so I added that across the top.
Here’s the link to Brandy’s video if you would like to watch how she made hers: https://brandyscards.com/stampin-up-secret-garden-stamp-set-notepad-cover/
I often use the card to dress up a plain gift bag. It’s quick & easy to do and makes a nice presentation. Just adhere a clear envelope to the bag and insert your card. This bag holds the Mini Paper Pumpkin box, notepad, and a new game! I can’t wait to play!
What’s your favorite game? I’d love to hear from you! Leave a comment below. *Don’t forget to comment on yesterday’s post for a chance to win some blog candy.
You can purchase any of the products I used to create today’s projects from my online store. Click HERE or on the images below to shop! *Orders of $40 or more receive EXCLUSIVE monthly tutorials (via email) featuring the Poinsettia Petals Bundle.
Have a great day! Stay safe! Stay well!
Just Stampin’
Jeanie
Host Code Exclusive Offer! All orders placed through my online store are eligible for my FREE monthly gifts. Please use the current host code. *If your order is $150 or more, do not use this code as You become the hostess and get the Rewards! Click HERE to Shop!
Current Host Code: BWGSSKXZ
Product List (Click on any image to view)
|
|
|||
|
|
|
|
|
|
|
|
|
|
|
|
|
|
|
|
|
|
")
 Designer Series Paper")


Be sure to check out the Quite Curvy Variety Bundle! The Quite Curvy Bundle will be available in the January-June 2021 Mini Catalog but you can get it now during the Stampin’ Up! early release. However, The Curvy Christmas stamp set and Classic Christmas 6″ x 6″ Designer Series Paper will only be available during the Early Release period – November 3 through January 4!
Click HERE to view/print the flyer with all the details or Click HERE to view my previous post for project inspiration!
Just Stampin’ Rewards
I appreciate each and every order! Here are the things you can expect when you place an online order with me in November:
- Handmade thank you card in the mail with any order.
- 3 FREE Exclusive Tutorials PLUS 3D Project Tutorial (shown HERE) featuring the stamp/bundle of the month when you order $40 or more (before tax & shipping). New tutorials every month! November tutorials feature the Poinsettia Petals Bundle.
- Poinsettia Petals card kit – Purchase the Poinsettia Petals Bundle and get a free card kit to make one of the cards featured in the tutorial. *Click on the image below to purchase.
|
|
")