Snow is Glistening Fun Fold Card

I am excited to share with you today’s card which uses some of the limited edition products from the just released Snowflake Showcase.Stampin Up Snow is Glistening Fun Fold Christmas card idea - Jeanie Stark StampinUp 
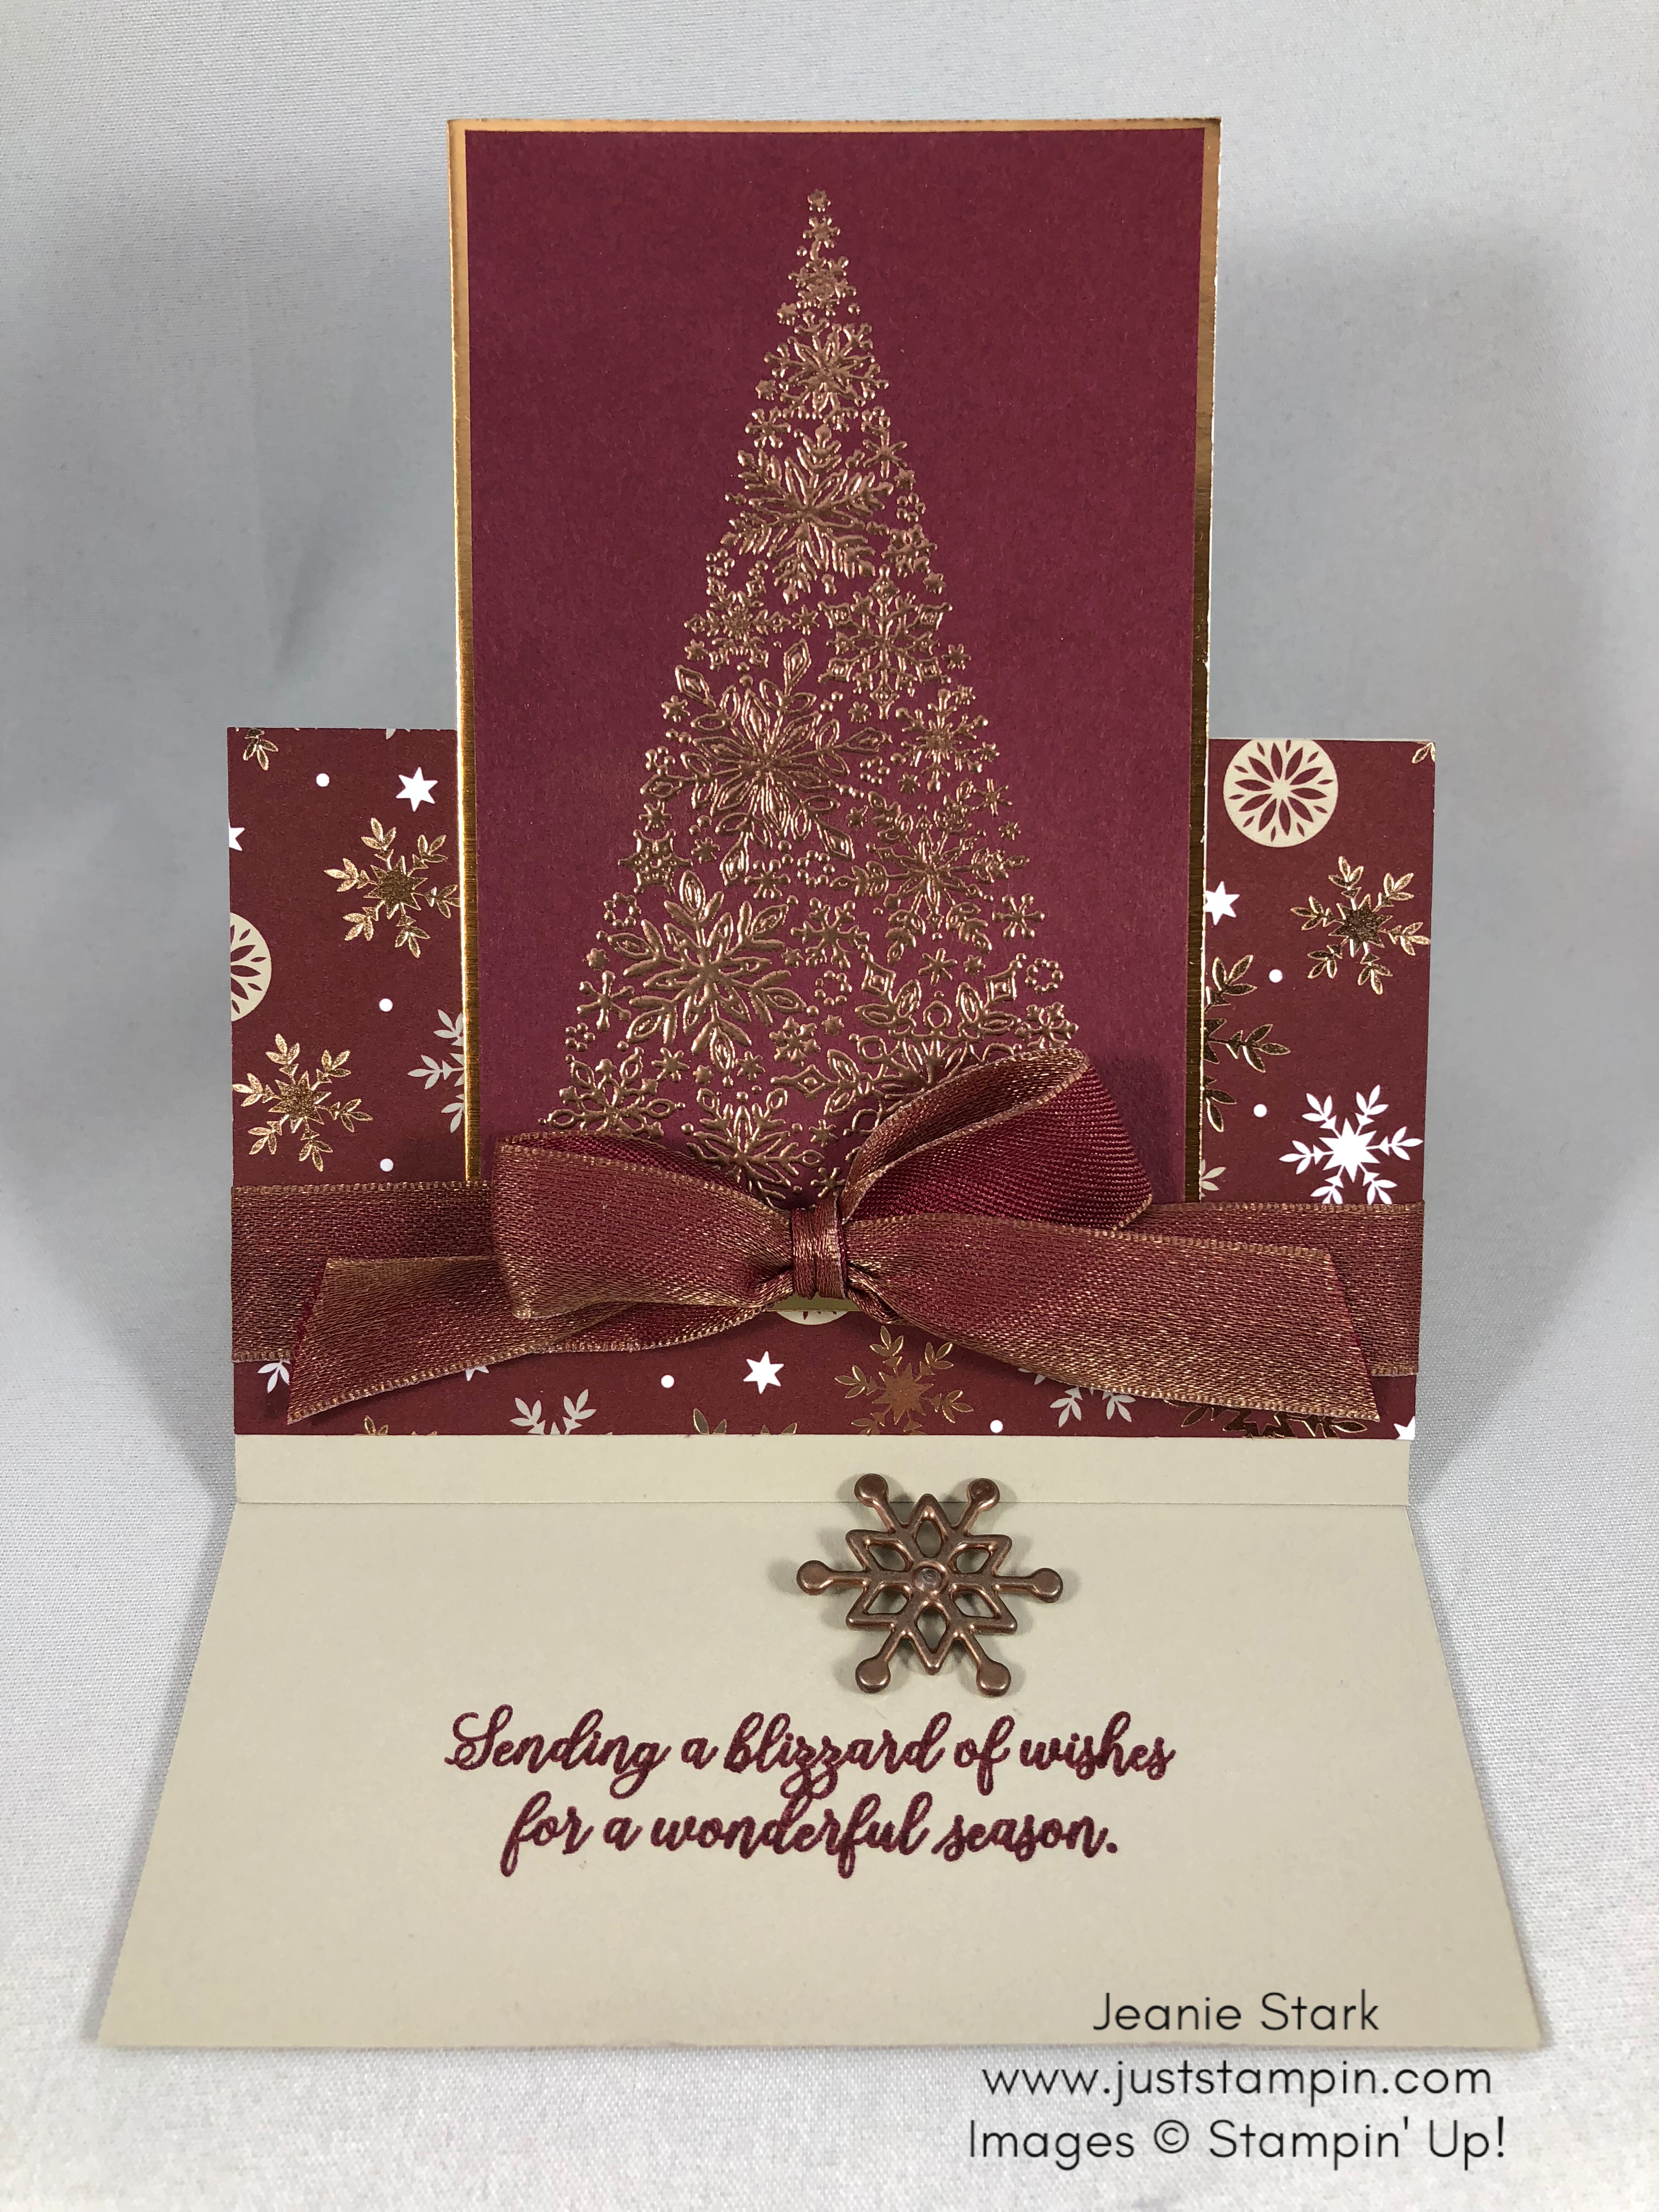
The star of this card is the copper embossed snowflake tree from the Snow is Glistening stamp set. I may have gone a little overboard heat embossing today but I just love the look and texture of the raised images. I even heat embossed the snowflake trinket!
Stampin Up Snow is Glistening Fun Fold heat embossed Christmas card idea - Jeanie Stark StampinUp
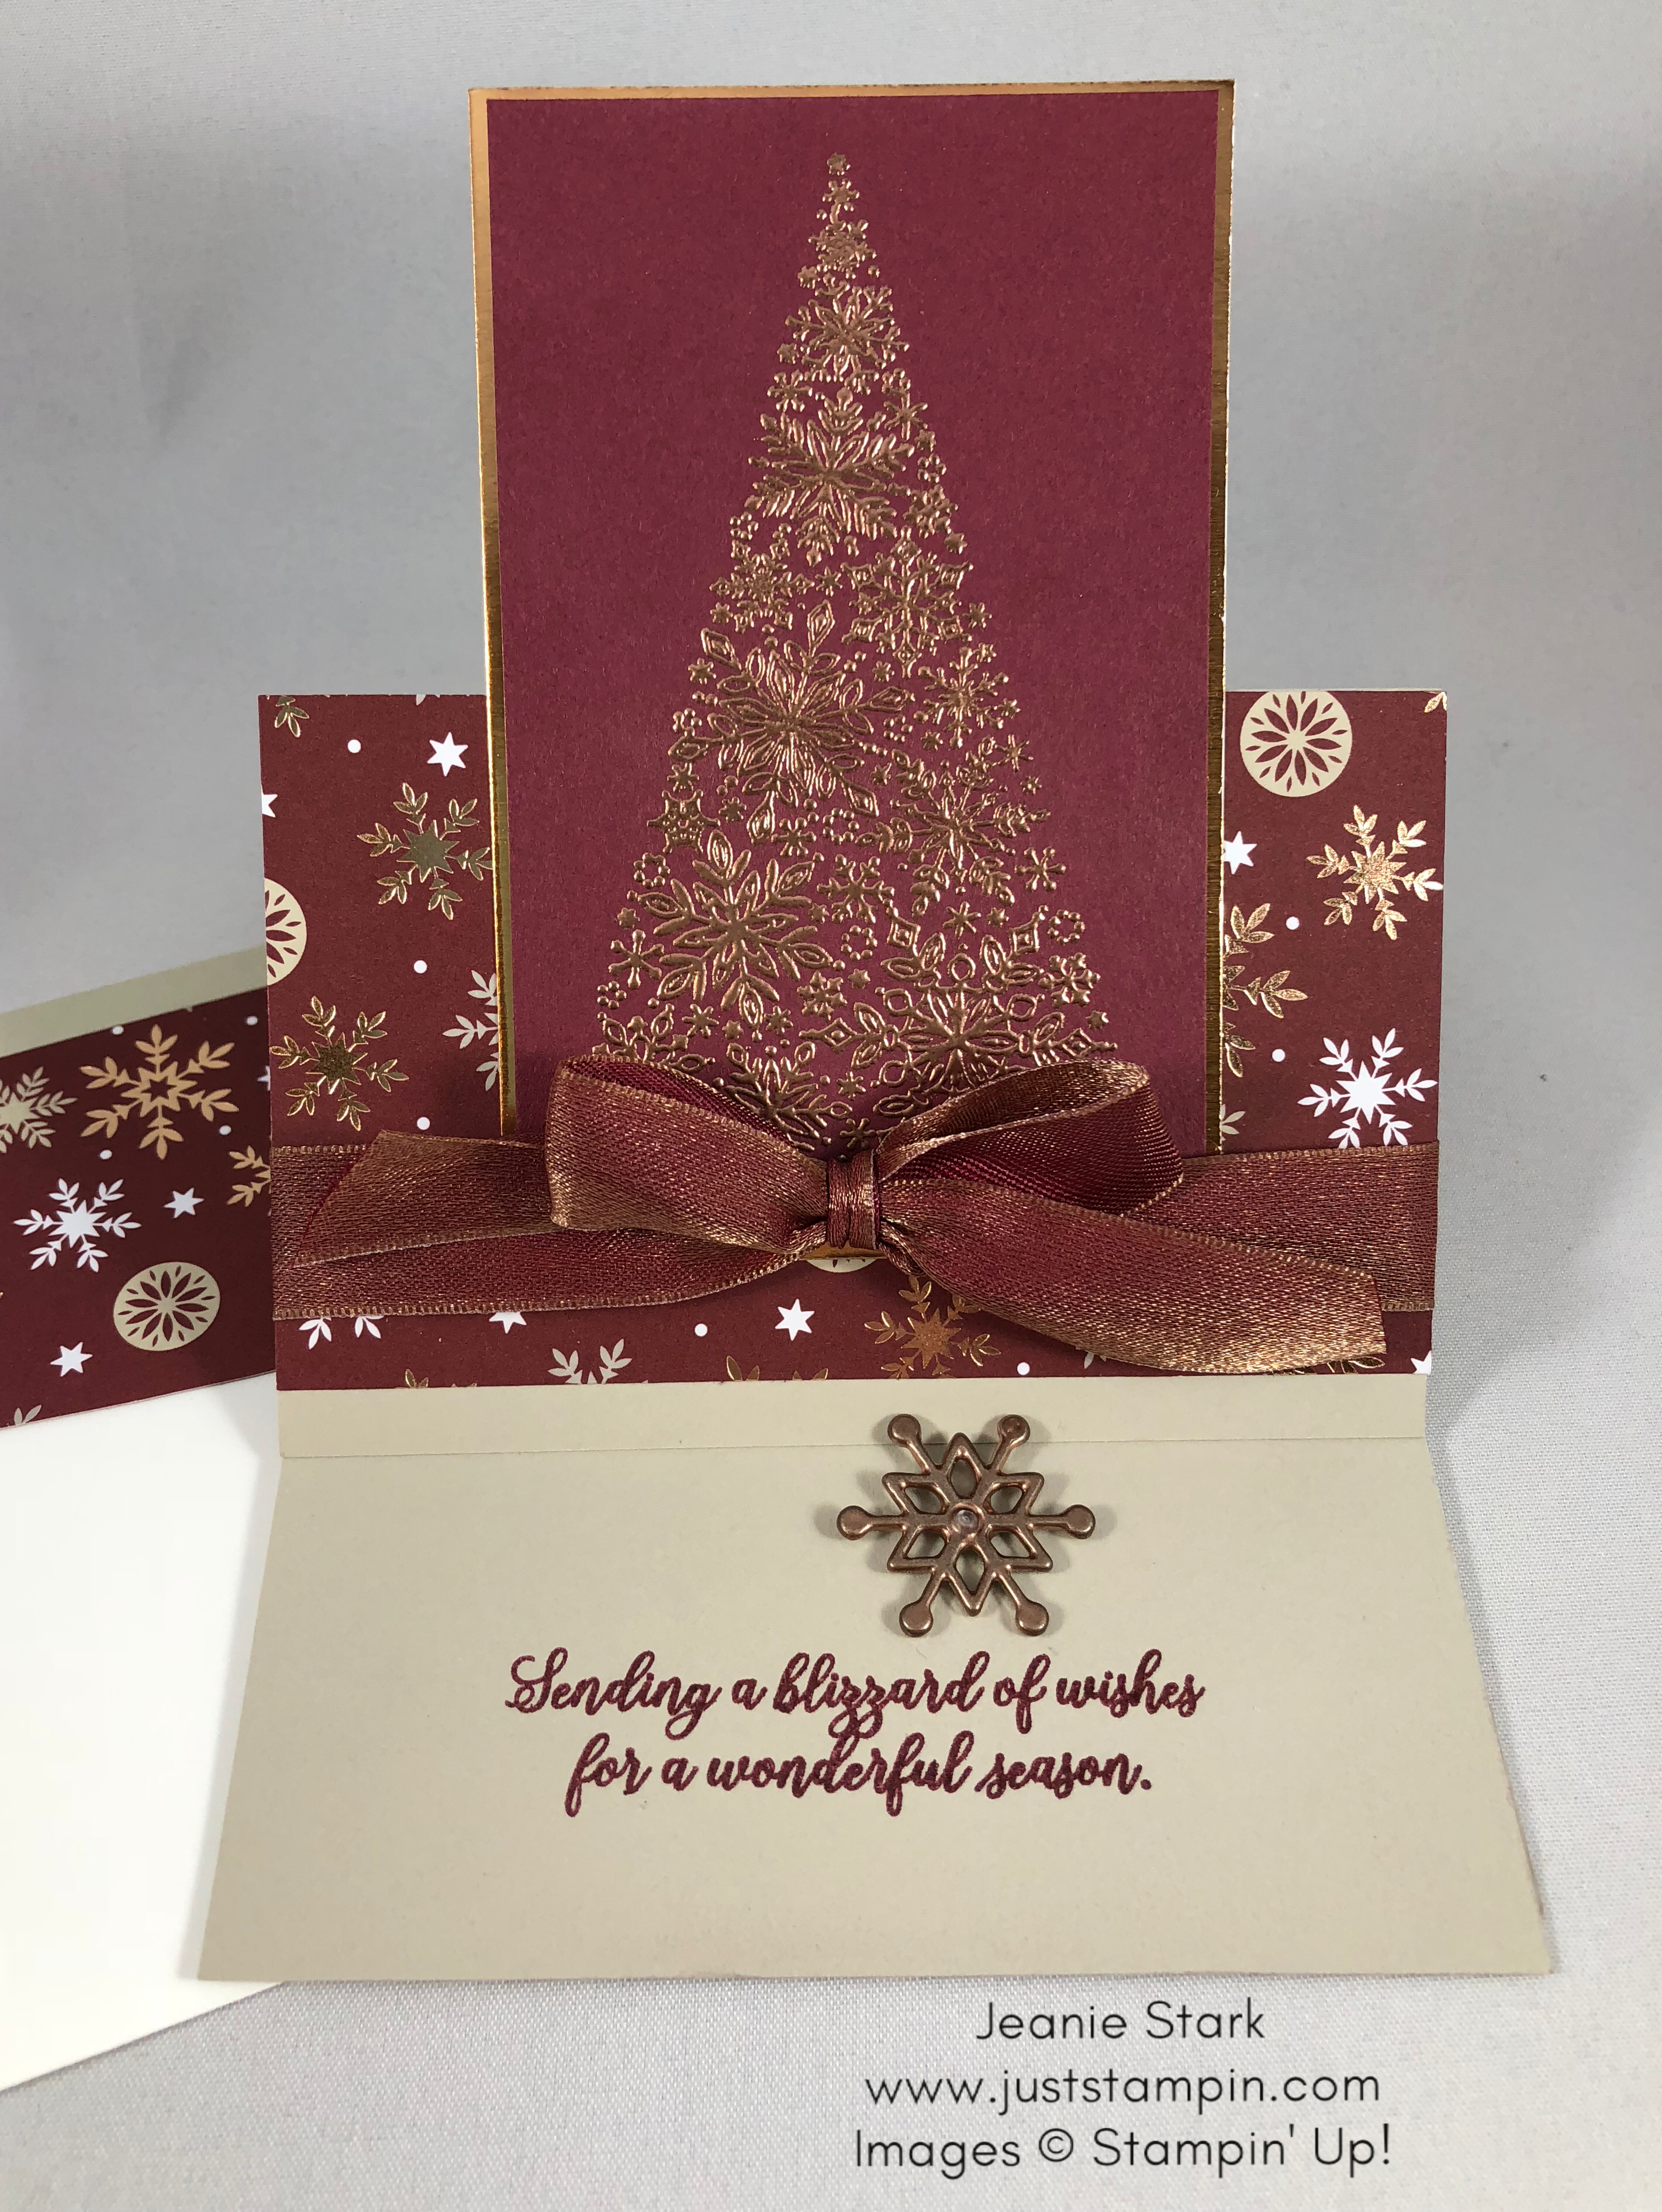
I love how this stamp set coordinates with the gorgeous Joyous Noel Specialty Designer Series Paper from the Holiday Catalog. This DSP and the Merry Merlot & Copper Reversible Ribbon I used on my card are from the Joyous Noel Suite (which is one of my favorites). I love the copper foil accents.

This easel fun fold is quick & easy to create! The Sahara Sand cardstock is cut at 4 1/4 x 11 and scored at 2 3/4 and 5 1/2.  I adhered a 2 1/2 x 4 1/4 piece of DSP just below the score line. The tree is heat embossed on Merry Merlot cardstock that measures 2 1/2 x 4 and layered on Copper Foil that is 2 5/8 x 4 1/8.  The layered image is adhered to the DSP only. *Don’t adhere the top portion as you want it to stand up when opened.

I wrapped the elegant ribbon around the card and tied a bow. I secured the bow at the base of the tree with a glue dot. Here’s a look at the card when it’s closed.
Stampin Up Joyous Noel and Snow is Glistening Fun Fold heat embossed Christmas card idea - Jeanie Stark StampinUp
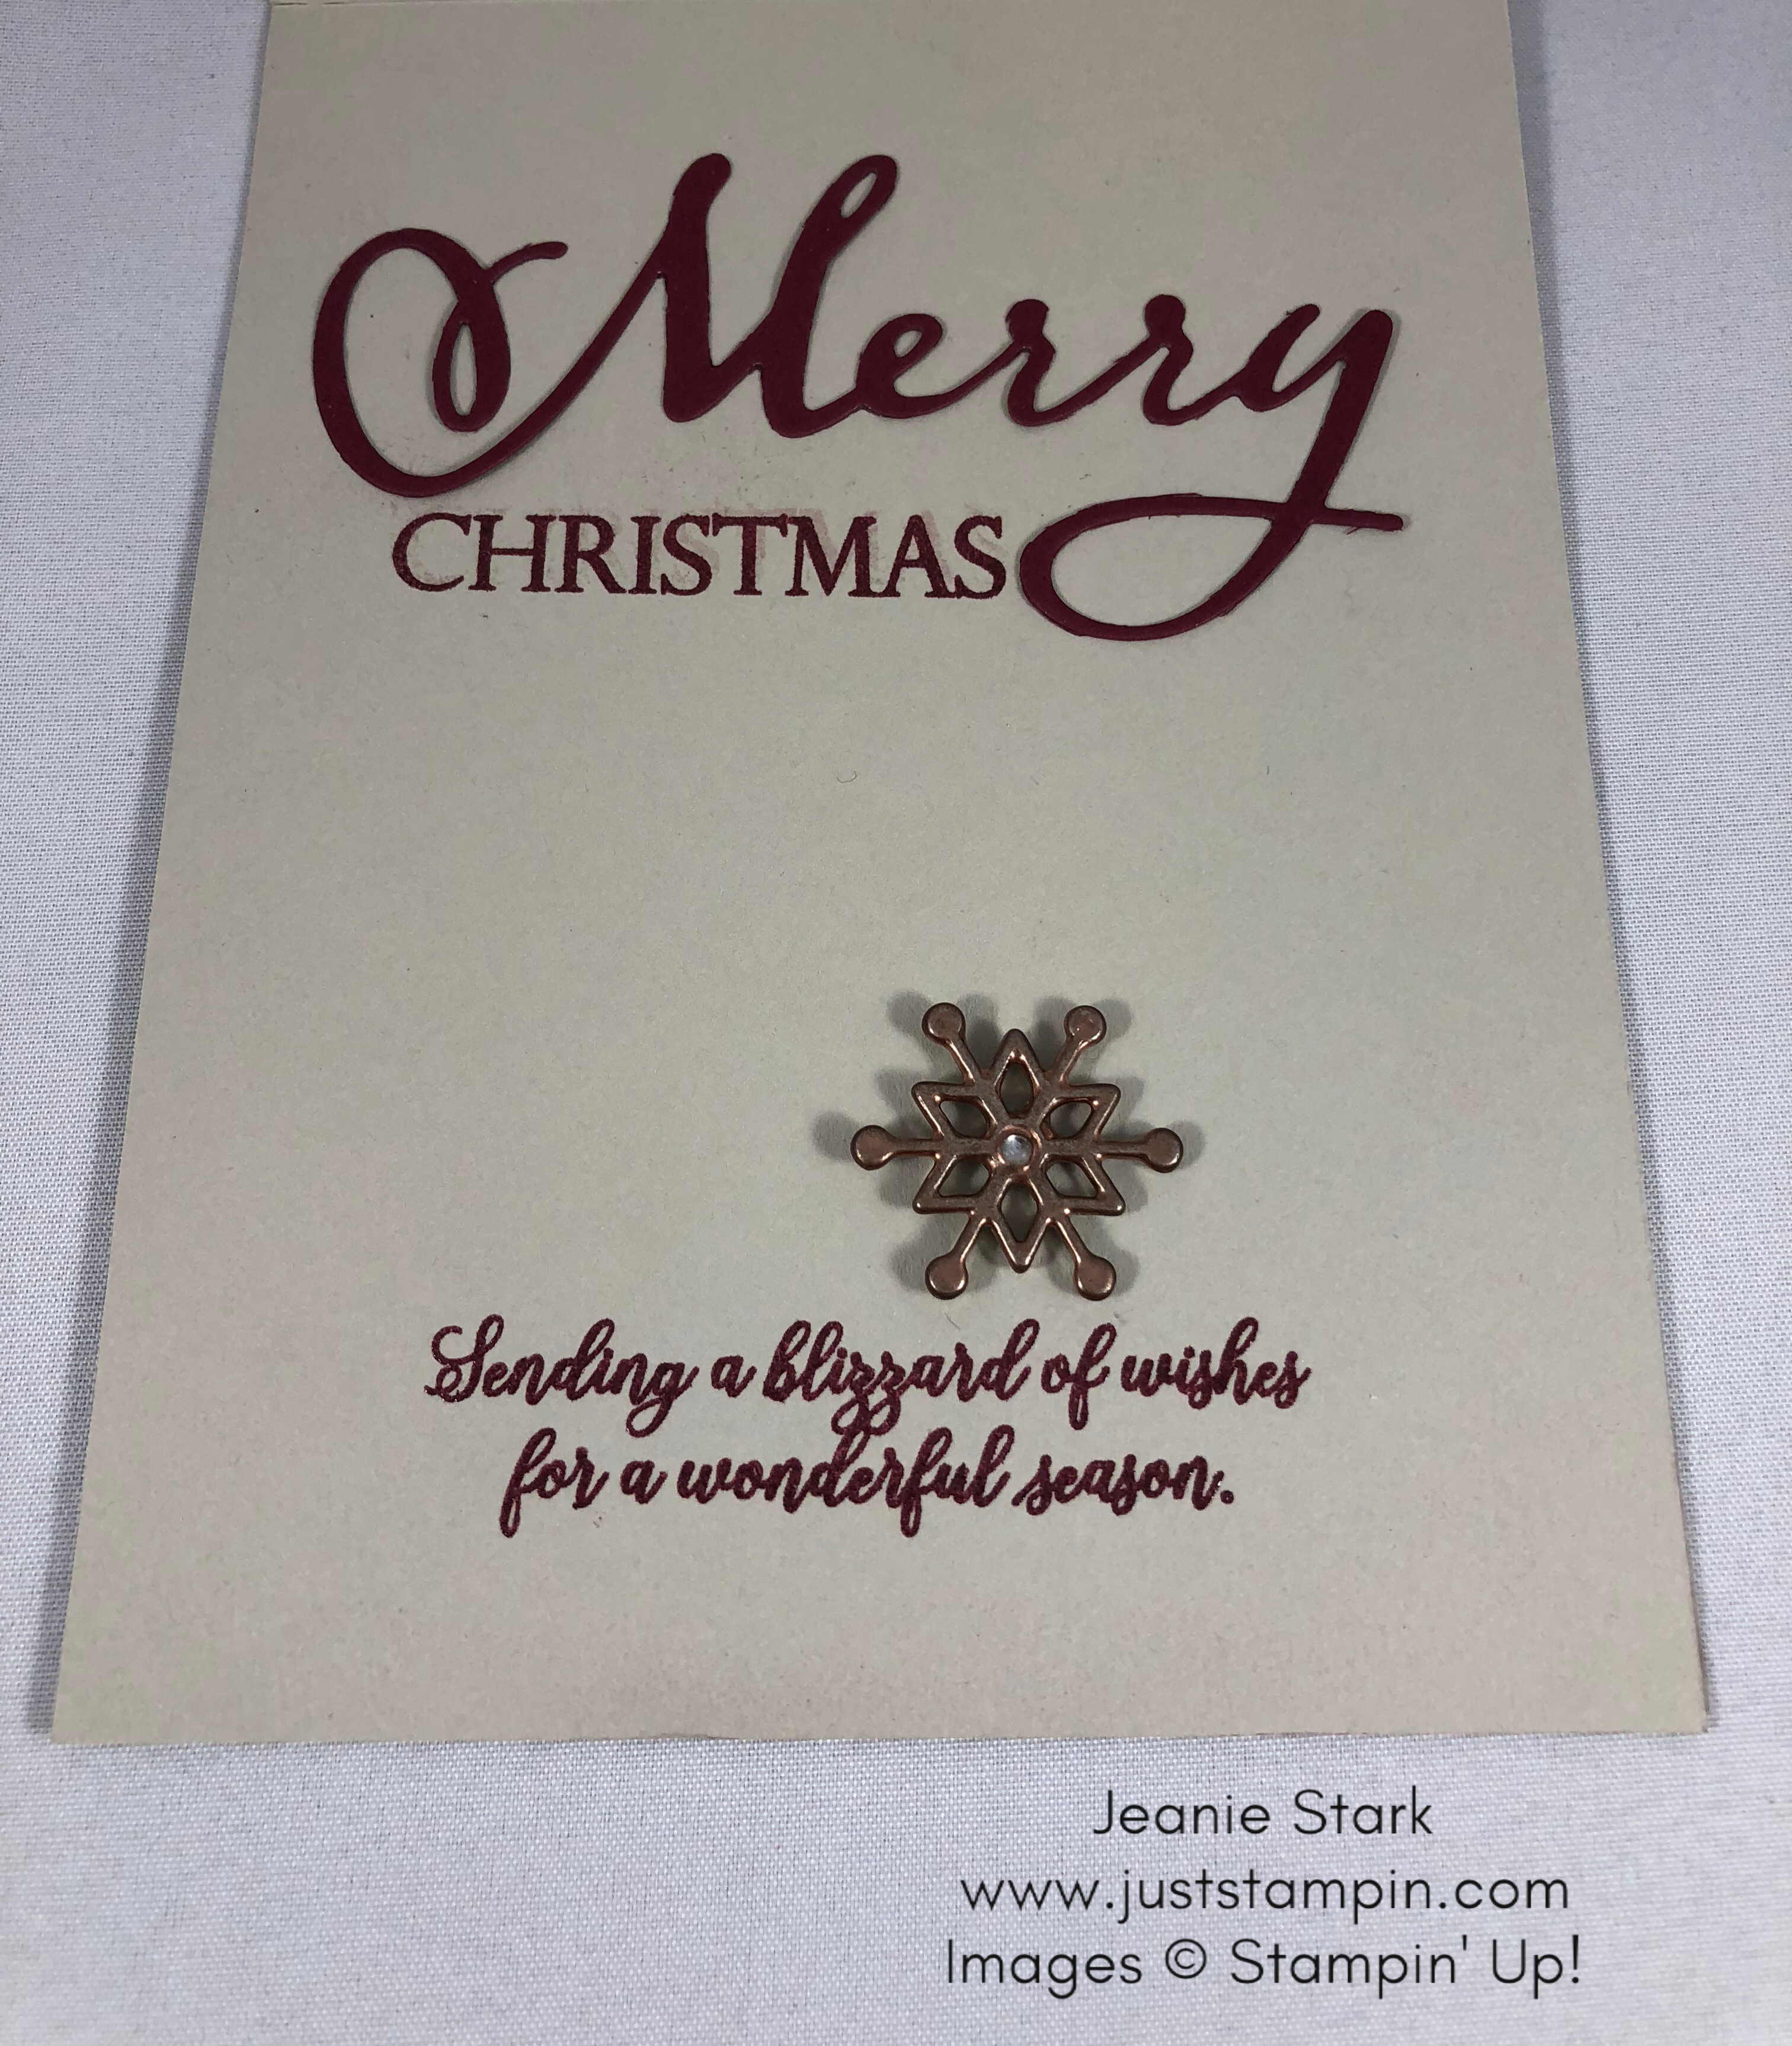
I love the inside of the card as much as the front! I cut the Merry die from the Merry Christmas Thinlits Dies and heat embossed the greeting.
Stampin Up Joyous Noel and Snow is Glistening Fun Fold heat embossed Christmas card idea - Jeanie Stark StampinUp
You can heat emboss sentiments in any color by simply stamping the sentiment in Versamark first, then ink, then sprinkle with Clear Embossing Powder. I love to watch the magic happen with the Heat Tool.  *Don’t forget to use the embossing buddy on the cardstock before you stamp to prevent the embossing powder from sticking to other areas of your card. I used Merry Merlot ink for the greetings. I wanted the snowflake to be copper so I put a glue dot on the back and used my paper piercing tool to hold it as I stamped it in the Versamark, then dipped it in the Copper Embossing Powder and heat set it with the Heat Tool. The raised snowflake holds the easel card up.
Stampin Up Joyous Noel and Snow is Glistening Fun Fold heat embossed Christmas card idea - Jeanie Stark StampinUp
I usually play around make more than one card when I’m creating and this was no exception.  I decided to switch up the sentiments and try the Merry die at the bottom.
Stampin Up Joyous Noel, Merry Christmas to All, and Snow is Glistening Fun Fold heat embossed Christmas card idea - Jeanie Stark StampinUp
I think this card would look pretty on a mantle or side table.
Stampin Up Joyous Noel, Merry Christmas to All, and Snow is Glistening Fun Fold heat embossed Christmas card idea - Jeanie Stark StampinUp
Which one do you prefer? I’d love to hear from you. Please leave a comment below.

SUPPLIES USED ON TODAY’S CARDS (CLICK ON ANY PRODUCT TO SHOP ONLINE):

Heat Tool

$30.00
Big Shot

$110.00
Glue Dots

$5.25


Remember… The Snowflake Showcase products are only available through November 30th (while supplies last). Trust me, you don’t want to miss out! I have more fun projects to share.  Click HERE to see more ideas and everything that is included in the showcase.
Snowflake Showcase header

Click HERE to view/print the Snowflake Showcase flyer.

Host Code Exclusive Offer! All orders placed through my online store are eligible for my FREE monthly gifts (card kits and more!). Please use the current host code.  *If your order is $150 or more, do not use this code as You become the hostess and get the Rewards! Click HERE to shop.

November Host Code: 9KYTA3C4

Have a great day!

Just Stampin’

Jeanie

Are you celebrating your birthday this month?  I offer FREE shipping (and a birthday card) on any Stampin’ Up! product purchase of $50 or more placed through my online store during your birthday month (in addition to my monthly thank you gift!) Please use the current host code.

*Don’t forget to order your Just Stampin’ Card Kit and 3D Project Buffet To Go! Click HERE for all the details.

Stepping It Up for Susan

Stampin Up Daisy Delight fun fold easel card. For lots of fun fold card inspiration check out my ABC Fun Folds at www.juststampin.com.

My friend Susan is away on a much deserved and earned Stampin’ Up! vacation. While she is away she asked team members to make “Simple Saturday” and “Step It Up Sunday” cards to share on her blog (www.simplestampin.com).  I am always up for a challenge and teamed up with my very talented friend and fellow demonstrator,  Ramsey.  I thought I had the easy job as Ramsey agreed to come up with a card and I just had to “step it up”. Well, when Ramsey sent me a photo of her card my first thought was, WOW! This is a beautiful card and already stepped up (with layers, double punched daisy, and a faceted gem). How am I going to “Step It Up?

Here’s Ramsey’s card:

My solution was to literally “Step It Up”.  You know how I love fun fold cards so I decided to make an easel card.

Stampin Up Daisy Delight fun fold easel card. For lots of fun fold card inspiration check out my ABC Fun Folds at www.juststampin.com.

This is a really easy card to make. The base of my card measures 4 1/4 x 5 1/2 Daffodil Delight, 4 1/8 x 5 3/8 Old Olive, and 4 x 5 1/4 Whisper White with a 1 x 4 strip of DSP from the Color Theory Designer Series Paper Stack. The sentiment is from Birthday Blooms, stamped in Old Olive, cut with the Layering Ovals Framelits, and popped up with Stampin’ Dimensionals. To make the easel I cut a piece of 3 x 6 1/4 Daffodil Delight cardstock and scored it at 2 3/4 and 5 1/2. I adhered it to the Daffodil Delight card base before adding the old olive and whisper white layers.

The stems are stamped on a piece of 2 3/4 x 5 1/4 Whisper White and layered on a piece of 2 7/8 x 5 3/8 Old Olive. I stamped the daisy on the Whisper White and then twice on scraps of Daffodil Delight. I punched out both yellow daisies with the Daisy Punch and offset them before adhering on top of the stamped image. I layered the stamped images on a piece of Old Olive that measures 2 7/8 x 5 3/8.  I wrapped some Crushed Curry Mini Chevron Ribbon around this layer and tied a bow. I adhered the layered image to the bottom of the daffodil delight (below the score line) so the image will prop up behind the sentiment.

My grasses did not turn out as nice as Ramsey’s (and I think she may have used Pear Pizzazz ink or stamped off). The ribbon serves to step it up with some added texture (and cover up my inky mistake).

Stampin Up Daisy Delight fun fold easel card. For lots of fun fold card inspiration check out my ABC Fun Folds at www.juststampin.com.

Stamp Sets: Daisy Delight, Birthday Blooms  Ink: Daffodil Delight, Old Olive  Papers: Daffodil Delight, Old Olive, Whisper White, Color Theory Designer Series Paper Stack Tools & Accessories: Daisy Punch, Layering Ovals Framelits, Crushed Curry Mini Chevron Ribbon, Gold Faceted Gems, Stampin’ Dimensional

Stampin Up Daisy Delight fun fold easel card. For lots of fun fold card inspiration check out my ABC Fun Folds at www.juststampin.com.

Many thanks to Ramsey for her card inspiration and to Susan for this fun challenge! If you don’t already follow Susan’s blog, check it out at www.simplestampin.com. You can click HERE to see more of Ramsey’s cards on Pinterest. You can see my cards on Pinterest HERE. Make sure you follow us for lots of card inspiration!

Have a wonderful day!

Just Stampin’

Jeanie

bonus days

Click HERE to shop and earn Bonus Days coupons! To get a FREE thank you gift from me, simply enter the host code at checkout when shopping from my online store.

Current Host Code: TUBYVJ69

bonus days 2

Bonus Days are back! For every $50 you spend between July 1–31 (before shipping and tax), you’ll get a $5 Bonus Days coupon that you can use August 1–31.

  • There is no limit to the number of coupons participants can receive per order or throughout the duration of the promotion.
  • An email address is required to participate; Bonus Days coupon codes can only be delivered via email.
  • All order types qualify for this promotion excluding Starter Kits.
  • Click here for more details.

Feel free to email me (j.stark@myactv.net) if you have any questions!

 Join my DOstamperSTARS team during Christmas In July, Dawn Olchefske #dostamping

Our Christmas in July promotion makes it easier than ever to sign up to be a demonstrator (hobby or business demonstrator)!

When you join my team in July…

  • You will receive a FREE Essentials Gift Pack with your Starter Kit ($52 value)
    • 118485 D Block (2 of them)
    • 130148 Grid Paper
    • 103579 Paper Snips
    • 104332 SNAIL Adhesive
    • 102300 Bone Folder
  • PLUS, to give you a taste of the perks of being a demonstrator, Stampin’ Up! will also include the Carols of Christmas Stamp Set from the holiday catalog for FREE ($20 value)

It’s Christmas in July!...Stampin’ Up!® - Stamp Your Art Out! www.stampyourartout.com

With so many basic items provided, you’ll be able to get your brand, new business/hobby off to a fast start—and spend your Starter Kit dollars (choose $125 for only $99) on things like your favorite stamp sets and accessories!

Fine print:

  • This offer is good for any recruit who joins during the month of July, including former demonstrators.
  • All Starter Kit orders must be submitted by 11:59 PM (MT) on July 31 to be eligible for this promotion.
  • Essential Gift Pack items (& Carols of Christmas stamp set) may not be exchange for other products.
  • Please note: The Essentials Gift Pack will automatically be added to the Starter Kit.

Click HERE for more information or click below to Join the Fun!

join-now

Click HERE to Join Now!

I look forward to welcoming you to my team!

E is for Elliptical Easel Fun Fold

It’s Ariane again, this time to showcase my mom’s Mother’s Day card. As she is in the middle of her fun fold series, I tried to follow suit and created this elliptical easel card.

img_4327

The nice part about this card is you can use any sentiment.

img_4320.jpg

The first thing to do is to prepare the base. I used a pool party card base and placed the scalloped oval framelit over it with a tiny bit at the top overhanging. You want the top to be connected.

img_4321

Then you want to cut out another scalloped oval which will become the card front. You also want to score the top of the card so it can fold. Make sure when you score you flip the card inside out so the card folds like a mountain and not a valley.

img_4328

To do the card top, I cut out a whisper white oval using the largest oval framelit and layered it on top. I used a stamp from Paper Pumpkin for the sentiment. To do the cascading flowers I used several punches to punch an assortment of flowers in So Saffron and Pink Pirouette.  I popped up a few using dimensionals. For the finishing touch, I added three pearls, which I forgot to picture, whoops (they can be seen in the first picture).

All that is left is to assemble all the pieces. First, you want to add another whisper white oval to the inside of the card. I left it blank so I could write a message. You could stamp a message as well. Then you want to adhere the card front and the card base together. To do this only place glue below the crease on the top of the card base. Then try to line up the scallops and place the card base on top. The final step is to create something to prop up the card front. I used a leftover flower, attached it to a dimensional and then placed it inside the card. That’s it!

img_4327

The best part about this card is it is so easy to modify. A few years ago, for Valentine’s Day, I used this technique with the heart framelits to make my parents Valentine’s cards. My mom has it on display in her craft room

If you want to see more and get directions to make a traditional easel card, Click HERE to see one my mom made for our Christmas card.

Hope you have a day full of stamping.

Ariane Stark