
Welcome to Day 12 of my 12 Days of Christmas! I hope you have enjoyed this series of projects as much as I have loved creating and sharing it with you! I hope you have been inspired along the way.
Today’s project is a simple thank you note card. Every since my children were little I always put a set of thank you cards in their stockings at Christmas so they could send notes to their grandparents, aunts, uncles, etc. to thank them for their gifts. (A set of these would also make a great teacher gift!)
My “go to” for thank you cards has always been Stampin’ Up! note cards & envelopes. They come scored and ready to decorate and are the perfect size to add a handwritten note inside.
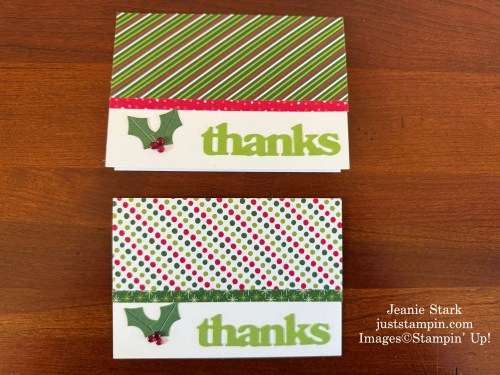
A favorite of mine this season has been the Take A Bow 6×6 Designer Series Paper. I love that you get 12 each of 4 double sided designs. I have been able to create many different projects and coordinate cards with gifts, tags, etc. And the designs are just so bright & cheery!
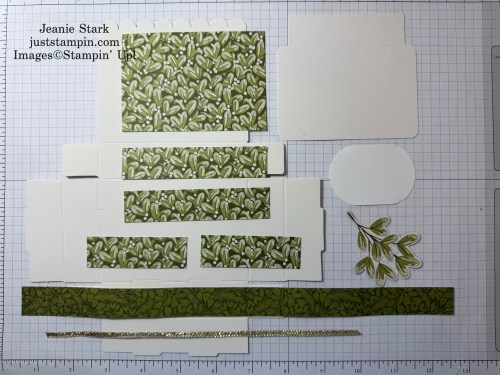
If you ordered my 12 Days of Christmas Kit to Go you received everything you need to craft along with me. Here’s a look at what was included in the kit for today’s project.
To Create this Project
- Card Base: Basic White Note Cards & Envelopes
- DSP (Take A Bow): 2 x 5, 2 @ 1⁄4 x 6
- Garden Green: scraps to die cut holly from Hang An Ornament Dies
- Granny Apple Green: Die Cut Thanks from Paper Pumpkin Thanks & Beyond Dies
- Cherry Cobbler Adhesive Backed Berries
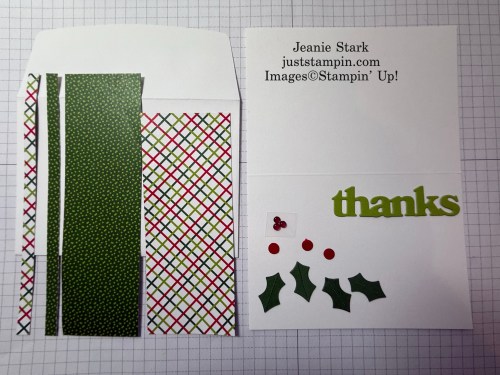
Directions:
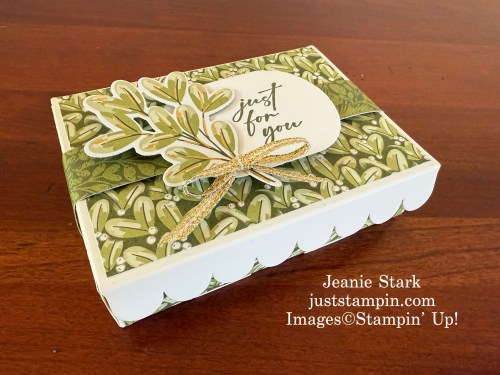
- Adhere 2 x 5 DSP to front of note card along the top.
- Adhere DSP strip below DSP layer.
- Adhere die cut Thanks along bottom right side.
- Add Holly and berries on front of card. *I included extra holly and punched berries for the inside of the card if desired.
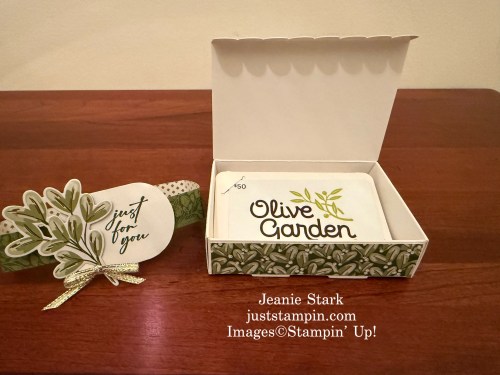
- Add DSP strip and layer to envelope flap and trim to fit.

I hope you have enjoyed my 12 Days of Christmas craft along. I do have another project to share with you tomorrow. I included a little thank you gift in with the 12 Days of Christmas Craft Along Kit. Check back tomorrow to see it.
Have a great day!!! Thanks for stopping by!
Just Stampin’
Jeanie
*If your order is under $150 please add the current host code to your order.
Host Code: YHMBWKAW
CLICK HERE TO SHOP or click on the product images below.
Here is your shopping list for today’s project:
|
|
|
|
|
|
|
|
|
|
|
![Basic White Note Cards & Envelopes [ 159232 ]](https://assets1.tamsnetwork.com/images/EC042017NF/159232s.jpg "Basic White Note Cards & Envelopes [ 159232 ]")
![Hang An Ornament Dies [ 164089 ]](https://assets1.tamsnetwork.com/images/EC042017NF/164089s.jpg "Hang An Ornament Dies [ 164089 ]")
![Thanks & Beyond Dies [ 164397 ]](https://assets1.tamsnetwork.com/images/EC042017NF/164397s.jpg "Thanks & Beyond Dies [ 164397 ]")
![Take A Bow 6" X 6" (15.2 X 15.2 Cm) Designer Series Paper [ 164309 ]](https://assets1.tamsnetwork.com/images/EC042017NF/164309s.jpg "Take A Bow 6\" X 6\" (15.2 X 15.2 Cm) Designer Series Paper [ 164309 ]")
![Granny Apple Green 8-1/2" X 11" Cardstock [ 146990 ]](https://assets1.tamsnetwork.com/images/EC042017NF/146990s.jpg "Granny Apple Green 8-1/2\" X 11\" Cardstock [ 146990 ]")
![Garden Green 8-1/2" X 11" Cardstock [ 102584 ]](https://assets1.tamsnetwork.com/images/EC042017NF/102584s.jpg "Garden Green 8-1/2\" X 11\" Cardstock [ 102584 ]")
![Cherry Cobbler & Pearl Adhesive Backed Berries [ 164119 ]](https://assets1.tamsnetwork.com/images/EC042017NF/164119s.jpg "Cherry Cobbler & Pearl Adhesive Backed Berries [ 164119 ]")
![Stampin' Seal [ 152813 ]](https://assets1.tamsnetwork.com/images/EC042017NF/152813s.jpg "Stampin' Seal [ 152813 ]")
![Multipurpose Liquid Glue [ 110755 ]](https://assets1.tamsnetwork.com/images/EC042017NF/110755s.jpg "Multipurpose Liquid Glue [ 110755 ]")
![Paper Trimmer [ 152392 ]](https://assets1.tamsnetwork.com/images/EC042017NF/152392s.jpg "Paper Trimmer [ 152392 ]")
![Mini Stampin' Cut & Emboss Machine [ 150673 ]](https://assets1.tamsnetwork.com/images/EC042017NF/150673s.jpg "Mini Stampin' Cut & Emboss Machine [ 150673 ]")

CLICK HERE TO SHOP Last Chance Products
Click HERE TO SHOP KITS COLLECTION *2 New Kits Added
*These would make great Christmas gifts for crafty friends & family!


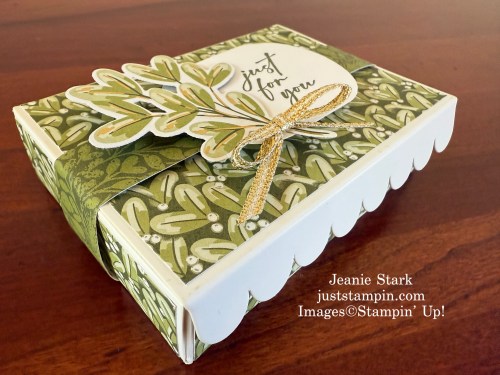


![Scalloped Gift Card Boxes [ 161751 ]](https://assets1.tamsnetwork.com/images/EC042017NF/161751s.jpg "Scalloped Gift Card Boxes [ 161751 ]")
![Season Of Green & Gold 12" X 12" (30.5 X 30.5 Cm) Specialty Designer Series Paper [ 164324 ]](https://assets1.tamsnetwork.com/images/EC042017NF/164324s.jpg "Season Of Green & Gold 12\" X 12\" (30.5 X 30.5 Cm) Specialty Designer Series Paper [ 164324 ]")
![Golden Greenery Dies [ 164116 ]](https://assets1.tamsnetwork.com/images/EC042017NF/164116s.jpg "Golden Greenery Dies [ 164116 ]")
![Unbounded Love Photopolymer Stamp Set (English) [ 163378 ]](https://assets1.tamsnetwork.com/images/EC042017NF/163378s.jpg "Unbounded Love Photopolymer Stamp Set (English) [ 163378 ]")
![Basic White 8 1/2" X 11" Cardstock [ 159276 ]](https://assets1.tamsnetwork.com/images/EC042017NF/159276s.jpg "Basic White 8 1/2\" X 11\" Cardstock [ 159276 ]")
![Mossy Meadow Classic Stampin' Pad [ 147111 ]](https://assets1.tamsnetwork.com/images/EC042017NF/147111s.jpg "Mossy Meadow Classic Stampin' Pad [ 147111 ]")
![Modern Oval Punch [ 162234 ]](https://assets1.tamsnetwork.com/images/EC042017NF/162234s.jpg "Modern Oval Punch [ 162234 ]")
![Gold & Silver 1/8" (3.2 Mm) Trim Combo Pack [ 161633 ]](https://assets1.tamsnetwork.com/images/EC042017NF/161633s.jpg "Gold & Silver 1/8\" (3.2 Mm) Trim Combo Pack [ 161633 ]")
![Mini Glue Dots [ 103683 ]](https://assets1.tamsnetwork.com/images/EC042017NF/103683s.jpg "Mini Glue Dots [ 103683 ]")
![Stampin' Dimensionals [ 104430 ]](https://assets1.tamsnetwork.com/images/EC042017NF/104430s.jpg "Stampin' Dimensionals [ 104430 ]")