
![]()
Hello, welcome to the Stampin’ Pretty Pals’ Blog Hop! This month our Design Team created projects where “It’s the Sentiment that Counts.” We hope you enjoy and will be inspired by them! Don’t forget to leave comments! We love hearing from you. At the end of my post, you will find the full line-up to help you “hop” along from Pal to Pal.
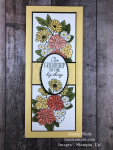
During these challenging times it seems more important than ever to reach out to others to let them know you’re thinking of them. Many of my former coworkers, students, and teacher friends could use a little encouragement as they head back to school either virtually or in person. Even though today’s technology has made chalkboards a thing of the past, I wanted to create some fun chalkboard easel cards for teachers or students.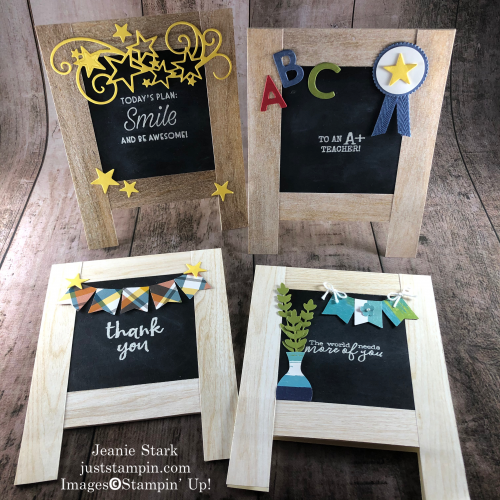
I used In Good Taste Designer Series Paper for these Chalkboard Easel Cards. You could also use the wood grain pattern found in the 6 x 6 Designer Series Paper Color Collections or make your own wood grain look with cardstock and the Pinewood Planks 3D Embossing Folder for some added texture.
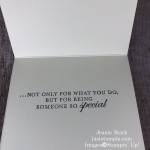
Everyone loves to feel appreciated! I combined sentiments from several different stamp sets for my cards today. *You can see a complete list of products used below. Here’s a close up of each one.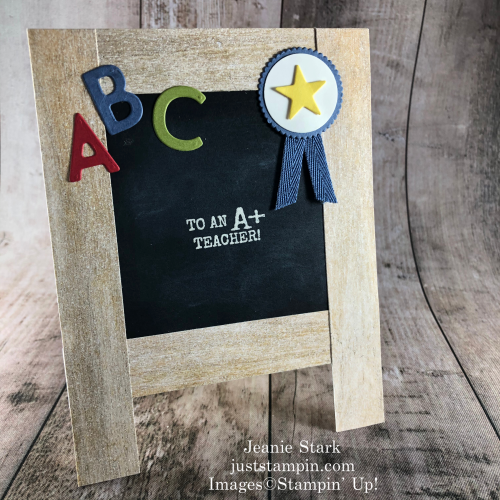
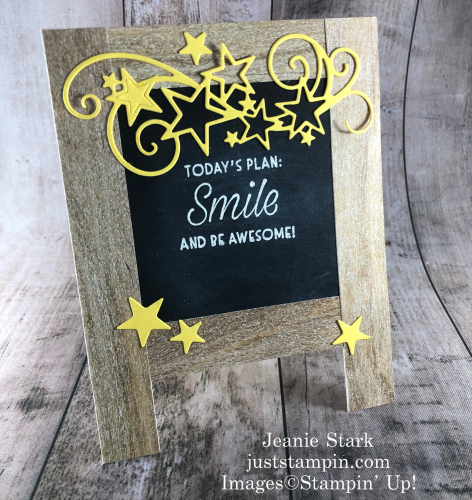
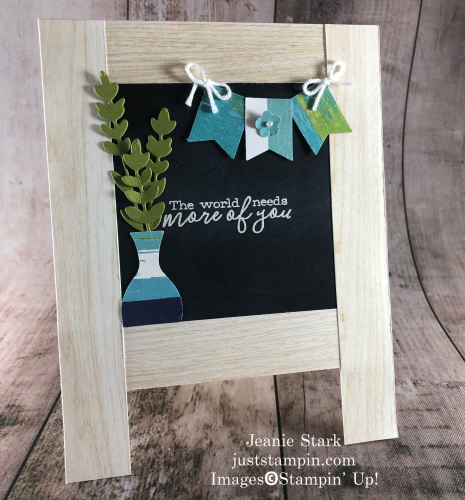

You could use a variety of sentiments for this card! It would be great for a graduation, teacher birthday or retirement, congratulations, welcome new teacher, etc.! I bet you can think of someone to make/send these cards to.

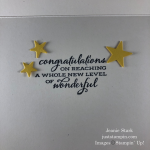


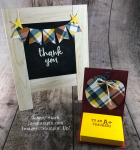
*Tip: Chalkboard Technique – To get the chalkboard look I heat embossed the sentiment using Versamark and white embossing powder. Then I used a sponge to dab some Whisper White Craft Ink on the black around the sentiment. Swirl in a circular motion as if you were erasing a chalkboard.
FYI…I have one of these chalk board easels that I used in my classroom.

Check back tomorrow for the complete tutorial and more ideas!
More inspiration awaits! Use the Blog Hop Line-up below to visit the rest of this month’s Design Team. My fellow Pals are excited to show you what they’ve created! Mark your calendars for our next blog hop on October 14th when our theme is “Tag, You’re It!” Participants will showcase tags or 3D items that will be great for gifts for any occasion. Don’t miss the fun! Until then, please stay safe and have fun in your craft room.
Stampin’ Pretty Pals’ Blog Hop Line-up
- Mary Fish at Stampin’ Pretty
- Tricia Chuba at ButterDish Designs
- Jeanie Stark at Just Stampin’
- Melissa Seplowitz at The Stamping Ninja
- Jen Roque at Stamp Camp with Jen
- Rae Harper Burnet at Wild West Paper Arts
- Jackie Beers at Blue Line Stamping
- Karen Hallam at Karen’s Stamping Habit
- Deb Walker at Deb Stamps Life
- Michelle Gleeson at StampinMojo
- Peggy Noe at Pretty Paper Cards
- Sue Jackson at Just Peachy Stamping
- Mary Hanson at Up North Stampin’
- Debbie Mageed at Secrets to Stamping
- Leah O’Brien at Honey Bee Stamping & More!
- Dacia Smith at My Creative Days
- Su Mohr at Aromas And Art
- Diana Carr at The Secret Life of Paper
- Stesha Bloodhart at Stampin’ Hoot!
- Christine Eck at Dances With Hooves Paper Design
- Beth McCullough at Stamping Mom
- Wendy Klein at Doggone Delightful Stampin’
- Ann Murray at Murray Stamps INK
- Pamela Sadler at Stampin’ Pink Rose
- Lisa Ann Bernard at Queen B Creations
- Lynn Kolcun at Avery’s Owlery
Have a great day! Stay Safe! Stay well!
Just Stampin’
Jeanie
Product List (Click on image to shop my online store.)
|
|
|||
|
|
|||
|
|
|||
|
|
|
Whisper White Craft Stampin’ Pad
[101731]
$8.00
|
|
|
|
|
|
|
|
|
|
|
")
")
")

")

")


")
 2020–2022 In Color Ribbon")


")


 To make sure you’re shopping with me, click
 ")


")
")
")

")