X is for A Little Foxy DSP

a-little-foxy-dsp

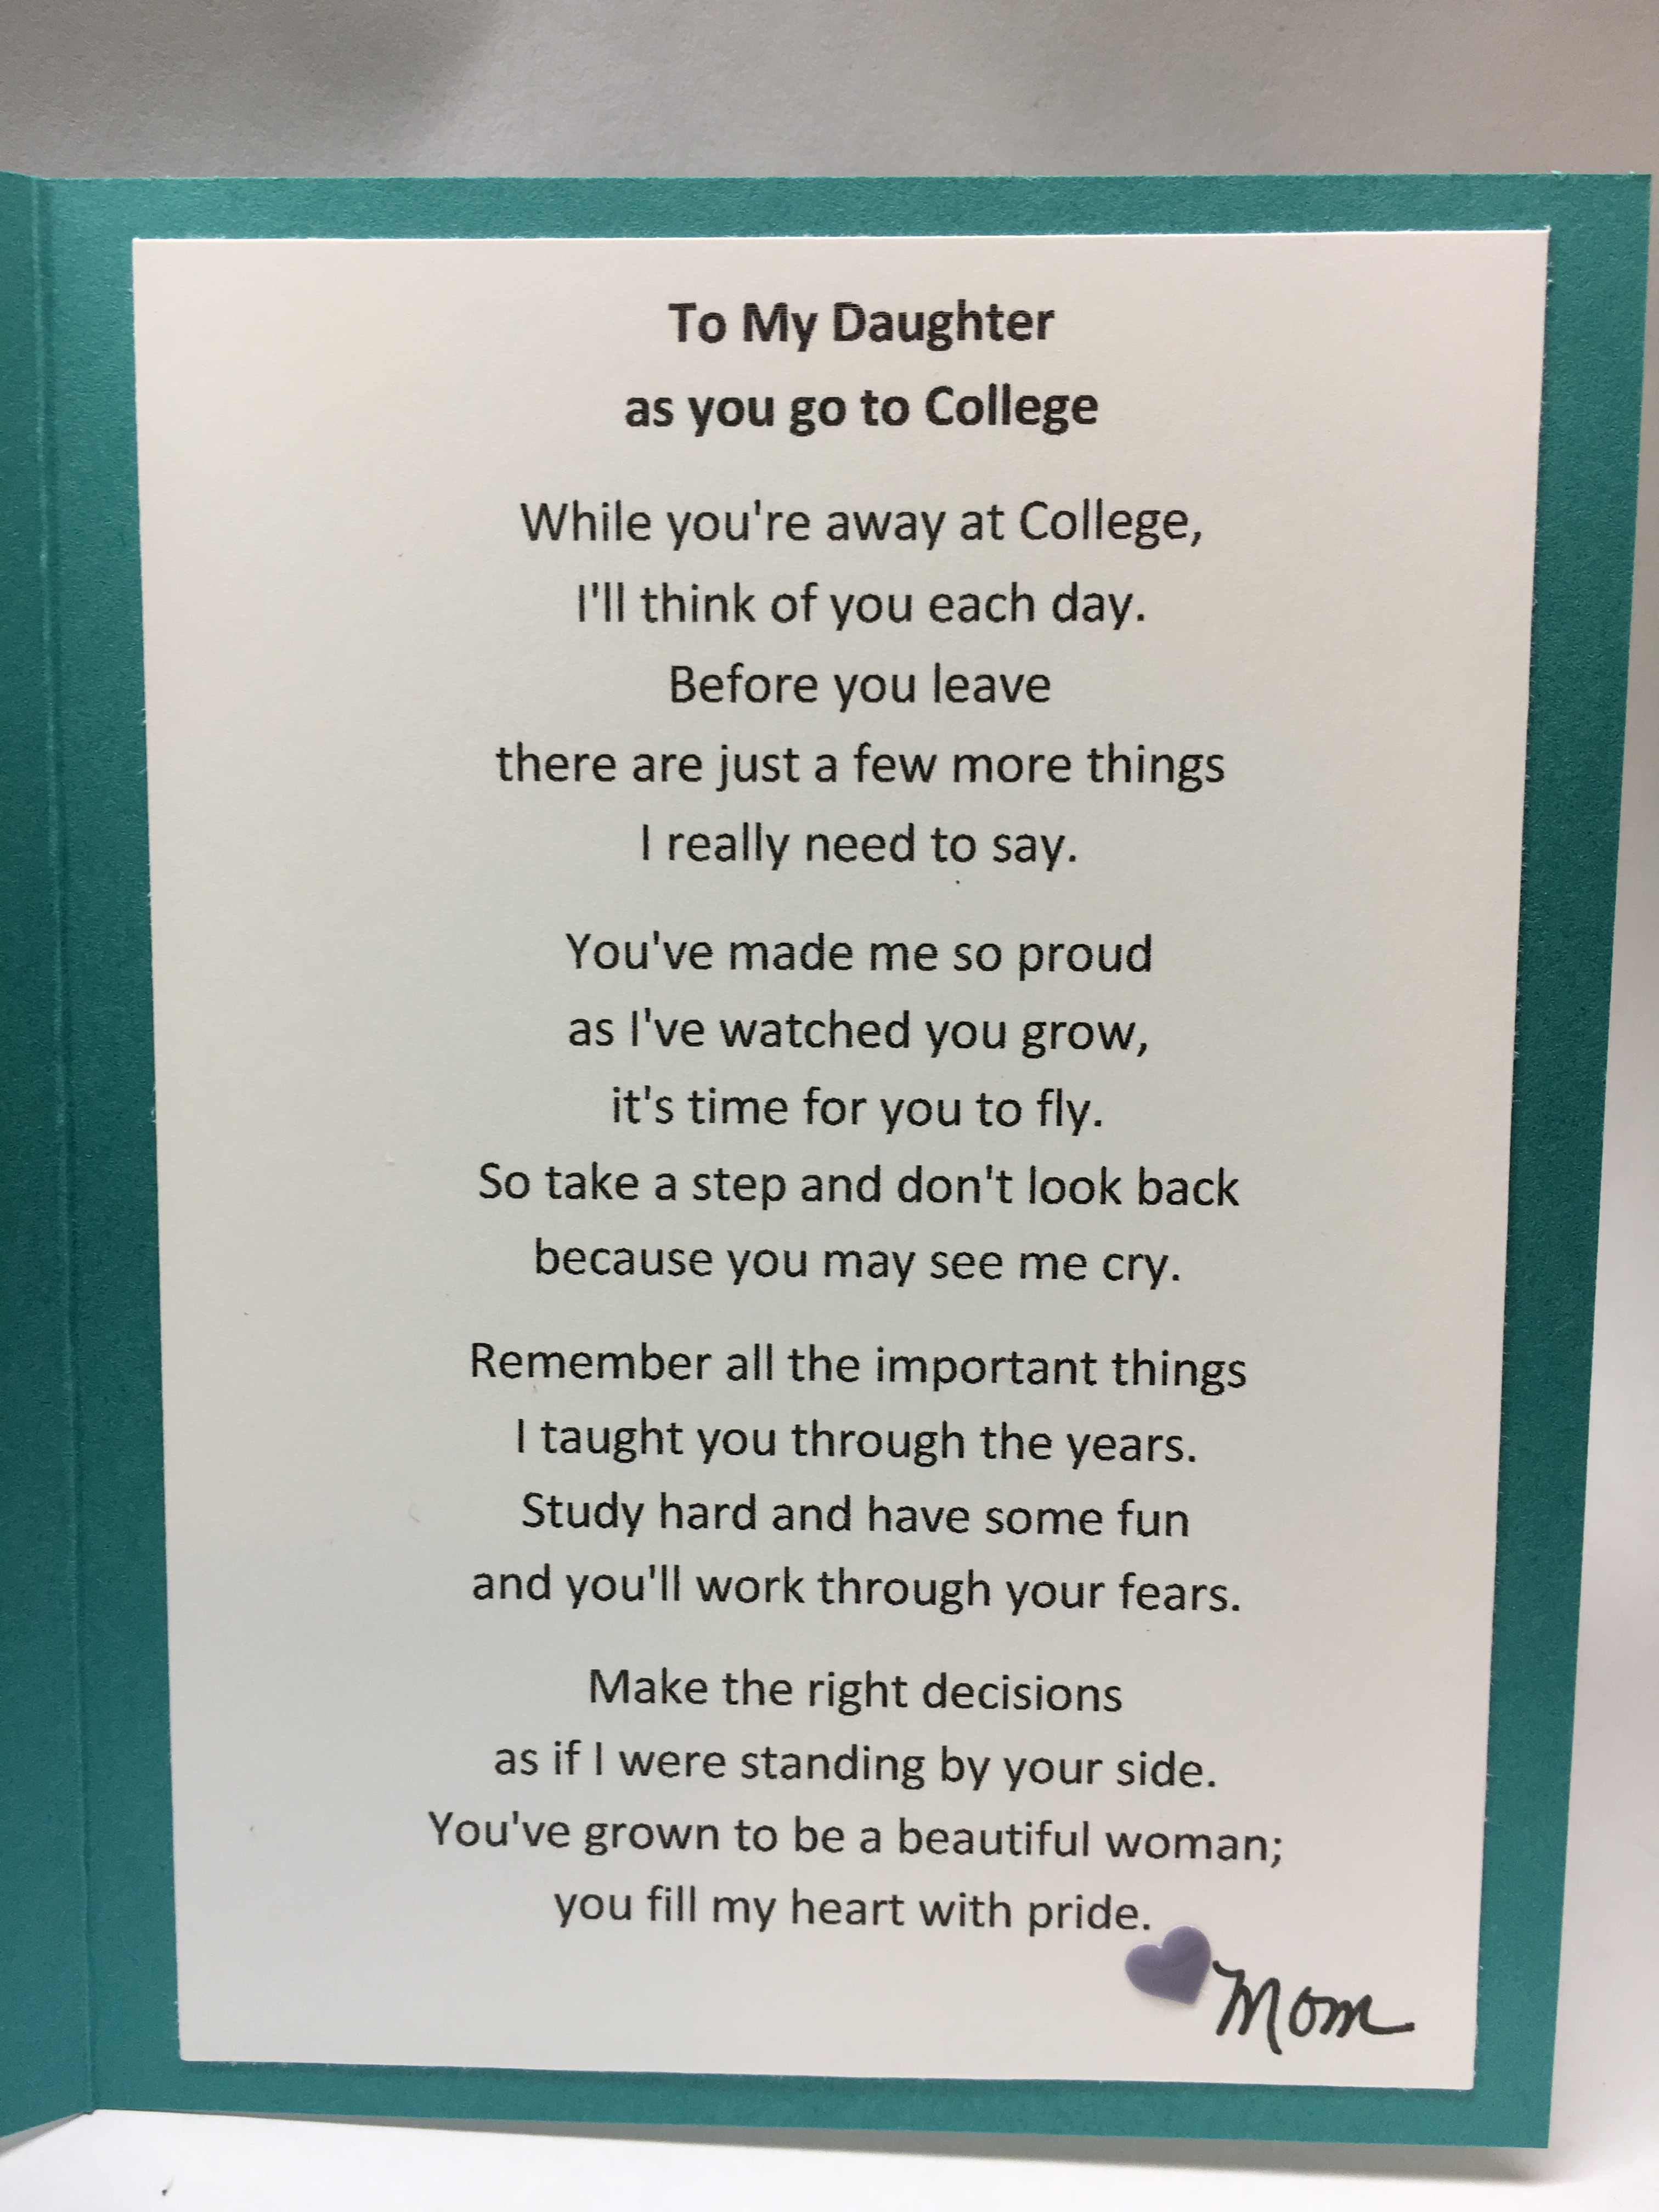
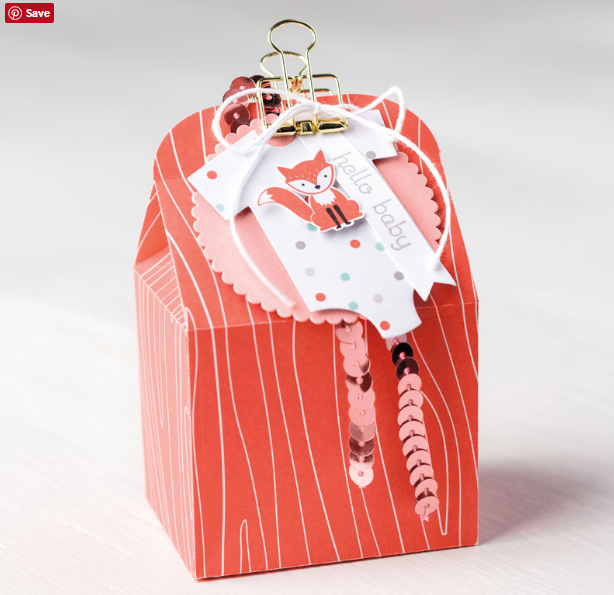
Welcome to my ABC’s of DSP. Today I am showcasing A little FoXy Designer Series Paper Stack. (OK so I may be stretching it a bit for the letter x but when I teach the letter X to my Pre-K students we say “X as in Fox”.)  This paper stack has 48 sheets: 4 each of 12 double-sided 6 x 6 designs. It coordinates with Calypso Coral, Pool Party, and Smoky Slate cardstock. I used the Foxy Friends Stamp Set and Fox Builder Punch along with A Little Foxy DSP to create this card and treat for my daughter (from her cat LOL).

img_5849

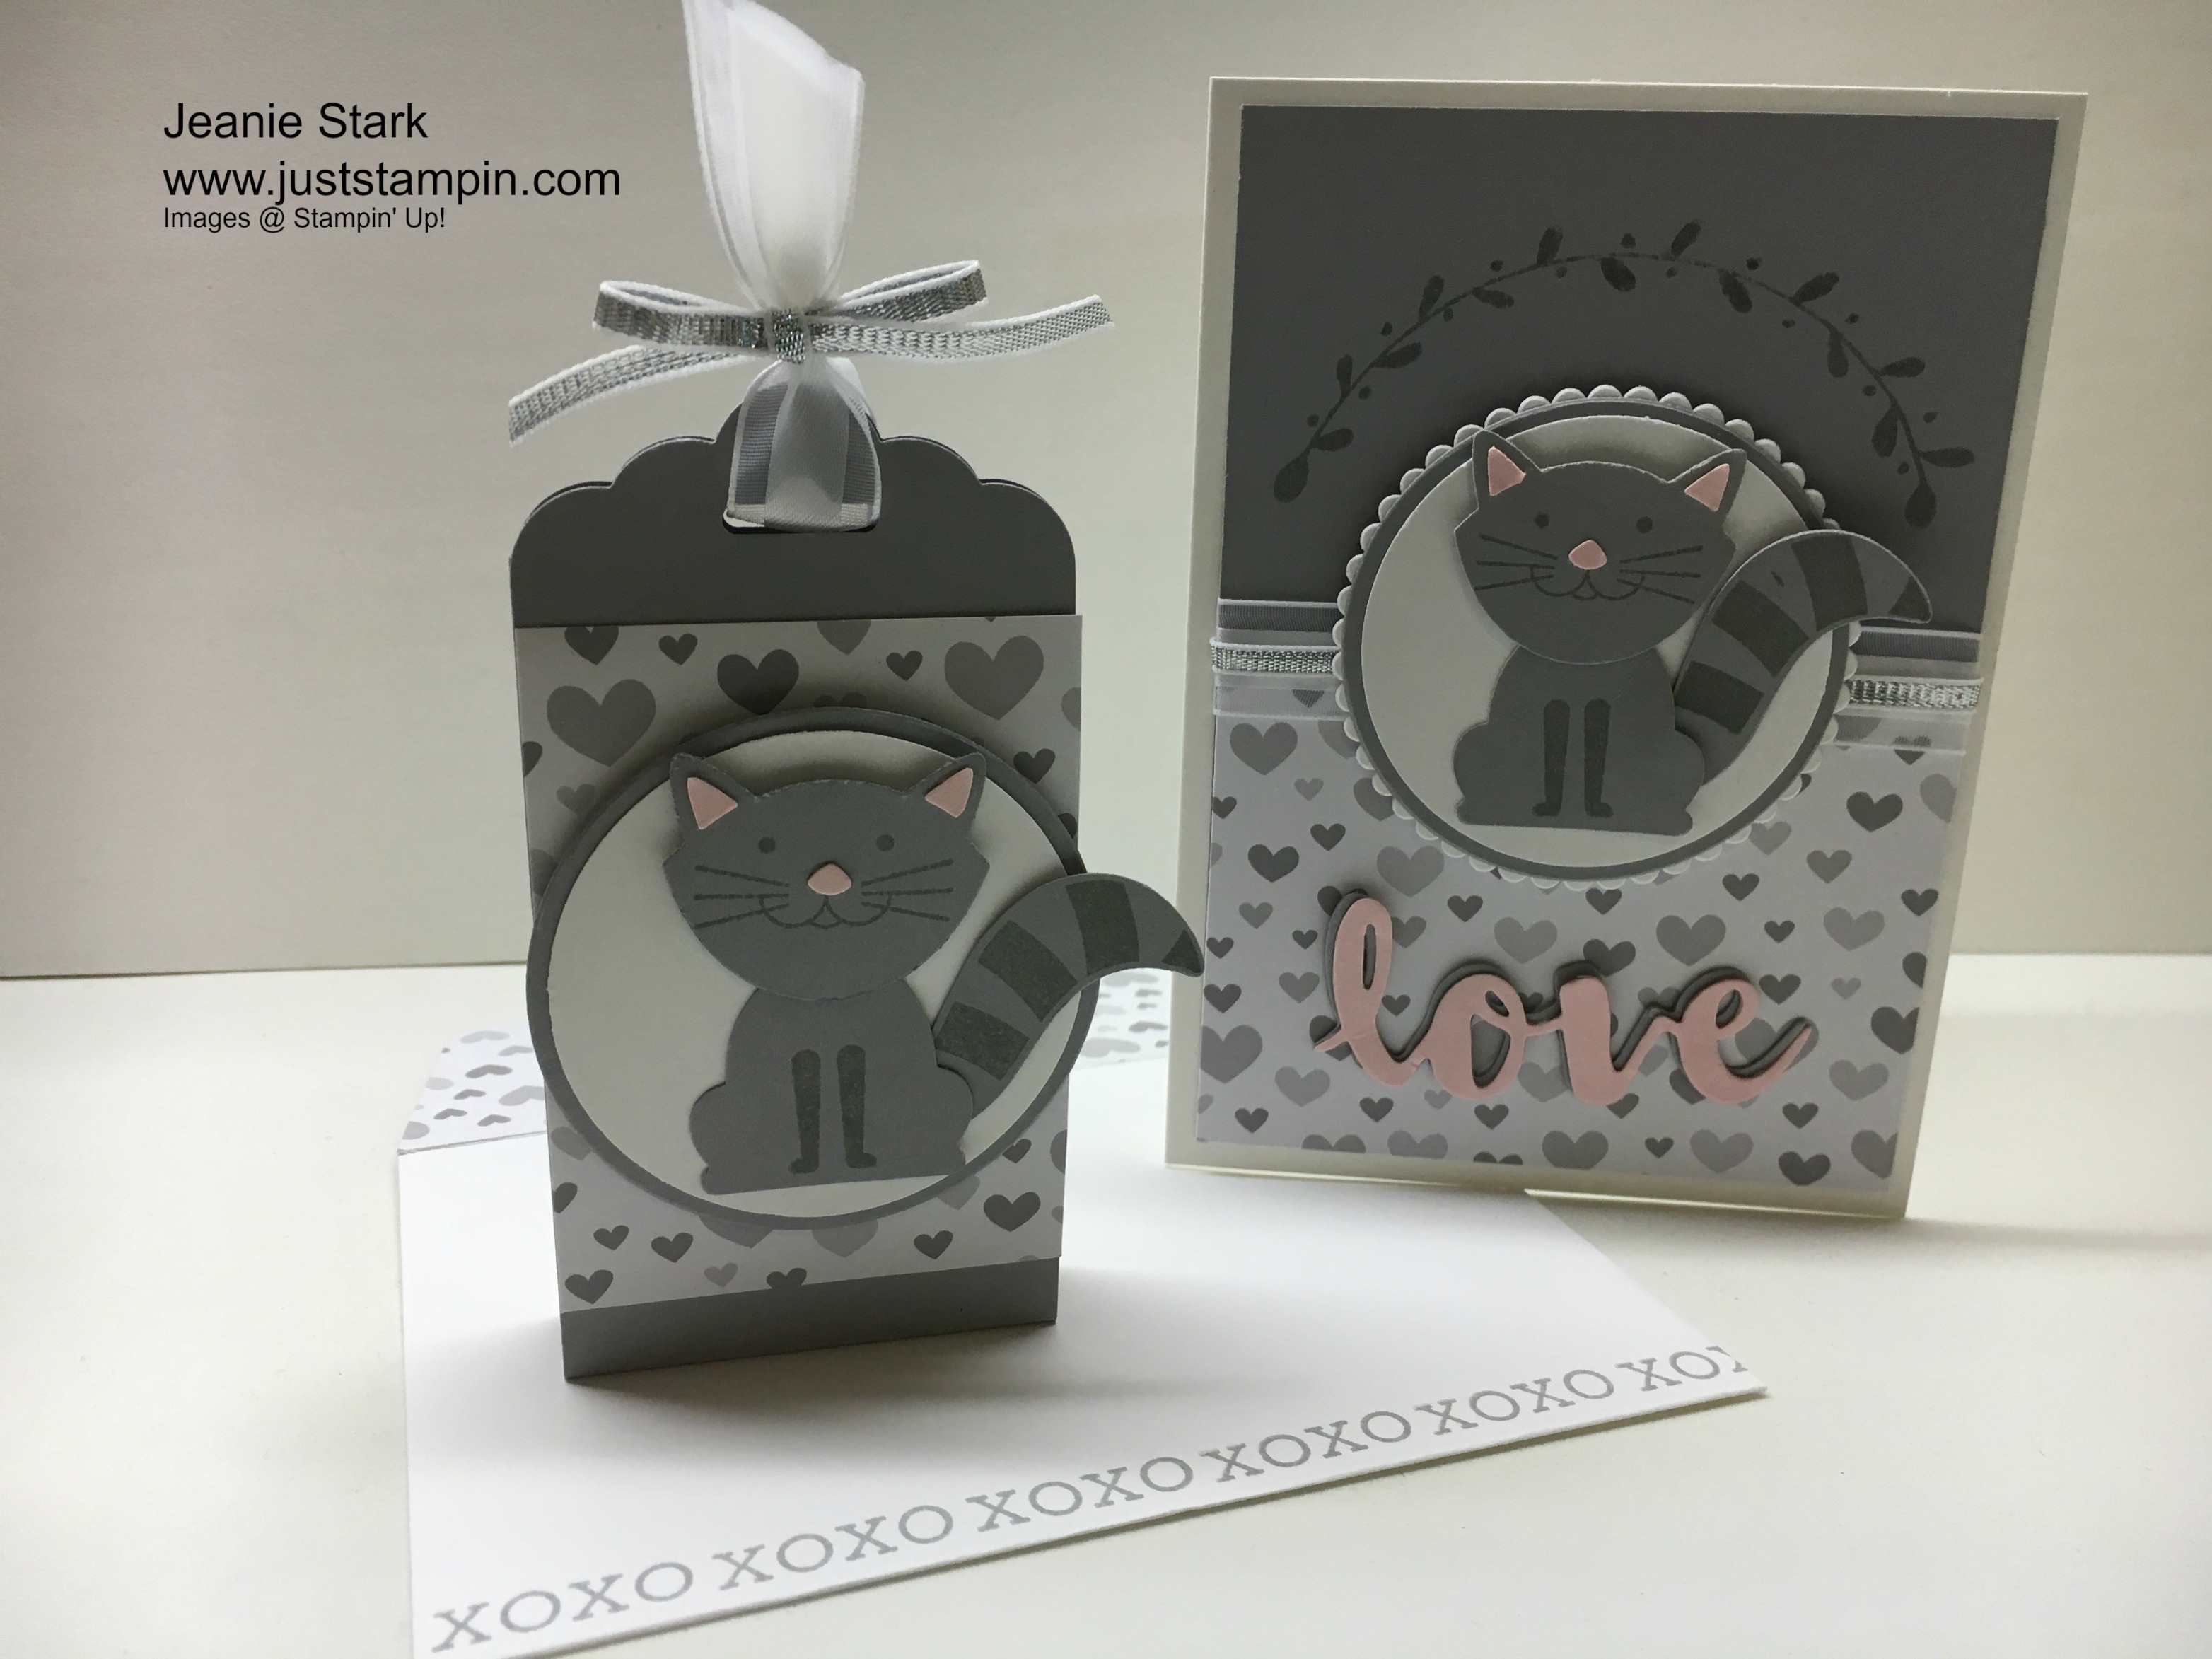
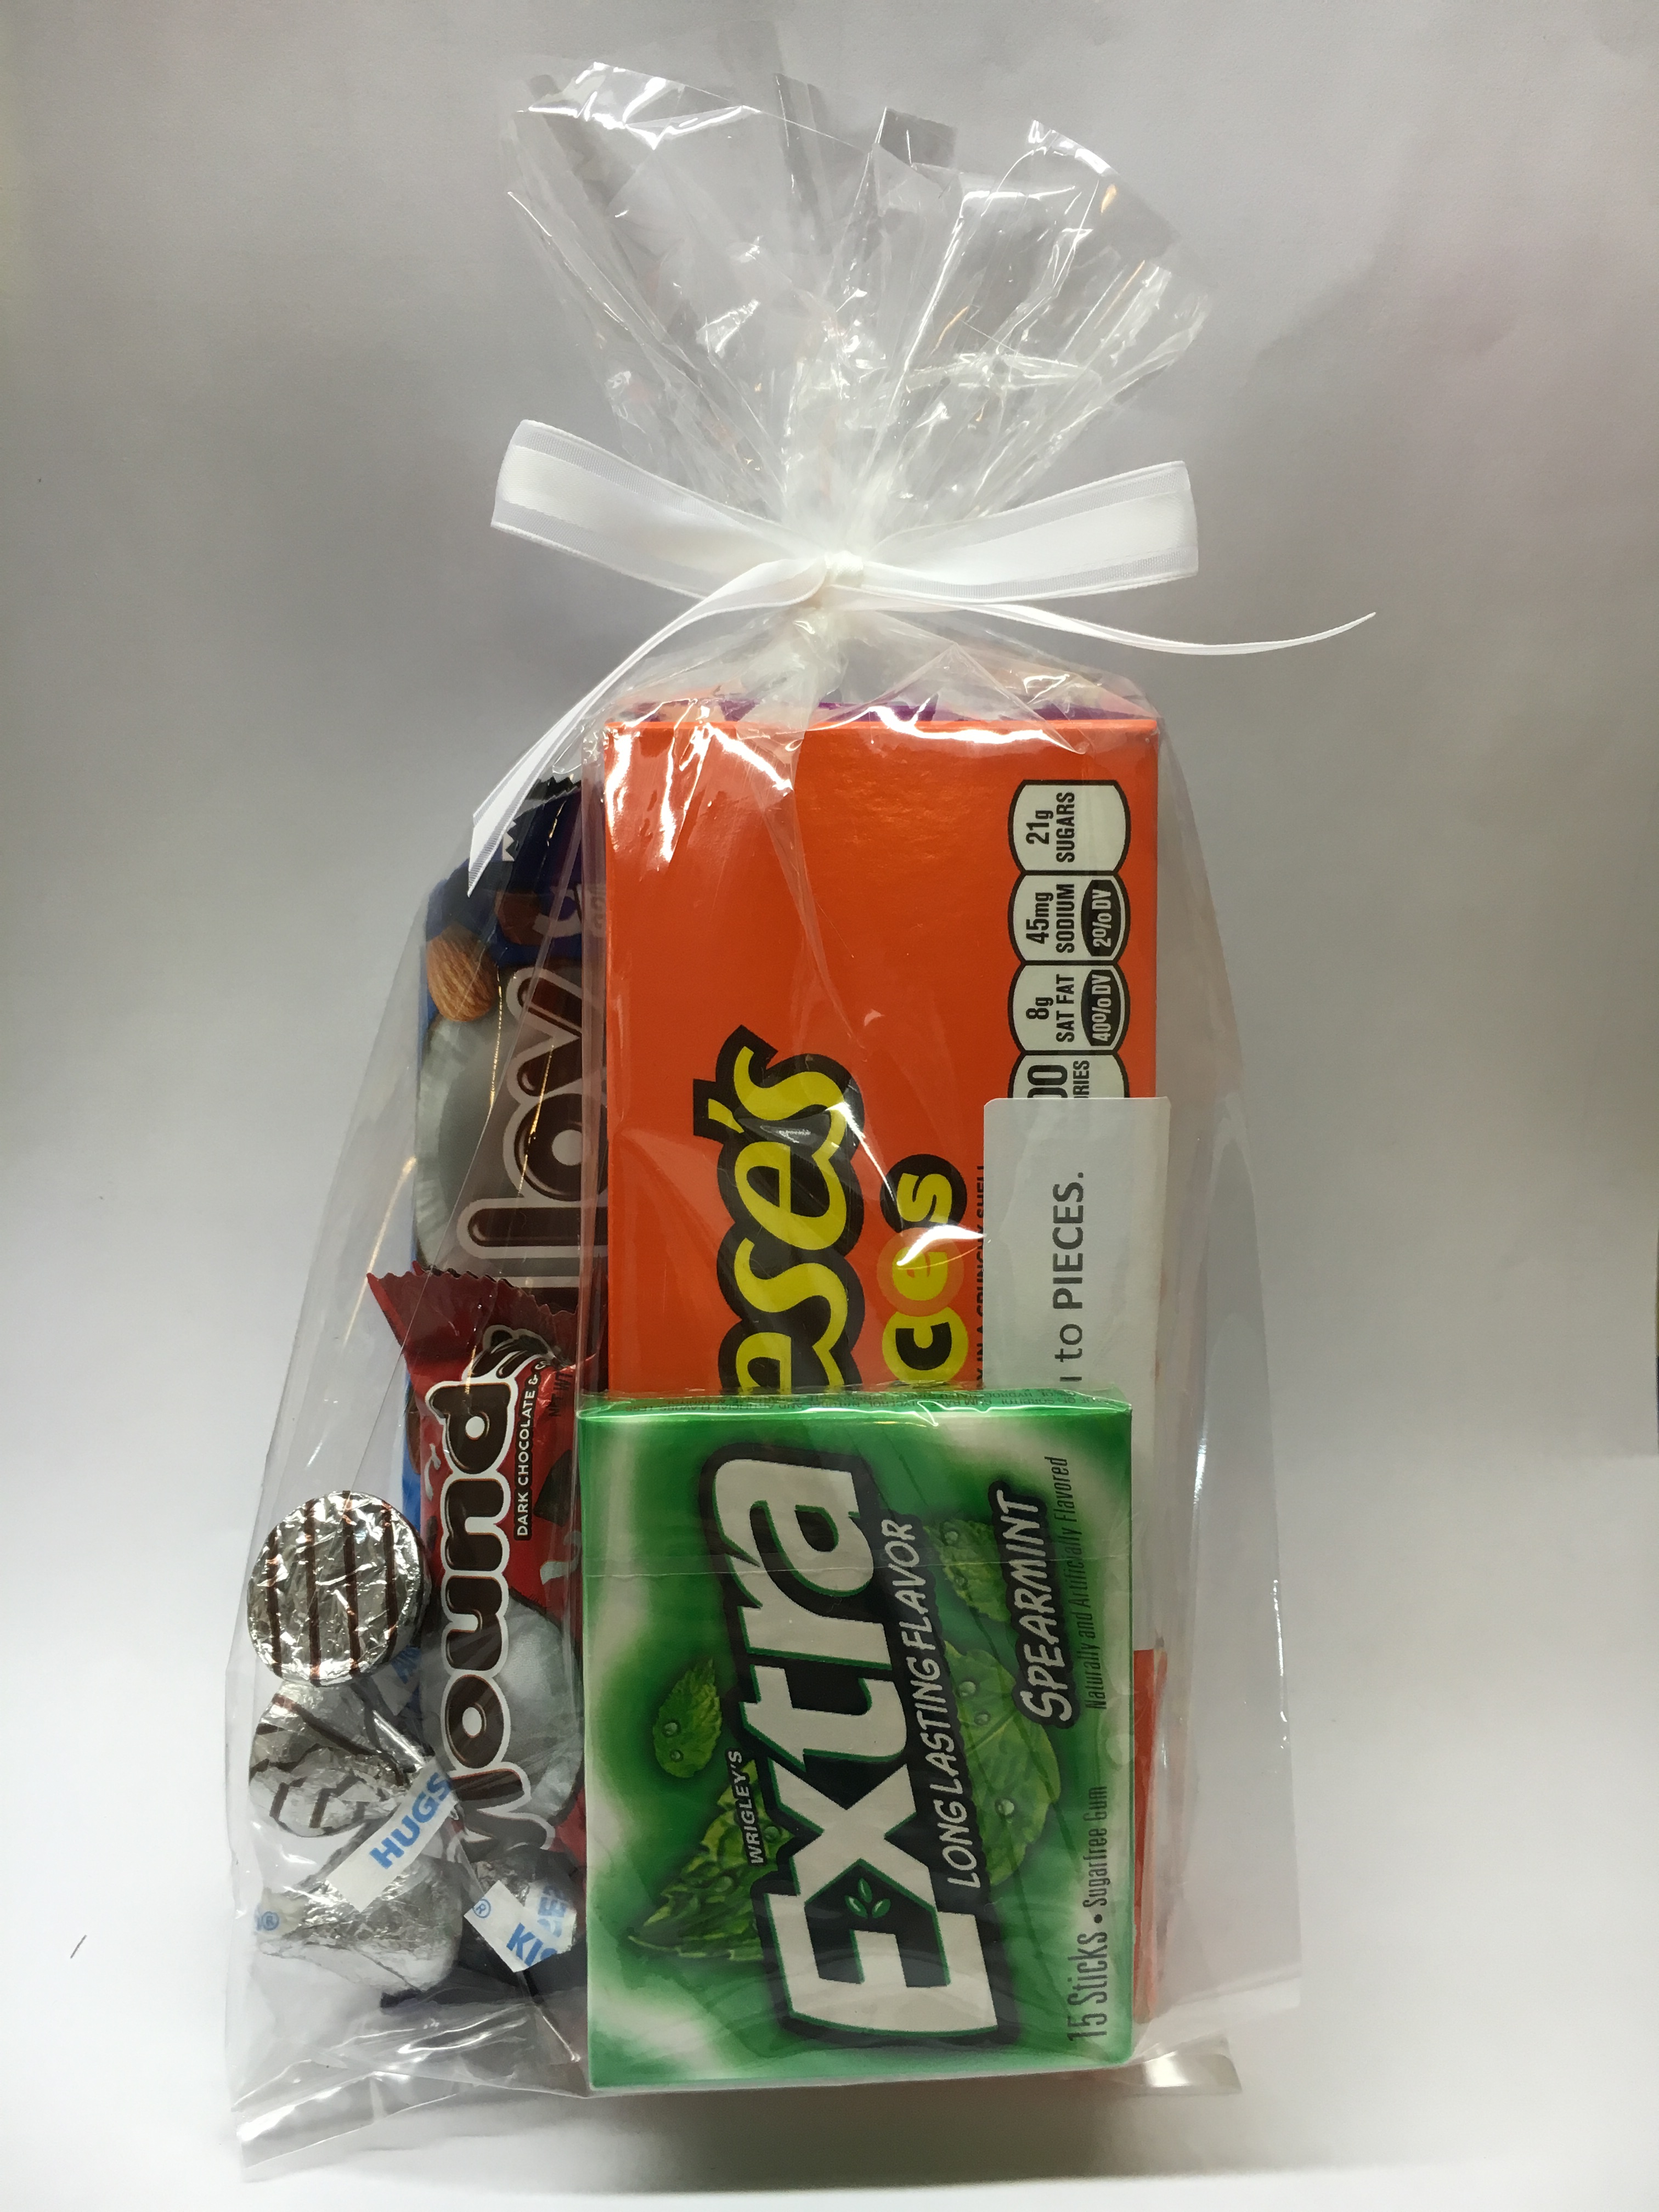
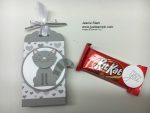
I love to make little gifts that coordinate. The treat holder is quick & easy to make.  Start with a piece of 2 x 8 1/2 cardstock and score it as 4″ and 4 1/2″ then punch each end with the Tag Topper Punch.  I added the heart pattern from A Little Foxy DSP stack then stamped, punched and adhered my kitty on to a 2″ whisper white circle which is adhered to a smoky slate circle cut from the Layering Circles Framelits and popped up with Dimensionals. This cat is so stinkin’ cute! It holds a mini Kit Kat (of course!) with a note, “Your Kit Kat misses you!”  How perfect!

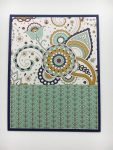
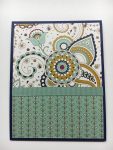
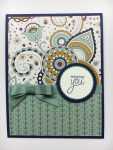
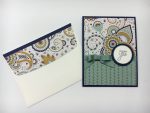
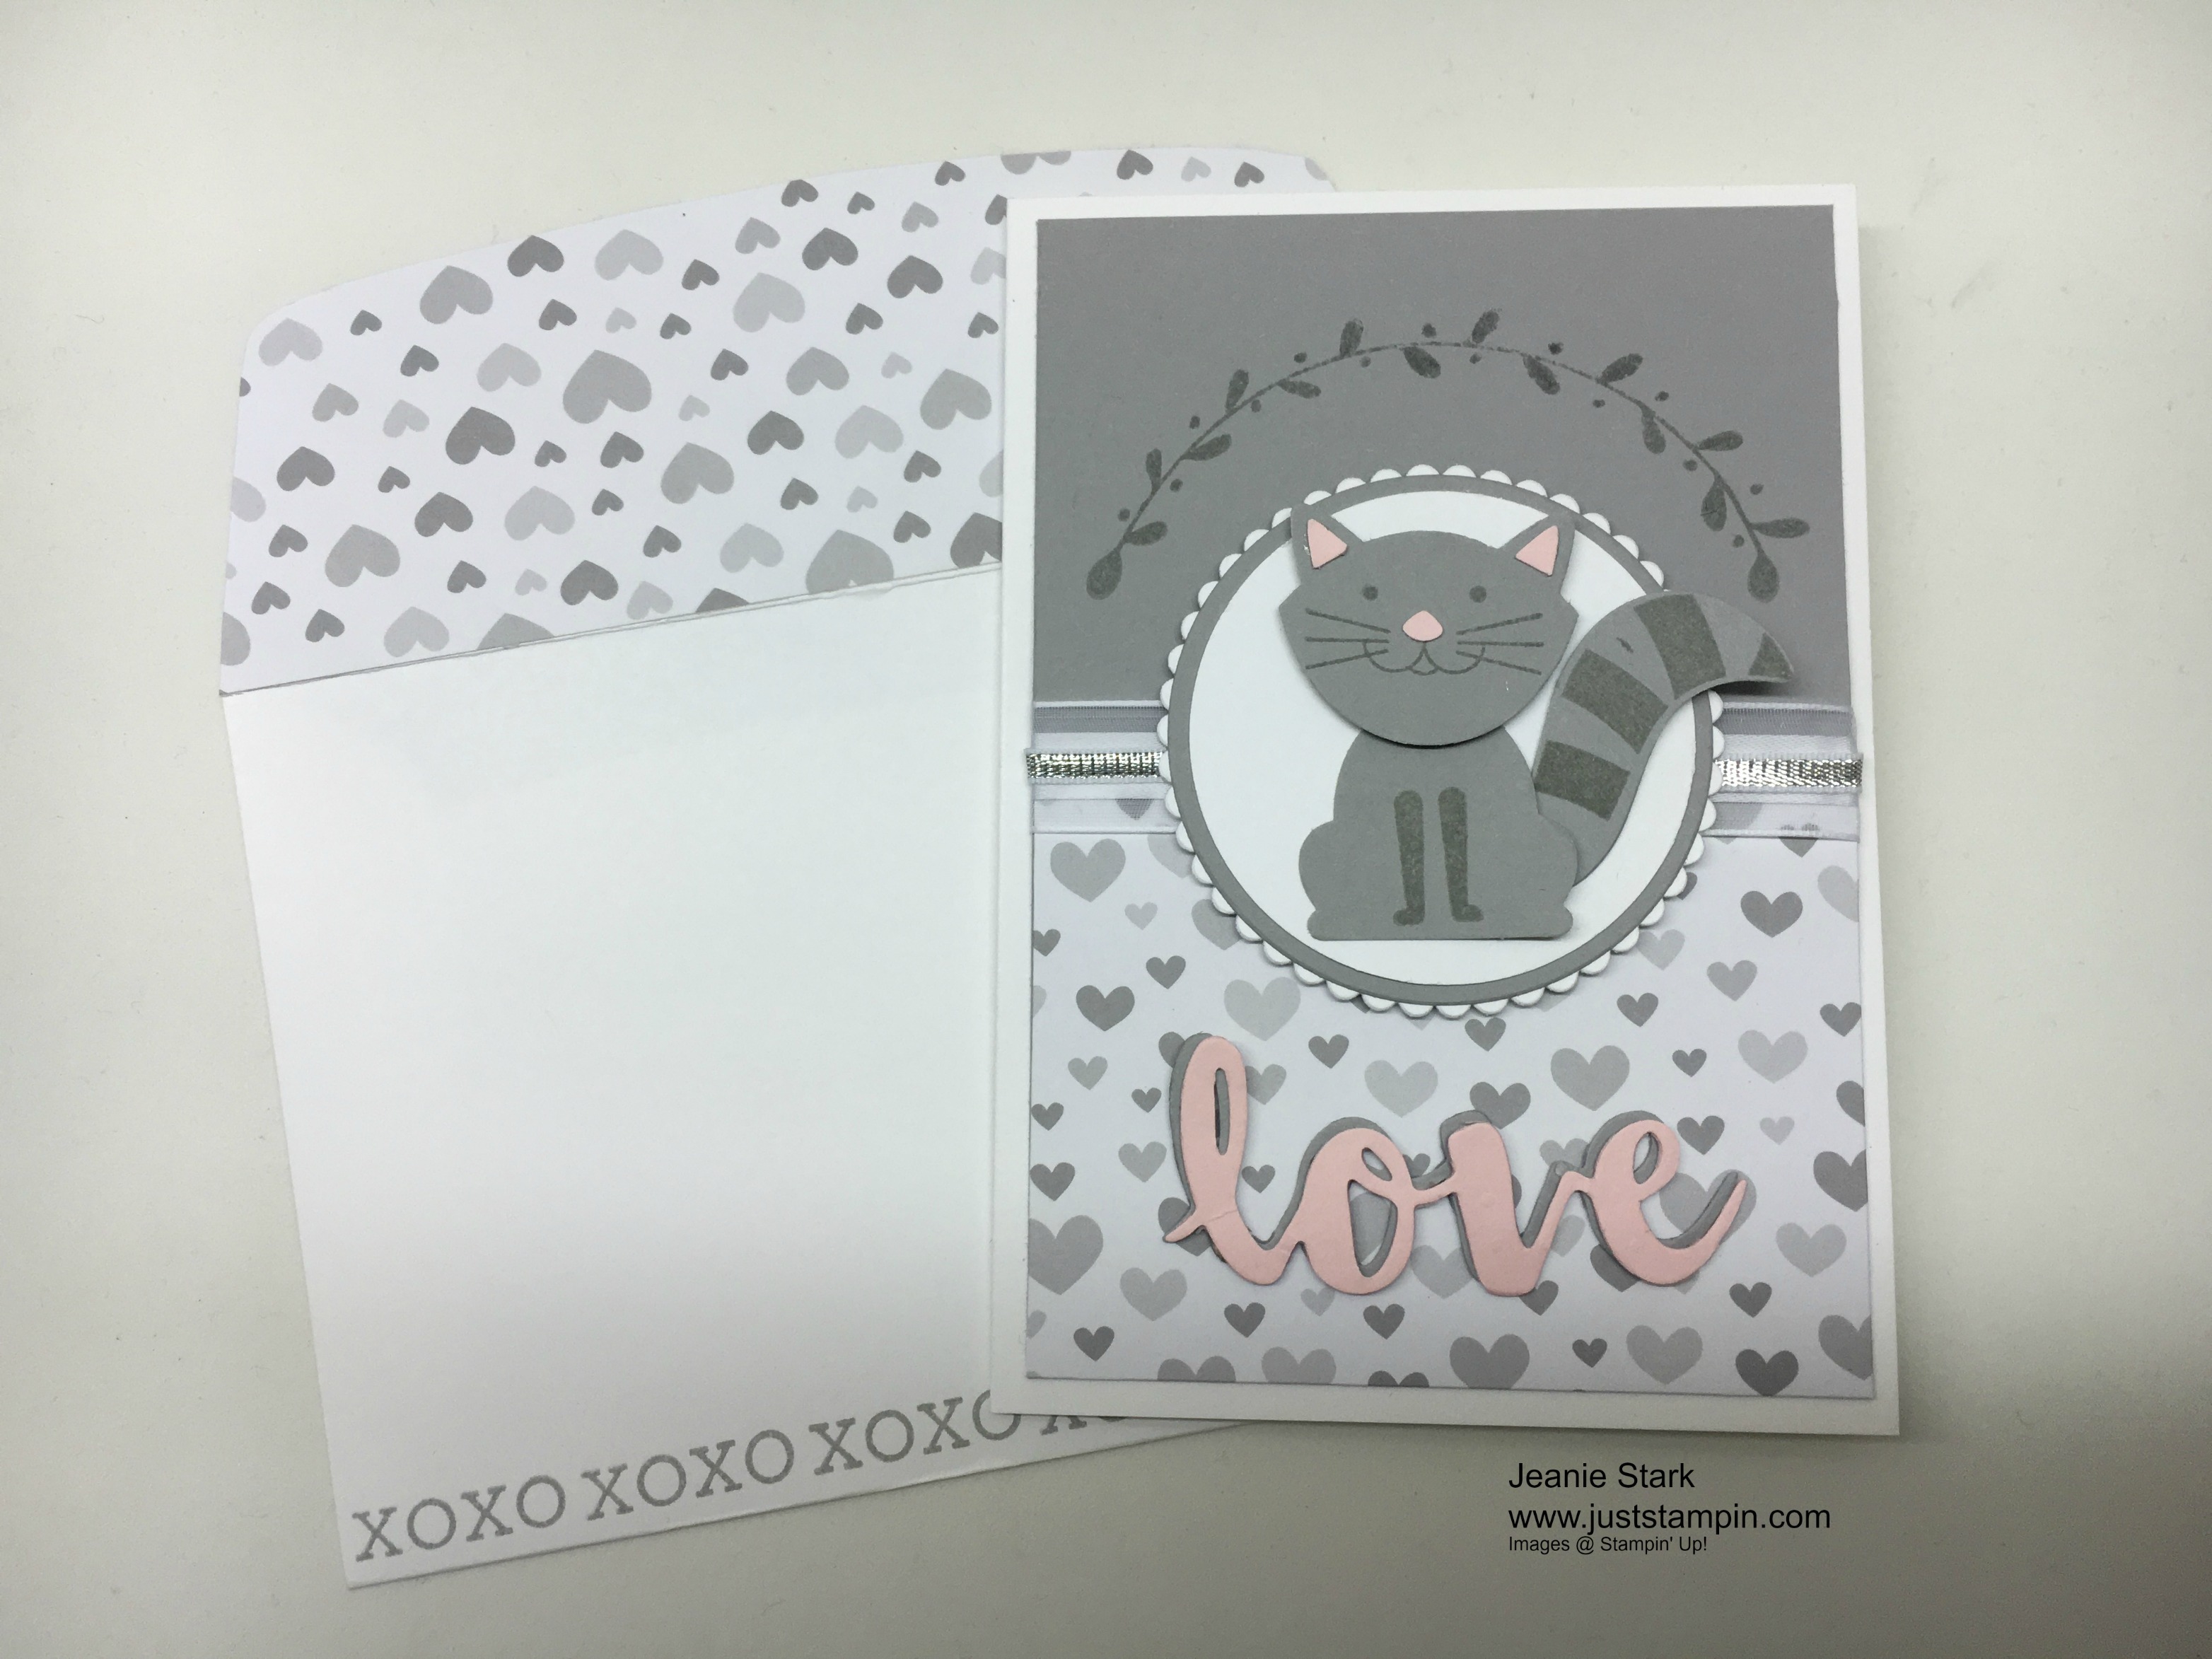
The matching note card has the same cute kitty made with the Foxy Friends Stamp Set and Fox Builder Punch as well as the heart DSP from A Little Foxy DSP stack. The “love” is from Sunshine Wishes Thinlits.  I cut it in both Smoky Slate and Pink Pirouette cardstock and offset it on my card. Check out those X’s on the front of the envelope. (Way to tie in the letter for today don’t you think? 🙂 )

img_5842

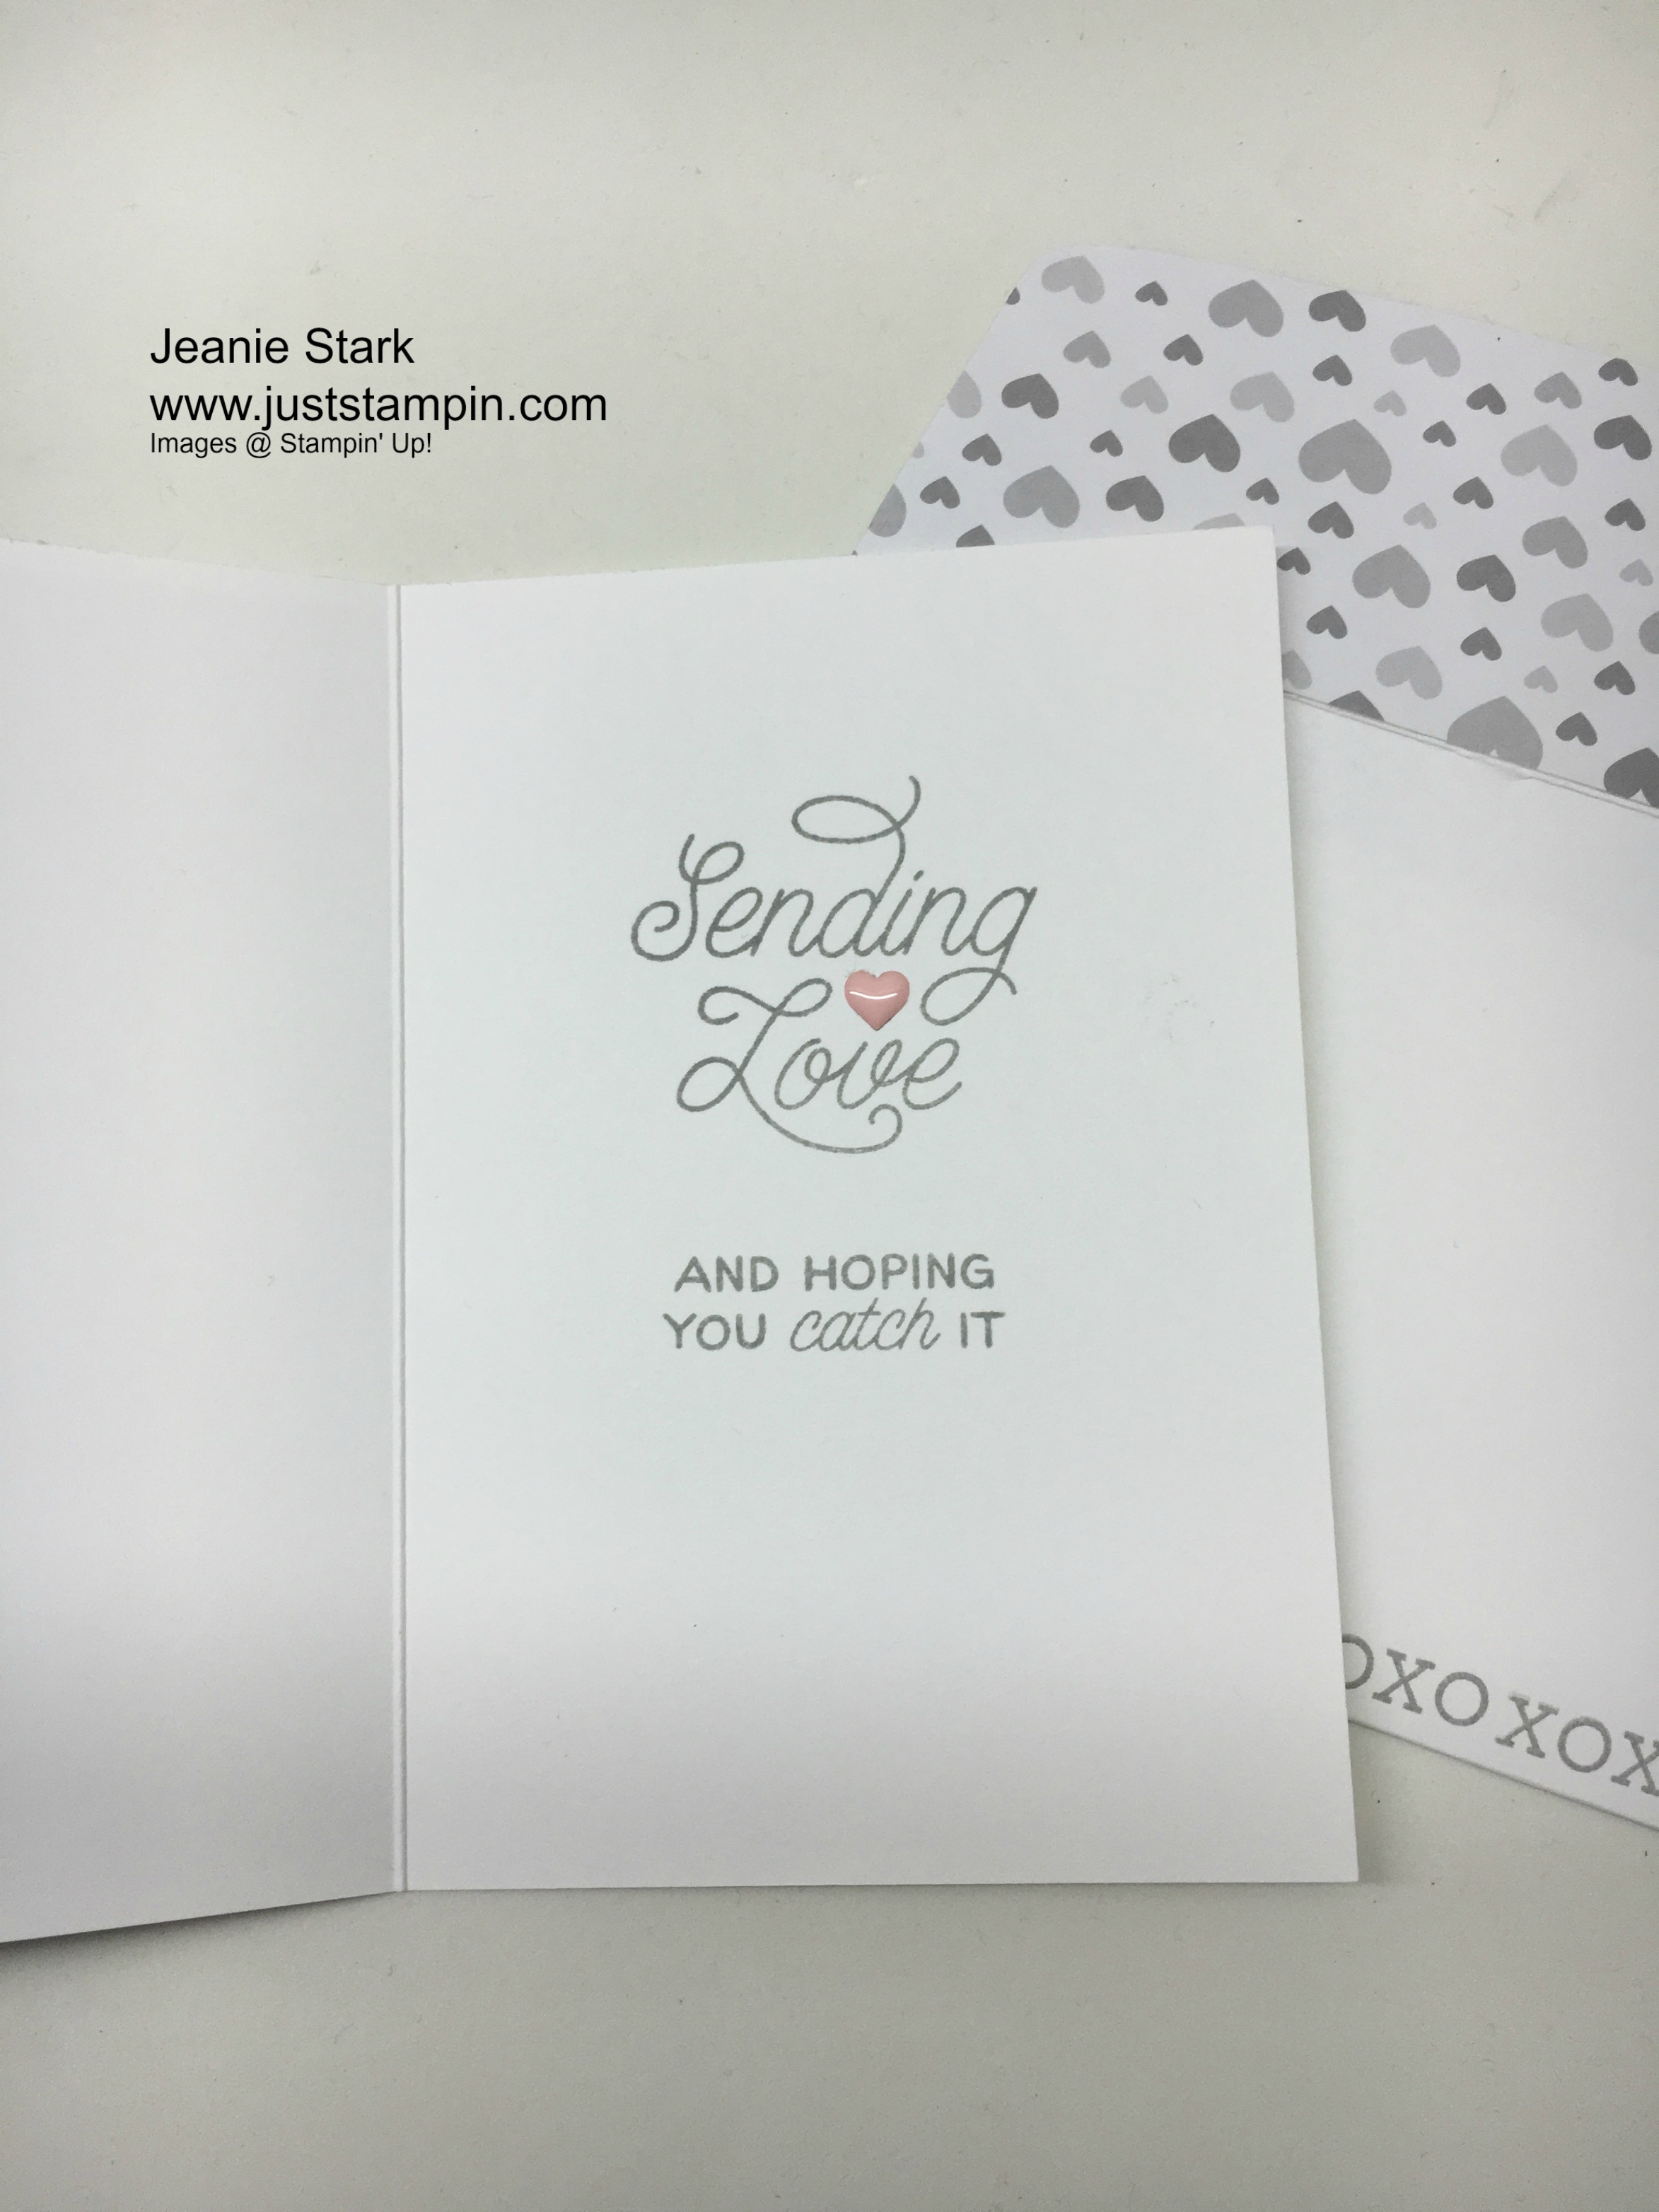
The inside sentiment is from Designer Tin of Cards and I added an enamel heart.

img_5853

Stamp Sets: Foxy Friends, Bloomin’ Love, Places You’ll Go, Designer Tin of Cards  Ink: Smoky Slate  Papers: Whisper White, Smoky Slate, Pink Pirouette, A Little Foxy Designer Series Paper Stack  Tools & Accessories: Fox Builder Punch, Tag Topper Punch, 2″ Circle Punch, Layering Circles Framelits, Sunshine Wishes Thinlits

Here is a quick video from Stampin’ Up! showing some of the possibilities with this stamp set and punch!  Check out the cool tip for stamping with this set!


Here’s some more ideas using this product suite.

a-little-foxy-samples

a-little-foxy-box

As you can see, you can make more than cards using this bundle.  Tags and treat holders are another fun way to make the most of your supplies!

img_5844

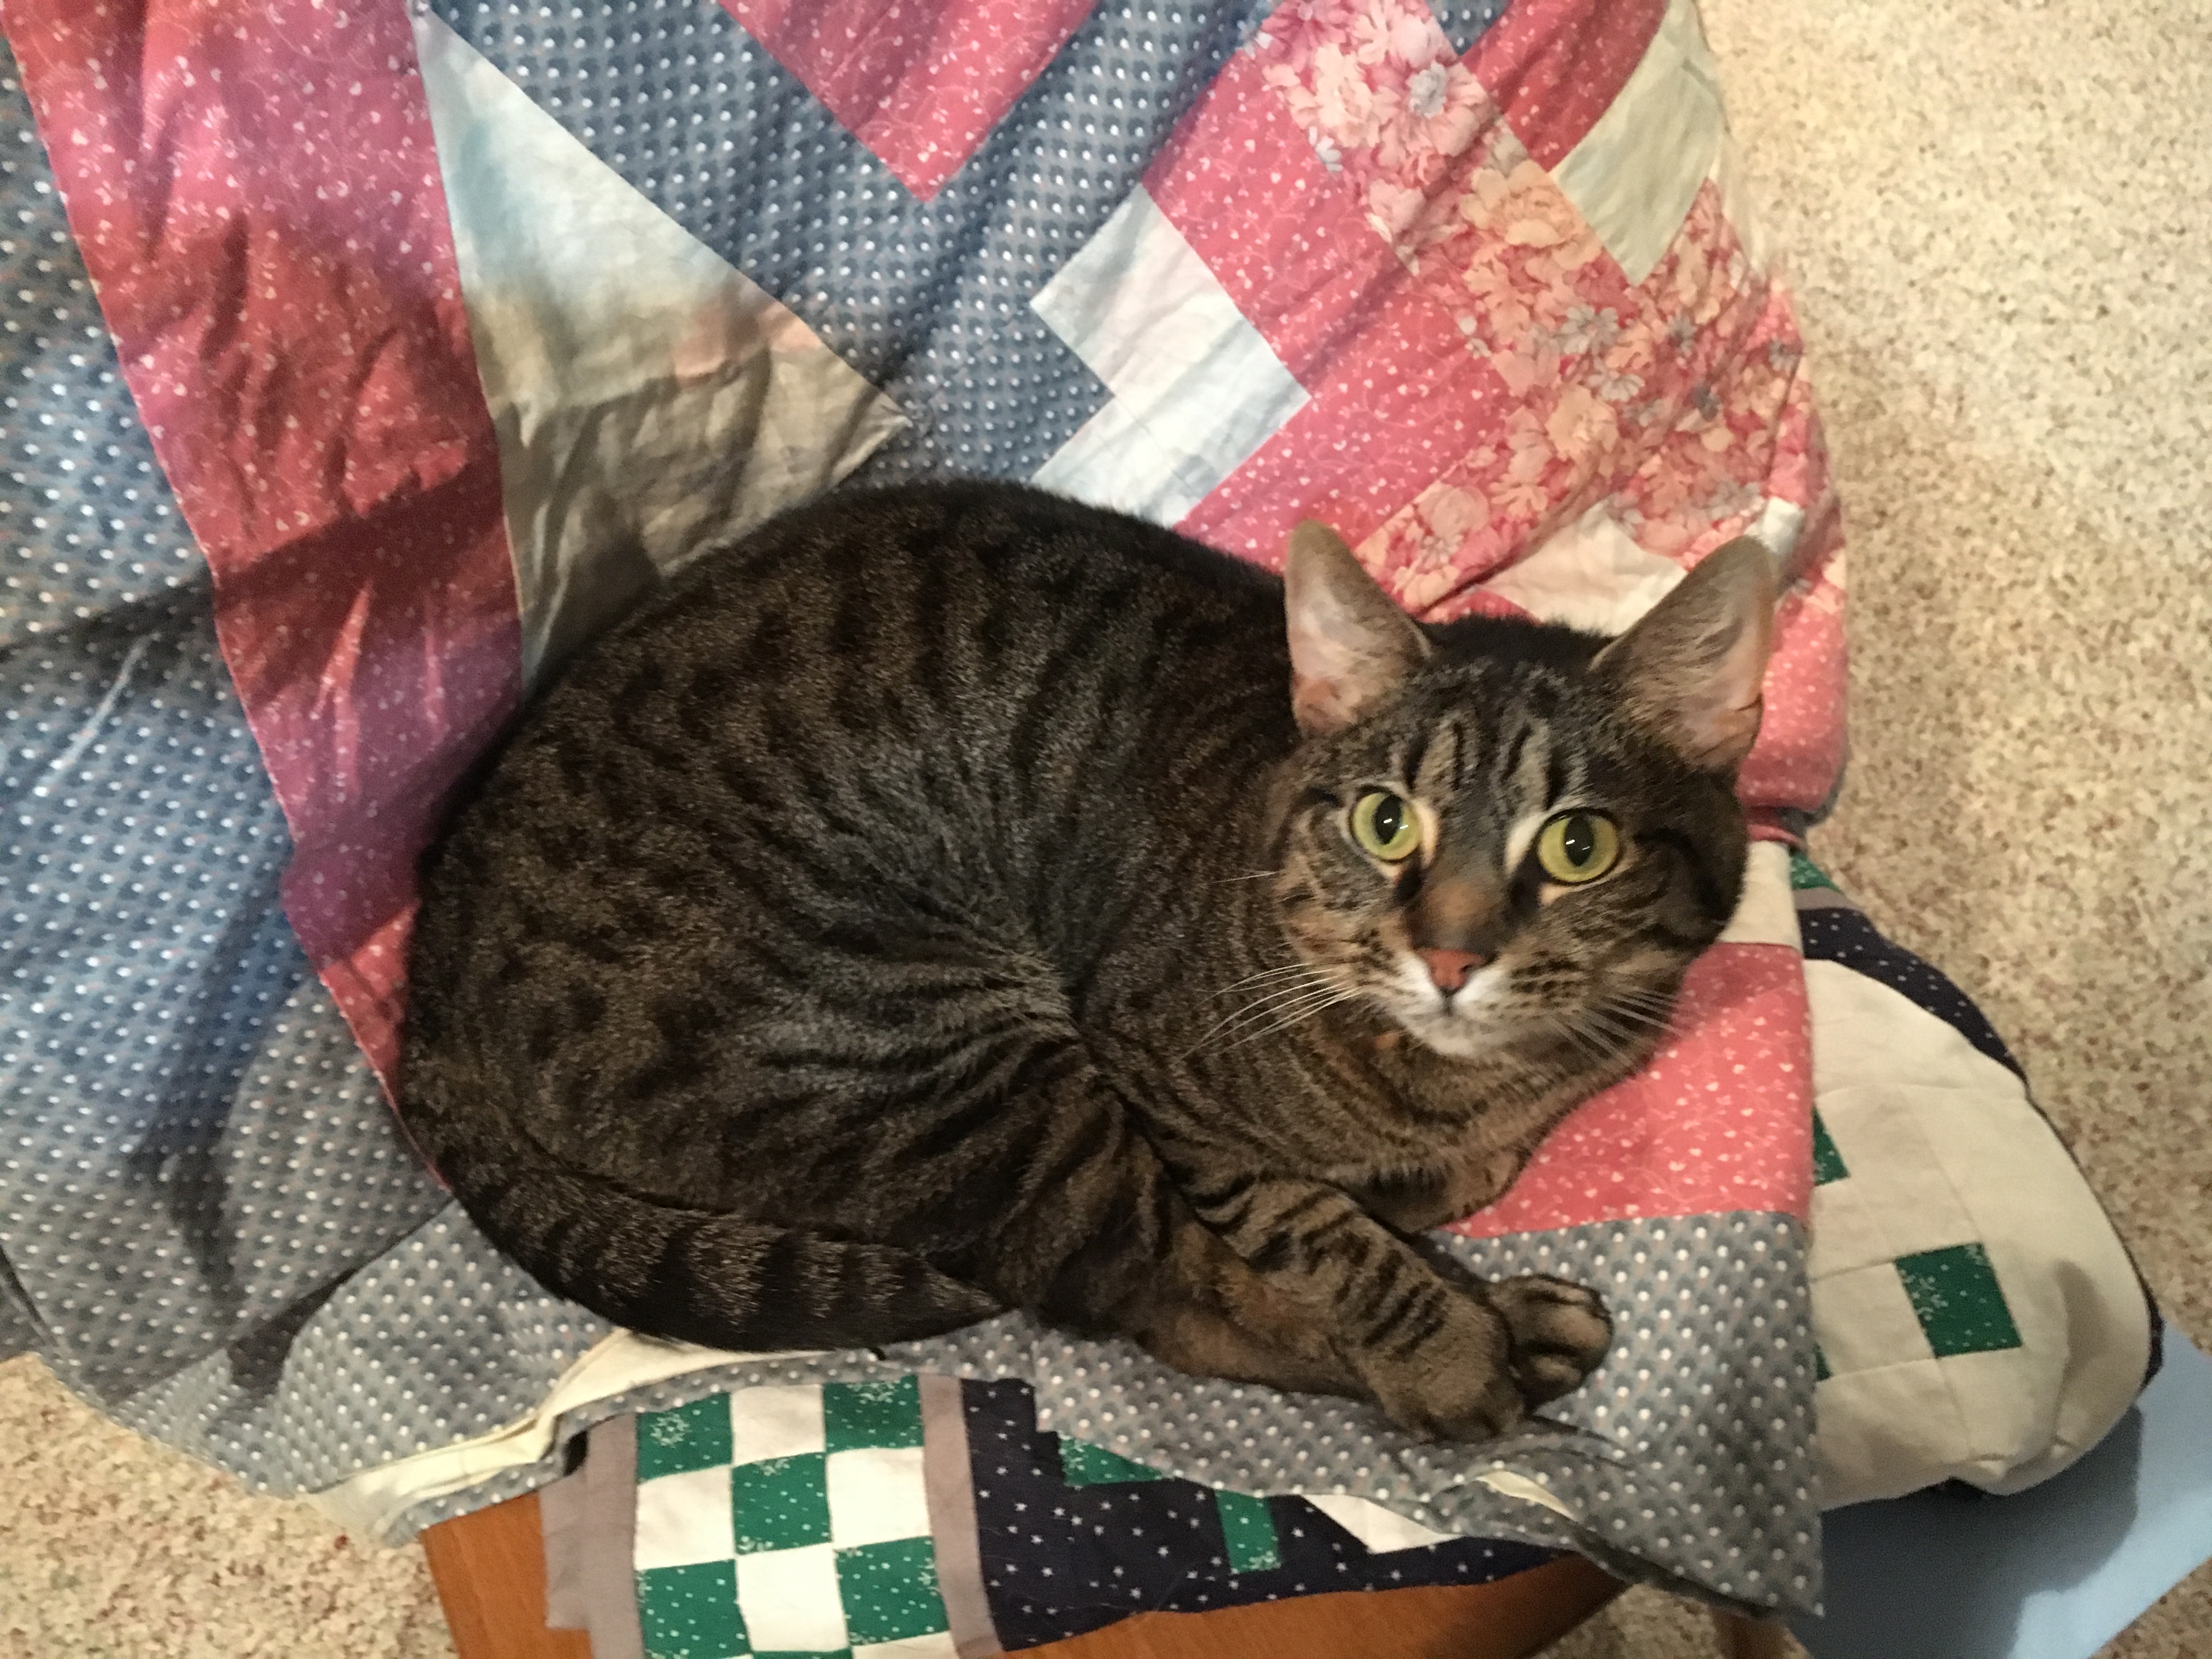
My daughter loves cats!  We already had one before she found 5 in a storm drain and called me to help rescue them.  The first thing I said was, “OK but we are not keeping them!” What can I say, we nursed those babies (actually had to bottle feed them) and found homes for the other 4 but there was no way she could let go of “Storm”.  Storm chose Ariane! She was the last one rescued and Ariane actually had to climb down into the storm drain to get her as she was so tiny, frightened, and frostbitten. (Storm actually lost the tip of her tail.) Well to make a long story short, we kept her and she never left Ariane’s side (seriously!).  She would sit on her lap while she did homework, wait outside the bathroom door while she showered, and slept beside or on top of her every night.  As we looked at colleges I thought Storm was my ticket to her choosing a college close by. HA!  Needless to say, Storm and I have grown closer these past 2 months as we both miss Ariane. Here’s a picture of Storm all snuggly warm on top of my quilt I pulled out the other day to show you. (Didn’t get that put away fast enough!)

img_5826

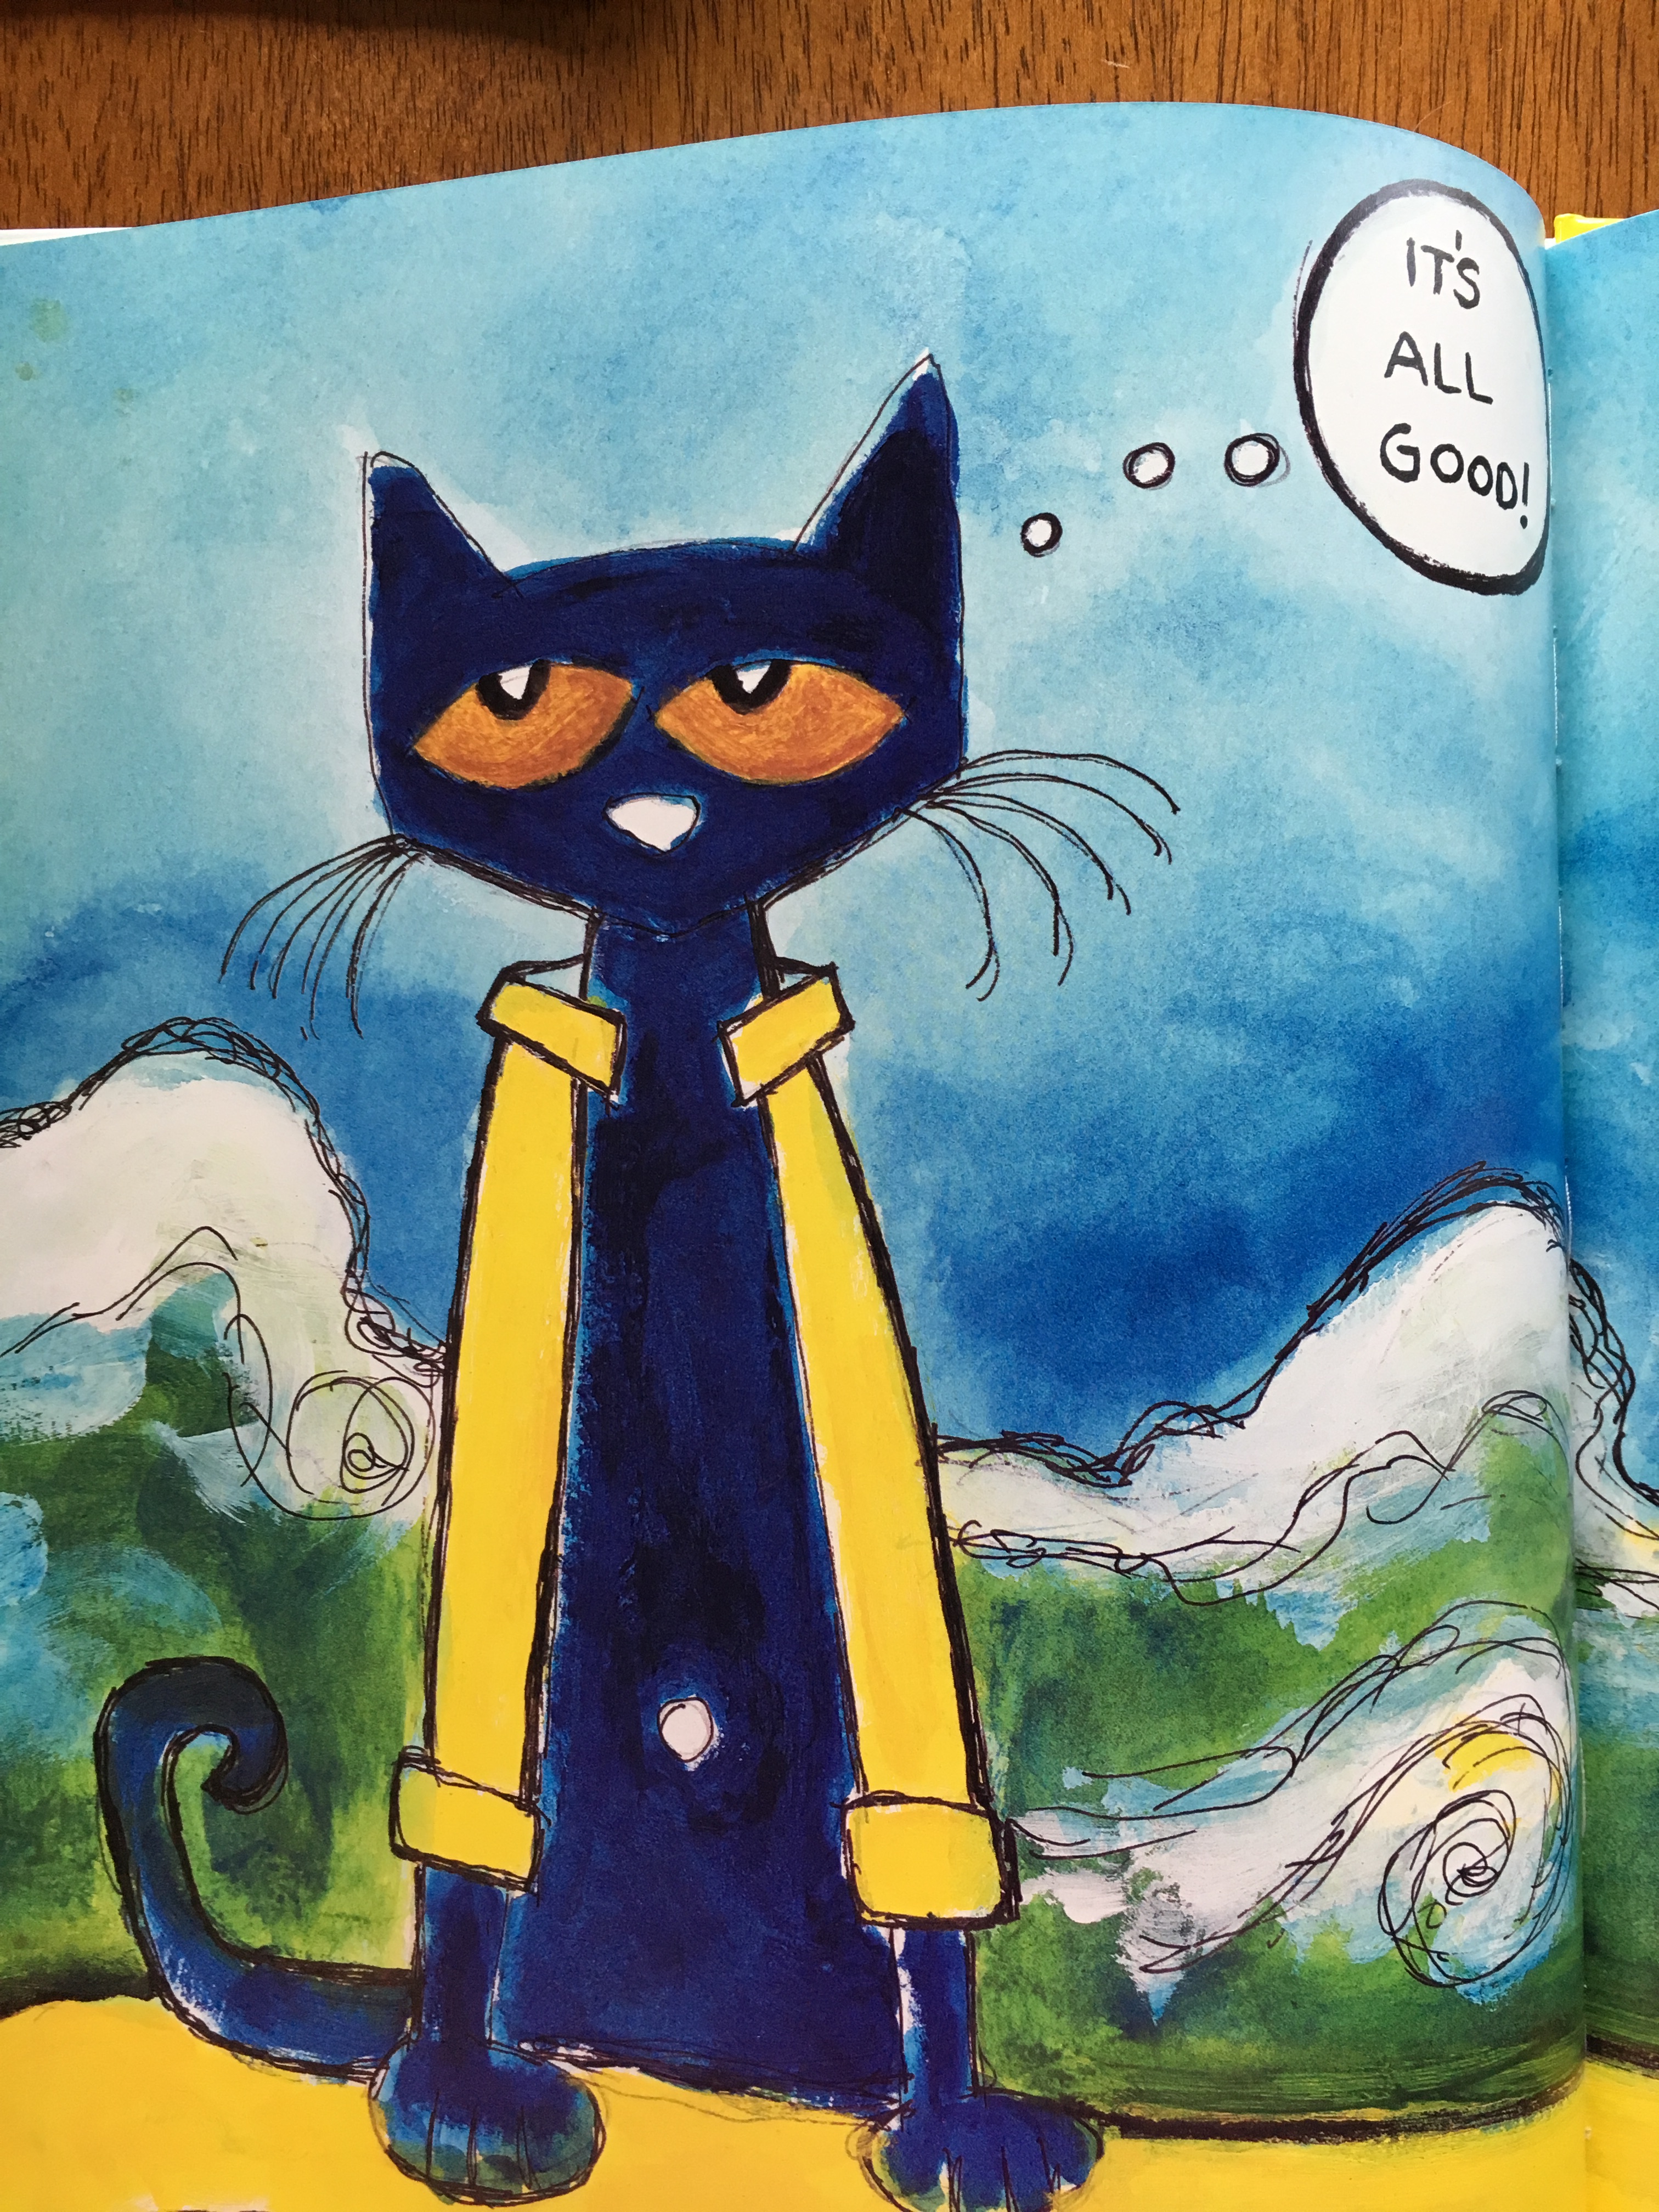
Isn’t she adorable?! So, as Pete the Cat would say, “It’s all Good!”  Speaking of Pete the Cat, every year I dress up for Halloween to go along with a book. (Last year I was the alphabet tree from Chicka, Chicka, Boom Boom). My PreK students this year love Pete the Cat stories so I am dressing up as Pete for our Halloween party today.

img_5821

My PreK students go trick-or-treating throughout the school and visit each classroom. The older kids don’t get to dress up so they enjoy seeing the little ones in their costumes and I always make them guess what character I am.  If you have young kids or grandchildren you need to read them Pete the Cat.  Let me forewarn you, once you get the songs in your head, you’ll be singing them for days!  LOL  Pete is upbeat and there’s a good lesson and moral in the stories. The buttons on my costume are attached with velcro so I’ll be “losing” them all day (and having my students find them).  I love Halloween almost as much as April Fool’s Day!  LOL

img_5822

img_5823

img_5824

random-number-9

Many thanks to everyone who left comments on my 100th blog post!  The winner of a set of handmade cards from me is Marie.  Please email me (j.stark@myactv.net) your address and I will send out your set of cards.  I will post the set of cards later this week. (I don’t want to spoil the surprise for Marie.) I really appreciate all the wonderful comments and I am so glad you enjoy my blog and feel inspired.  I love to create and share with others!

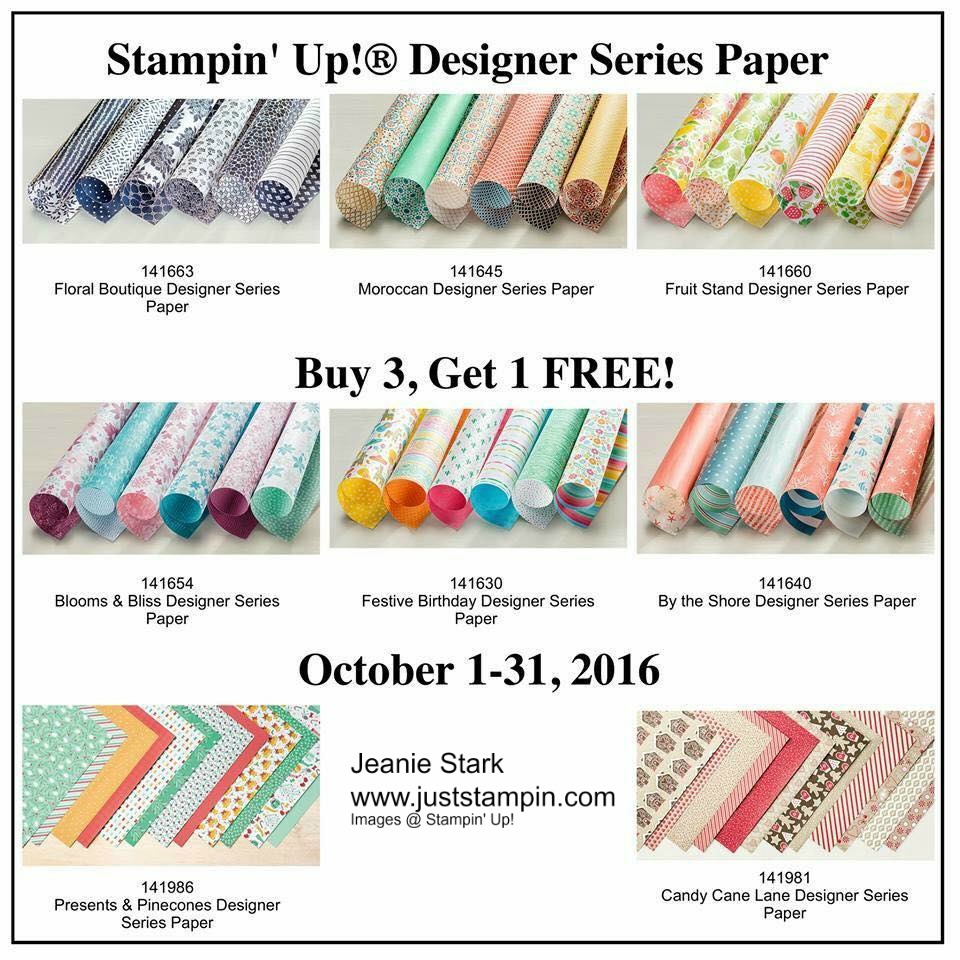
Today is the last day to take advantage of the Buy 3, Get 1 FREE Designer Series Paper Sale.  I have been showcasing the beautiful Stampin’ Up! designs all month long. (There’s only 2 alphabet letters left in this series.) Many of you left comments the other day sharing your favorite Designer Series Paper and so I thought I’d share my Top 4 choices from the DSP SALE (just in case you want to know which ones I recommend on this last day of the sale)…Floral Boutique (LOVE navy and white…so classic!), By the Shore (I love the beach, combing for shells, and sand between my toes.  Plus, the prints on the back of these designs are versatile for year round projects!),  Candy Cane Lane (So stinkin’ cute and perfect for Christmas projects!), and my last choice is a toss up…  I just recently purchased the Moroccan DSP so I haven’t used it as much yet but I really like the prints (so much better in person than you see in the catalog!). My other choice is Fruit Stand. (It has been the biggest surprise for me.)  I admit it was not on my wish list; however, I won a pack at the shoebox swap I attended last summer and fell in love with the prints!  I used that whole pack and have just about used up all of my second pack. I made a bunch of apple note cards for teacher thank you notes, used the lemon DSP to go with little gift packets of lemonade as well as get well cards, made adorable 3 x 3 strawberry cards to go with a basket of fresh berries or jam…I could go on and on about this pack! Try some out for yourself!

Click HERE to shop my online store and take advantage of the Stampin’ Up! Designer Series Paper Sale before it’s too late!  Please use the Hostess Code 7DB3CBKS when you check out.  I’ve added a visual below to show where to enter the code. I always send a thank you gift each month when you order from me. This month I have lots of 4 x 6 DSP samples going out to my customers along with a thank you card.  I appreciate each and every order!

Thanks for stopping by!  Have a Happy Halloween!

Just Stampin’

Jeanie

img_4672

Coming Nov. 1st!!!  Email me today if you want to preorder (j.stark@myactv.net).

stitched-from-the-heart-framelits-flyer

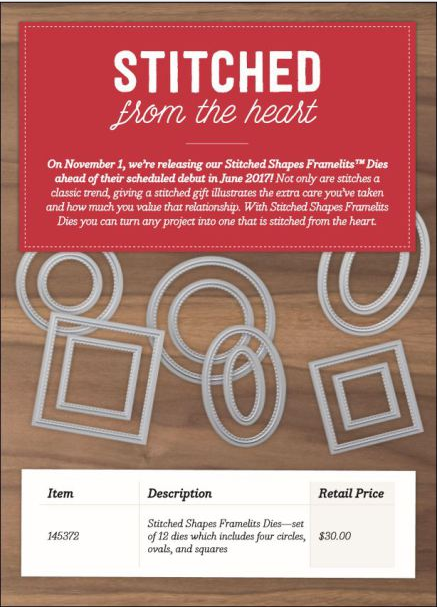
Save 25% on these stamp sets Nov. 1 – 30th!

stamp-sale-november-1st

D is for Designer Series Paper

Welcome to my ABC’s of Stampin’ series.  Today it’s all about Designer Series Paper (aka DSP)! I love color and patterns and enjoy decorating my home with lots of different coordinating fabrics.  That’s one reason why I love Stampin’ Up! Designer Series Paper…it coordinates with our color collections. Here’s one example showing 5 colors that coordinate with this piece of DSP from the new Holiday Catalog, Petals & Paisleys Specialty Designer Series Paper.

Stampin Up Petals & Paisleys Specialty Designer Series Paper - Jeanie Stark StampinUp

Click HERE for a chart prepared by our amazing PALS leader, Mary Fish.  It has a list of all the Designer Series Paper and coordinating cardstock colors.  I keep a copy in my craft area for easy reference.

Today I am going to show you how to let the DSP shine! Stampin Up! Designer Series Paper comes in 12 x 12 or 6 x 6 paper packs. The paper has double-sided designs which gives you even more choices and variety for your projects. Here’s some tips for cutting your paper to make some quick and simple cards with DSP.  Start with a piece of 6 x 6 (or cut your 12 x 12 to 6 x 12 then 6 x 6).Cut the 6 x 6 to 4 x 6, then 4 x 5 1/4.  You will now have 3 pieces: 1 @ 4 x 5 1/4, 1 @ 3/4 x 4, and 1 @ 2 x 6.

Stampin Up Petals & Paisleys Specialty Designer Series Paper - Jeanie Stark StampinUp

You will use all 3 pieces to follow a simple “formula” to make a card and decorate the envelope.

Cut 2 inches off the 4 x 5 1/4 piece so you have 2 pieces: 1 @ 2 x 4 and 1 @ 3 1/4 x 4.  Turn one piece over so you have 2 different designs. Choose a piece of coordinating cardstock (4 1/4 x 11, scored at 5 1/2) and adhere both pieces.


You can attach a piece of coordinating ribbon or a strip of cardstock over the seam line. Stamp a sentiment and cut or punch out and adhere with Stampin’ Dimensionals. I used ribbon from the coordinating trio pack and attached a bow with a glue dot.  I used the Layering Circles Framelits to cut and layer my sentiment from Places You’ll Go stamp set. (Who do you think I made this card for?)


I used the small 3/4 inch strip on the inside of my card and the 2 x 6 strip for my envelope flap.  How cool is that-no leftover pieces!


Here’s another “formula” for using another 6 x 6 piece of DSP.   (I cut my 12 x 12 sheet to 6 x 12, then 6 x 6 so I had 2 6 x6 pieces.) This time I made 2 cards from the 6 x 6 DSP.  (Just because I had to use all the pieces!) For the first one I was inspired by one of my  Paper Pumpkin kits that had intricate die cut outs with a diagonal strip in the middle to add a sentiment, ribbon, etc.

I cut the 6 x 6 DSP into 3 pieces: 1 @ 2 x 6, 1 @ 4 x 4, and 1 @ 2 x 4.

Stampin Up Petals & Paisleys Specialty Designer Series Paper - Jeanie Stark StampinUp

Next I cut the 4 x 4 piece on an angle (slash), separated the pieces, and adhered to a piece of 4 1/4 x 5 1/2 coordinated cardstock.  You can stamp a sentiment, add cutouts, etc. So many possibilities!


I played around with different colors and cut outs and came up with this for a friend who is starting a new job. I layered the die from Sunshine Wishes Thinlits.


For my third card, I intended to use the 2 x 4 piece of DSP to make a banner using the triple banner punch but, I liked it layered on the card as it was.  I used the layered circle framelits to cut out my sentiment and coordinated layer and attached it to my card with Stampin’ Dimensionals.  The last piece of 2 x 6 DSP was used for my envelope again.  🙂

img_4130img_4142

WOW!  3 different cards with matching envelopes from a piece of 6 x 12 DSP! And they were quick & easy!

img_4143

I store my 12 x 12 DSP in plastic magazine files by color collections. It’s easy to see and grab what I need.


How would you like some Designer Series Paper to design some cards of your own?  You can get a sampling for FREE with today’s Back to School Special.  Simply place an order(through my online shop) of $30 or more (before tax and shipping) and use the Hostess code VS23B4FP  at checkout.  I will mail you a sampling of Stampin’ Up! Designer Series Papers.You will be able to make cards like these in a jiff.

I hope you have a Delightful Day!

Just Stampin’

Jeanie

Adventure Awaits…

img_3356

Today I leave to take my daughter to college. (I packed plenty of tissues!)  WHEW! It feels like she went from my sweet little baby to high school graduate in the blink of an eye!

img_3352

I am filled with mixed emotions.  I am so happy for her and the opportunities that lie ahead as she pursues her dreams.  I just wish it wasn’t so far away…I am really going to miss her! For the past 29 years my life has revolved around being a mom to my two children.  I am so proud of them both! My son is taking vacation time from work to travel with me to move his little sister in to her dorm. (He is so sweet and thoughtful like that.)  I remember when I was pregnant and we first told him he was going to have a little brother or sister and he said, “I’ve been waiting for this my whole life!” (He was 10.)

Let’s get to today’s card before I start crying…

This card is for my daughter as she starts her college adventure. My color inspiration came from the bedding she picked out for her dorm room. I chose Bermuda Bay, Wisteria Wonder, and Night of Navy (There’s a little Sweet Sugarplum in there but I kept my card to three colors and white.) I always play around with how I’m going to lay out my card.  I usually start with one idea (pictured below) and end up with something different before I’m done.  I really liked how the sample in the catalog (page 117) angled the layered pieces so I went with that in the end. I’m OK with changes (in cards at least. LOL)


I stamped the images from the  Places You’ll Go stamp set on Whisper White and Bermuda Bay cardstock with Night of Navy ink.  I used a circle from the Layering Circle Framelits to cut out the globe.

I have a funny feeling this stamp set is going to be getting a lot of use!! The new circles collection framelits are awesome!  Check out all the different sizes…and you can make scallop layers too!

I stamped the banner from Banners for You in Bermuda Bay ink.  Then I stamped the sentiment in Night of Navy ink.  The photopolymer stamps are easy to bend which I did to fit it inside the curve on the banner. I cut the banner with the matching framelits.

img_3347


I adhered the globe and the banner to the card.  I used Stampin’ Dimensionals to pop the banner.

We have shopped all summer to find everything she needed for her college room in colors that coordinate so I thought her going away card should coordinate too!  I knew I wanted to use a poem I saved on the inside of her card so I typed it on the computer and printed it on whisper white cardstock then cut it to fit.

img_3412

My husband bought some candy and we attached little sticker sayings to each (Thank You Pinterest!). I wrapped it all up in a Cellophane bag and tied it with Organza Ribbon.

img_3408

In case you are wondering what the stickers on the candy say…

We wish you MOUNDS of JOY!  We know you will go the EXTRA mile to reach your goals.  Be GOOD & get PLENTY of rest.  We love you to PIECES.  HUGS & KISSES! With Love, Mom and Dad

Here’s a final picture showing my van all packed.  I never thought it was all going to fit!

img_3391


It’s a good thing that in another week I will be heading back to school myself. I am a Pre-K teacher and I’ll soon have a classroom of 4 year olds to keep me busy and entertained. Every day is a new adventure!

Stamp sets: Places You’ll Go, Banners For You  Inks: Bermuda Bay, Night of Navy  Papers: Bermuda Bay, Night of Navy, Wisteria Wonder, Whisper White  Tools & Accessories: Layering Circles Framelits, Bunch of Banners Framelits, Subtles Enamel Shapes, Stampin’ Dimensionals, Fast Fuse Adhesive

Have a wonderful day!

Just Stampin’

Jeanie