You know how I love to make cards to coordinate with a gift. Well, if I can, I also like to make my thank you notes reflect the gift I received. I had to pull a couple of retired stamp sets off the shelf for today’s cards.
I received this gorgeous orchid from the office staff at school. This beauty has a place of honor on the table in my foyer so everyone who comes through my front door is guaranteed to see it! I don’t have a green thumb so the pressure is on to keep it alive!

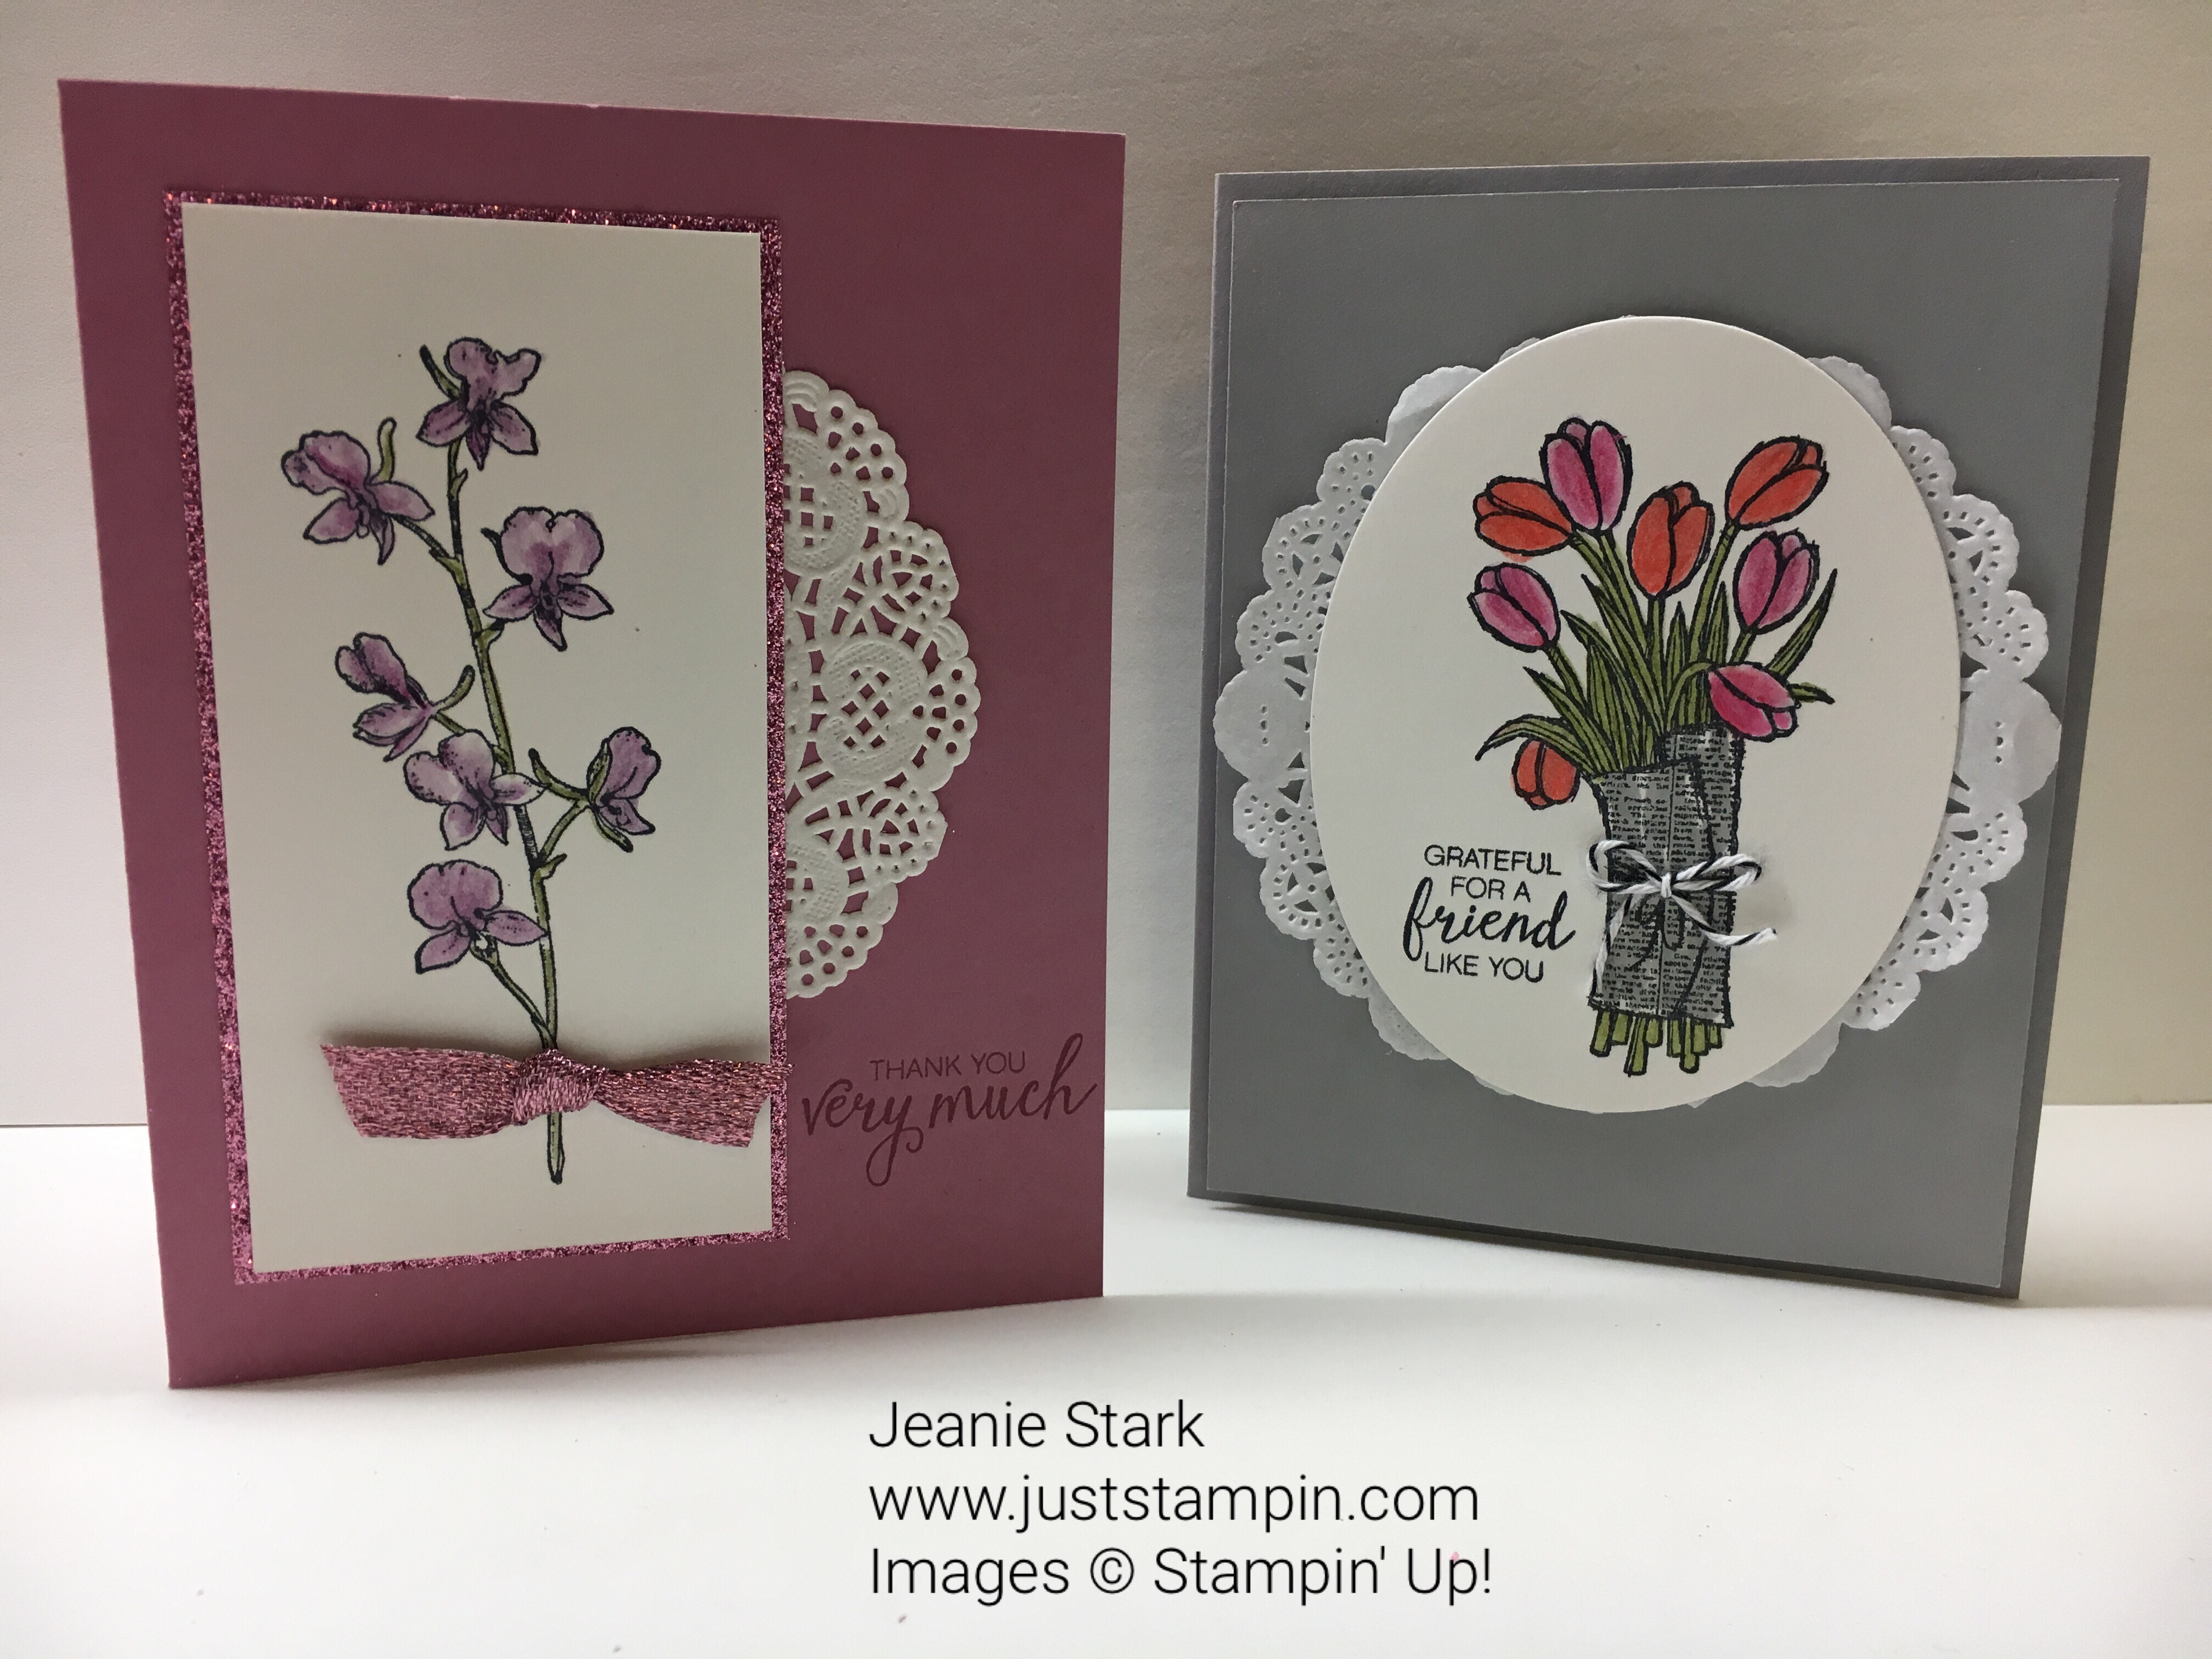
I wanted to use the Happy Watercolor Stamp Set (retired) for the orchid and Sweet Sugarplum for my card base.
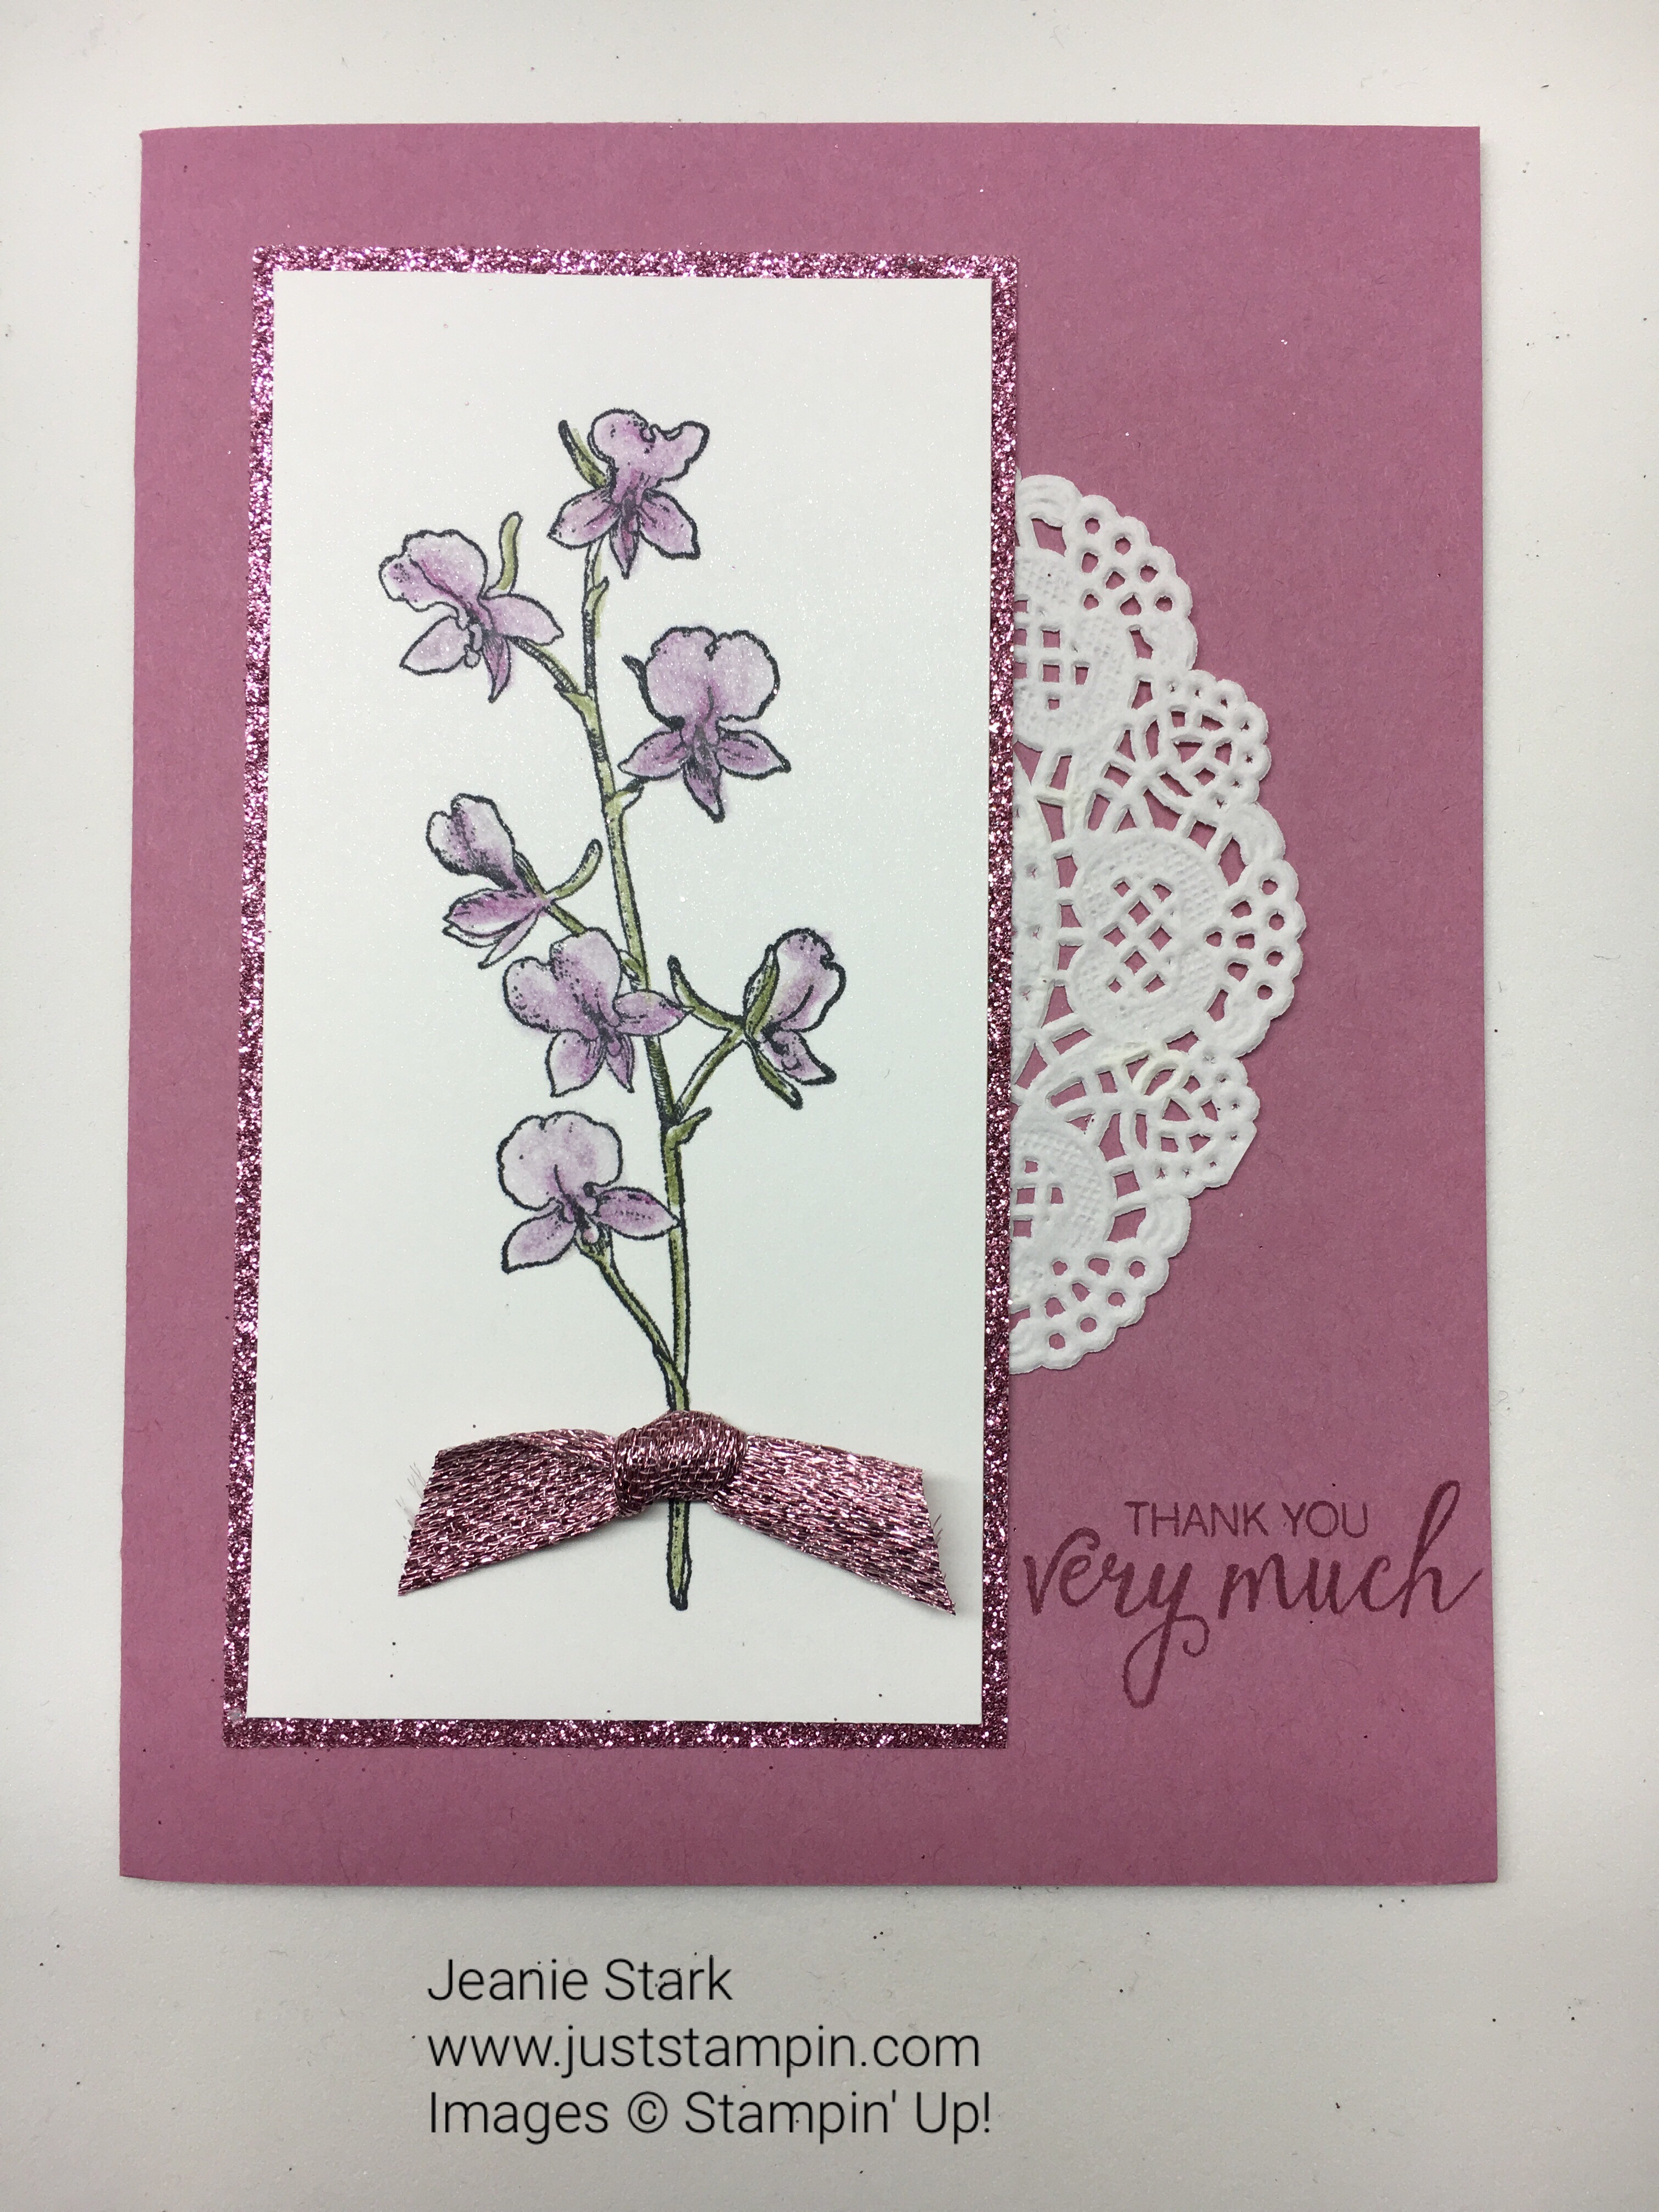
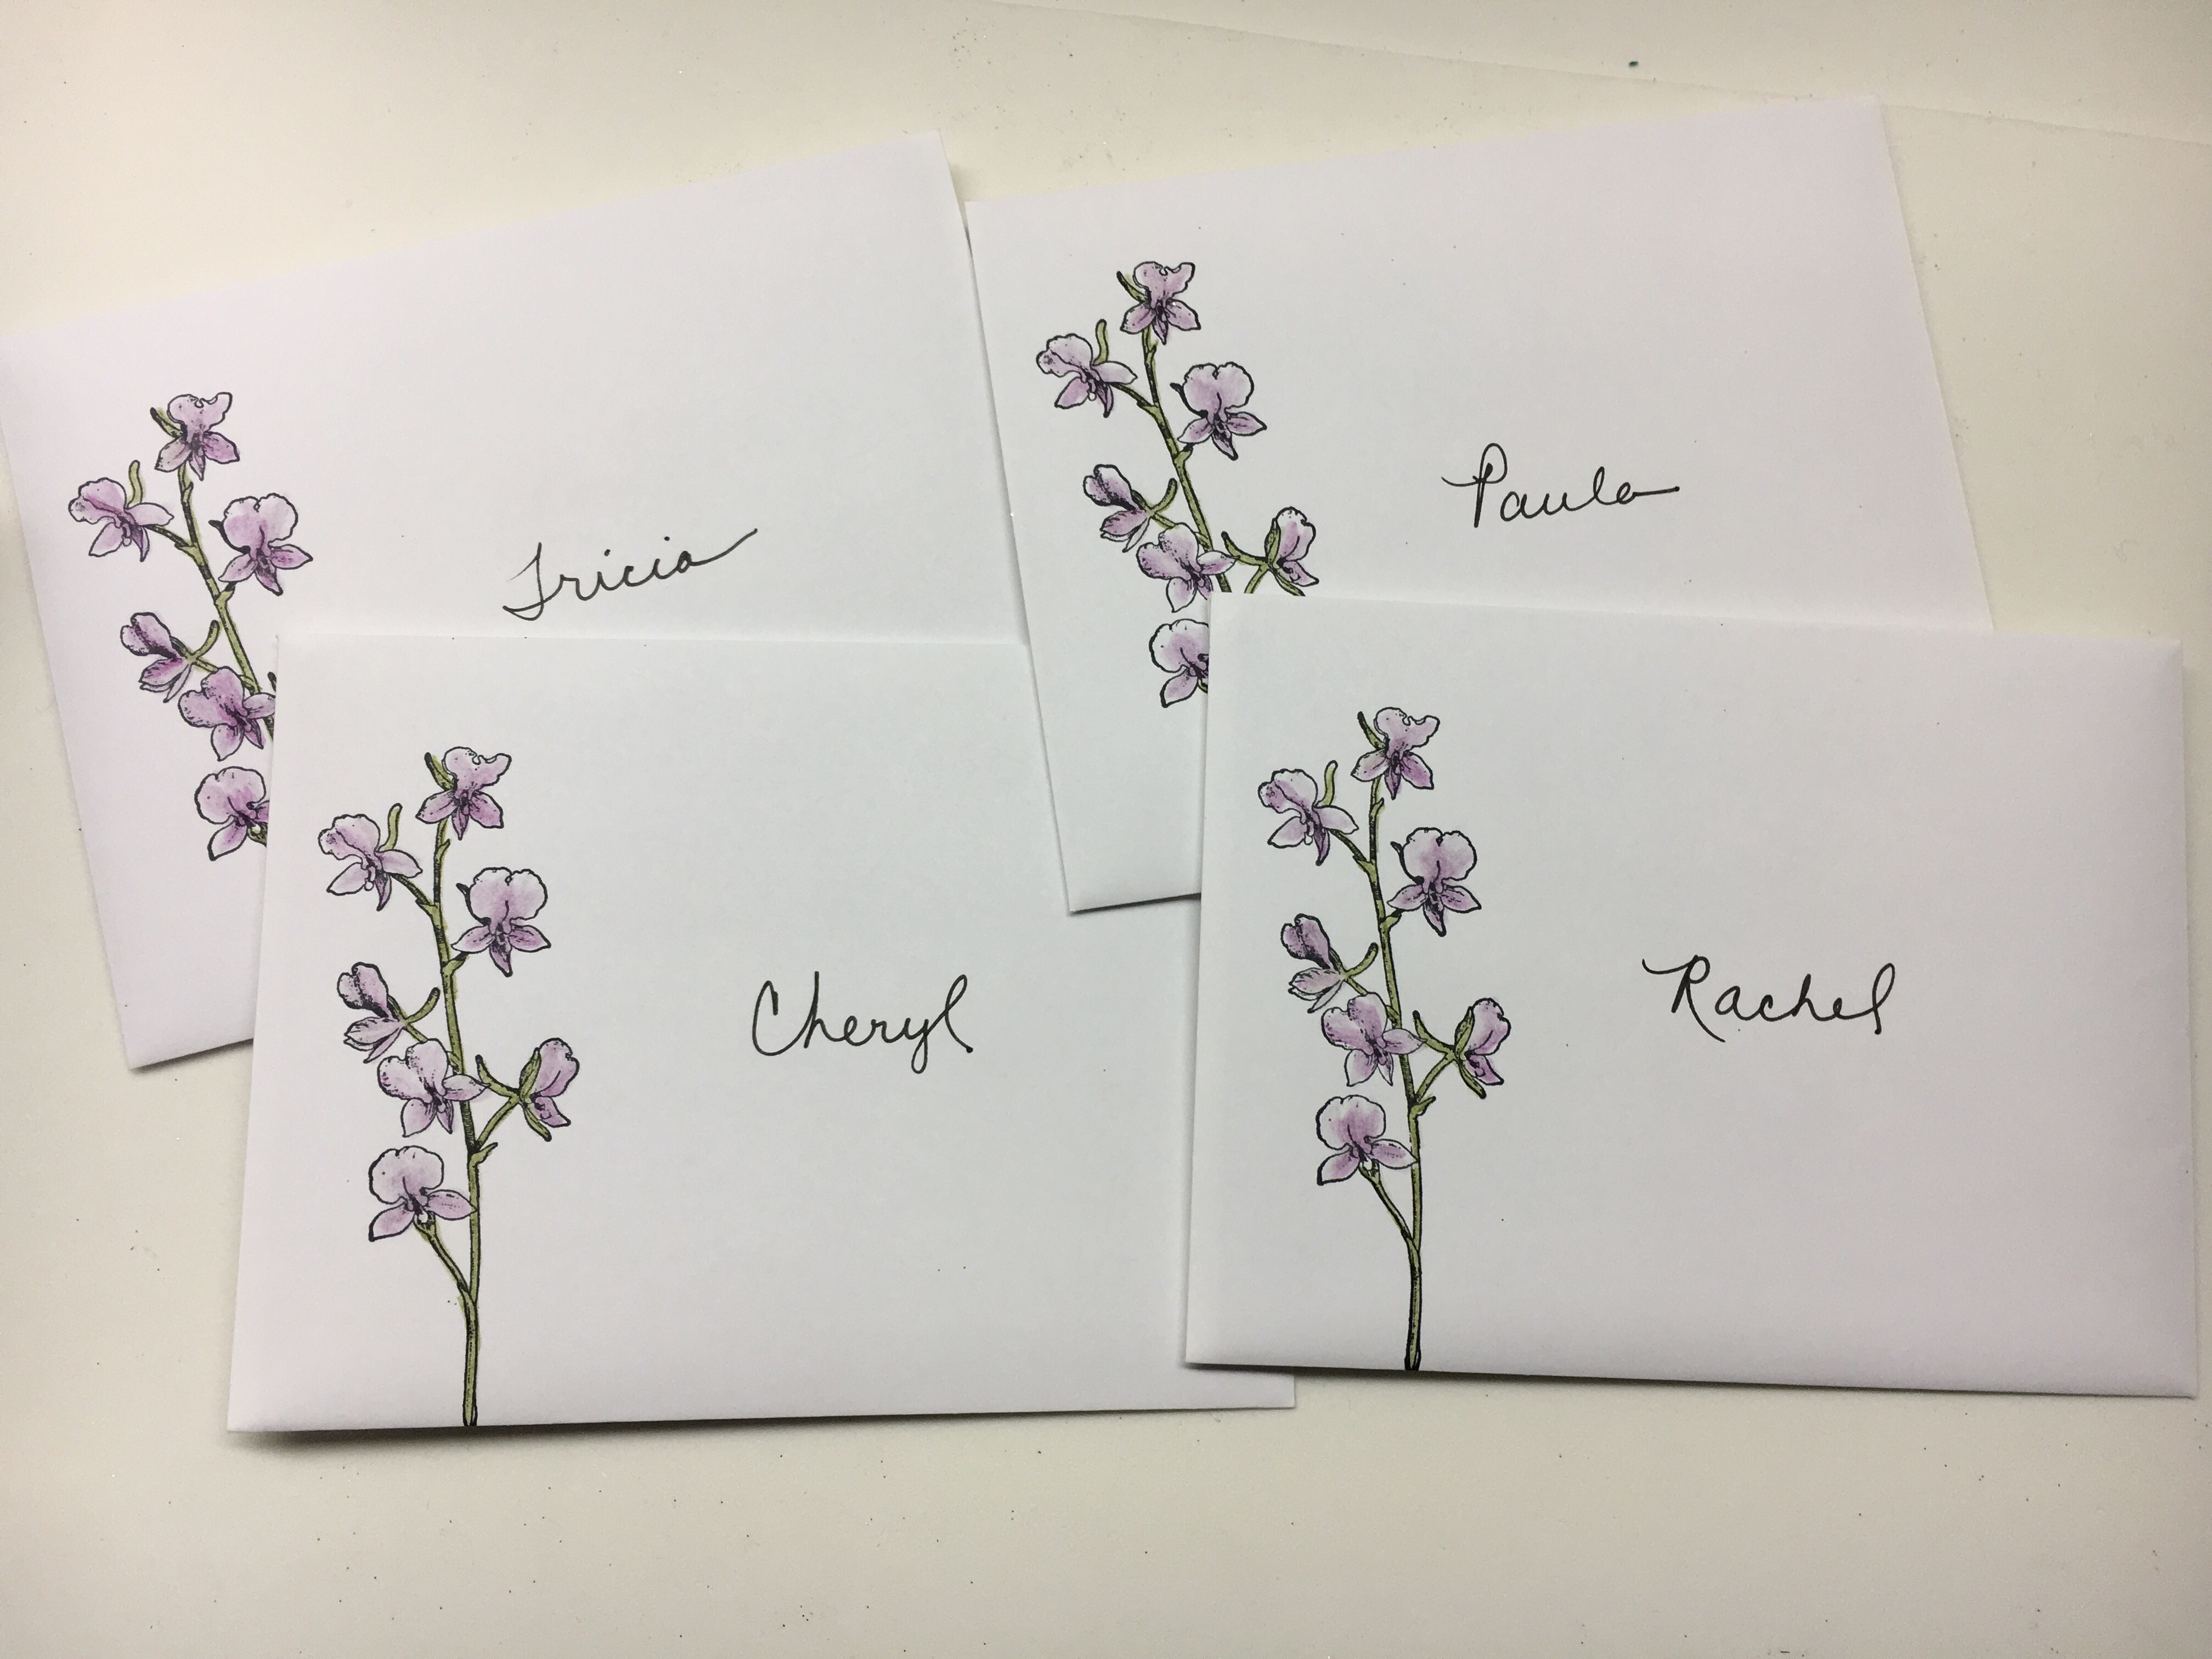
I stamped the orchid on a piece of 2 1/4 x 4 1/2 Shimmery White. This is my go to paper for watercolor projects. I colored the flower with the Watercolor Pencils and a blender pen. It is so quick and easy to do!! I love the new Glimmer Paper that I got for FREE during Sale-A-Bration. I cut a 2 3/8 x 4 5/8 piece of Sweet Sugarplum to mat the stamped image. I made a bow from some Sweet Sugarplum Glitter Ribbon (retired from the Holiday catalog) which matched perfectly with the Glimmer Paper. I cut a Delicate White Doily in half and adhered it behind the layered piece. The sentiment from Bunch of Blossoms Stamp Set is stamped in Sweet Sugarplum ink. I made one for each of the them and colored the envelopes to match.

My friend Caroline brought me a basket with dinner and flowers. She is such a great cook! I wasn’t feeling my best that day and her thoughtfulness really cheered me up!
Caroline often buys cards from me and she really likes the watercolor ones so I knew I wanted to watercolor her thank you note.
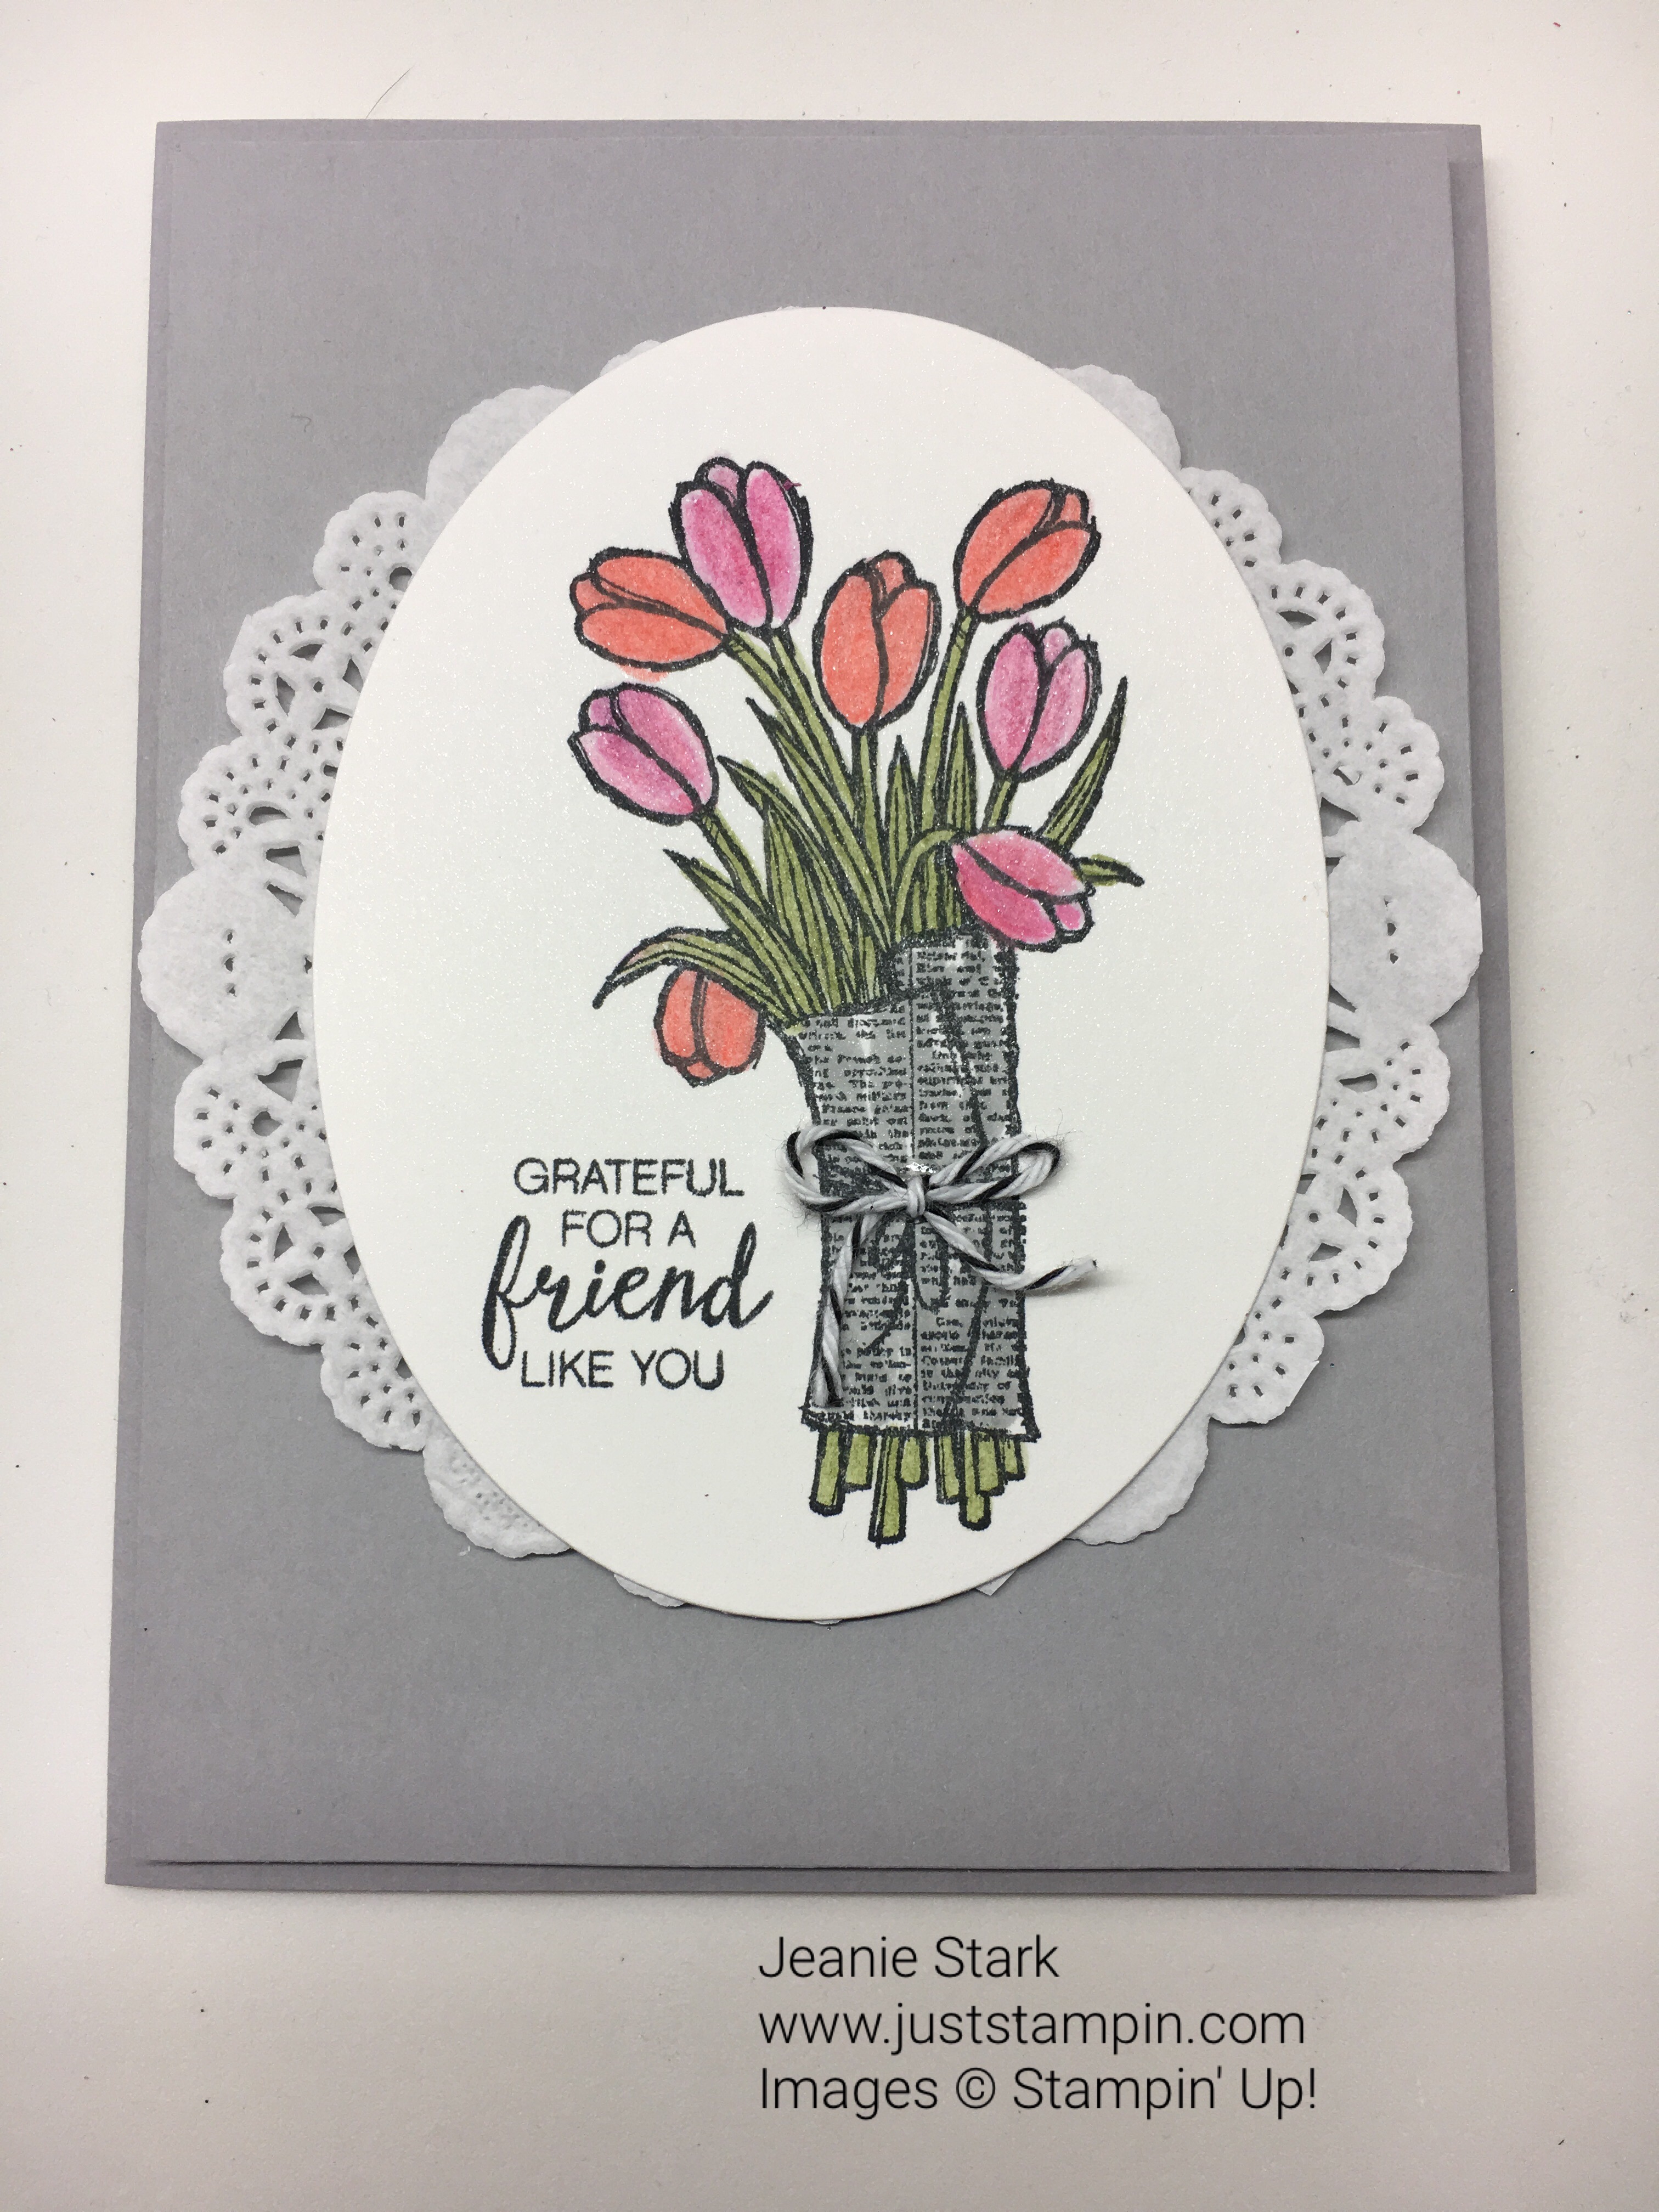
This card is a remake of one I made several years ago that I found on Pinterest. I used the Love is Kindness Stamp Set (retired) because it had some beautiful tulips just like the flowers. I stamped the image on Shimmery White cardstock with Momento Black ink and colored it with the Watercolor Pencils and Blender Pen. I cut it out with an Oval Framelit and adhered it to the Delicate White Doily. The sentiment is from Bunch of Blossoms Stamp Set. I used Basic Black Bakers Twine to make a bow and attached it with a glue dot. My card base is Smoky Slate with another layer of Smoky Slate that measures 4 x 5 1/4. I adhered both the layered panel and the stamped layer with Stampin’ Dimensionals. The inside sentiment is from the Thankful Thoughts Stamp Set. I love to stamp the inside of my card as well as my envelope to match.

I still have several more thank you cards to make! I hope you will check back tomorrow to see what I made to go with the Edible Arrangement I received. I photographed all the Swap Cards today and hope to swap and send them out this week. I’ll wait to make sure everyone receives their card before I showcase the cards on my blog. You are in for a real treat!
Have a wonderful day!
Just Stampin’
Jeanie


Shop!
For every $50 you spend (before tax and shipping), you get a FREE Sale-A-Bration product. That means it’s the perfect time to purchase those products you’ve had your eye on while earning more products for free. As an added bonus, Stampin’ Up! added three new Sale-a-bration products on February 21 (One of the new products is the Glimmer Paper I used on my orchid card)!
Click HERE to Shop. Use the February Hostess code K3VM6YBW when placing your online order to receive my Just Stampin’ Card Buffet Kit with an online order of $50 or more. Click HERE for more information.

VIEW: Sale-A-Bration – release 1
VIEW: Sale-A-Bration – release 2 (new) Check out the new Glimmer Paper (my favorite)!

Host!
You can earn Host Rewards with sales of $150. Place an order of $250 or greater or host a party with at least $250 in sales during Sale-A-Bration and you’ll earn $25 more in Stampin’ Rewards/Host Cash!! You can even apply your Stampin’ Rewards toward a Starter Kit and become a demonstrator yourself!

Join!
It’s the best time of year to join Stampin’ Up! During Sale-A-Bration, you can become a demonstrator for just $99 and choose TWO additional stamp sets for your Starter Kit—any stamp set, any price! (Excludes Sale-A-Bration sets and bundles.) Plus, the kit ships for free! Send me an email at j.stark@myactv.net if you have any questions or want to plan a time to chat. Click HERE and HERE for more information or click below to Join the Fun!