Celebration Labels Tags for the Pals Blog Hop

Hello, welcome to the Stampin’ Pretty Pals’ Blog Hop! This month our Design Team’s theme is “Tag, You’re It” – tags or 3D projects to get you inspired for the upcoming gift season. We hope you enjoy and will be inspired by them! Don’t forget to leave comments! We love hearing from you. At the end of my post, you will find the full line-up to help you “hop” along from Pal to Pal.

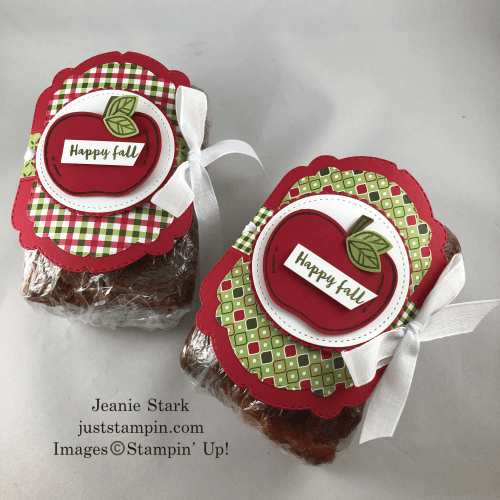
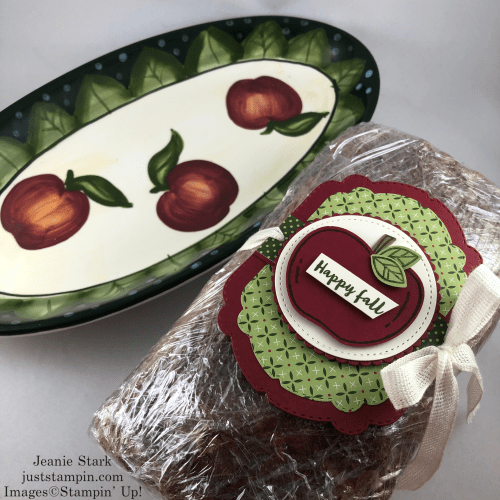
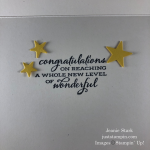
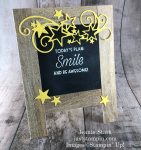
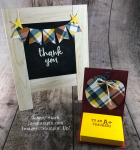
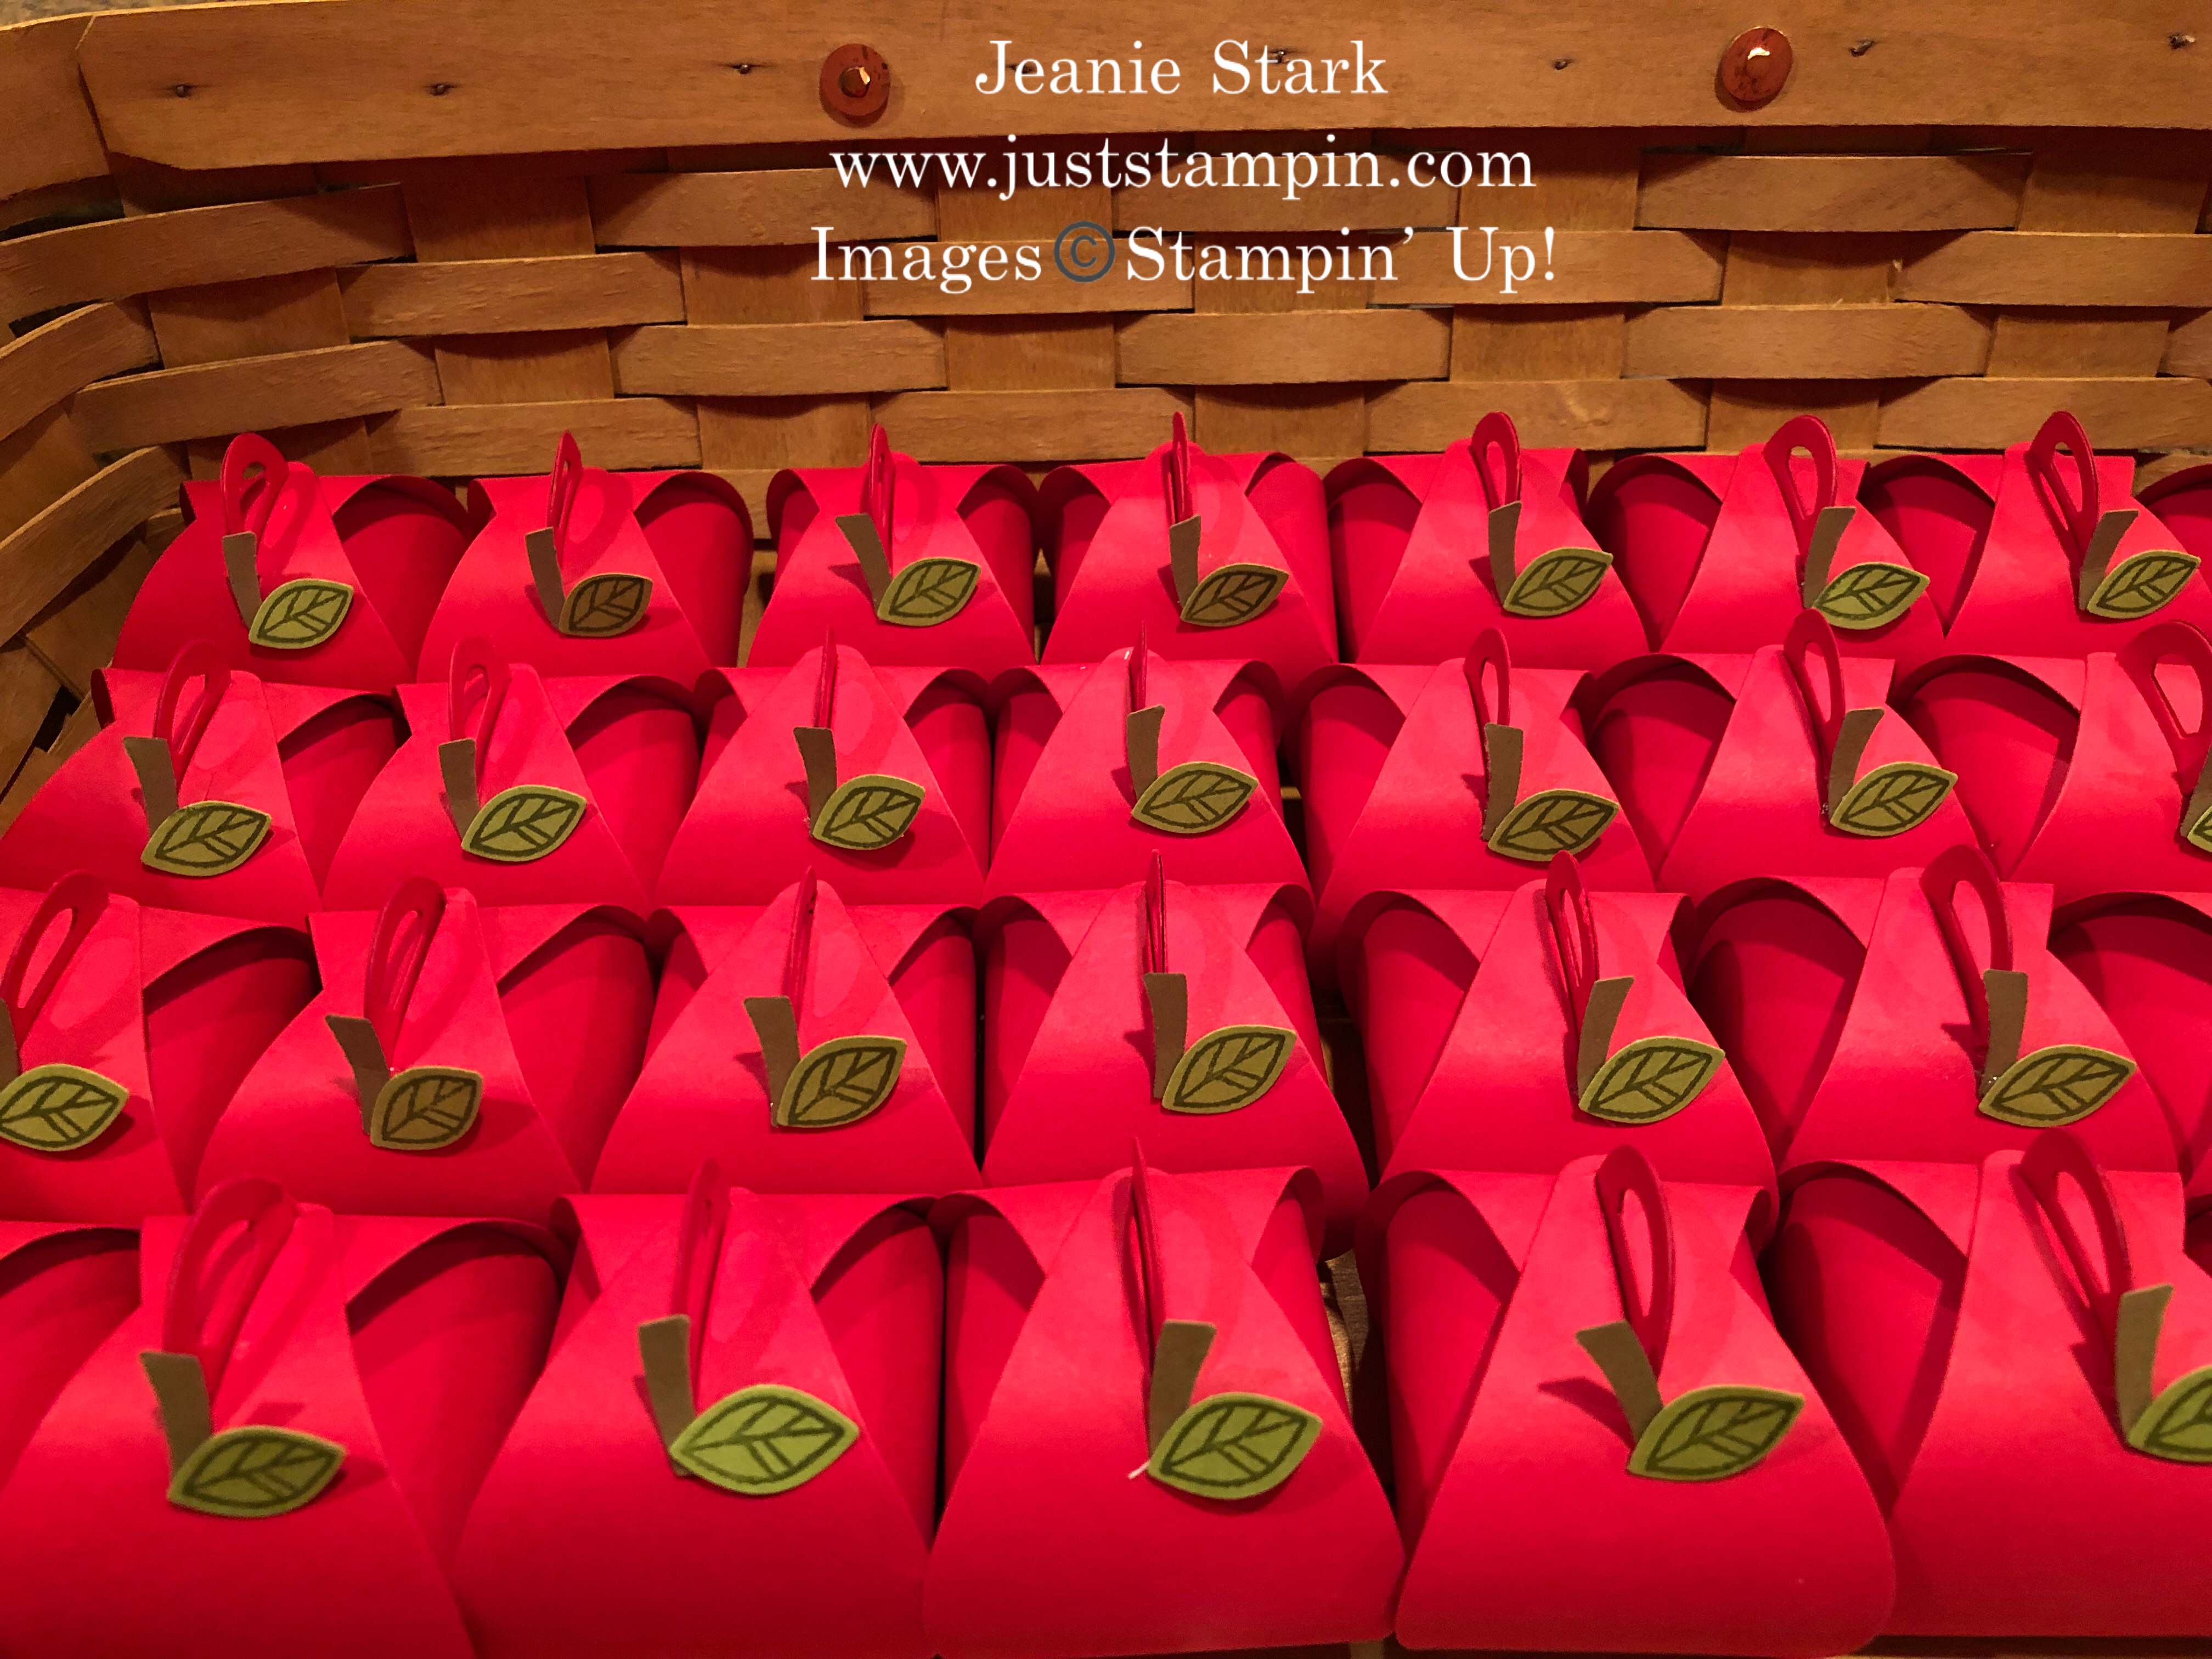
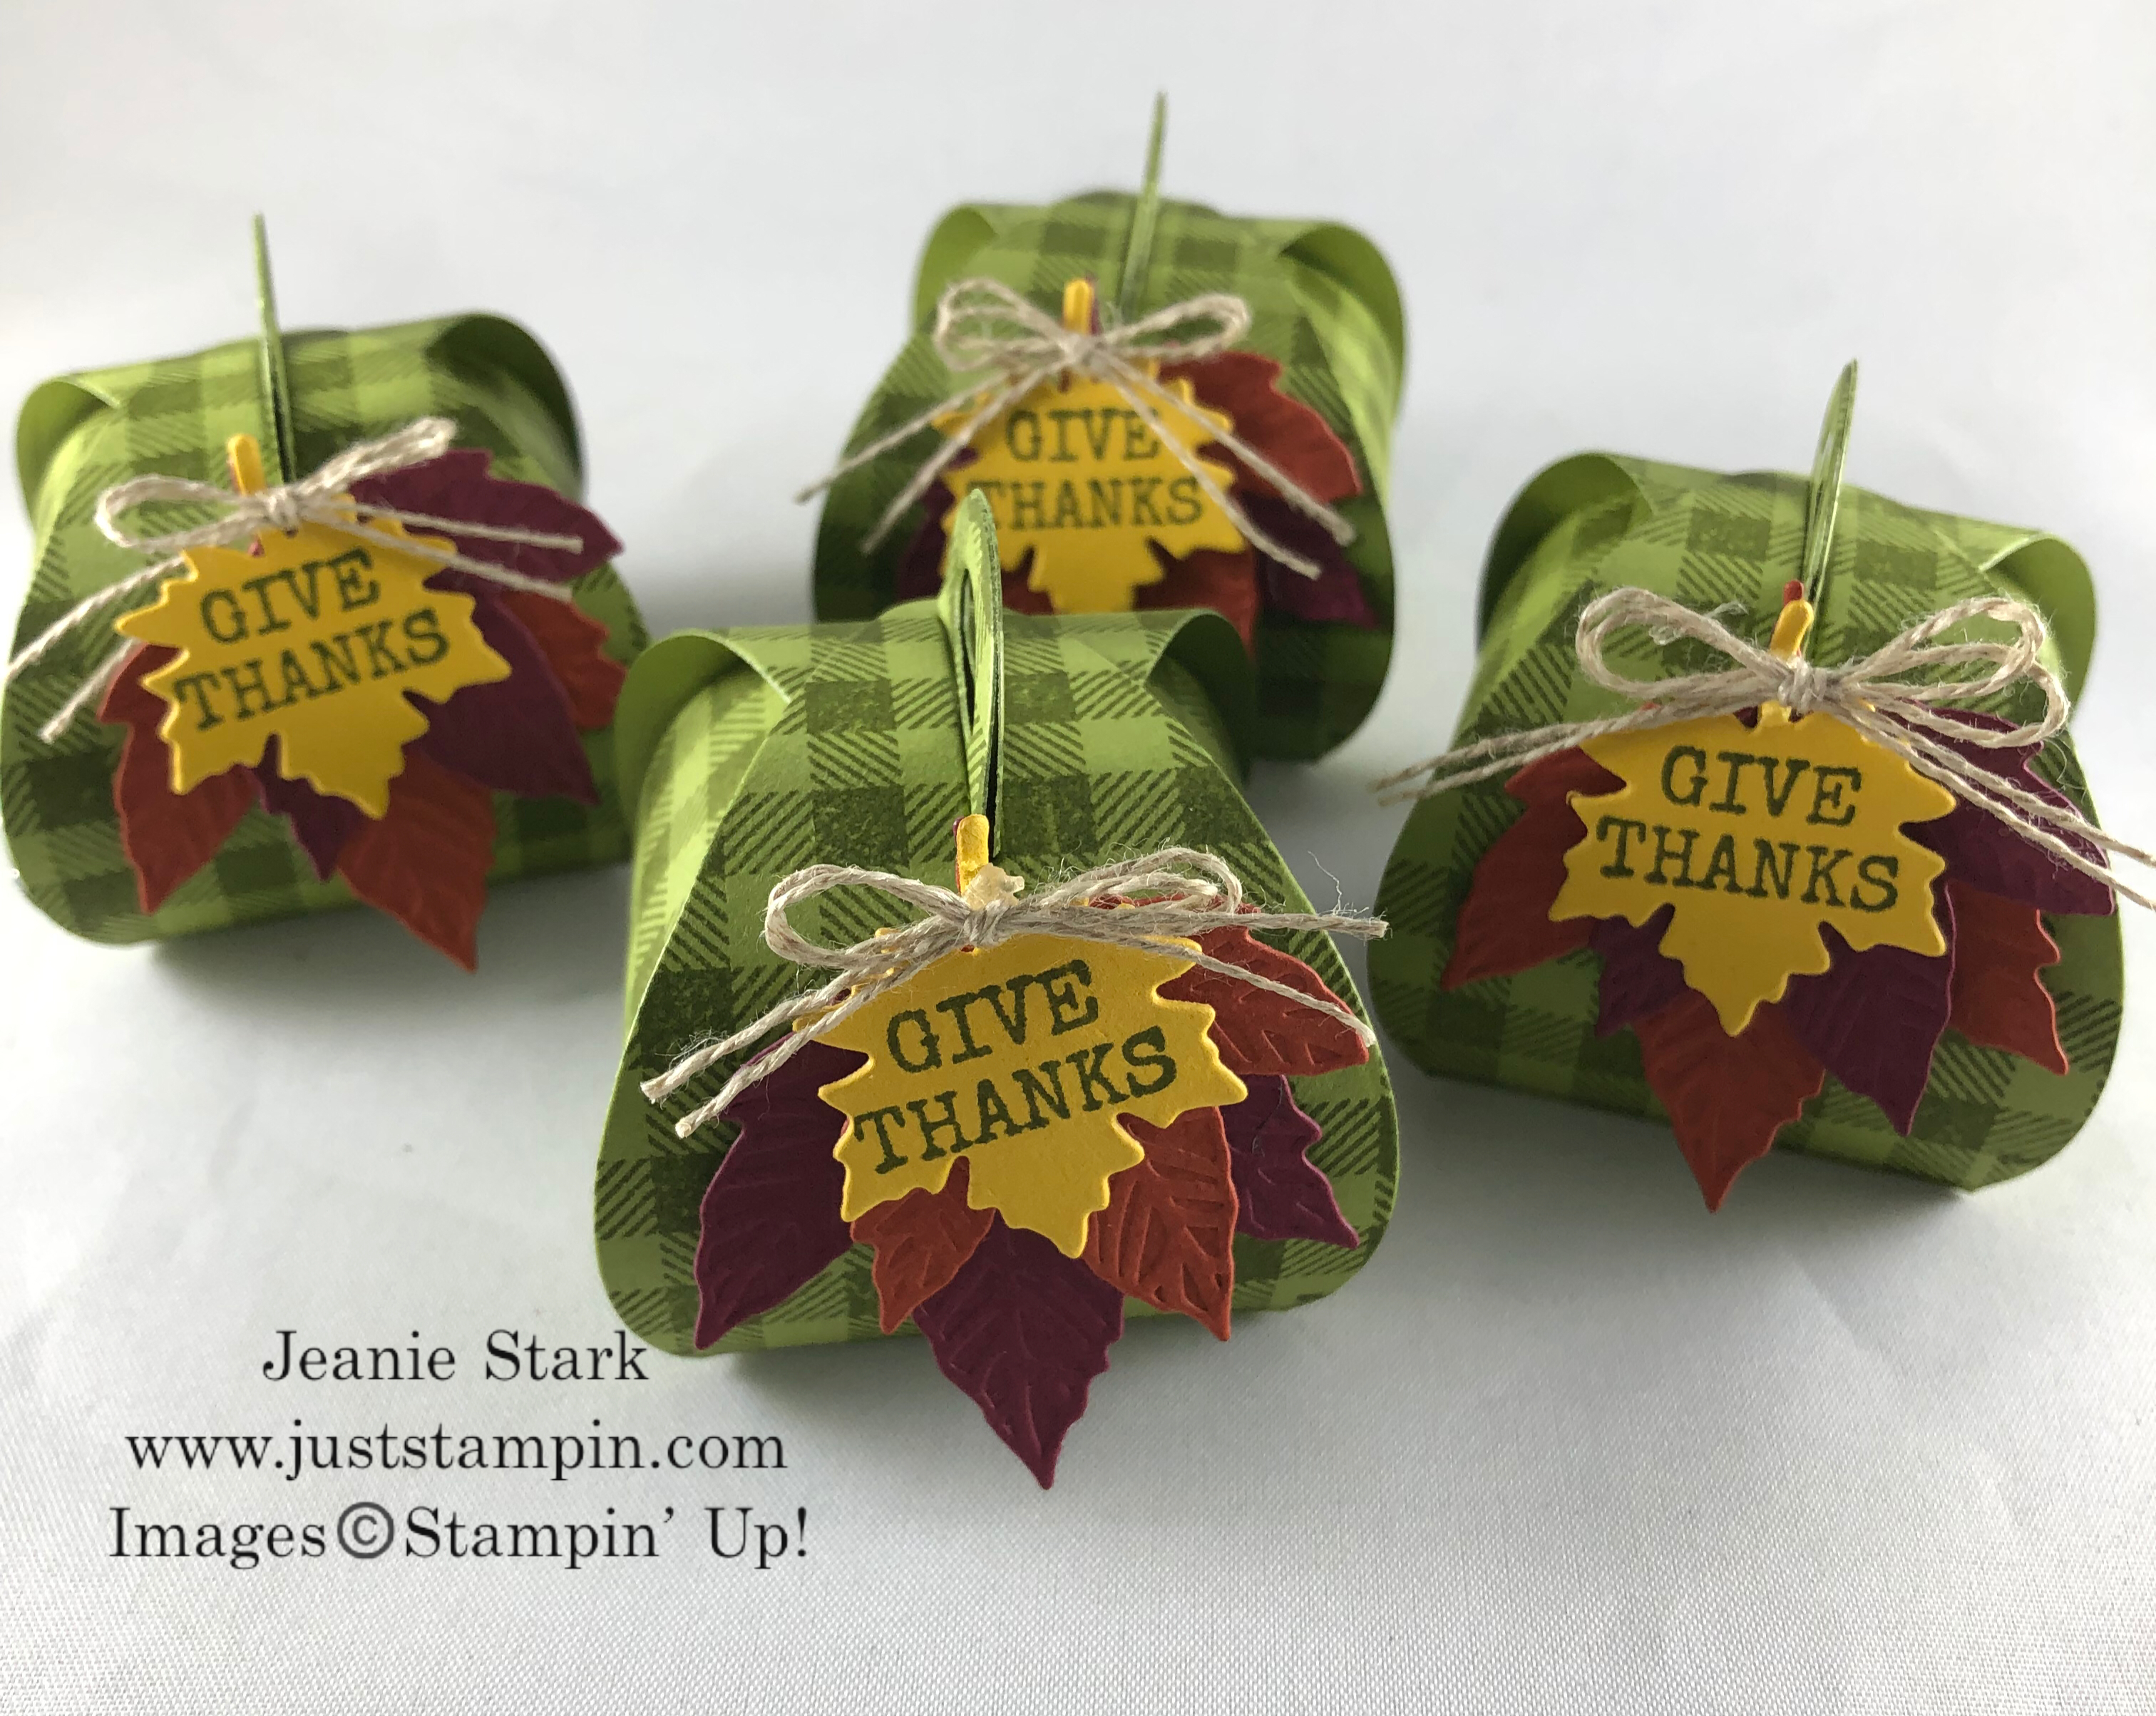
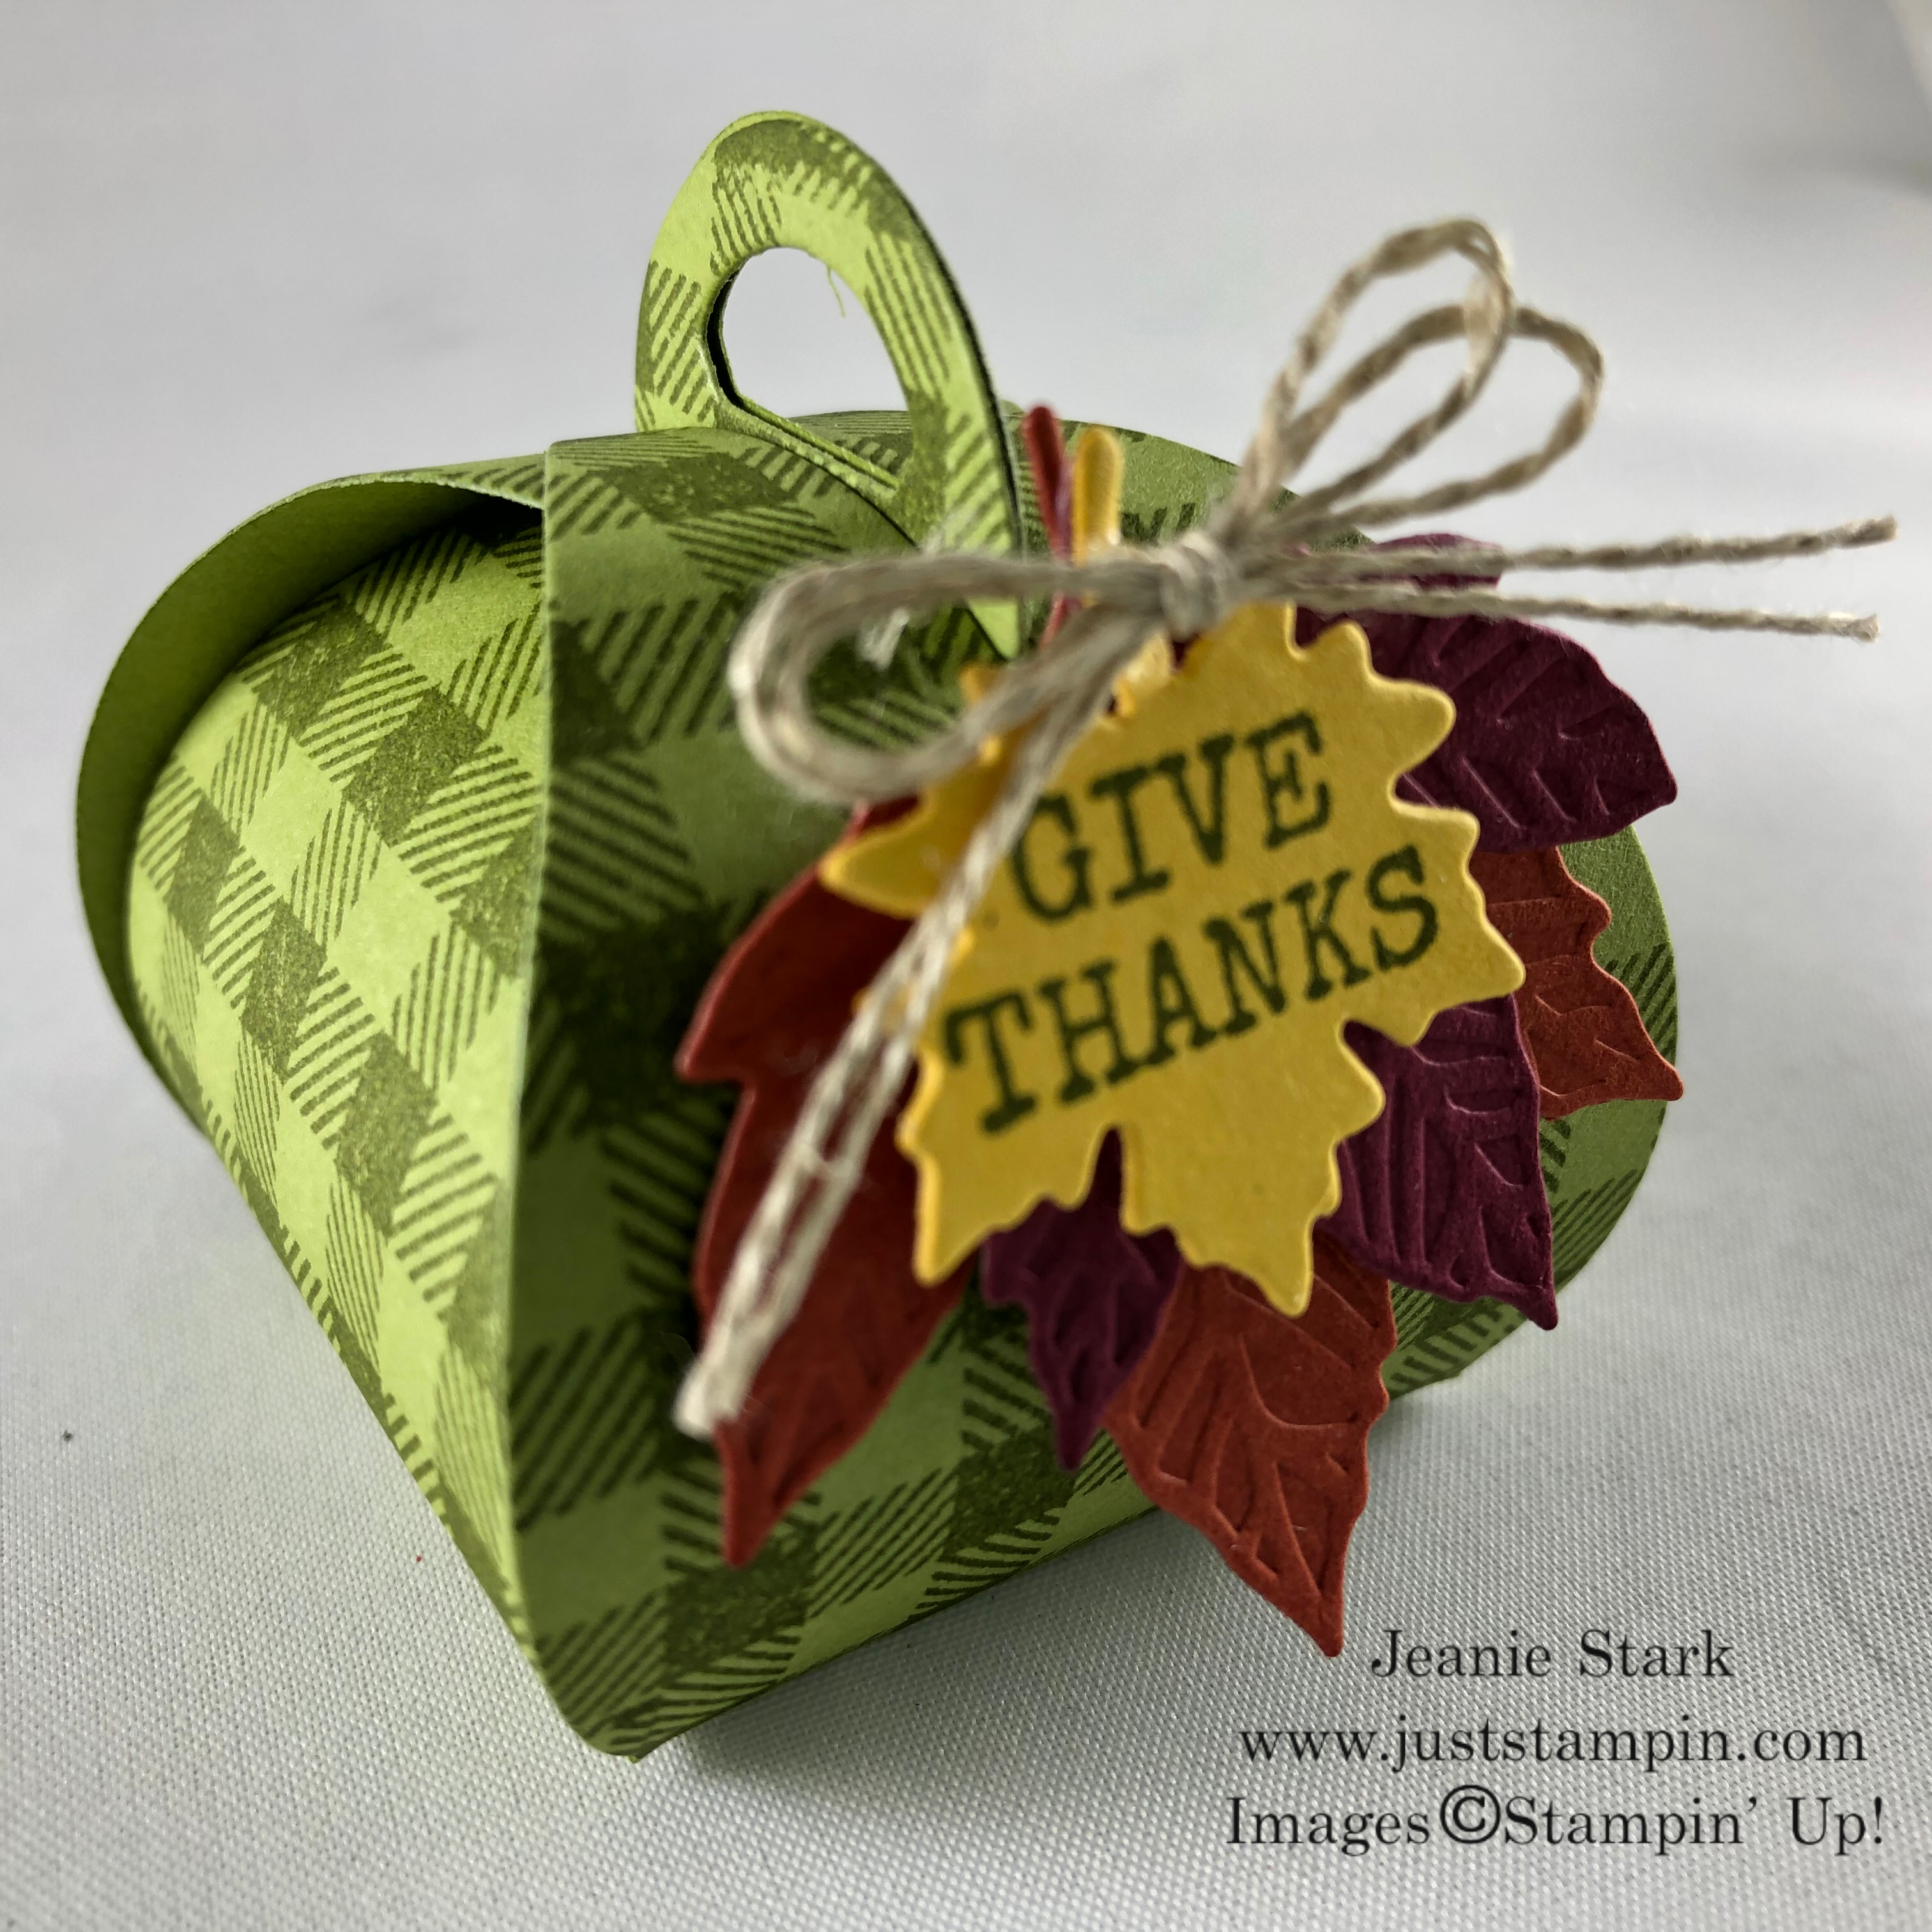
I am loving the versatility with the Celebration Labels Dies! I paired the dies with the Harvest Hellos stamp set and Apple Builder Punch to make these tags for some homemade applesauce and apple bread.

Stampin' Up! Harvest Hellos and Celebration Labels tag ideas - Jeanie Stark StampinUp
One of my favorite fall traditions is to pick my own apples from the orchard then come home and make all kinds of apple recipes! My family loves my apple bread. I decided to take a little (6 1/2 hour) drive to personally deliver some to my adult children last weekend. (*The fall foliage made for a beautiful trip north!)

Stampin' Up! Celebrations Labels and Harvest Hellos tag idea - Jeanie Stark StampinUp

I also made some bread for my sister and coordinated her tag to match the bread plate.

Stampin' Up! Harvest Hellos and Celebration Labels Dies tag idea - Jenaie Stark StampinUp
The Heartwarming Hugs Designer Series Paper I used on each of the tags is part of the 15% OFF sale this month! These patterns can be used for many different occasions throughout the year!

Stampin' Up! Heartwarming Hugs Designer Series Paper - for inspiration and ordering visit juststampin.com - Jeanie Stark StampinUp
Stampin' Up! Celebration Labels, Heartwarming Hugs, and Harvest Hellos tag idea - Jeanie Stark StampinUp
These tags are all about layering! The Celebration Labels Dies have 5 different sizes. They’re perfect to create handmade projects for any occasion. You can click HERE to see some cards I shared previously using these dies.

Stampin' Up! Celebration Labels Dies - for inspiration and ordering visit juststampin.com - Jeanie Stark StampinUp
Here’s a tip to extend your dies for even more layering possibilities! Cut out one of the dies then line up the notches in your paper trimmer and cut in half. Adhere to the top and bottom of the layering die and add a strip across the middle.

Here’s the details if you’d like to make these tags. (FYI…I’m planning to use the pumpkin from Harvest Hellos to make tags for Pumpkin Bread for Thanksgiving!)

Supplies:

Stamp sets: Harvest Hellos (Bundle), Banner Year
Paper: Heartwarming Hugs Designer Series Paper, Real Red/Cherry Cobbler, Whisper White/Very Vanilla, Pear Pizzazz, Soft Suede
Ink: Mossy Meadow, Memento Black, Real Red Blends Combo
Tools & Accessories: Celebration Labels Dies, Stitched Shapes Dies, Layering Circles Dies, Apple Builder Punch, Playful Pets Trim Combo, Flowers For Every Season Ribbon Combo, Forever Greenery Trim Combo, 1/8″ Hole Punch, Stampin’ Seal, Mini Glue Dots, Stampin’ Dimensionals

Measurements:

Real Red or Cherry Cobbler: 3 ½ x 5 (Cut with Celebrations Label Die), 1 x 3 ¼ (Layering strip), 2 x 2 ½ (punch apple), 2 ¾ square (Cut with Scallop Circle Die)
DSP Layers: 3 x 4 (Cut w/ Celebration Labels Die), 7/8 x 3 ¼ strip
Whisper White: Cut 2 3/8” Stitched Circle, ½” strip to stamp sentiment
Soft Suede and Pear Pizzazz: scraps to stamp and punch stem and leaves

Click on the image below for my Apple Bread RecipeApple Bread Recipe- Jeanie Stark - Independent Stampin' Up! Demonstrator - juststampin.com - StampinUp
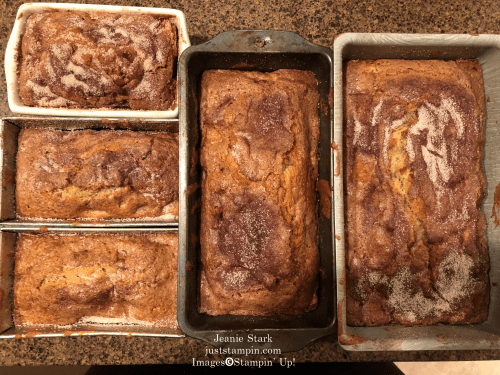
More inspiration awaits! Use the Blog Hop Line-up below to visit the rest of this month’s Design Team. My fellow Pals are excited to show you what they’ve created! Mark your calendars for our next blog hop on November 11th when our theme is “Pile It On!” Participants will showcase projects with lots of layers, embellishments and/or texture. Don’t miss the fun! Until then, please stay safe and have fun in your craft space.

Stampin’ Pretty Pals October Blog Hop Line-Up:

  1. Mary Fish at Stampin’ Pretty
  2. Melissa Seplowitz at The Stamping Ninja
  3. Ann Murray at Murray Stamps Ink
  4. Stesha Bloodhart at Stampin’ Hoot!
  5. Karen Buttery at Karen On The Lake Stamper
  6. Jeanie Stark at Just Stampin’ <<YOU ARE HERE>>
  7. Jen Roque at Stamp Camp with Jen
  8. Lori Pinto at LollyPop Paper and Ink
  9. Mary Hanson at Up North Stampin’
  10. Beth McCullough at Stamping Mom
  11. Tricia Chuba at ButterDish Designs
  12. Su Mohr at Aromas And Art
  13. Leah O’Brien at Honey Bee Stamping & More!
  14. Dacia Smith at My Creative Days
  15. Rae Harper Burnet at Wild West Paper Arts
  16. Sue Jackson at Just Peachy Stamping
  17. Peggy Noe at Pretty Paper Cards
  18. Debbie Mageed at Secrets to Stamping
  19. Wendy Klein at Doggone Delightful Stampin’
  20. Deb Walker at Deb Stamps Life
  21. Jackie Beers at Blue Line Stamping
  22. Lisa Ann Bernard at Queen B Creations
  23. Pamela Sadler at Stampin Pink Rose
  24. Debbie Crowley at expressively deb…

Have a great day! Stay Safe! Stay well!
Just Stampin’
Jeanie
Product List (Click on image to shop my online store.)

Need DSP? Stock Up & Save this month!  Select packs are 15% off during October.

Designer Series Paper Sale (Click on the images below to shop in my online store.)

Chalkboard Easel Card Tutorial

Yesterday I posted several card ideas for teachers, school employees, or your favorite student. Back to school this year is certainly different during the current pandemic. With so many changes facing teachers, students, and parents, it’s nice to let them know you’re thinking of them.  Everyone loves to feel appreciated and these easel cards are quick & easy to make to brighten someone’s day!

Stampin' Up! In Good Taste thank you and inspirational chalkboard easel card card ideas for teachers or students - Jeanie Stark StampinUp

Here’s the details to create a chalkboard easel card:

Measurements

  • Card Base (Thick Very Vanilla): 4 1/4 x 11 scored at 5 1/2
  • Basic Black: 3 3/4 x 3 3/4
  • In Good Taste Designer Series Paper: 2 strips 3/4 x 4 1/4, 2 strips 3/4 x 5 1/2

Directions

  1. Fold and burnish the card base.
  2. Line up the open end of the card base at the 3/4″ mark (along the right side of the trimmer) and cut up to the 1″ mark.  Flip the card and do the same on the other side of the card.
  3. Turn the card sideways so the cut marks line up at the 1″ mark (along the right side of the trimmer). Start at 3/4″ and cut to the 3 1/2″ mark (to remove piece between the cut lines).
  4. Stamp sentiment on black cardstock with Versamark Ink and emboss with white embossing powder using the Heat Tool.
  5. Use a sponge or tissue to dab White Craft Ink around the sentiment. Swirl in a circular motion as if you were erasing a chalkboard.
  6. Adhere black piece to card base.
  7. Adhere DSP strips along the top and bottom first, then adhere DSP along the sides overlapping the top and bottom piece.
  8. Embellish chalkboard as desired.

Here’s a little more details for each one…

Stamp sets: Harvest Hellos, Celebrate Sunflowers. Die cut letters using Playful Alphabet Dies. Create medal with Layering Circles Dies, Stitched Stars Dies, and Misty Moonlight 1/4″ Ribbon.

Stamp Sets: Nothing Better Than, Daisy Lane, Forever Fern. Embellish with Stitched Stars Dies.

Stamp Sets: Free As A Bird, Ornate Thanks, Good Morning Magnolia. Die Cut greenery from Sunflowers Dies. Punch vase from Artistry Blooms Designer Series Paper using Vases Builder Punch. Create banner using Banners Pick A Punch. Flower punched from Confetti Flowers Border Punch.

Stamp Sets: Massive Thanks, Good Morning Magnolia. Create Banner using Banners Pick A Punch and Stitched Stars Dies.

Create a coordinating Post It Note Gift using the Apple Builder Punch and Plaid Tidings Designer Series Paper. Click HERE or on the image below to view the original post for directions.

Stampin' Up! Apple Builder Punch and Plaid Tidings Mini Post It Note Holder idea for back to school - Jeanie Stark StampinUp

Here’s another idea for a great little gift/treat holder for a student or teacher. *Click HERE to view the original post.

Have a great day! Stay safe! Stay well!

Just Stampin’

Jeanie

Host Code Exclusive Offer! All orders placed through my online store are eligible for my FREE monthly gifts (*See Rewards below). Please use the current host code.  *If your order is $150 or more, do not use this code as You become the hostess and get the Rewards! Click HERE to Shop!

September Host Code: T6C2VFBK

Product List (Click on image to view more details and shop from my online store.)

Whisper White Craft Stampin' Pad

Whisper White Craft Stampin’ Pad
[101731]
$8.00

Just Stampin’ Rewards

I appreciate each and every order! Here are the things you can expect when you place an online order with me in September:

  • Handmade thank you card in the mail with any order.
  • 3 FREE Exclusive Tutorials featuring the stamp/bundle of the month when you order $40 or more (before tax & shipping).  New tutorials every month! September tutorials feature the Arrange A Wreath Bundle. *Remember to add the current host code when you check out. Current Host Code: T6C2VFBK
  • Free card kit –  Purchase the Arrange A Wreath Bundle and get a free card kit to make one of the cards featured in the tutorial. *Click on the image below to purchase

Exclusive Tutorials FREE with Purchase (*In addition to rewards above! Please remember to add the host code!)

  • Celebrate Sunflowers – Get 3 exclusive tutorial with the purchase of the Celebrate Sunflowers Bundle. (Click HERE to view one of the cards included in the tutorials.)
  • Jar of Flowers – Get 3 exclusive card tutorials with the purchase of the Jar of Flowers Bundle. (Click HERE to view one of the cards included in the tutorials.)
  • Ornate Garden – Purchase the Ornate Styles Bundle or Ornate Thanks Bundle and receive 3 exclusive card tutorials. If you purchase both the Ornate Styles Bundle and Ornate Thanks Bundle I will send you all three kits to create each of the cards featured in the tutorials!
  • Timeless Tulips – Get 3 Exclusive Card Tutorials PLUS my 3D Tulip Treats Tutorial (Click HERE to view tulip treats) with the purchase of the Timeless Tulips Bundle!
  • So Sentimental – Get 3 exclusive tutorials with the purchase of the So Sentimental Bundle.
  • Peaceful Poppies –  Get 3 exclusive tutorials with the purchase of the Painted Poppies Bundle or the Peaceful Moments Bundle. If you purchase both the Painted Poppies Bundle and the Peaceful Moments Bundle I will send you all three kits to create each of the cards featured in the tutorials!

Product List (Click on any image to view larger in my online store.)

Join my team and get extra rewards this month! Plus have access to my exclusive monthly tutorials!

Get & Go Starter Kit Special

Stampin' Up! Get & Go Starter Kit Promotion - Join my team Sept. 1-30 and earn 2 free stamp sets plus cardstock pieces to create 16 cards - visit juststampin.com for more informaton - Jeanie Stark StampinUp

Includes 16 Card Kits, 2 FREE Stamp Sets, and MORE!!!

  • For $99 you GET $125 in products that YOU get to choose PLUS…
    • Two FREE stamp sets (Queen Anne’s Lace and So Much Love)
    • 16 Card Kits and Envelopes
    • Basic Rhinestone Jewels
    • FREE SHIPPING
  • Use Card Kits for your personal crafting, to craft with a friend, OR for your first class or event.
  • Click Here for a few FAQs about being a demonstrator.
  • Click HERE to Join NOW!

Feel free to contact me if you have any questions or want more information!  I’d love to chat!

M is for Mini Curvy Keepsake Box Dies

Welcome to my ABC Holiday 2019 Series! Throughout this series I will be sharing all kinds of cards, gifts, and ideas to help make your holidays as easy as ABC! Today I’m showcasing the Mini Curvy Keepsake Box. I loved it’s Mama (Curvy Keepsakes Die) from several years ago and just about anything mama could do, so can this little cutie! Here’s a look at the first project I made.

Stampin' Up!Harvest Hellos Bundle and Mini Curvy Keepsake Box Dies apple treat holder idea - Jeanie Stark StampinUpStampin' Up!Harvest Hellos Bundle and Mini Curvy Keepsake Box Dies apple treat holder idea - Jeanie Stark StampinUp

I made over 50 of these apples…for the teachers for back to school, the hairdressers at the shop where I sell my cards, friends, etc.  They are so quick & easy to make! You had to cut two for the old “Mama” die and then you had to glue and assemble but this little one doesn’t require any adhesive at all and you can get two of these boxes per sheet of paper.  I filled the apples with 5 caramels each which still makes a nice little treat to give.  There are so many other things you can fill them with too! Here’s some others I made for Fall/Thanksgiving.

Stampin' Up! Mini Curvy Keepsake Box Dies Fall or Thanksgiving table favor idea - Jeanie Stark StampinUp

I used the Tiny Keepsakes Stamp Set to make the checked pattern on my boxes. You can purchase the Tiny Keepsakes Stamp Set and the Mini Curvy Keepsakes Box Dies as a bundle and SAVE 10%.  I debated getting the bundle and thought I would just buy the dies but I am so glad I went ahead and purchased the bundle!  The Tiny Keepsakes Stamp Set has two miniature background stamps with adorable greetings. You can make your cards and projects so creative making your own “Designer Series Paper” using the checked or stripes! Take a look at all you get with the Tiny Keepsakes Bundle.

Stampin' Up! Tiny Keepsakes Bundle - for inspiration, tutorials, and more visit juststampin.com - Jeanie Stark StampinUp

Here’s a quick video to see how easy it is to put this treat holder together!

I like to use my bone folder to curl each side of the paper before I put it together.  It gives it a more rounded look.

Stampin' Up! Gathered Leaves and Mini Curvy Keepsakes Box Dies Fall or Thanksgiving treat holder idea - Jeanie Stark StampinUp

I filled these with M&M’s and a special little note. For years I’ve mixed up my special “Blessings Mix” and always had that in whatever table favors I made that year. This year, I’m changing it up and going with some M&M’s and a Thanksgiving Gratitude Game to get some fun family conversation going (I hope).

Thanksgiving Gratitude Game idea - visit juststampin.com for inspiration and Stampin' Up! supplies - Jeanie Stark StampinUp

Click to print your own Thanksgiving Gratitude Game.

You can click HERE or HERE for more Thanksgiving favor ideas.

On a personal note…I am one happy mama today as my daughter flew in late last night and is home for a few days. We are planning to hit the craft shows this weekend, perhaps take a hike to the waterfalls, and enjoy the gorgeous Fall weather.  And, since she can’t come home for Thanksgiving this year, we are planning to celebrate the holiday this weekend with a big turkey and all the trimmings. I grew up in Massachusetts and went on many field trips to Plymouth Plantation.  We were told the first Thanksgiving was actually celebrated in October. It was good ole President George Washington who decided to proclaim a national Thanksgiving holiday in November. For me, any day I have my kids home is a day of Thanksgiving!!!!

Have a wonderful weekend!
Just Stampin’
Jeanie

*Host Code Exclusive! All orders placed through my online store are eligible for my FREE monthly gifts (Exclusive tutorials, card kits and more!). Please use the current host code below. *If your order is $150 or more, do not use this code as You become the hostess and get the Rewards! Don’t forget to check out the Clearance Rack and SAVE! Click HERE to shop. 

October Host Code:  FG7M24JM

FREE Tutorials…This month I am offering 3 Exclusive PDF card tutorials using the All Around Wreath Dies and coordinating stamp sets. You can get these tutorials FREE with a purchase of $40 or more from my online store. (These ideas will not be shared on my blog.) In addition, you will receive a handmade thank you card from me along with a card kit for any order each month! I love to make and send cards and I appreciate your support!

Did you miss out on the Exclusive monthly tutorials in September featuring the Gather Together Bundle? Order the bundle from my online store and I’ll send you the tutorials for FREE!

Click on the bundle to order!

Product List for Mini Curvy Keepsakes Box Projects (Click on any image to shop my online store.)

What’s better than creating a handmade card? Sending it of course! That’s why Stampin’ Up! is excited to announce the first annual World Card Sending Week from Sunday, October 6 to Saturday, October 12. We’re setting a goal to send 50,000 cards that week! I would love your help in reaching our goal. I hope you will find some time to create this week. Then keep track of how many cards you send from Oct. 6 – 12.  On October 12th I will ask that you to leave a comment on my blog with how many cards you sent.  Let’s work together and send smiles across the world!