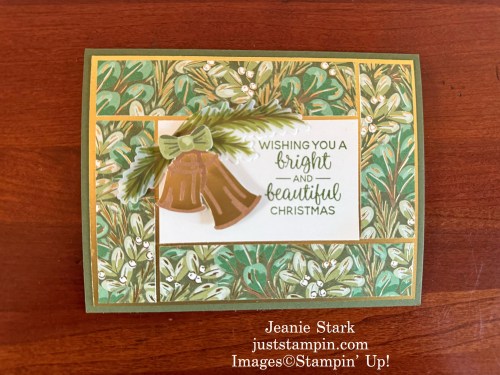
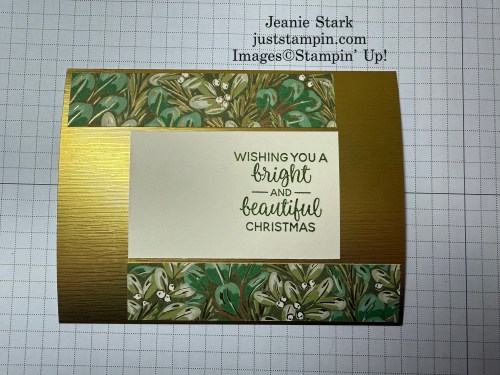
Welcome to my 12 Days of Christmas-Day 6! I am so excited to bring you 12 days of fun Christmas projects that will hopefully inspire you to create! Today I am sharing a panel frame card created using the “sophisticated” Season of Green & Gold Specialty Designer Series Paper.
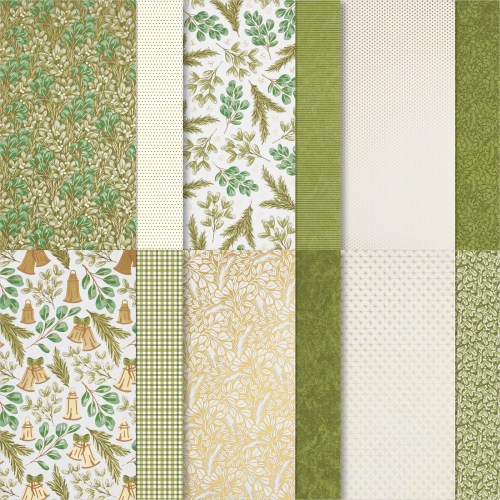
The Season of Green & Gold Specialty Designer Series Paper is an online exclusive and my favorite this holiday season. With gorgeous greenery and glistening gold foil patterns, these paper designs are sure to set your Christmas crafts apart from the rest!
Season of Green & Gold 12″ x 12″ Specialty Designer Series Paper
This paper is perfect for holiday cards and gift tags, but the timeless designs work for year-round projects, too. (Would make for a beautiful wedding or anniversary card!) *The Golden Greenery Dies coordinate with this paper and cut out some of the designs.
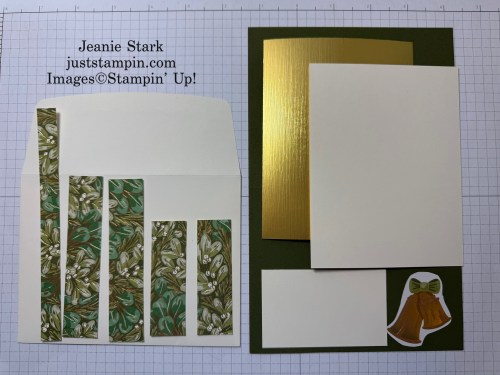
If you ordered my 12 Days of Christmas Kit to Go you received everything you need to craft along with me. Here’s a look at what was included in the kit for today’s project.
To Create this Project
Card Base (Mossy Meadow): 5 1⁄2 x 8 1⁄2 score @ 4 1⁄4
Brushed Gold Foil: 4 x 5 1/4
Very Vanilla: 1 15/16 x 3 3/16 (sentiment layer), 4 x 5 1⁄4 (inside)
Season of Green & Gold Specialty DSP: 2 @ 7/8 x 4 1/8, 2 @ 7/8 x 2 7/8, 1⁄2 x 6 (front of envelope), fussy cut bells
Fold and burnish the cardstock along the score line.
Stamp Sentiment on Very Vanilla panel.
Adhere long DSP strips along the top and bottom of the Gold foil panel as shown. Adhere the sentiment panel in the center. Then add the shorter panels across the top and bottom.
Adhere Gold panel to card base.
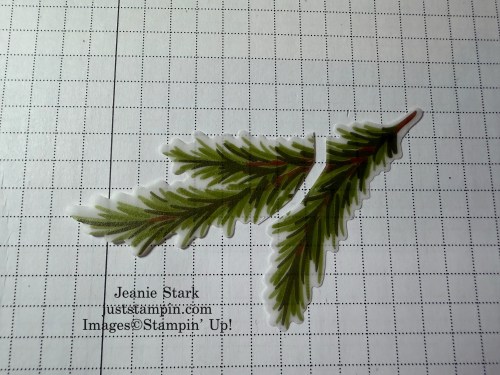
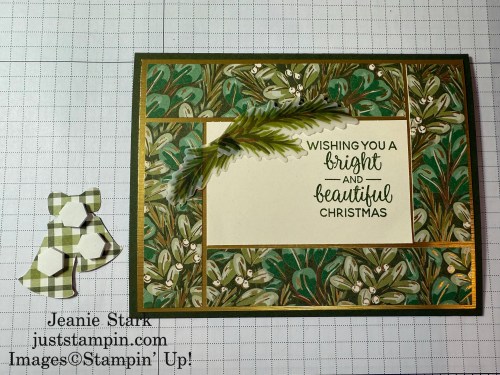
Cut die cut greenery into 2 pieces and adhere as shown.
Fussy cut bells and adhere with Stampin’ Dimensionals.
Adhere inside layer. Stamp sentiment or add handwritten message.
Adhere DSP strip to front of envelope. Trim to fit.
What do you think of this panel frame card? I’d love to hear from you. Leave a comment below. Previously I shared this card design in a vertical layout. You can view those cards HERE.
Check back tomorrow to see what else I created using the Season of Green & Gold Designer Series Paper!
Have a great day!!! Thanks for stopping by!
Just Stampin’
Jeanie
*If your order is under $150 please add the current host code to your order. Host Code: YHMBWKAW
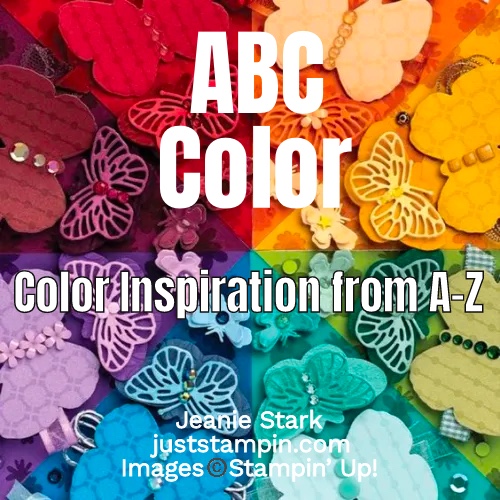
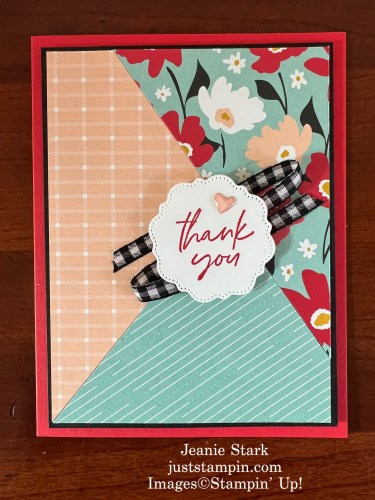
Welcome to my ABC Color Series! Stampin’ Up! offers so many great color choices! I love to combine different colors and patterns and hope to inspire you with some fun color combinations throughout this series. Today’s cards feature PoppyParade, PoolParty, & PetalPink.
I created these cards using a fun technique called Stack, Slice, & Shuffle. It’s so simple…You stack 3 pieces of DSP, slice together, then shuffle to create 3 cards! Here are the details.
DSP (Sunny Days): *cut 3 different but coordinating pieces- 5 x 3 3/4
Basic White (inside): cut 3 @ 5 1/4 x 4, scraps to stamp and cut sentiment
Directions:
Fold & burnish card bases.
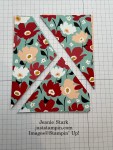
Stack together the 3 pieces of designer series paper and cut all 3 at the same time. There’s so many different ways you can “Slice” your paper. I made the first cut ~ 1″ from the upper left edge down to ~ 1″ above the lower right corner. *I did not measure! My second cut was from the middle point to the corner.
Shuffle the DSP- Mix up the 3 sets of DSP so you have one pattern in each stack (like a puzzle).
Adhere the DSP to cardstock layer. Adhere layered DSP to card base with Stampin’ Dimensionals.
Stamp sentiments and cut with Thoughtful Expressions Dies.
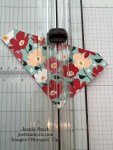
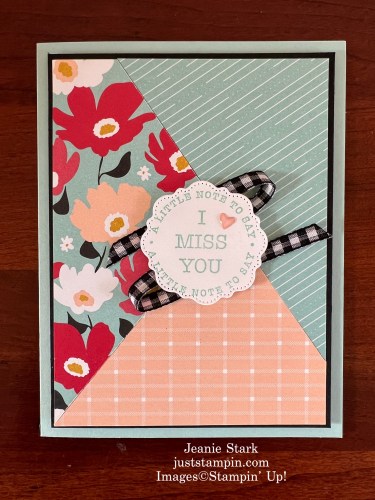
Attach ribbon to center of card with Stampin’ Dimensionals. Add Die cut sentiment on top. Add Adhesive-Backed Heart embellishment.
Adhere White cardstock layer inside card for sentiment or handwritten message.
Here’s a closer look at each card.
Biggest Wish Stamp Set and Thoughtful Expressions DiesSomething Fancy Stamp Set and Thoughtful Expressions DiesSending Love Stamp Set and Thoughtful Expressions Dies
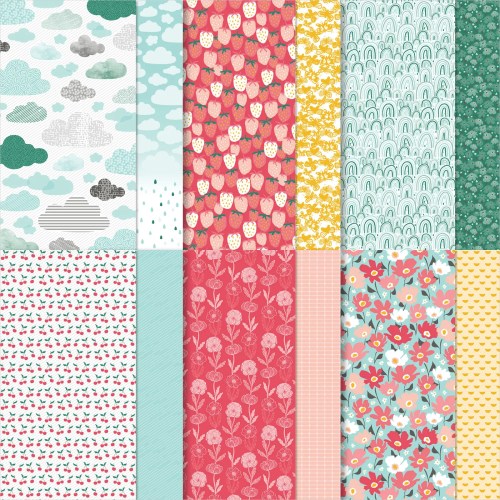
These make great all occasion cards! I love the new Thoughtful Expressions Dies (available as a bundle -Save 10%). I used the Sunny Days Designer Series Paper. This paper pack is FREE during Sale-A-Bration with an order of $50 or more.
The cheerful colors and joyful designs all work together, so you can mix and match any way you like. You can also fussy cut the flowers and strawberries to create fun accent pieces for all your paper crafting projects. Here are the colors I chose to create with today.
Are you ready to give the Stack, Slice, & Shuffle Technique a try? What color combo will you use?
Would you like to see and create with some of the new products just released? Order my Just Stampin’ Card Kit to go! Click HEREfor details.
Have a great day!
Just Stampin’
Jeanie
Current Host Code: CFUENJND * If your order is under $150 be sure to add the host code to your order to receive a thank you gift from me. If your order is $150 or more, don’t use the host code. You will earn Stampin’ Rewards to spend as well as my thank you gift. All orders receive a handmade card in the mail from me.
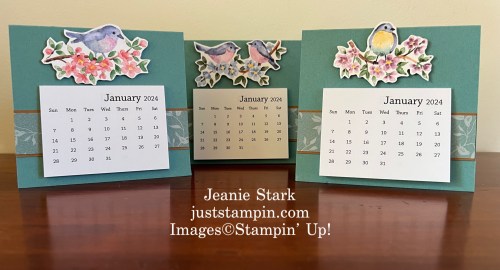
January’s thank you gift includes a calendar kit with your order of $50 or more! (Plus you will earn a FREE Sale-A-Bration product!!!) Product List (Click on image to shop my online store.)
Love being creative? Become a Stampin’ Up! demonstrator and start your own journey. I’d love to have you on my team! Stampin’ Up! is offering TWO options to join during Sale-a-Bration:
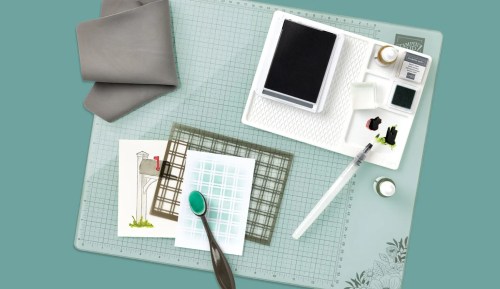
OPTION ONE – Your choice of $125 of FREE product for $99 with free shipping PLUS Stampin’ Up!’s Glass Mat Studio (a retail value of $60). The studio includes a 17″ x 14″ glass mat, an 8-3/8″ x 6″ silicone mat and an 8-1/4″ square cleaning cloth. Here’s a look at the Stampin’ Glass Mat Studio:
OPTION TWO – Your choice of an additional $30 in FREE products to add to your Starter Kit. That’s $155 of your choice of products for just $99. PLUS free shipping.
Both options include FREE SHIPPING, a FREE Paper Pumpkin Kit, and More!
If you have thought about joining and want to be a part of an amazing online community of stampers, feel free to email me (j.stark@goeaston.net). I’d love to answer your questions or set up a time to chat with you. *Team members receive my kit tutorials (and more) for FREE. Check out more details and how to Join HERE.
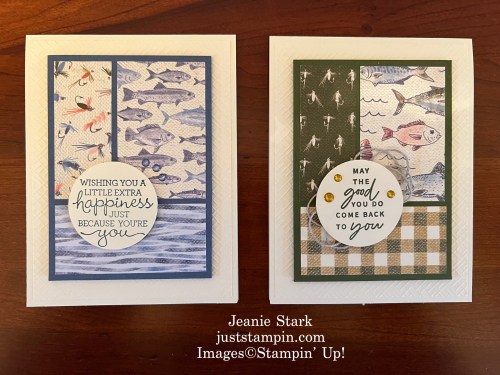
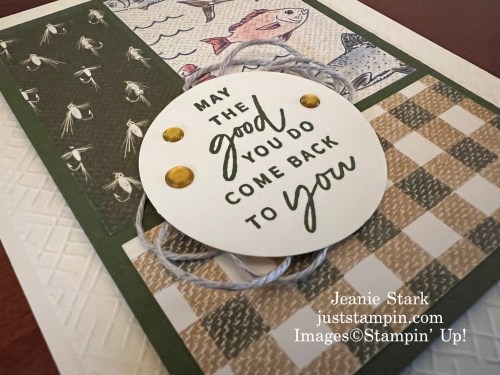
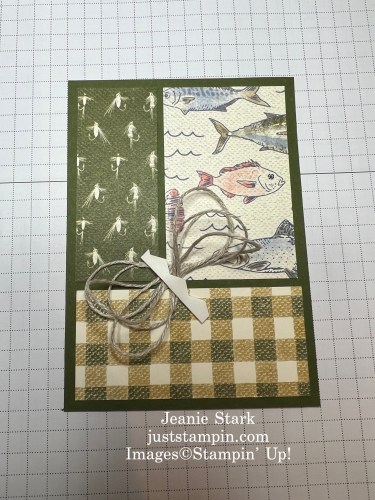
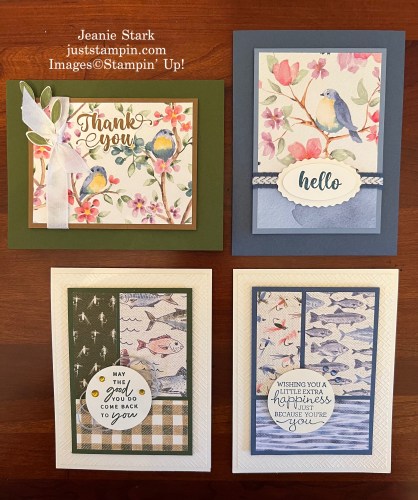
Welcome to my ABC Color Series! Stampin’ Up! offers so many great color choices! I love to combine different colors and patterns and hope to inspire you with some fun color combinations throughout this series. Today’s projects feature Misty Moonlight & Mossy Meadow. I have several cards to share with you today. First, I decided to make a couple of masculine cards using the Let’s Go Fishing Designer Series Paper.
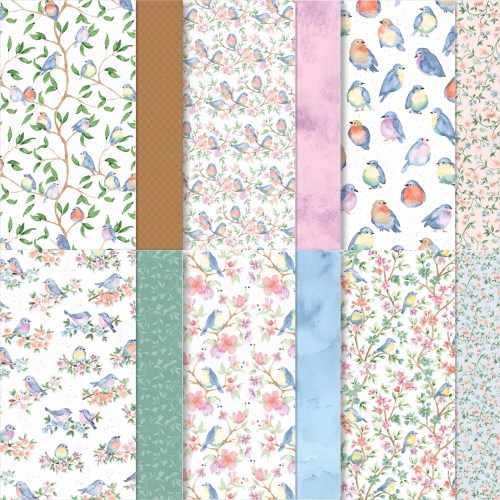
This style card showcases three different patterned papers. The Let’s Go Fishing Designer Series Paper Pack is the “reel” deal for crafters who love to fish and people who need a fishing-themed card! This paper is filled with images of fish, nets, fishing lures, and planks. Create cards for the anglers in your life or add this paper to your holiday scrapbook pages. This paper also has basic designs that you can use any time, on any project.. Here’s a look at all 12 patterns.
Let’s Go Fishing Designer Series Paper Product colors: Boho Blue, Calypso Coral, Misty Moonlight, Mossy Meadow, Pebbled Path, Pecan Pie, Petal Pink, Very Vanilla, Wild Wheat
Card base (Thick Very Vanilla): 4 1/4 x 11 scored @ 5 1/2
Very Vanilla: 4 x 5 1/5 embossed with Basics 3D Crosshatch, scrap to stamp sentiment and punch with 1 3/4″ Circle Punch, 3 3/4 x 5 (inside)
Cardstock Layer (Misty Moonlight/Mossy Meadow): 3 1/4 x 4 1/2, 4 x 5 1/4 (inside)
DSP (Let’s Go Fishing): 1 1/8 x 2 3/4, 1 3/4 x 2 3/4, 3 x 1 3/8, 1/2 x 3 3/4 (inside), 2 1/4 x 6 (envelope)
Directions:
Fold & burnish card base (use bone folder).
Emboss Very Vanilla layer with Basics 3D Crosshatch Embossing Folder. Adhere to front of card with Multipurpose Liquid Glue.
Adhere DSP panels to colored cardstock layer. Adhere layer to card base with Stampin’ Dimensionals.
Stamp sentiment and punch with Circle Punch. Adhere to card with Stampin’ Dimensionals. *If you want to add Linen Thread (like I did for Mossy Meadow card) add before adhering sentiment.
Embellish with 2023-2025 In Color Dots.
Adhere DSP strip to Very Vanilla layer (inside card). Stamp sentiment or leave blank to add handwritten message.
Wrap Linen Thread around Very Vanilla cardstock just above DSP and tie a bow. Adhere to colored cardstock layer then adhere inside card.
Adhere DSP to envelope flap and trim to fit.
*You can view the complete list of products I used to create these cards below.
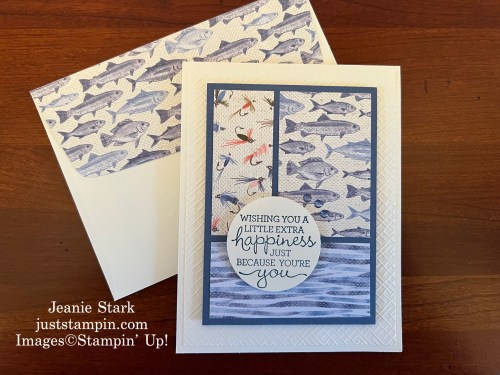
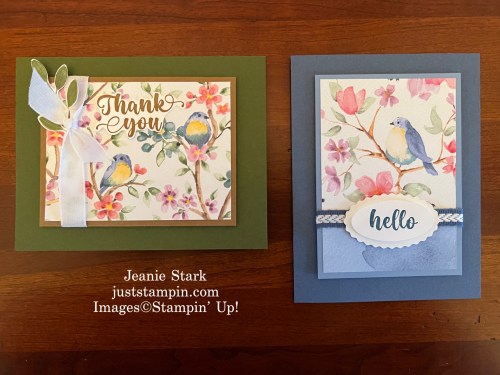
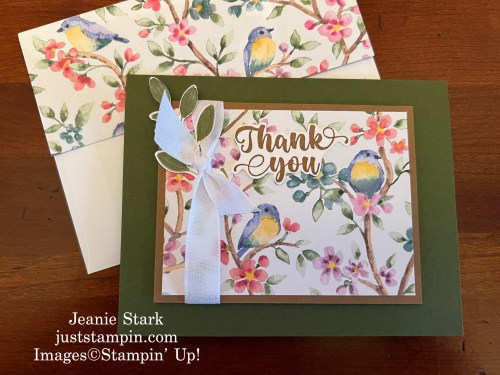
The card design above showcased three different patterns of DSP. Sometimes you want the DSP to really shine and be the focal point. The two cards below show simple card designs to showcase just one or two patterned papers.
The Flight & Airy Designer Series Paper is my favorite DSP in the Sale-A-Bration brochure. You can get this paper for FREE with a $50 purchase. Look at these beautiful patterns!
Card base (Mossy Meadow): 5 1/2 x 8 1/2 scored @ 4 1/4
Cardstock Layer (Pecan Pie): 3 1/4 x 4 1/4
DSP (Flight & Airy): 4 x 3, 2 1/4 x 6 (envelope)
Basic White: scraps to stamp/punch leaf and sentiment.
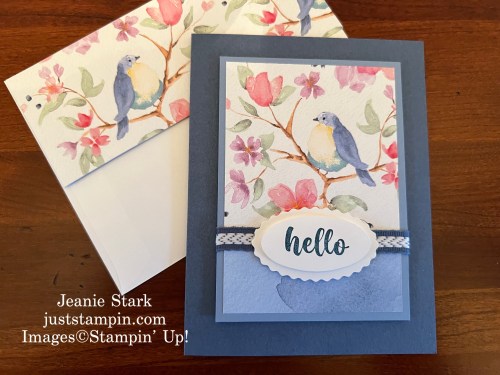
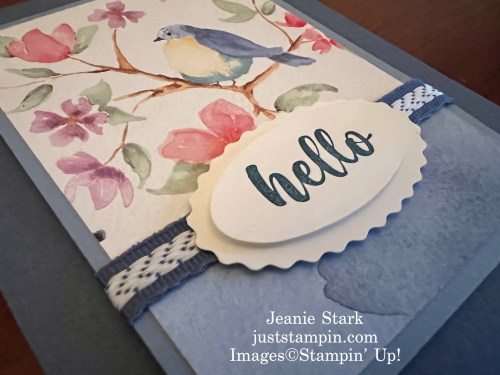
My last card is basically the same design as the card above except you cut the DSP into two pieces. You flip one piece over to showcase the other side. The ribbon covers the seam and is adhered on the back of the cardstock before adhering the layer to the card base.
Card base (Misty Moonlight): 5 1/2 x 8 1/2 scored @ 4 1/4
Cardstock Layer (Boho Blue): 3 1/4 x 4 1/2
DSP (Flight & Airy): 3, x 4 1/4, 2 1/4 x 6 (envelope)
Basic White: scraps to stamp/punch sentiment.
Here’s a look at all the different cards featuring 1, 2, and 3 different patterned papers.
Do you have a favorite card from today? I’d love to hear from you! Leave a comment below. I will pick a random winner to send one of these cards to.
Need helping coming up with the perfect color combination? Download the free Color Coach created by Stampin’ Up! to give you some color inspiration!
The Color Coach includes cards with sample color combinations for the Stampin’ Up! Colors:
Have a wonderful day! Thanks for stopping by!
Just Stampin’
Jeanie
Current Host Code: CFUENJND * If your order is under $150 be sure to add the host code to your order to receive a thank you gift from me. If your order is $150 or more, don’t use the host code. You will earn Stampin’ Rewards to spend as well as my thank you gift. All orders receive a handmade card in the mail from me.
January’s thank you gift includes a calendar kit with your order of $50 or more! (Plus you will earn a FREE Sale-A-Bration product!!!)
Get free items with each $50-100 you purchase! Click HEREfor all the details.
Product List For Let’s Go Fishing Cards
*Click on any image to view/shop my online store.


![Season Of Green & Gold 12" X 12" (30.5 X 30.5 Cm) Specialty Designer Series Paper [ 164324 ]](https://assets1.tamsnetwork.com/images/EC042017NF/164324s.jpg "Season Of Green & Gold 12\" X 12\" (30.5 X 30.5 Cm) Specialty Designer Series Paper [ 164324 ]")
![Graceful Greenery Vellum 12" X 12" (30.5 X 30.5 Cm) Specialty Designer Series Paper [ 164118 ]](https://assets1.tamsnetwork.com/images/EC042017NF/164118s.jpg "Graceful Greenery Vellum 12\" X 12\" (30.5 X 30.5 Cm) Specialty Designer Series Paper [ 164118 ]")
![Golden Greenery Dies [ 164116 ]](https://assets1.tamsnetwork.com/images/EC042017NF/164116s.jpg "Golden Greenery Dies [ 164116 ]")
![Brushed Silver And Gold Foil 12" X 12" (30.5 X 30.5 Cm) Specialty Paper [ 164861 ]](https://assets1.tamsnetwork.com/images/EC042017NF/164861s.jpg "Brushed Silver And Gold Foil 12\" X 12\" (30.5 X 30.5 Cm) Specialty Paper [ 164861 ]")
![Mossy Meadow 8-1/2" X 11" Cardstock [ 133676 ]](https://assets1.tamsnetwork.com/images/EC042017NF/133676s.jpg "Mossy Meadow 8-1/2\" X 11\" Cardstock [ 133676 ]")
![Very Vanilla 8-1/2" X 11" Cardstock [ 101650 ]](https://assets1.tamsnetwork.com/images/EC042017NF/101650s.jpg "Very Vanilla 8-1/2\" X 11\" Cardstock [ 101650 ]")
![Artful Amaryllis Photopolymer Stamp Set (English) [ 164242 ]](https://assets1.tamsnetwork.com/images/EC042017NF/164242s.jpg "Artful Amaryllis Photopolymer Stamp Set (English) [ 164242 ]")
![Multipurpose Liquid Glue [ 110755 ]](https://assets1.tamsnetwork.com/images/EC042017NF/110755s.jpg "Multipurpose Liquid Glue [ 110755 ]")
![Stampin' Dimensionals [ 104430 ]](https://assets1.tamsnetwork.com/images/EC042017NF/104430s.jpg "Stampin' Dimensionals [ 104430 ]")
![Paper Snips [ 103579 ]](https://assets1.tamsnetwork.com/images/EC042017NF/103579s.jpg "Paper Snips [ 103579 ]")
![Paper Trimmer [ 152392 ]](https://assets1.tamsnetwork.com/images/EC042017NF/152392s.jpg "Paper Trimmer [ 152392 ]")
![Mini Stampin' Cut & Emboss Machine [ 150673 ]](https://assets1.tamsnetwork.com/images/EC042017NF/150673s.jpg "Mini Stampin' Cut & Emboss Machine [ 150673 ]")


")
")
")
 Designer Series Paper")


 Gingham Ribbon")


")
 Designer Series Paper")


 Circle Punch")


 Designer Series Paper")
")


 Inner Braid Ribbon")

