Welcome to my ABC’s with Fun Folds series. I have two origami cards for you today. I have always loved origami ever since I was in elementary school. My fourth grade teacher introduced me to this and I would be in awe of everything she made.
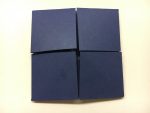
My first origami fun fold is a shadow box fold in red, white, and blue in honor of Memorial Day.
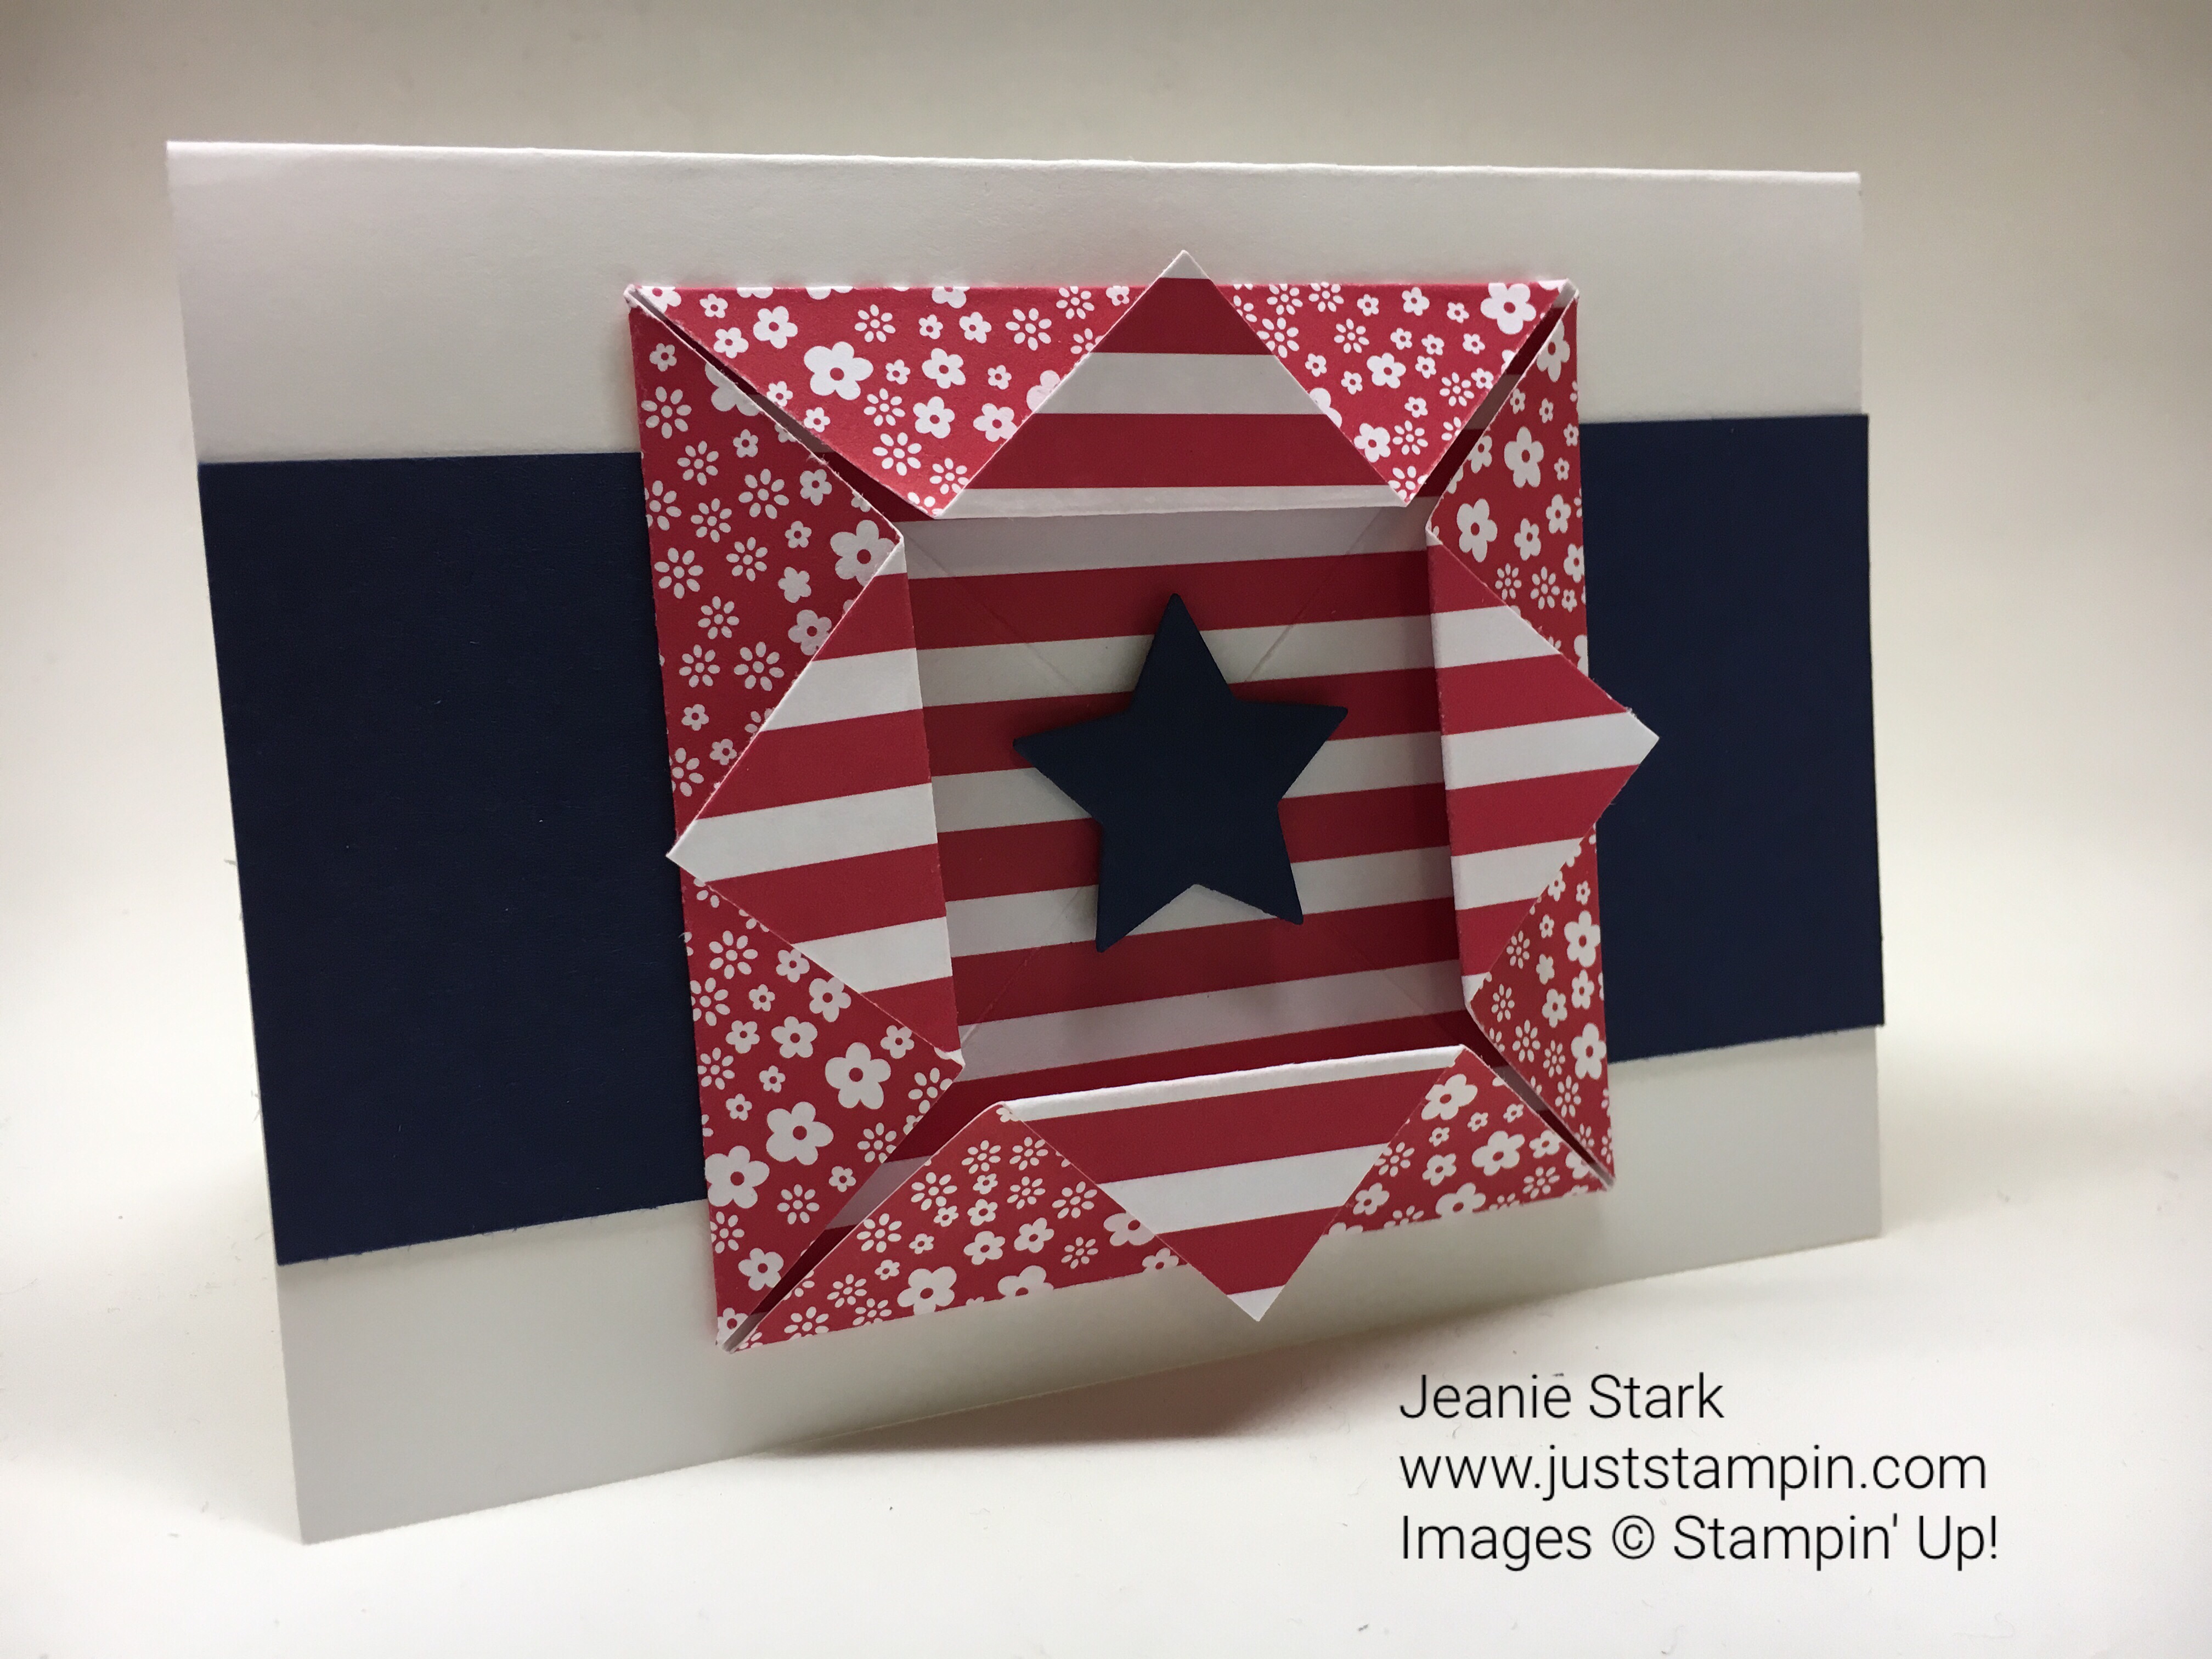
This one is quick and easy to do. I started with the Whisper White note cards & envelopes and added a 2 x 5 strip of Night of Navy across the middle. My DSP measures 4 x 4. I folded it in half and creased with my bone folder. Then I opened it and folded it in half in the opposite direction. Next, I folded the points to where the fold lines intersect and creased each time with the bone folder. Then I took each tip and folded it back to the edge and creased with the bone folder.

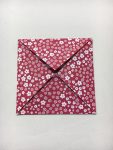

I adhered this to the center of my note card. Then I cut a navy star using the smallest star from the Star Framelits (retiring May 31). I attached this to the center with a Stampin’ Dimensional.

That’s all there is to it. You could easily make a bunch of these in no time at all. A set of 20 note cards & envelopes is only $6. There are many variations you could do with this design…just changing out the DSP would give it a totally different look. Add a flower, heart, or sentiment in the center or even turn it so it is a diamond shape instead of a square. It’s definitely a fun fold that’s fun to make!

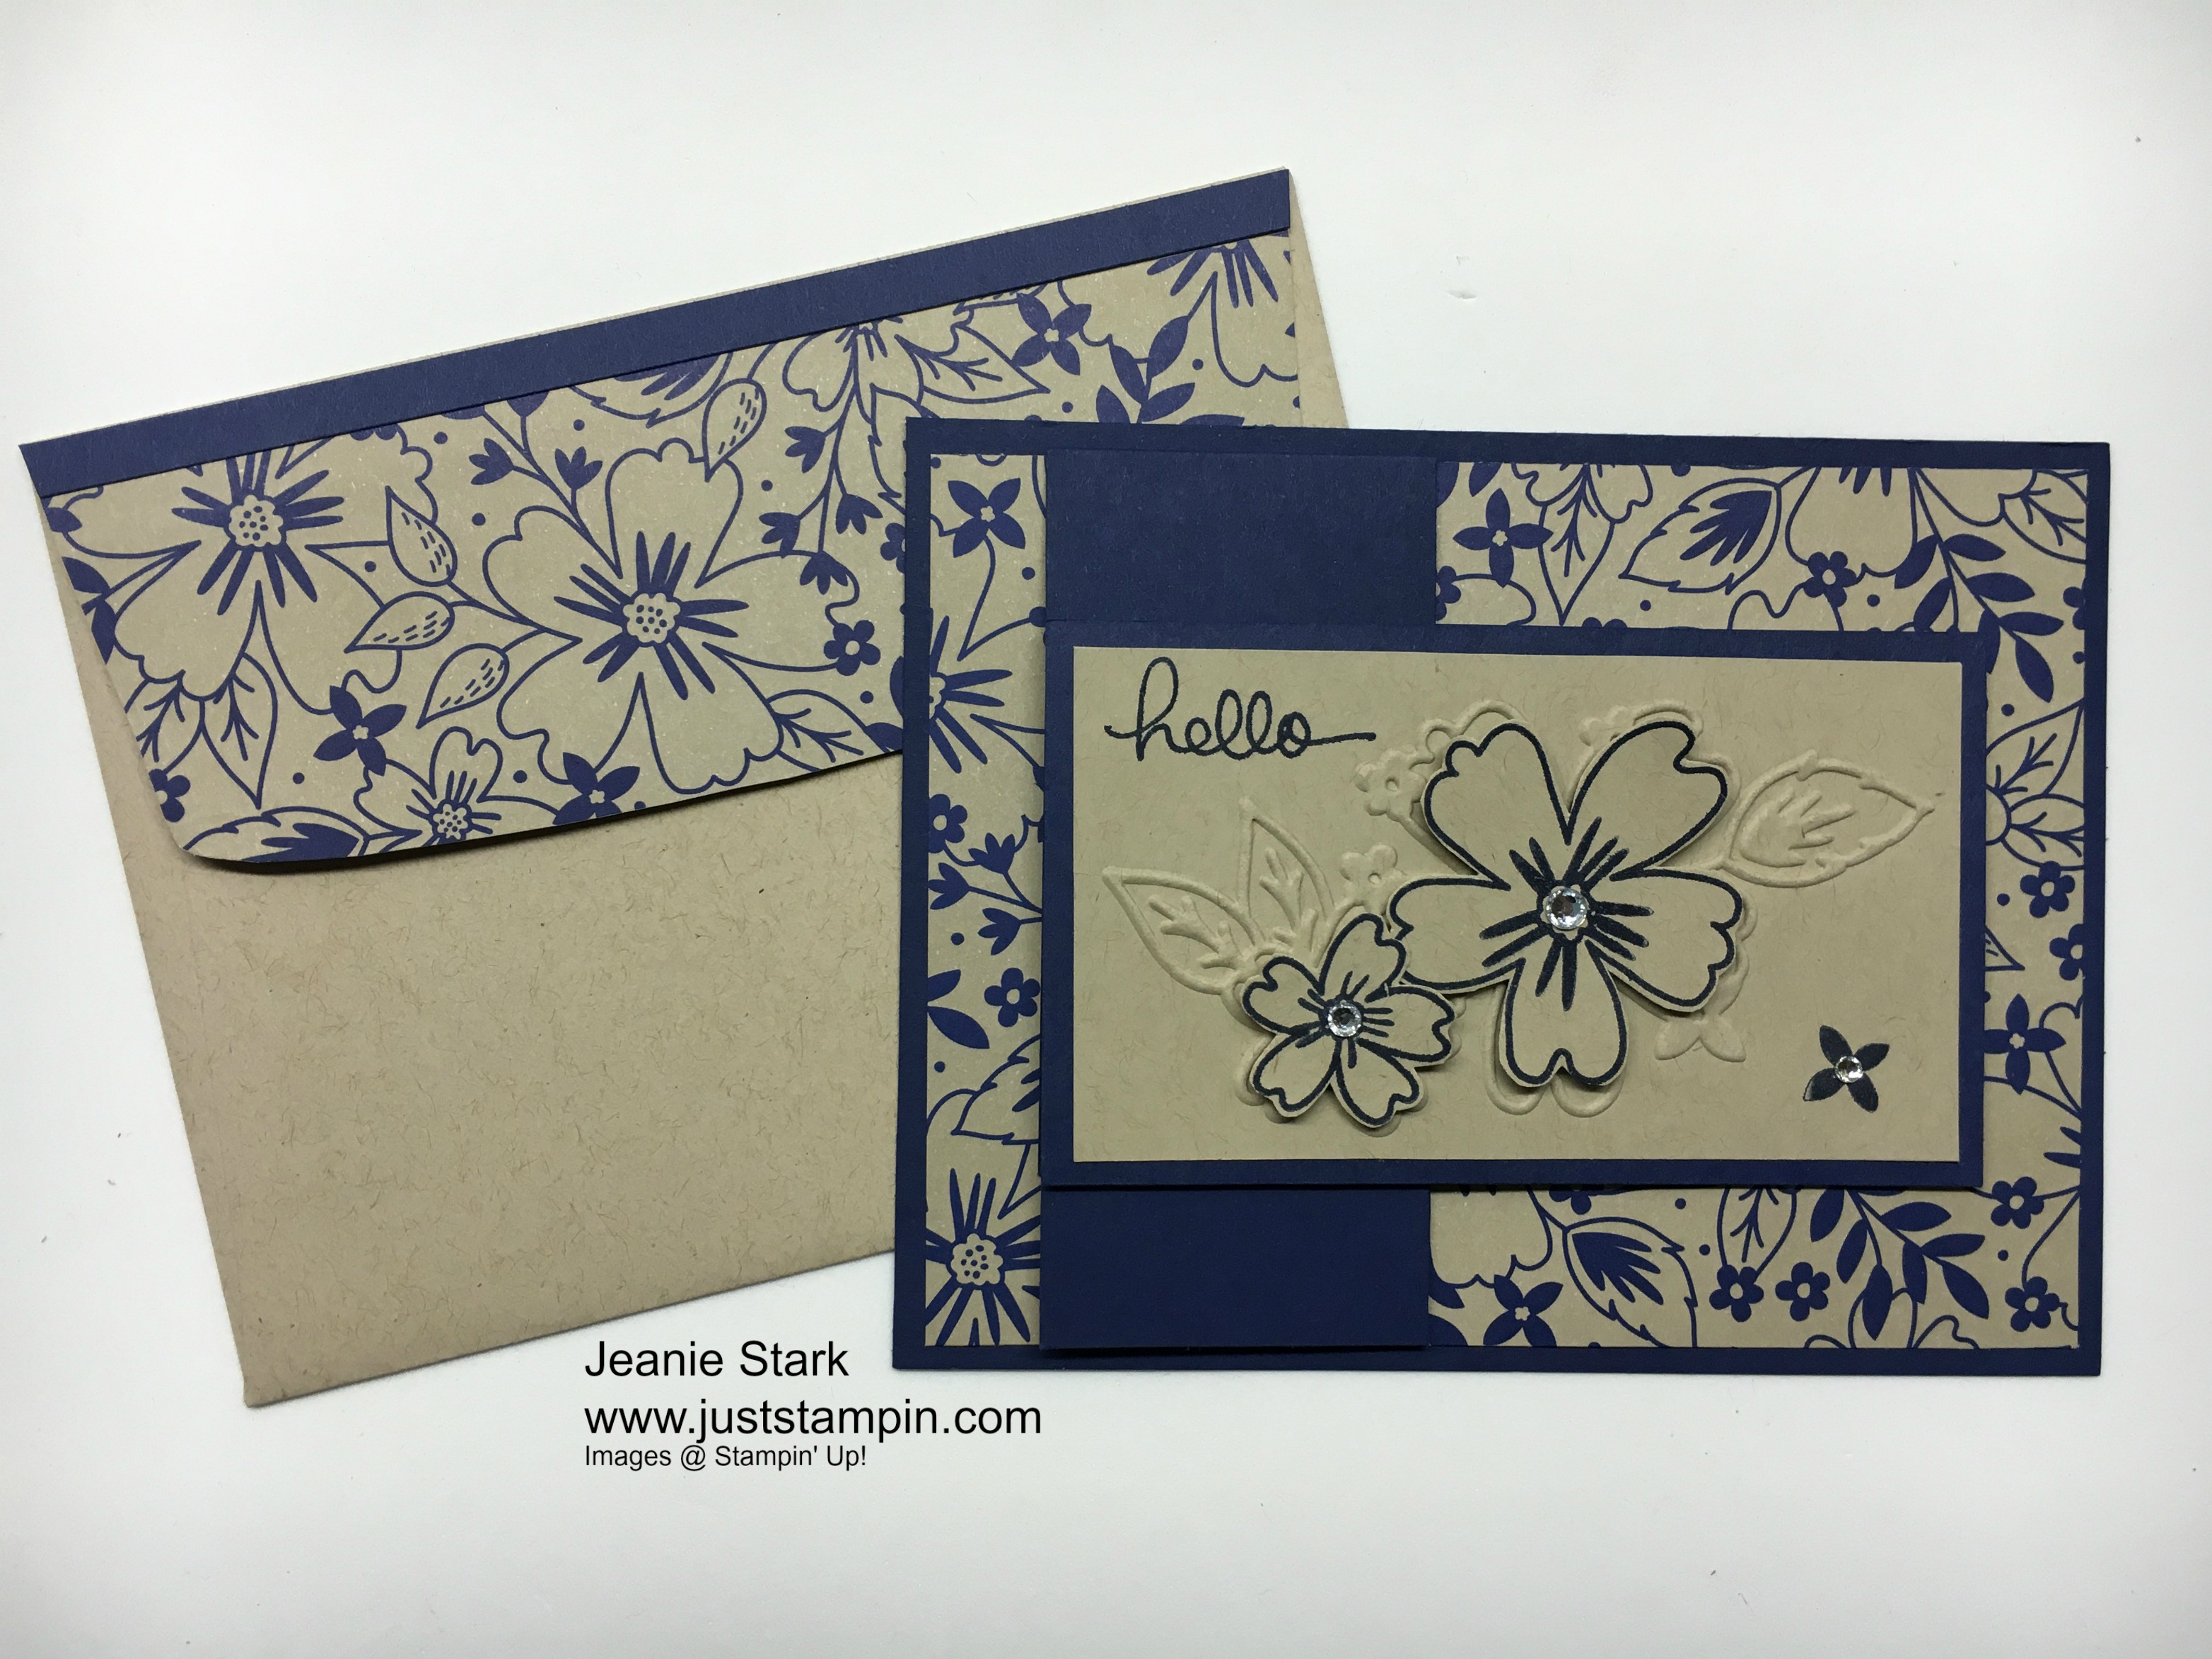
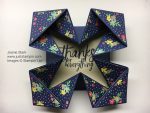
This next origami fold is a little more time consuming but still fairly easy to do and lots of fun. This card makes a statement when you open it!


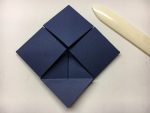
Start with a piece of 8 x 8 cardstock and score at 2 & 6 on both sides.
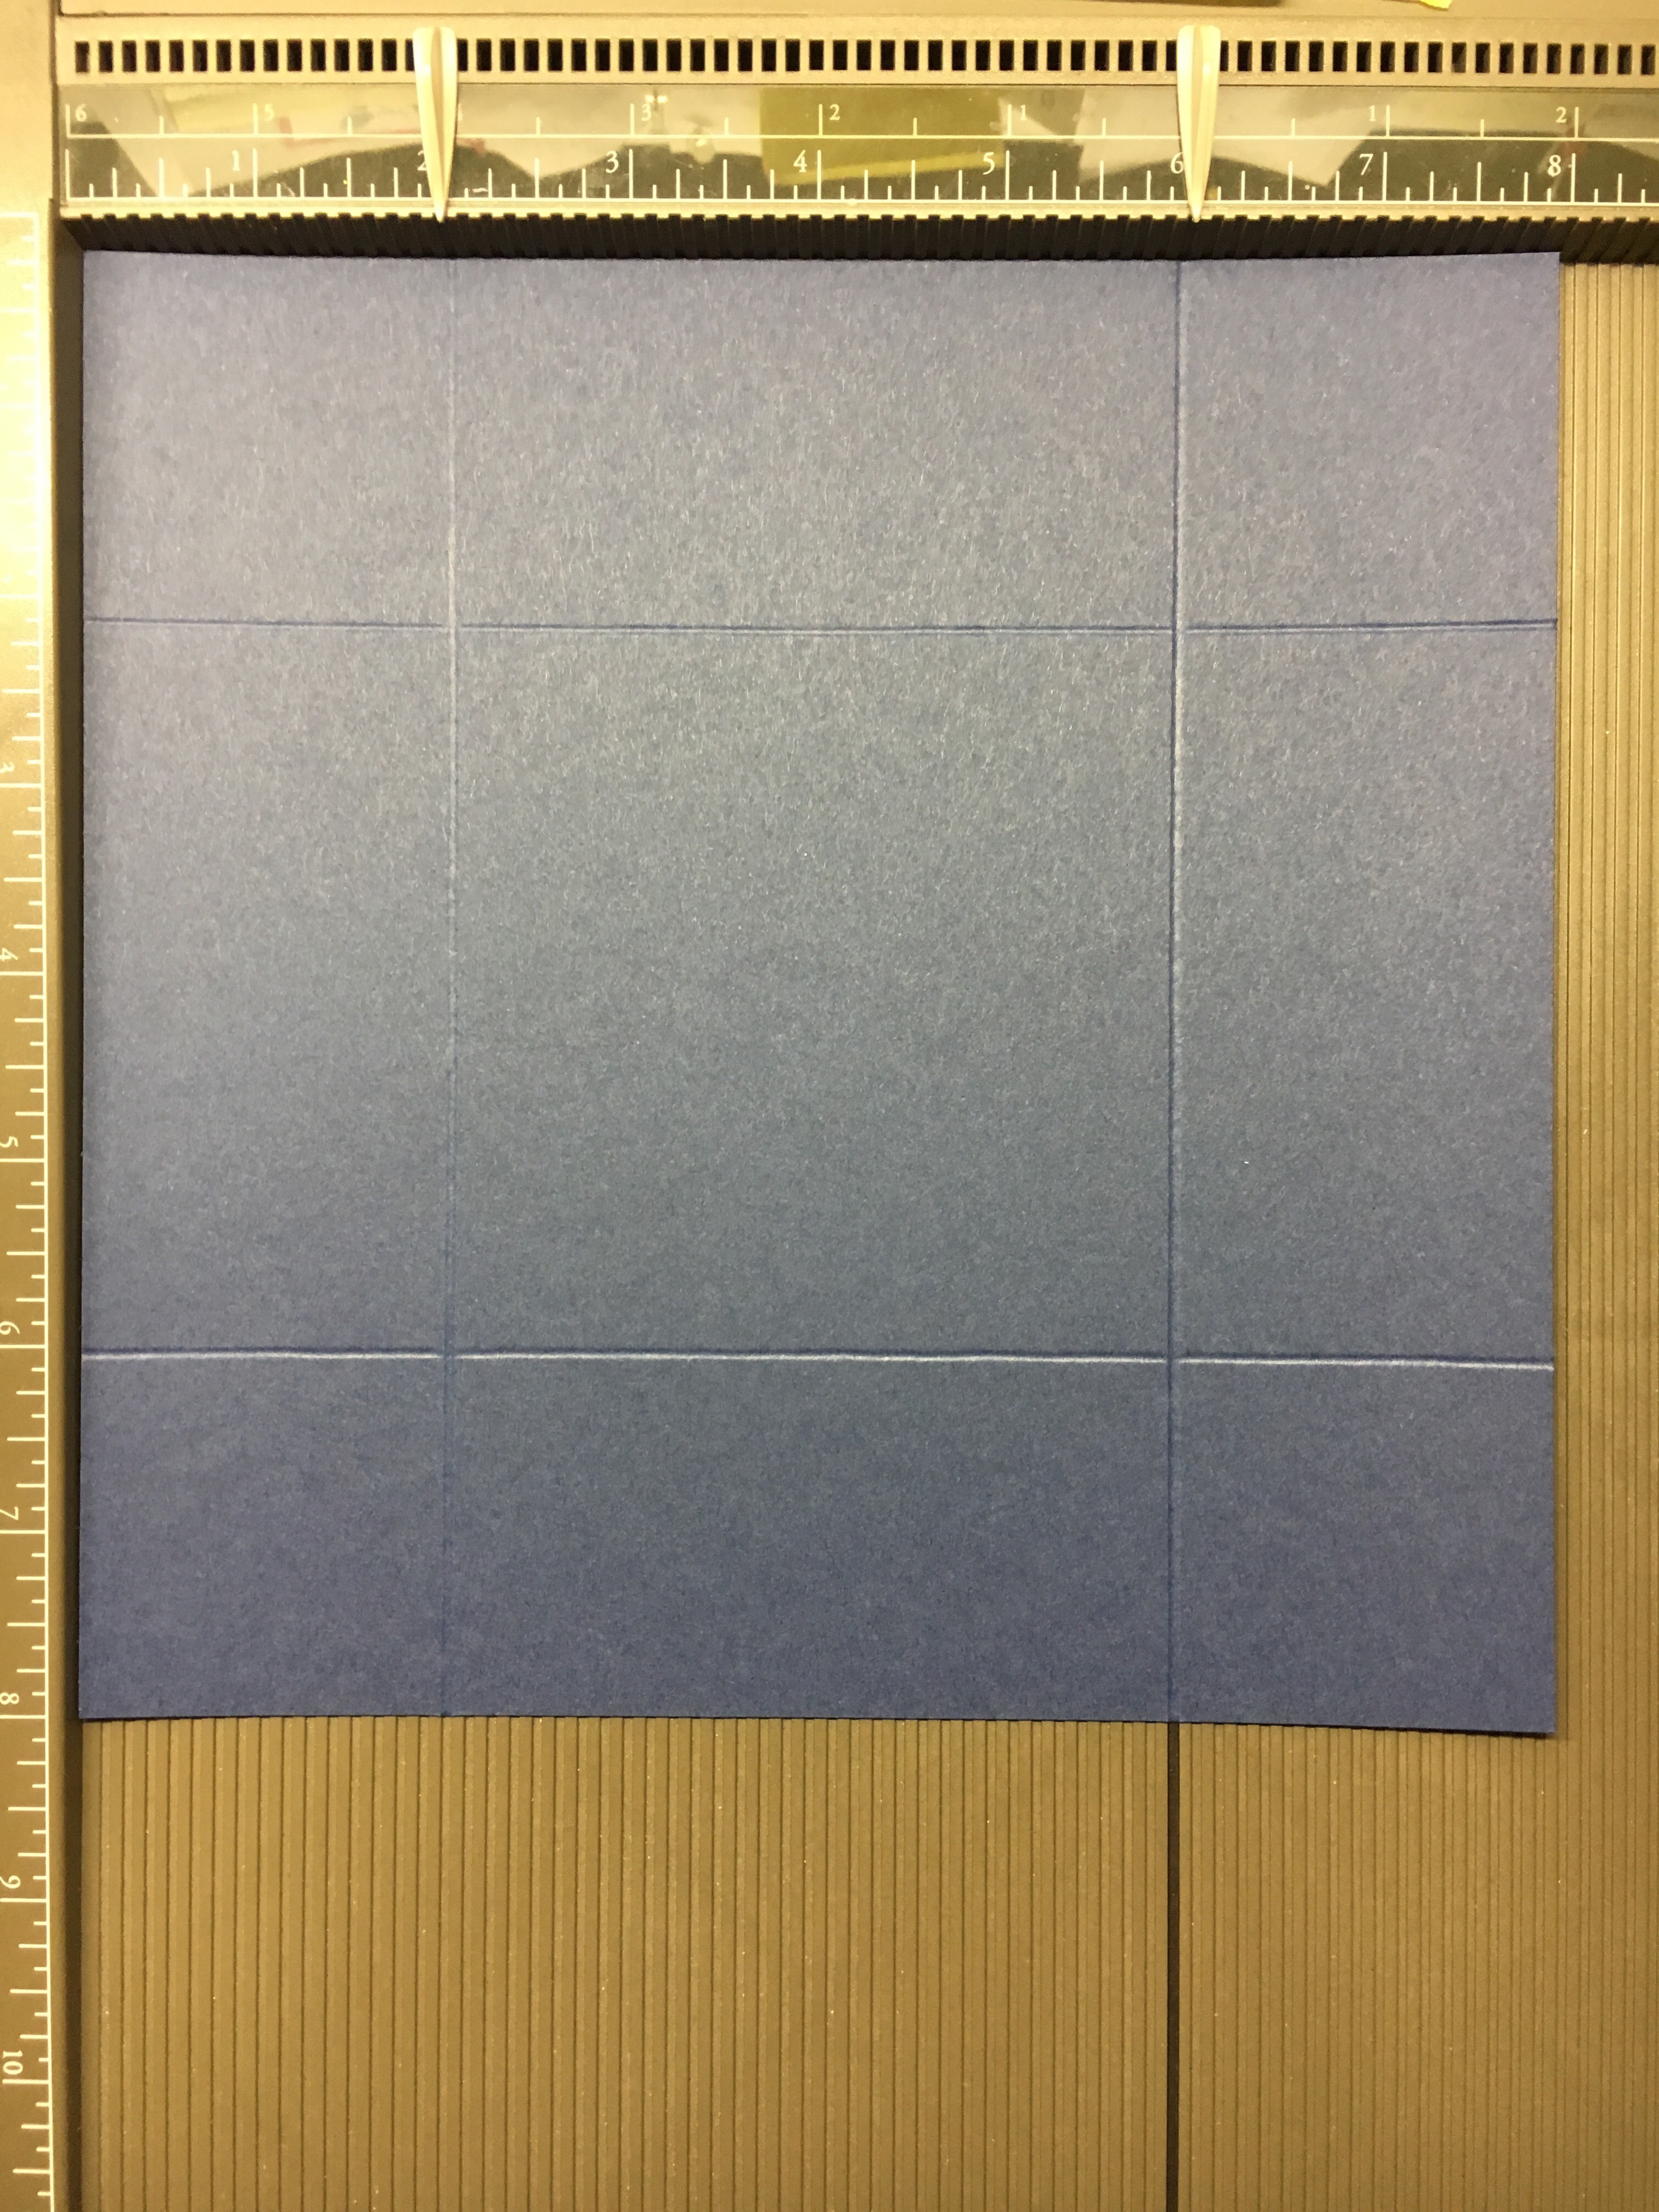
Fold all score lines using a bone folder. Fold again in the opposite direction. (This will allow the folds to fold easily.) Mark the center at 4″. Fold each corner into the center. Notice how the score lines line up. Fold using a bone folder.
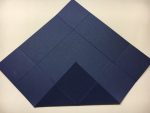

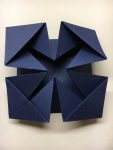
Unfold the cardstock with the square in front of you. Push the sides (with the large triangles) in with your fingers on the fold and push the square down to make it flat. Do this on all four sides.

Next, take the inside corners and fold over, folding each in half to form triangles. Make sure to line up all the edges and points and crease with a bone folder.
Next you can decorate as you like.
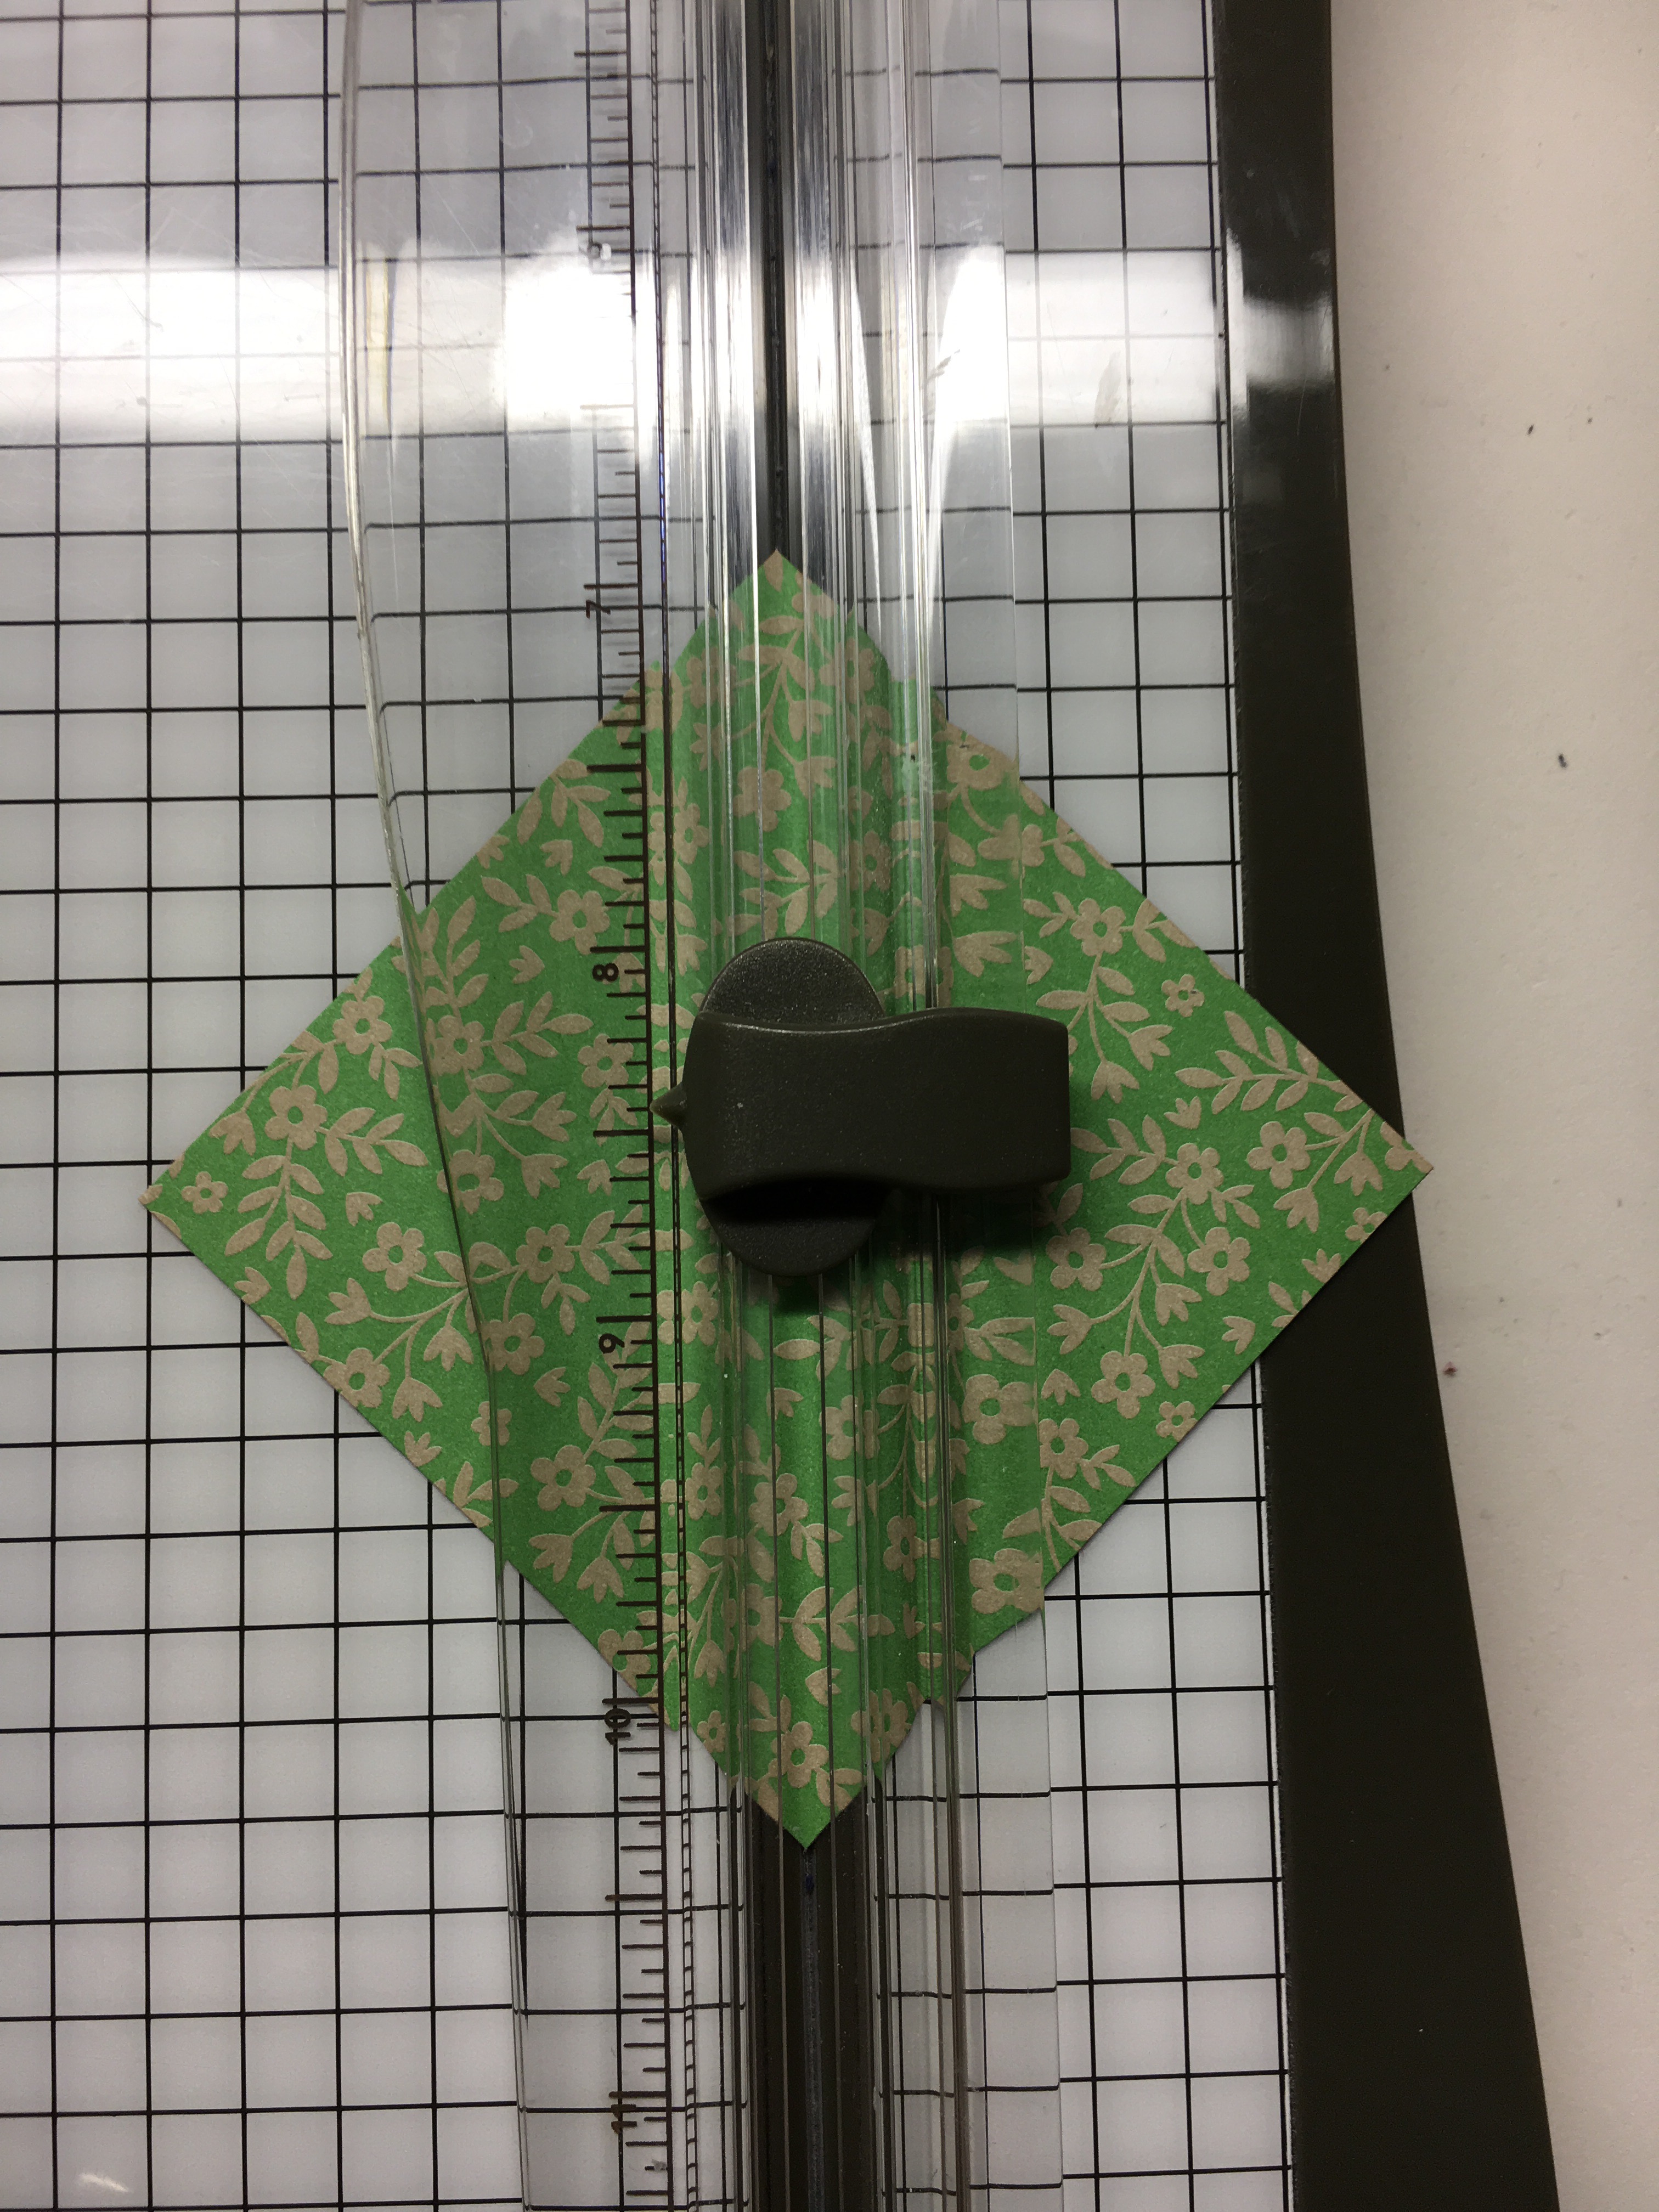
Cut (2) 2 1/2″ squares of DSP. Cut these in half from point to point to make 4 large triangles. *When cutting from points it is best to place your blade in the center and cut up and down rather than try to start at the point.
Cut (8) 1 3/4″ squares of DSP and cut in half to make 16 small triangles.
Cut a 3 1/2″ square to stamp your sentiment and layer with a 3 3/4″ square.
Adhere these to the card base.

The belly band measures 9 x 1 1/4 with a 9 x 1 strip of DSP. Wrap lightly around the card and adhere. You want to make sure you can slide it on and off easily.
The DSP diamond on the front is a 1 3/4″ square layered on a 2″ square. I embossed and fussy cut the flower from the Floral Affection Embossing Folder and attached it on the front.
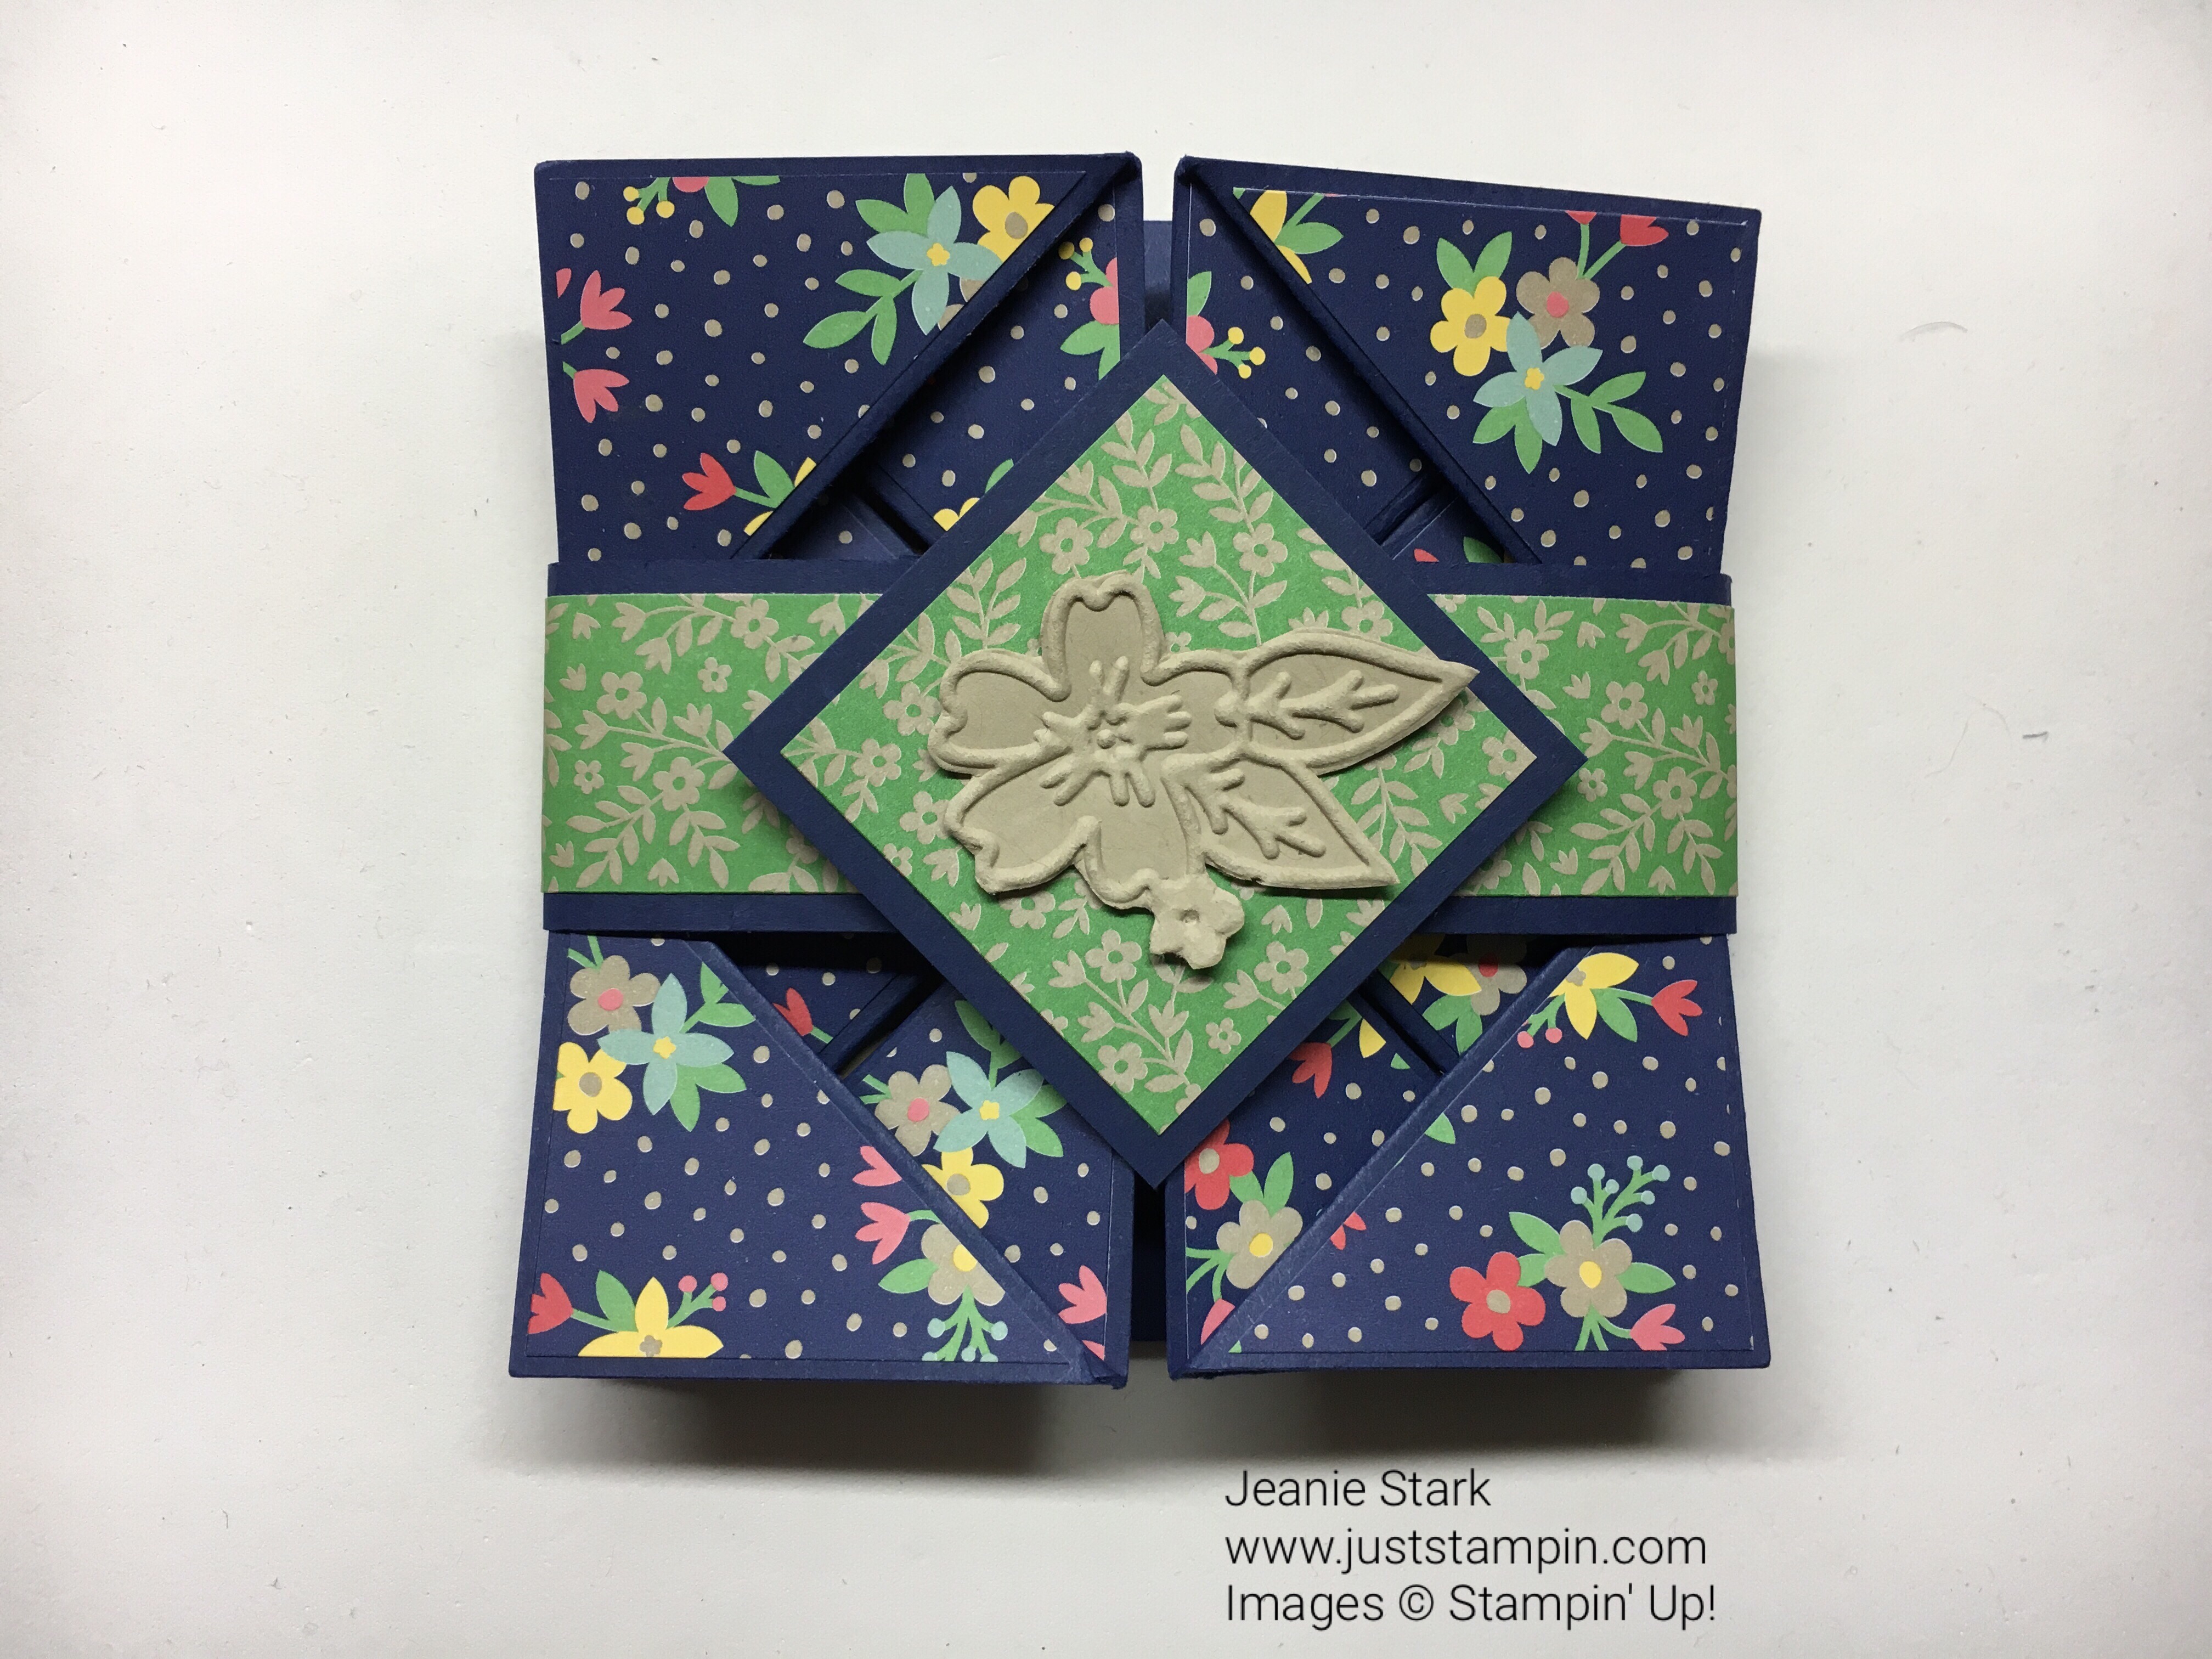
This card fits in a regular envelope. (I plan to hand deliver mine.)
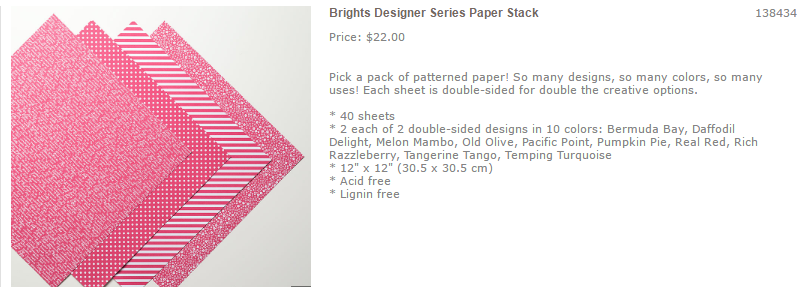
Many of the products I used on today’s cards are retiring…Affectionately Your Specialty Designer Series Paper, Floral Affection Embossing Folder, and the Star Framelits. Check out my online store to SAVE on these products and more before they are gone for good! (*The Brights Designer Series Paper Stack used on my first card is already sold out!)
Have an Outstanding Day!
Just Stampin’
Jeanie
*All orders placed through my online store are eligible for my FREE monthly gifts (card kits and more!). Click HERE to shop. Please use the current host code below.
Current Host Code: MPP2NJHT 

Click on the image above to see all the retiring items while supplies last!