B is for the Big Shot

Welcome to my ABC’s of Stampin’ series! Each day I will focus on some of the basics of stamping and share some tips, tutorials, and exclusive Back to School Specials as I share cards and projects.

I LOVE and use my Big Shot every day! It cuts, scores, and embosses! You can create boxes, bags, bows, and more! The Stampin’ Up! Big Shot comes with an EXCLUSIVE  base plate that is GREAT!!! Here’s a video showing you all the basics.

Click HERE to see and print a flyer for how to make your “sandwich” for the Big Shot when using Intricate Dies,  Thinlits & Framelits, and Textured Impressions Embossing Folders. You can keep it as a reference by your Big Shot.

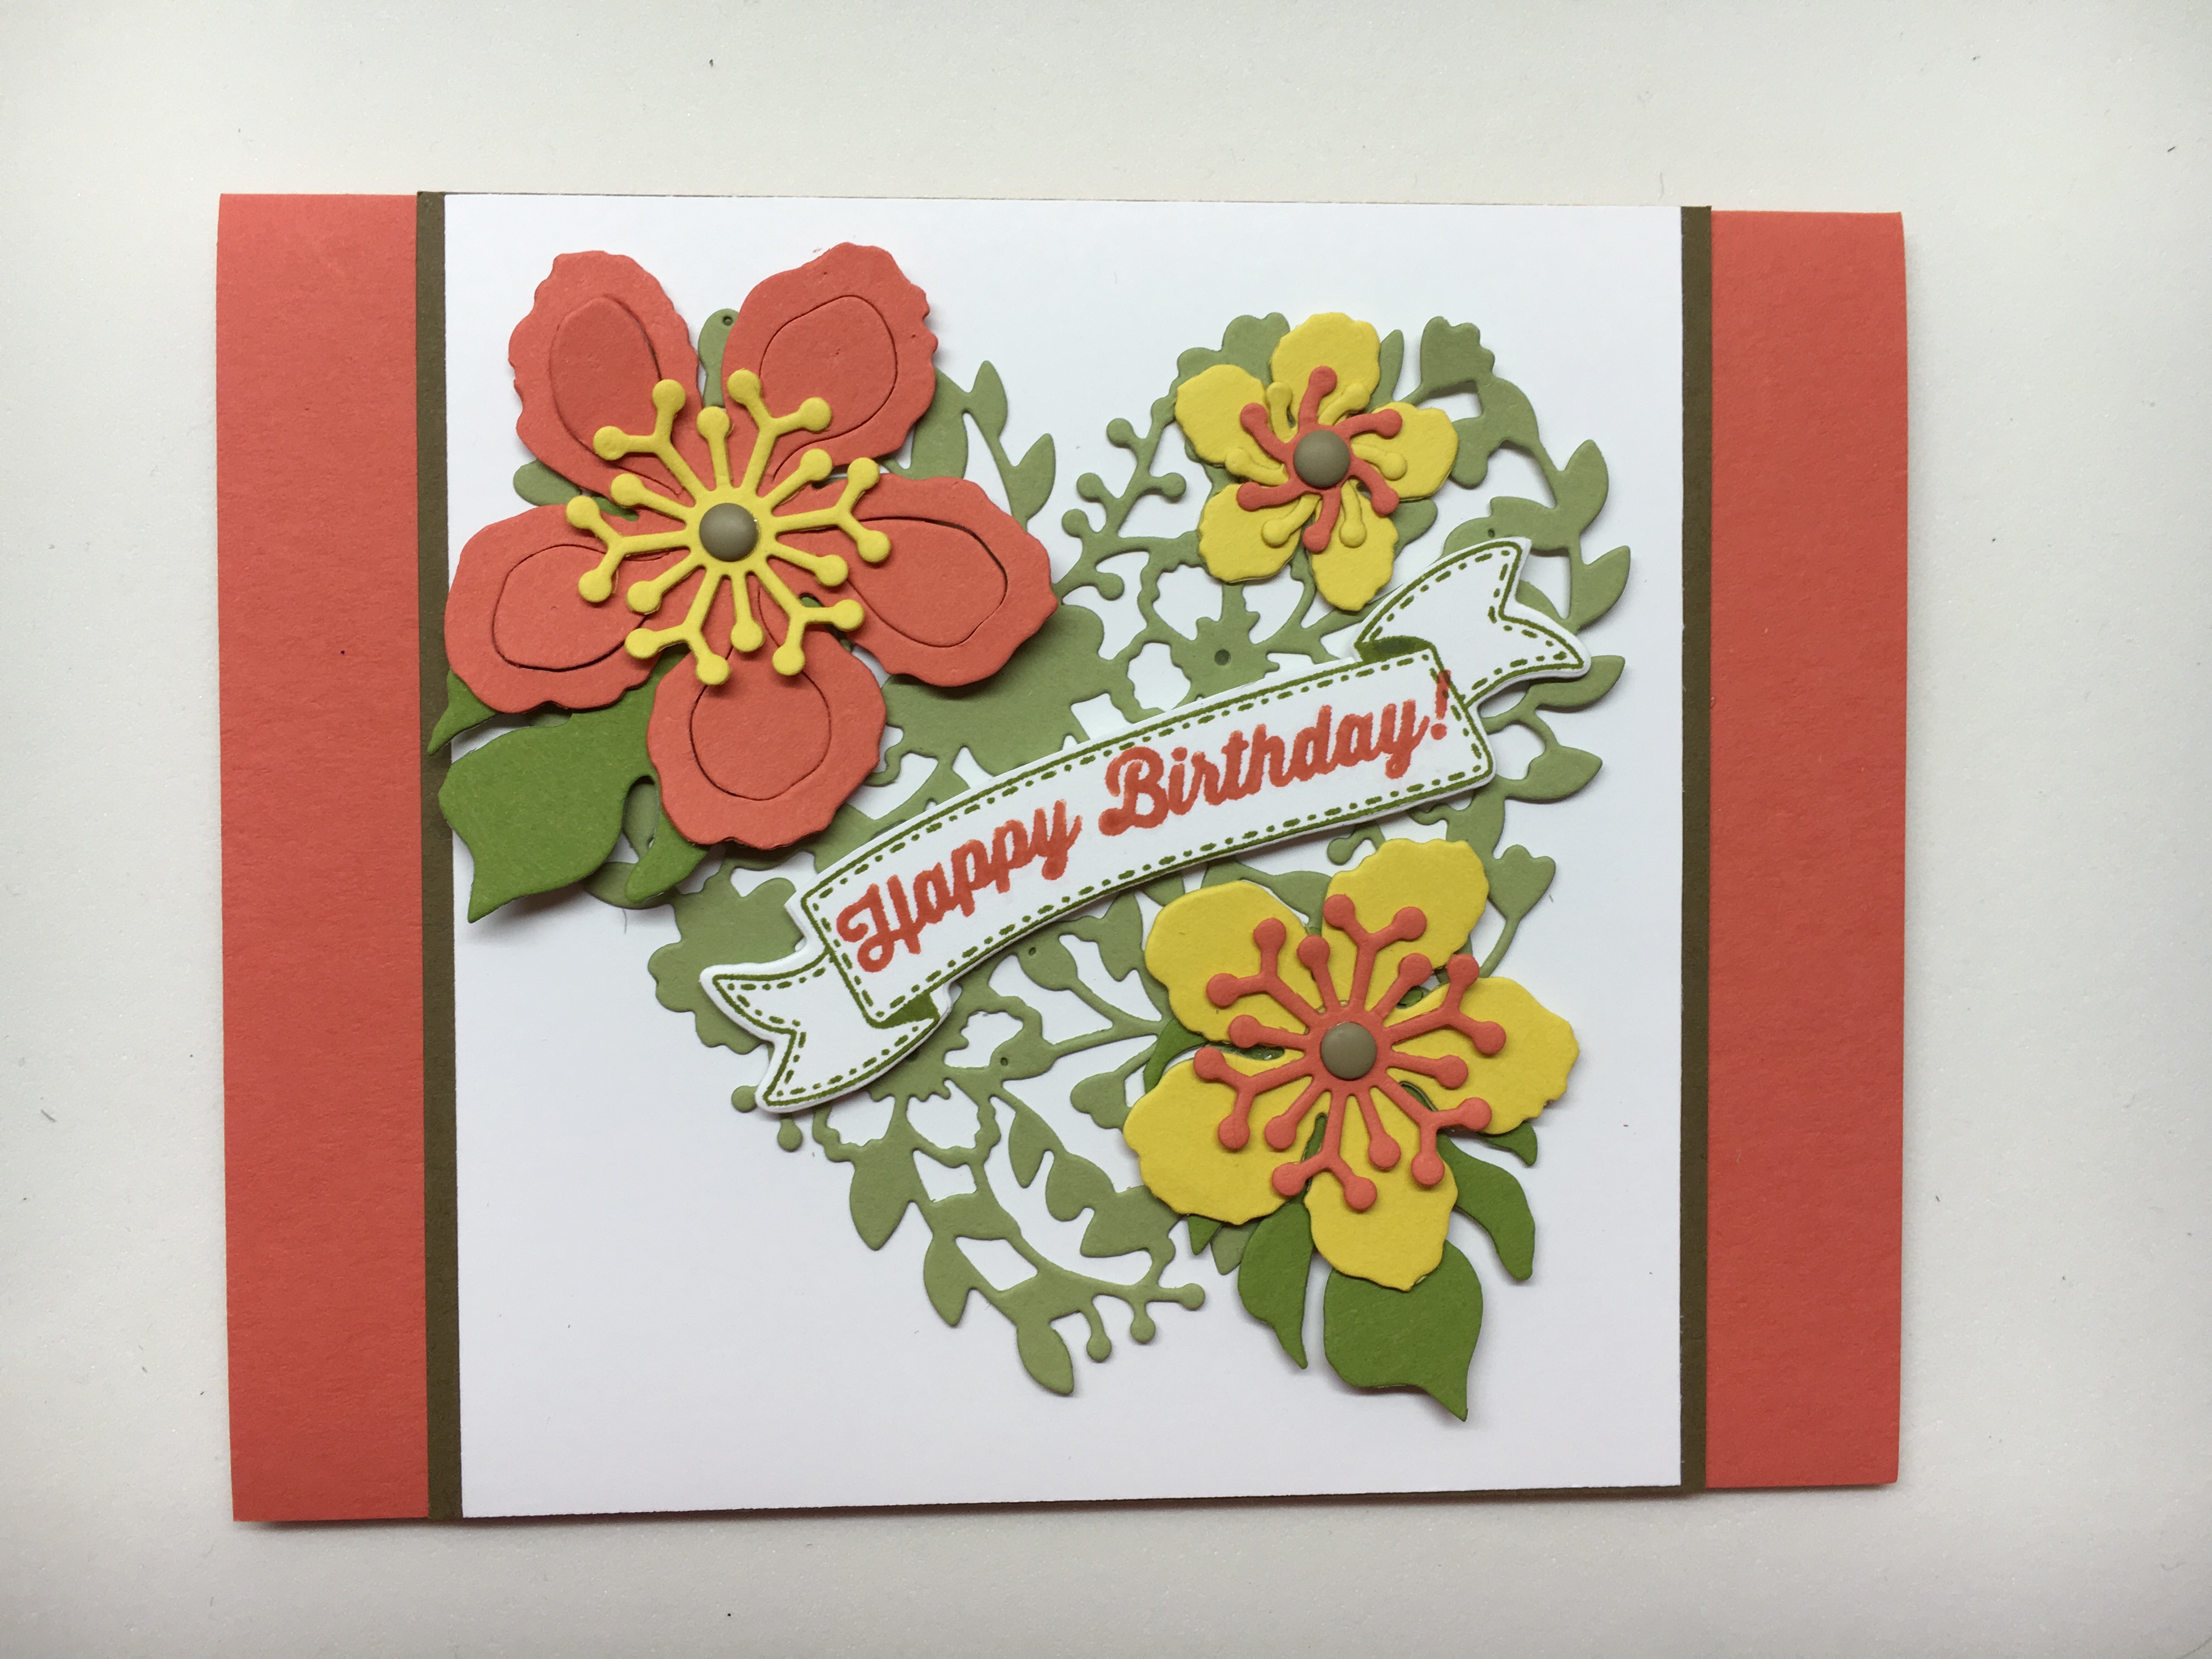
Today is my mom’s birthday! She loves the fall colors. Our home was always decorated in shades of red, orange, gold, and tan.  We had orange woodwork in our kitchen and textured wallpaper in our living room and dining room (Think late 70’s).  I saw a card by Diane Barnes using these flowers and die and it reminded me of my bedroom curtains when I was a kid.  They had these bold, bright flowers in orange and yellow. I used my Big Shot and the Precision Base Plate to make this childhood memory inspired birthday card for my mom.
Stampin Up Birthday card idea using Bloomin Heart THinlints, Botanical Builder Framelits, Bunch of Banners Framlelits - Jeanie Stark StampinUp

Here are some tips and tricks for using the Precision Base Plate with your Big Shot for when you need to cut detailed dies.

You will love what the Big Shot can do for you. It’s a MUST HAVE for any crafter.

I admit, the Big Shot Die-Cutting Machine is an investment. (But well worth it!)  Here are some suggestions to get it at a savings…

1) Sign up to be a Stampin’ Up! Demonstrator and order it with your starter kit.  You get $125 in product of your choice for $99 (shipping & handling is included). Plus you will get a FREE Paper Pumpkin kit, business supplies, and more to get you started. I’d love to chat with you if you are interested or have questions. There’s no pressure or obligation. Stampin’ Up! welcomes hobby demonstrators who just want to get product at a discount. Why not join?

2) Host a get together or virtual party and earn hostess dollars toward your purchase.  I will set up a hostess code so you and your friends and family can order online and you will get the rewards.

3) Just go ahead and order it from my website today and take advantage of today’s Back to School Special… With the purchase of the Big Shot I will send you a Free set of Replacement Cutting Pads (I have 2 sets I use all the time…1 just for embossing and 1 for cutting.  If you missed my previous post about this you can click HERE ). NOTE: You can only get the new updated base plate through Stampin’ Up! It comes with your Big Shot.

If you already have the Big Shot you can order just the new updated platform ($26). Therefore, I am offering a second Back to School Special for today…If you already own the Big Shot and want to purchase the new platform from me today, I will send you a sampling of precut framelits, thinlits, and embossed cardstock pieces.  Oh the possibilities! This way you can see and create with some of the different options that are available.  What fun!  (I will also send a sampling along with the cutting pads to anyone who purchases the Big Shot from me.) Remember to use the Hostess Code VS23B4FP  when you check out.

img_4056

Here’s another look at today’s Birthday card for my mom. I used lots of tools that begin with B as well as the stamp set and banner.  🙂

Stampin Up Birthday card idea using Bloomin Heart THinlints, Botanical Builder Framelits, Bunch of Banners Framlelits - Jeanie Stark StampinUp

Stamp set: Birthday Banners  Ink:  Calypso Coral, Old Olive Papers: Whisper White, Calypso Coral, Daffodil Delight, Old Olive, Pear Pizzazz, Soft Suede  Tools & Accessories: Bloomin’ Heart Thinlits, Botanical Builder Framelits, Bunch of Banners Framelits, Big Shot, Precision Base Plate, Stampin’ Dimensionals, Glue Dots, Fine-Tip Glue Pen, Fast Fuse Adhesive, Soft Suede Candy Dots (Retired)

Have a Beautiful day!

Just Stampin’

Jeanie


Adventure Awaits…

img_3356

Today I leave to take my daughter to college. (I packed plenty of tissues!)  WHEW! It feels like she went from my sweet little baby to high school graduate in the blink of an eye!

img_3352

I am filled with mixed emotions.  I am so happy for her and the opportunities that lie ahead as she pursues her dreams.  I just wish it wasn’t so far away…I am really going to miss her! For the past 29 years my life has revolved around being a mom to my two children.  I am so proud of them both! My son is taking vacation time from work to travel with me to move his little sister in to her dorm. (He is so sweet and thoughtful like that.)  I remember when I was pregnant and we first told him he was going to have a little brother or sister and he said, “I’ve been waiting for this my whole life!” (He was 10.)

Let’s get to today’s card before I start crying…

This card is for my daughter as she starts her college adventure. My color inspiration came from the bedding she picked out for her dorm room. I chose Bermuda Bay, Wisteria Wonder, and Night of Navy (There’s a little Sweet Sugarplum in there but I kept my card to three colors and white.) I always play around with how I’m going to lay out my card.  I usually start with one idea (pictured below) and end up with something different before I’m done.  I really liked how the sample in the catalog (page 117) angled the layered pieces so I went with that in the end. I’m OK with changes (in cards at least. LOL)


I stamped the images from the  Places You’ll Go stamp set on Whisper White and Bermuda Bay cardstock with Night of Navy ink.  I used a circle from the Layering Circle Framelits to cut out the globe.

I have a funny feeling this stamp set is going to be getting a lot of use!! The new circles collection framelits are awesome!  Check out all the different sizes…and you can make scallop layers too!

I stamped the banner from Banners for You in Bermuda Bay ink.  Then I stamped the sentiment in Night of Navy ink.  The photopolymer stamps are easy to bend which I did to fit it inside the curve on the banner. I cut the banner with the matching framelits.

img_3347


I adhered the globe and the banner to the card.  I used Stampin’ Dimensionals to pop the banner.

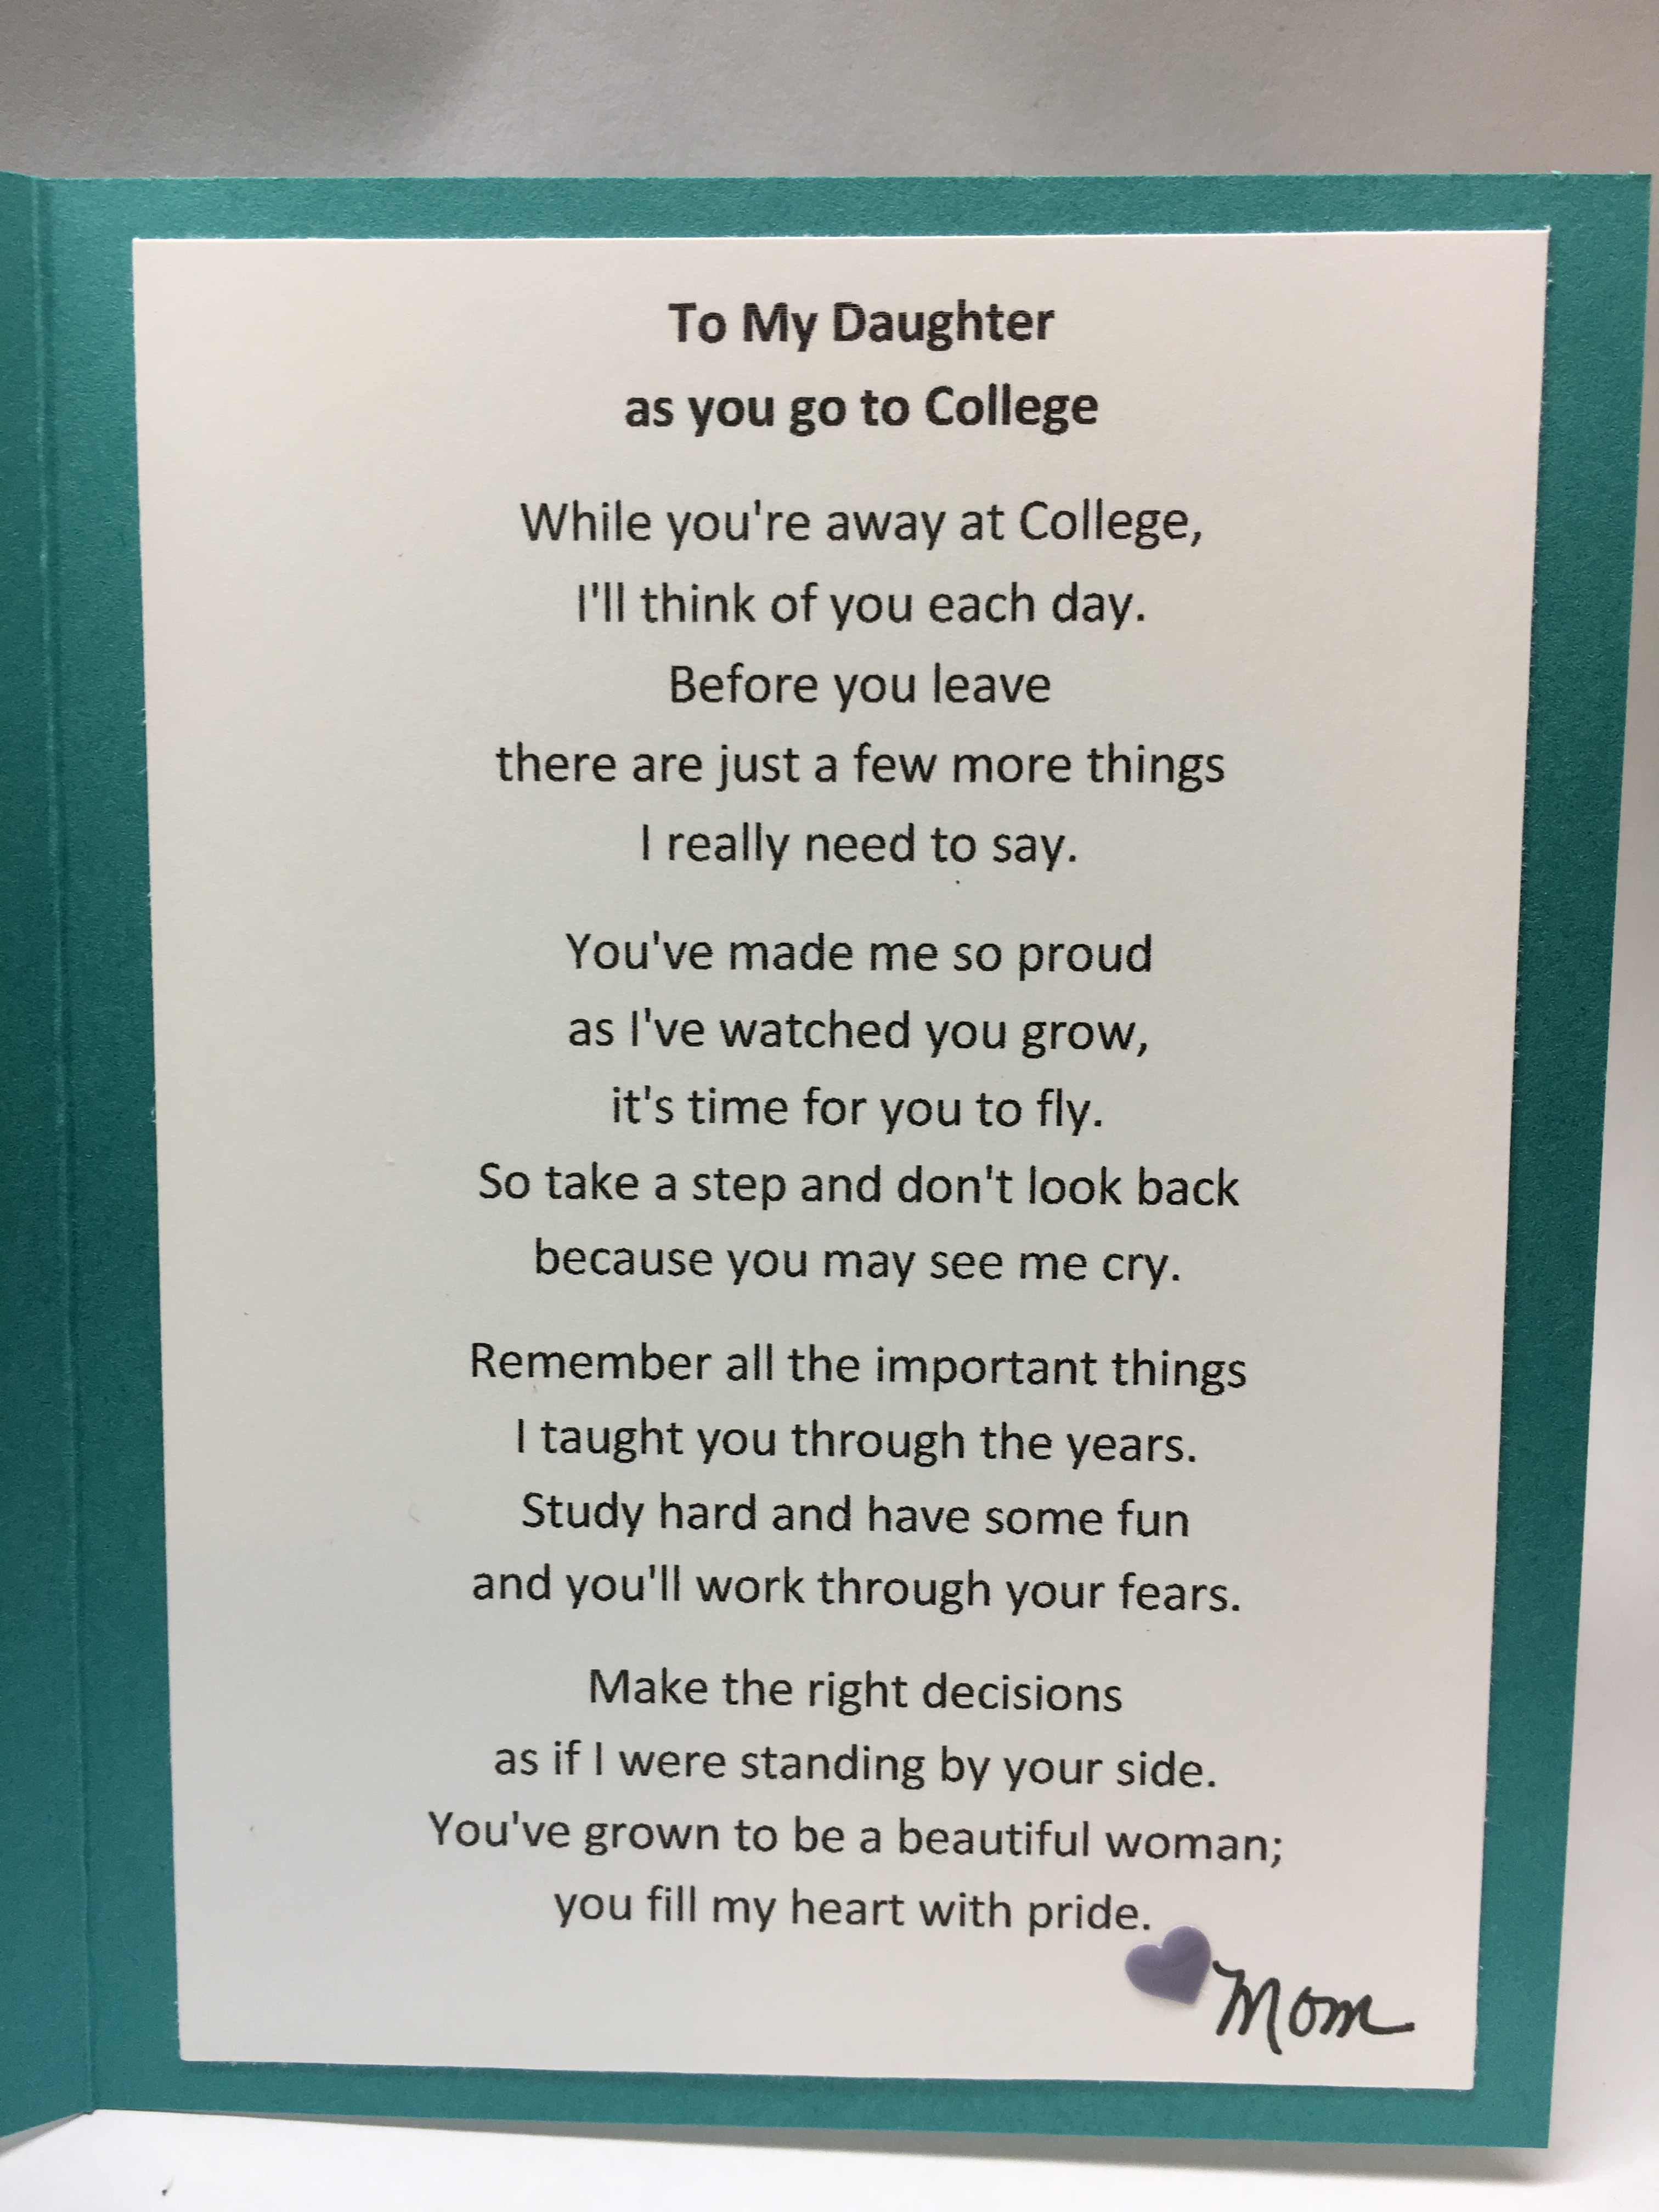
We have shopped all summer to find everything she needed for her college room in colors that coordinate so I thought her going away card should coordinate too!  I knew I wanted to use a poem I saved on the inside of her card so I typed it on the computer and printed it on whisper white cardstock then cut it to fit.

img_3412

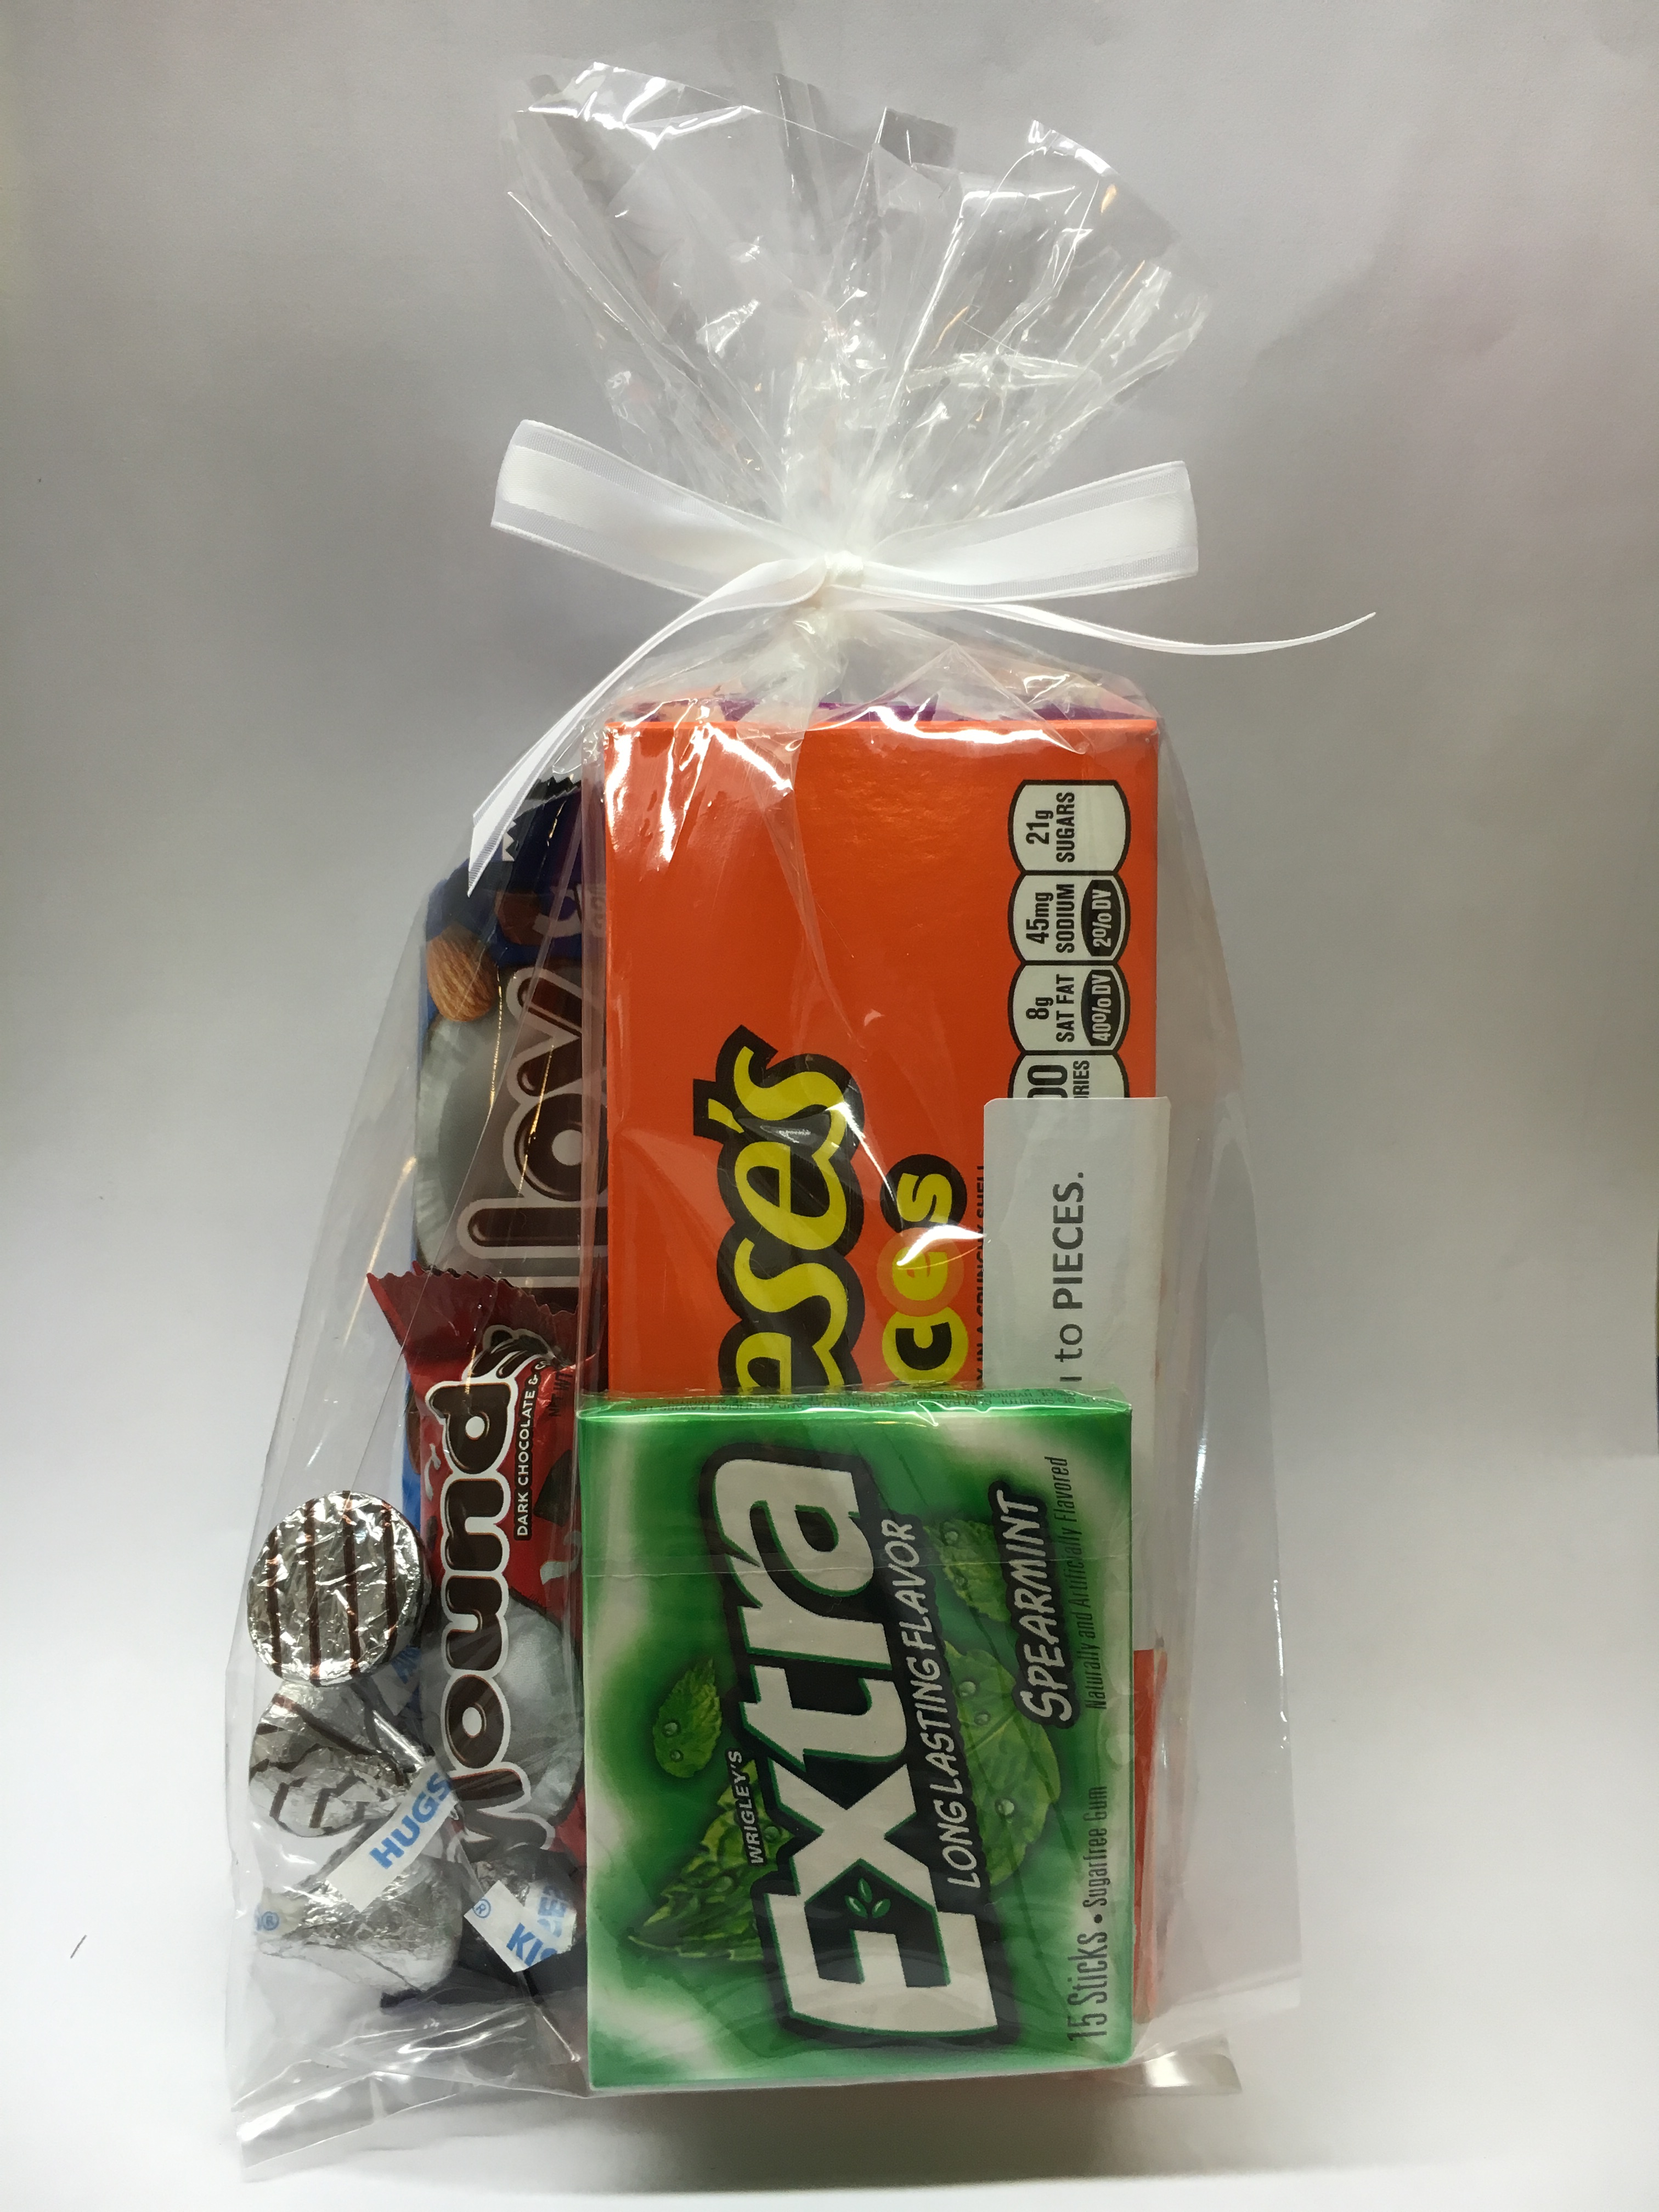
My husband bought some candy and we attached little sticker sayings to each (Thank You Pinterest!). I wrapped it all up in a Cellophane bag and tied it with Organza Ribbon.

img_3408

In case you are wondering what the stickers on the candy say…

We wish you MOUNDS of JOY!  We know you will go the EXTRA mile to reach your goals.  Be GOOD & get PLENTY of rest.  We love you to PIECES.  HUGS & KISSES! With Love, Mom and Dad

Here’s a final picture showing my van all packed.  I never thought it was all going to fit!

img_3391


It’s a good thing that in another week I will be heading back to school myself. I am a Pre-K teacher and I’ll soon have a classroom of 4 year olds to keep me busy and entertained. Every day is a new adventure!

Stamp sets: Places You’ll Go, Banners For You  Inks: Bermuda Bay, Night of Navy  Papers: Bermuda Bay, Night of Navy, Wisteria Wonder, Whisper White  Tools & Accessories: Layering Circles Framelits, Bunch of Banners Framelits, Subtles Enamel Shapes, Stampin’ Dimensionals, Fast Fuse Adhesive

Have a wonderful day!

Just Stampin’

Jeanie
Fun Fold Friday…Pleated Fold

img_1379

The inspiration for this card came from my friend Marisa.  She knows how I love to make fun fold cards and shared how to make this pleated fold. (She is a Fabulous Friend!)

I used Sweet Sugarplum, Rich Razzleberry, and Whisper White card stock to layer my card. I made the pleated fold in Sweet Sugarplum using the 2016-2018 In Color Designer Series Paper Stack.  I LOVE the Stampin’ Up DSP Stacks…the prints are double sided, great quality, and coordinate perfectly with our card stock. It makes it easy to match colors together to make a special card for someone.

To make the pleated fold you need to start with at piece of 10 x 5 DSP.  Score at 1, 1 1/2, 2 1/2, 3, 4, 4 1/2, 5 1/2, 6, 7, 7 1/2, 8 1/2, 9.  Then mark both short sides at 2 and 3 inches and cut from that point to the center score lines.

img_1343

Next you want to fold on the score lines back and forth. Add tear and tape on the back to keep it together and attach it to your card layer.


Attach the Whisper White layer to the Rich Razzleberry card stock and adhere it to the Sweet Sugarplum card base. I stamped the banner and sentiment using Sweet Sugarplum and Rich Razzleberry inks and the Banners For You Stamp Set. I cut it out with the matching Bunch of Banners Framelits.  You can purchase the stamp set and framelits together as a bundle and save 10%.  There are so many different banners and sentiments to choose from in this set that you will use it again and again.

I love to decorate my envelope to match and here I used the same DSP on the back flap.

img_1387

I hope you have a Fabulous Friend that you can make this card to send.  I am sure it will put a smile on their face to know that you were thinking of them. If you would like to purchase any of the products used in today’s card click the SHOP button at the top and it will take you directly to my online store where you can shop 24/7.  Contact me if you have any questions.  I would love to help you share some handmade kindness.

Have a wonderful day!

Just Stampin’

Jeanie