I is for Irresistibly Floral DSP

irresistably-floral-dsp

Welcome to the ABC’s with DSP!  This month I am featuring projects showcasing Stampin’ Up! Designer Series Paper. Today I am focusing on the Irresistibly Floral Specialty Designer Series Paper. You get 12 12×12 sheets: 2 each of 6 single-sided designs. These white-on-white designs really come to life when the paper is inked.

img_5298Irresistibly Floral Designer Series Paper from Stampin’ Up!

These two cards may well be the fastest cards I have ever made.  I used the new Sponge Brayer from Stampin’ Up (found on page  172 in the annual catalog).  To achieve these beautiful, soft results, all you do is roll the brayer in the ink a few times and roll in on your paper.  You get the emboss resist without the fuss of having to emboss yourself! You just need to use a tissue to wipe away the excess ink from your DSP after you sponge it with the brayer.  The white glossy patterns on the Irresistibly Floral paper resists the ink.

img_5297

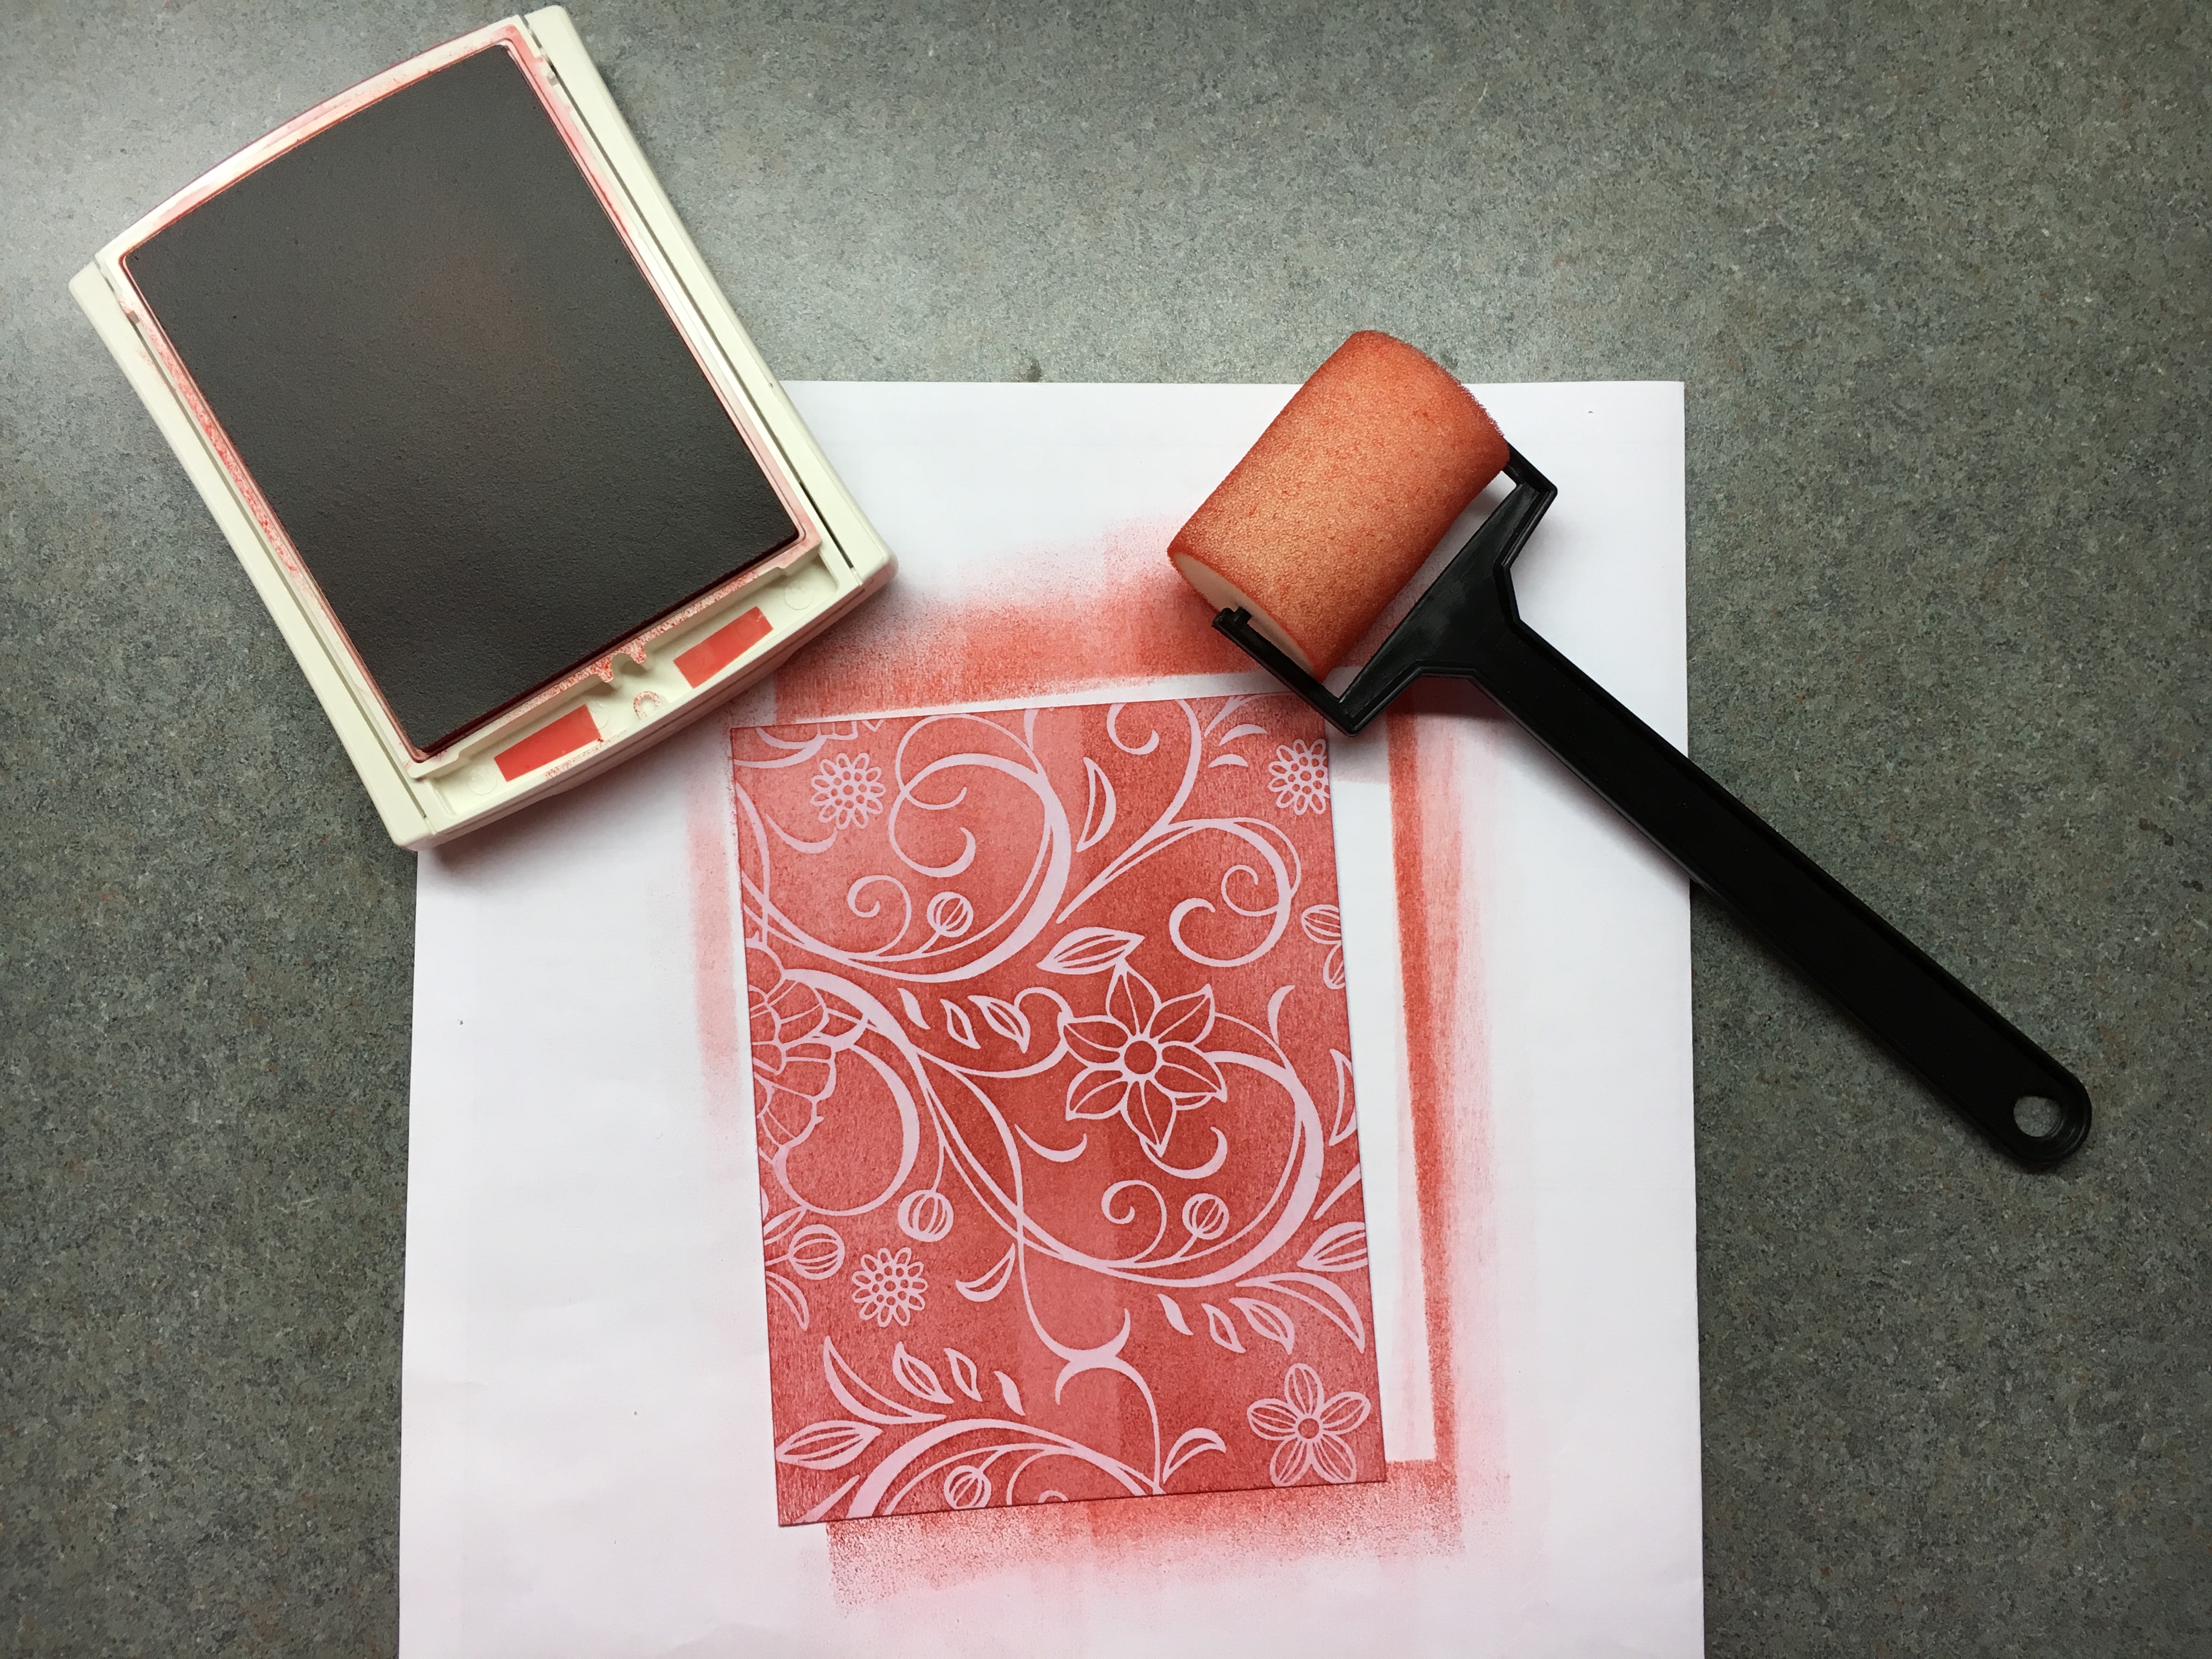
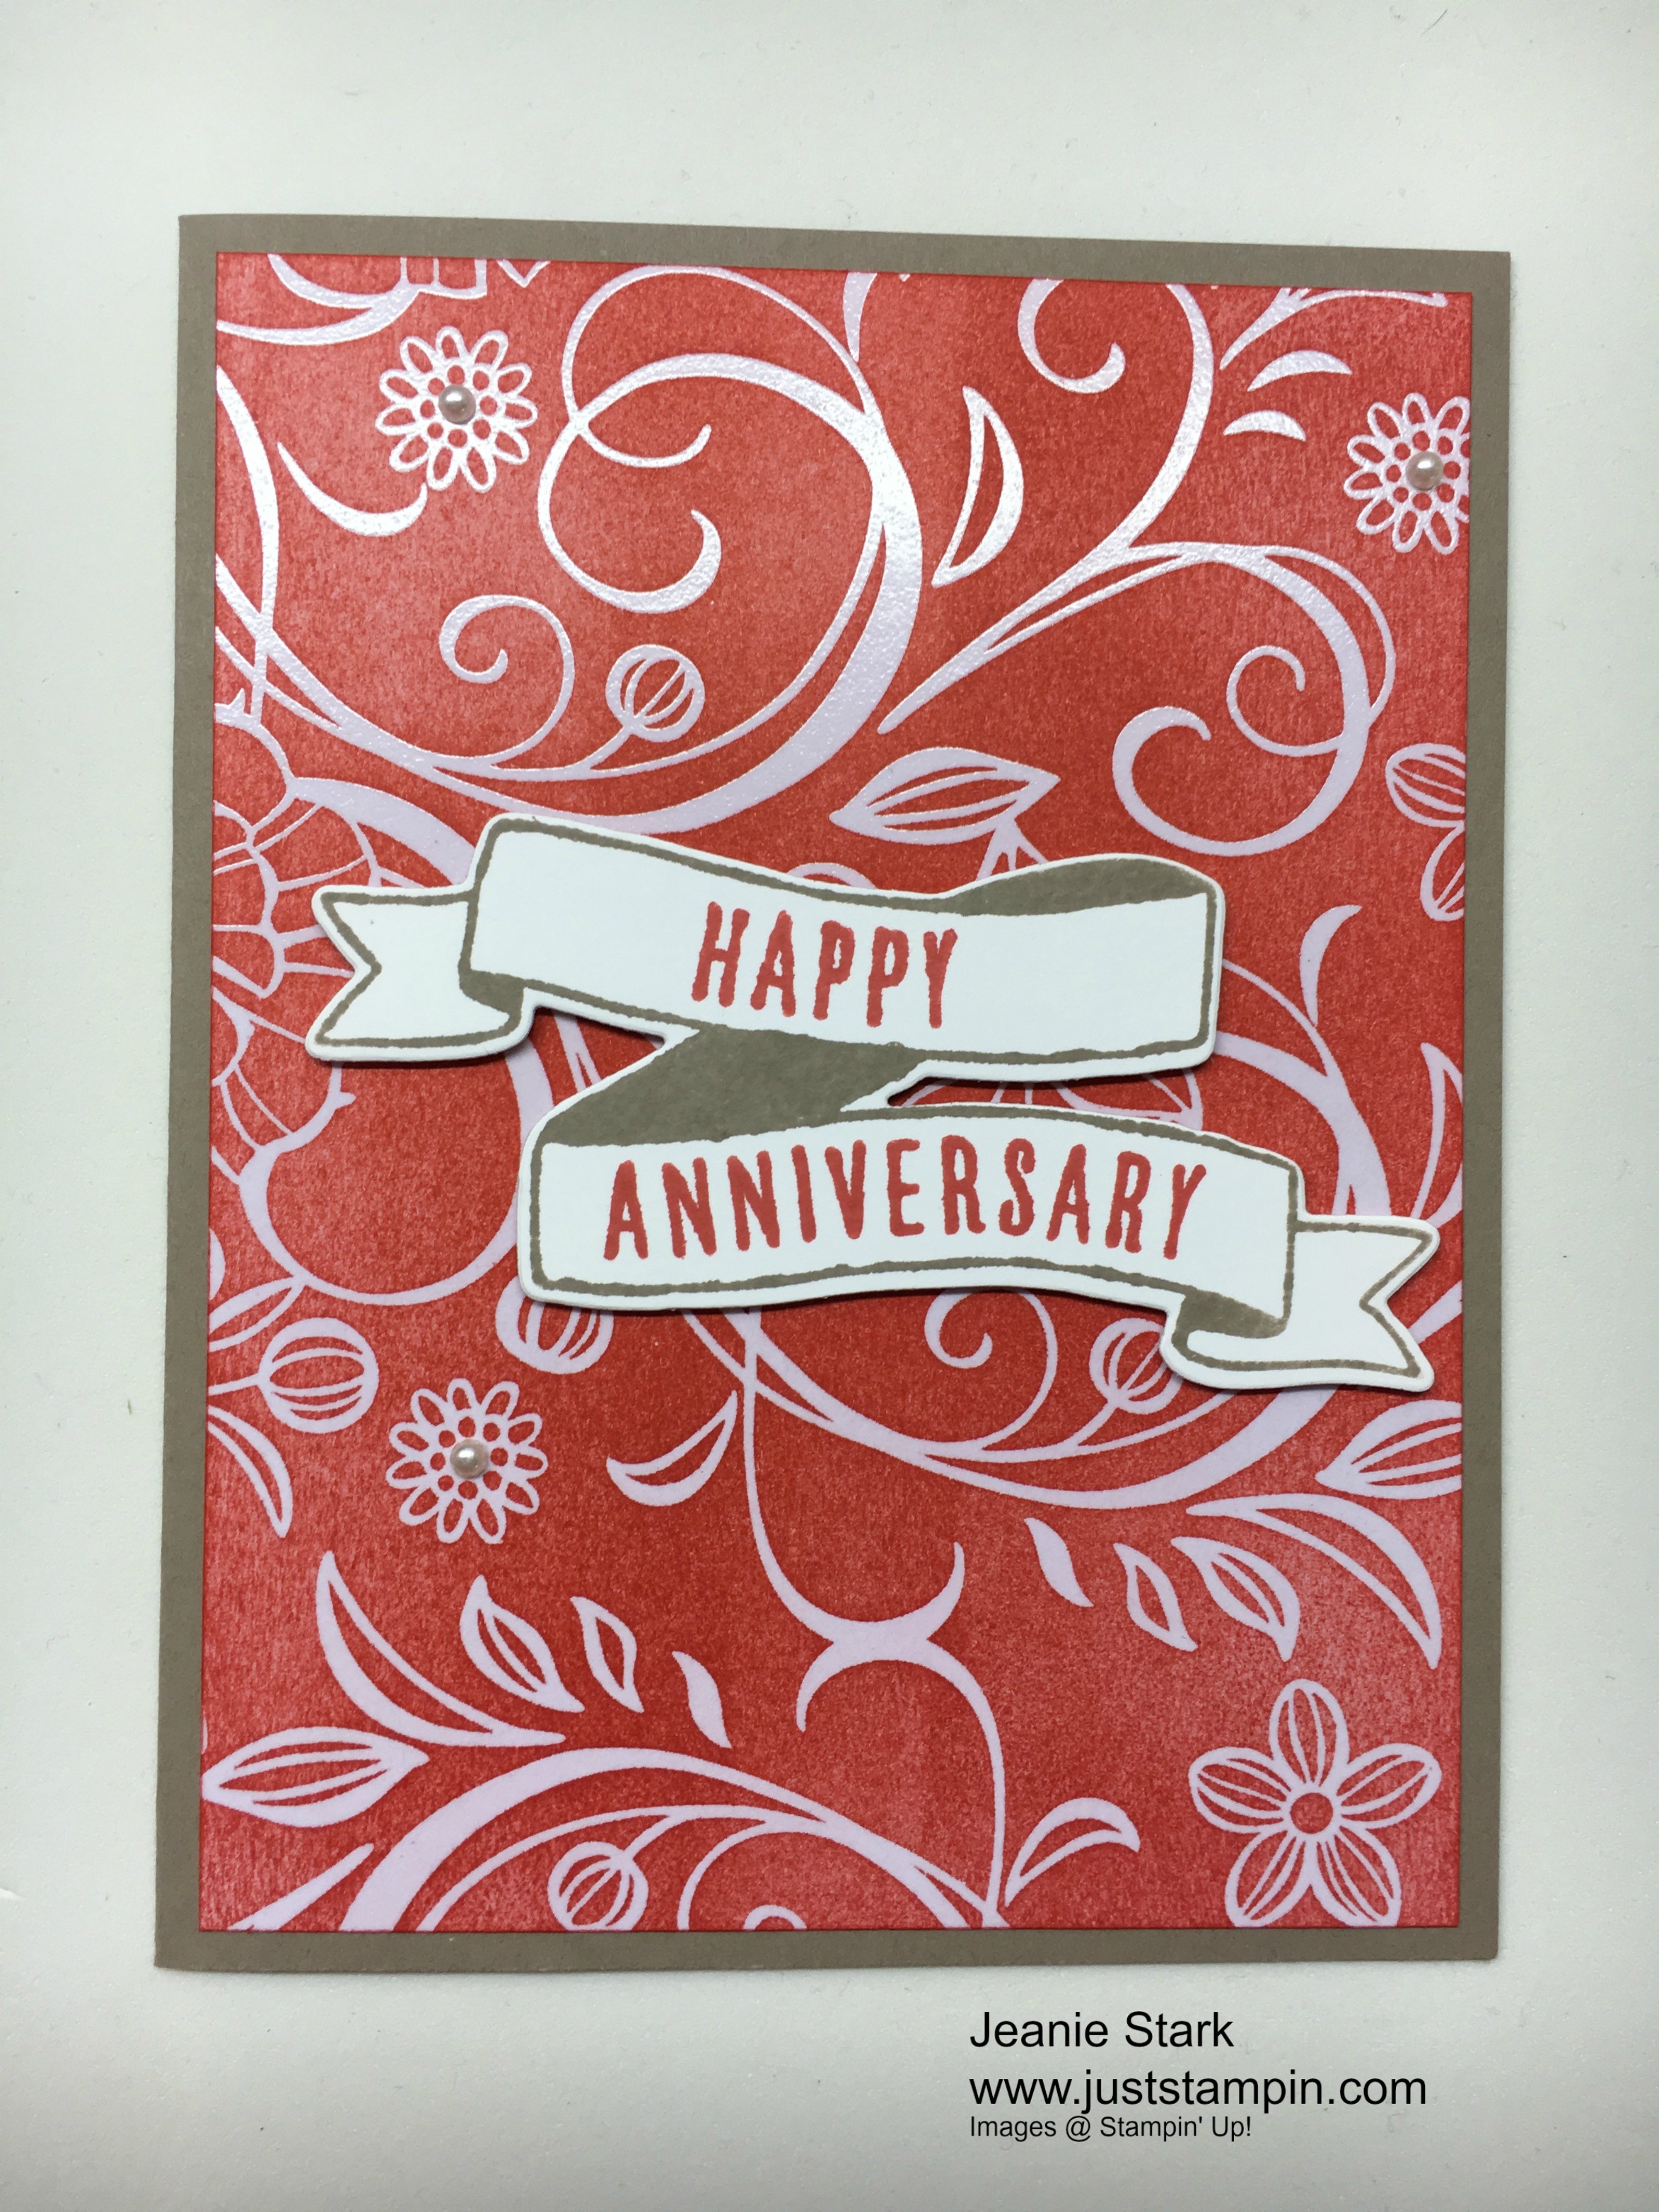
I chose to use the 2015 – 2017 In Colors for my cards. I sponged the first card with Watermelon Wonder.  After I wiped it with a tissue, I adhered it to my Tip Top Taupe card base and made a banner using the Banners for You Stamp Set and Bunch of Banners Framelits.  I attached the banner with Stampin’ Dimensionals and added a few Basic Pearl Jewels.

img_5299
Irresistibly Floral Designer Series Paper sponged using the sponge brayer

I just washed my sponge brayer with water to clean off the ink and squeezed it dry.  For my next card I was going for the ombre effect using mint macaron ink on the diamond Specialty DSP.  You can play around and get all different effects.  I added organza ribbon and Basic Pearl Jewels and popped it up with Stampin’ Dimensionals. I stamped the sentiment from Suite Sayings with Mint Macaron ink for a tone on tone look. Simple works!

img_5300
Stampin’ Up! Irresistibly Floral Designer Series Paper and Suite Sayings Stamp Set

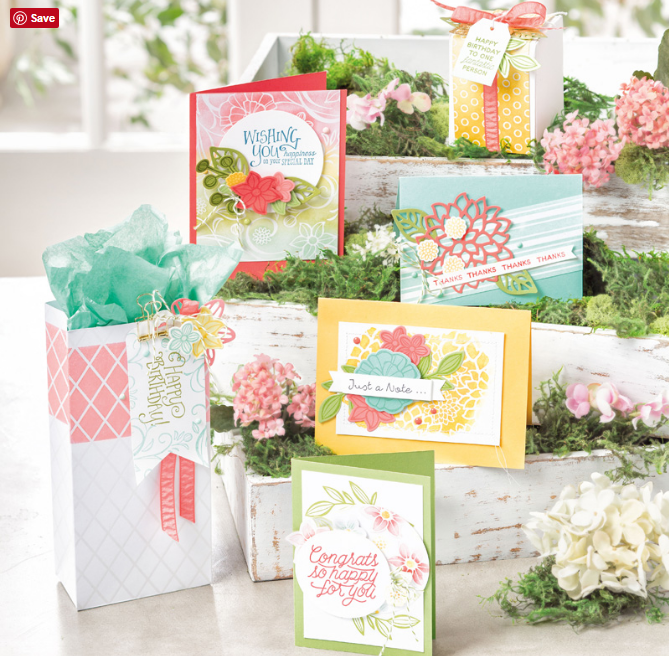
Here are some great samples that are in the annual catalog (page 126) using the Irresistibly Floral Specialty DSP, Falling Flowers stamp set and the matching May Flowers Framelits.

irresistably-floral-samples

Don’t forget about the Designer Series Paper Sale going on this month!

dsp-promo-buy-3-get-1-free

Click HERE to shop my online store, check out the Irresistibly Floral Suite, and take advantage of the Stampin’ Up! Designer Series Paper Sale Oct. 1-31.  Please use the Hostess Code 7DB3CBKS when you check out.  I’ve added a visual below to show where to enter the code. I always send a thank you gift each month when you order from me.  I appreciate each and every order!

Thanks for stopping by! Have an Interesting day!

Just Stampin’

Jeanie

img_4672
Stampin’ Up! Designer Series Paper

It’s all in the Details…Floral Details

Detailed Floral and Sunshine Wishes Thinlits congratulations wedding card idea - Jeanie Stark StampinUp

I knew the Detailed Floral Thinlits were going to be added to my collection the second I saw them!  I purchased them as a Bundle with the Floral Phrases Stamp Set and Saved 10%. Woo Hoo! Previously I shared a video how to use these dies.  You can see that HERE if you missed it. I promised you I would be sharing more cards using this set and today I’m going to share two more cards using these thinlits.  Today’s cards are standard size (unlike the fun fold card I shared on the Pals Blog Hop). The first card features the Bow Builder Punch. I love the Stampin’ Up punches because they are quick and easy to use. You can watch this short video to see how I made the bow for my card.

This card is classic in black and vanilla.  It went together quick with the help of my Big Shot.  The sentiment on the front is from Sunshine Wishes Thinlits…this set has several great sayings to cut out and use on your projects.  I cut the Detail Floral Thinlits on the front of the card and then added the vanilla cardstock behind it on the inside. I used the Floral Phrases stamp set to stamp the inside sentiment and border in basic black archival ink.

Detailed Floral and Sunshine Wishes Thinlits congratulations wedding card idea - Jeanie Stark StampinUp


I made this next card using the same colors and floral thinlits only this time you can see through the detailed die to the inside of  the card.

Detailed Floral Thinlits and Bunch of Banners Framelits anniversary card idea - Jeanie Stark StampinUp

I stamped and cut the sentiment on the front using the Banners For You Stamp Set and Bunch of Banners Framelits. I popped the banner up using Stampin’ Dimensionals and added some Pearl Basic Jewels.  So elegant! I used the same verse on the inside as I did on the wedding card because it can easily work for both wedding and anniversary.  For this card I had to make sure I stamped it on the left side so the words couldn’t be seen through the die on the front.

Detailed Floral Thinlits anniversary card idea - Jeanie Stark StampinUp

Detailed Floral Thinlits and Bunch of Banners Framelits anniversary card idea - Jeanie Stark StampinUp


I used the border stamp from the Floral Phrases stamp set to decorate the front of my envelopes.  It makes a nice space to write the recipient’s address.

img_3200

Having the right tools makes it easy to make beautiful cards.  If you would like to purchase any of the products used click the SHOP button to get started stamping! I would love to be your card coach if you are not currently working with another Stampin’ Up Demonstrator. Feel free to contact me if you have any questions.

Stamp sets: Floral Phrases, Banners for You  Ink:  Basic Black Archival  Papers: Basic Black, Very Vanilla  Tools & Accessories: Detailed Floral Thinlits, Sunshine Wishes Thinlits, Bunch of Banners Framelits, Bow Builder Punch, Big Shot, Precision Base Plate, Pearl basic Jewels, Stampin’ Dimensionals, Glue Dots, Fine-Tip Glue Pen, Fast Fuse Adhesive

Have a wonderful day!

Just Stampin’

Jeanie


Adventure Awaits…

img_3356

Today I leave to take my daughter to college. (I packed plenty of tissues!)  WHEW! It feels like she went from my sweet little baby to high school graduate in the blink of an eye!

img_3352

I am filled with mixed emotions.  I am so happy for her and the opportunities that lie ahead as she pursues her dreams.  I just wish it wasn’t so far away…I am really going to miss her! For the past 29 years my life has revolved around being a mom to my two children.  I am so proud of them both! My son is taking vacation time from work to travel with me to move his little sister in to her dorm. (He is so sweet and thoughtful like that.)  I remember when I was pregnant and we first told him he was going to have a little brother or sister and he said, “I’ve been waiting for this my whole life!” (He was 10.)

Let’s get to today’s card before I start crying…

This card is for my daughter as she starts her college adventure. My color inspiration came from the bedding she picked out for her dorm room. I chose Bermuda Bay, Wisteria Wonder, and Night of Navy (There’s a little Sweet Sugarplum in there but I kept my card to three colors and white.) I always play around with how I’m going to lay out my card.  I usually start with one idea (pictured below) and end up with something different before I’m done.  I really liked how the sample in the catalog (page 117) angled the layered pieces so I went with that in the end. I’m OK with changes (in cards at least. LOL)


I stamped the images from the  Places You’ll Go stamp set on Whisper White and Bermuda Bay cardstock with Night of Navy ink.  I used a circle from the Layering Circle Framelits to cut out the globe.

I have a funny feeling this stamp set is going to be getting a lot of use!! The new circles collection framelits are awesome!  Check out all the different sizes…and you can make scallop layers too!

I stamped the banner from Banners for You in Bermuda Bay ink.  Then I stamped the sentiment in Night of Navy ink.  The photopolymer stamps are easy to bend which I did to fit it inside the curve on the banner. I cut the banner with the matching framelits.

img_3347


I adhered the globe and the banner to the card.  I used Stampin’ Dimensionals to pop the banner.

We have shopped all summer to find everything she needed for her college room in colors that coordinate so I thought her going away card should coordinate too!  I knew I wanted to use a poem I saved on the inside of her card so I typed it on the computer and printed it on whisper white cardstock then cut it to fit.

img_3412

My husband bought some candy and we attached little sticker sayings to each (Thank You Pinterest!). I wrapped it all up in a Cellophane bag and tied it with Organza Ribbon.

img_3408

In case you are wondering what the stickers on the candy say…

We wish you MOUNDS of JOY!  We know you will go the EXTRA mile to reach your goals.  Be GOOD & get PLENTY of rest.  We love you to PIECES.  HUGS & KISSES! With Love, Mom and Dad

Here’s a final picture showing my van all packed.  I never thought it was all going to fit!

img_3391


It’s a good thing that in another week I will be heading back to school myself. I am a Pre-K teacher and I’ll soon have a classroom of 4 year olds to keep me busy and entertained. Every day is a new adventure!

Stamp sets: Places You’ll Go, Banners For You  Inks: Bermuda Bay, Night of Navy  Papers: Bermuda Bay, Night of Navy, Wisteria Wonder, Whisper White  Tools & Accessories: Layering Circles Framelits, Bunch of Banners Framelits, Subtles Enamel Shapes, Stampin’ Dimensionals, Fast Fuse Adhesive

Have a wonderful day!

Just Stampin’

Jeanie