
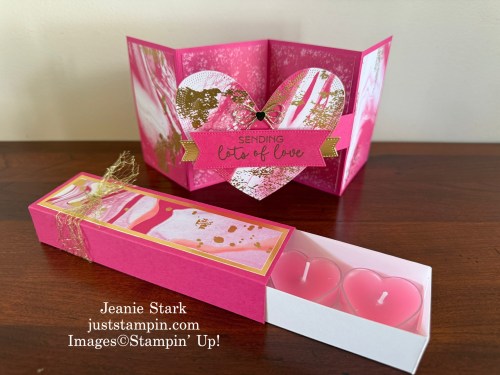
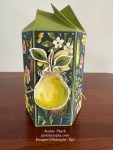
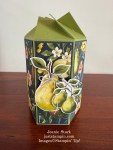
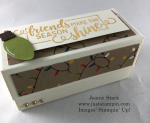
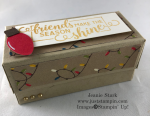
Today’s project is a quick & easy slider box I created for some heart shaped tea light candles. I love to create gifts to have on hand. These heart shaped tea lights make a great hostess gift or for a coworker/friend’s birthday. This is perfect for enjoying a relaxing bath after a long day (stamping! LOL).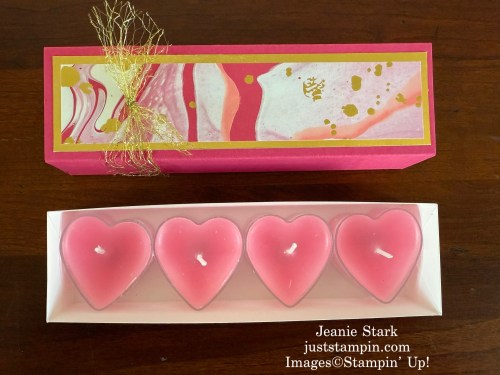
Supplies/Measurements:
- Basic White Thick Cardstock – 8 1/4″ x 3 3/4″
- Melon Mambo cardstock – 6 1/4″ x 6 1/2″
- Gold Foil – 6″ x 1 1/2″
- Marbled Elegance Specialty Designer Series Paper – 5 3/4″ x 1 1/4″
- ribbon
Directions:
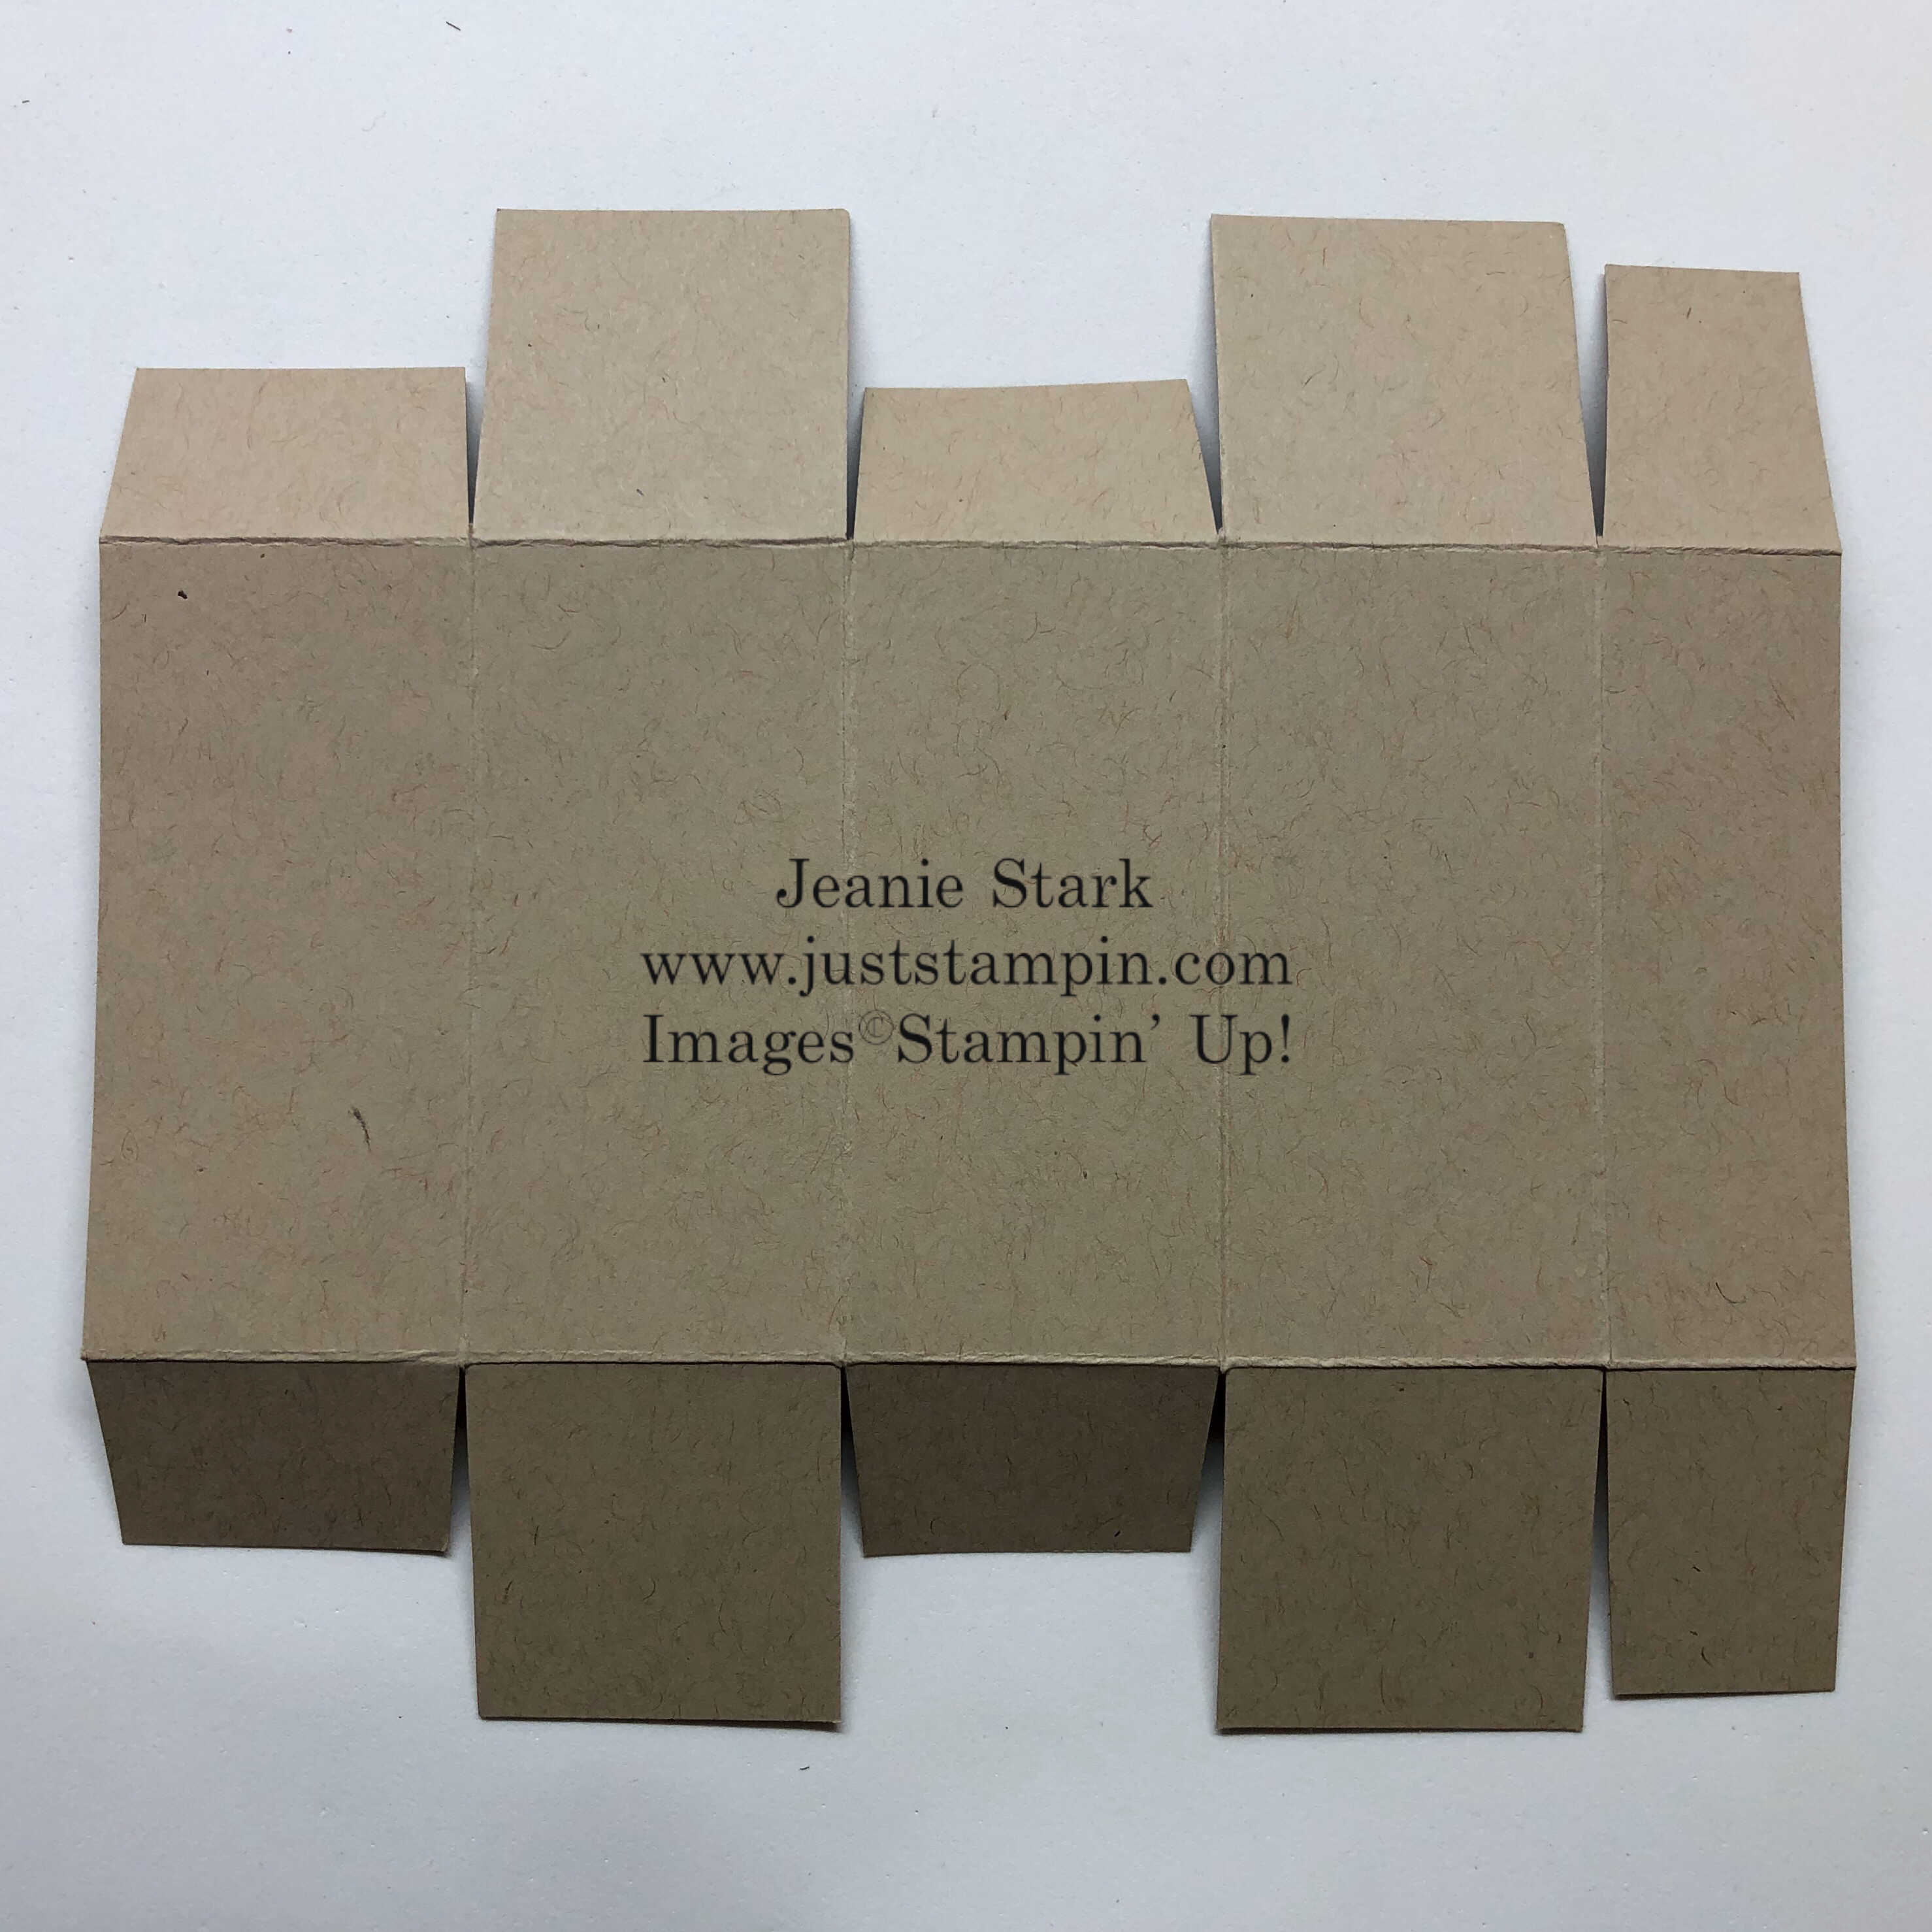
- Score the Basic White cardstock on each side at 1″. Trim off the corners to form triangles and cut two slots on opposite sides to form corner flaps.
- Apply Multipurpose Liquid Glue to the corners and fold in to form your base.

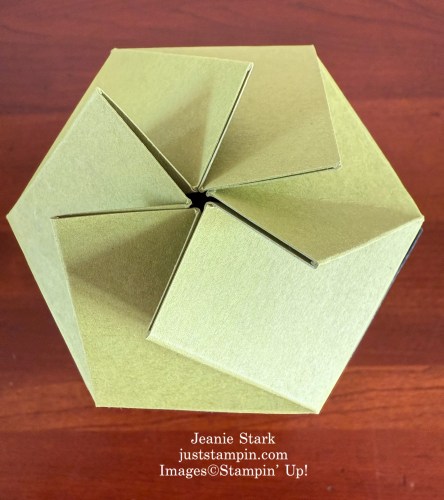
- Score the Melon Mambo cardstock along the 6 1/2″ side at 1 13/16″, 2 7/8″, 4 11/16″, & 5 3/4″
- Apply Liquid Glue to the 3/4″ flap, fold to close to adhere & form your wrap.

- Adhere the Gold Foil layer and the patterned paper.
- Wrap ribbon and tie a simple knot.

I created this box to coordinate with the tucked fun fold card I shared yesterday. If you missed that post (and the PDF to create the card), you can view it HERE.
*This box can hold 4 round tea light candles as well.
Have you ordered my Just Stampin’ Card Kit to go for July?
Click HERE for all the details (before they sell out)!
Have a great day! Thanks for stopping by!
Just Stampin’
Jeanie

My Just Stampin’ Rewards:
I appreciate each and every order! Here are the things you can expect when you place an online order with me:
- Shop and earn 10% back in Stampin’ Rewards on orders of $20 or more. Use them on your next order or save them up to 1 year for something special!
- All orders will receive a handmade thank you card from me.
(*You can choose to remove the sticky note inside and reuse the card.) - With a $50 order you will receive a PDF from my “Just Stampin’ Sketchbook” showcasing card designs that you can use with any stamp set. This is a great resource! (*You can collect new design tutorials each month!)
- With an order of $75 (or more) I will send you the PDF and thank you card as well as a card kit or Stampin’ Up Product of my choosing – this varies monthly.
Product List (Click on image to SHOP my online store.)
|
|
|
|
|
|
|
|
|
|
|
|
|
|
|
|
![Hearts Of Elegance Photopolymer Stamp Set (English) [ 164909 ]](https://assets1.tamsnetwork.com/images/EC042017NF/164909s.jpg "Hearts Of Elegance Photopolymer Stamp Set (English) [ 164909 ]")
![Hearts Of Elegance Dies [ 164915 ]](https://assets1.tamsnetwork.com/images/EC042017NF/164915s.jpg "Hearts Of Elegance Dies [ 164915 ]")
![Marbled Elegance 12" X 12" (30.5 X 30.5 Cm) Specialty Designer Series Paper [ 164919 ]](https://assets1.tamsnetwork.com/images/EC042017NF/164919s.jpg "Marbled Elegance 12\" X 12\" (30.5 X 30.5 Cm) Specialty Designer Series Paper [ 164919 ]")
![Basic White 12" X 12" (30.5 X 30.5 Cm) Thick Cardstock [ 166782 ]](https://assets1.tamsnetwork.com/images/EC042017NF/166782s.jpg "Basic White 12\" X 12\" (30.5 X 30.5 Cm) Thick Cardstock [ 166782 ]")
![Melon Mambo 8-1/2" X 11" Cardstock [ 115320 ]](https://assets1.tamsnetwork.com/images/EC042017NF/115320s.jpg "Melon Mambo 8-1/2\" X 11\" Cardstock [ 115320 ]")
![Gold Foil Sheets [ 132622 ]](https://assets1.tamsnetwork.com/images/EC042017NF/132622s.jpg "Gold Foil Sheets [ 132622 ]")
![Stampin' Seal [ 152813 ]](https://assets1.tamsnetwork.com/images/EC042017NF/152813s.jpg "Stampin' Seal [ 152813 ]")
![Multipurpose Liquid Glue [ 110755 ]](https://assets1.tamsnetwork.com/images/EC042017NF/110755s.jpg "Multipurpose Liquid Glue [ 110755 ]")
![Gold 1 1/2" (3.8 Cm) Open Weave Trim [ 165715 ]](https://assets1.tamsnetwork.com/images/EC042017NF/165715s.jpg "Gold 1 1/2\" (3.8 Cm) Open Weave Trim [ 165715 ]")
![Bone Folder [ 102300 ]](https://assets1.tamsnetwork.com/images/EC042017NF/102300s.jpg "Bone Folder [ 102300 ]")
![Paper Trimmer [ 152392 ]](https://assets1.tamsnetwork.com/images/EC042017NF/152392s.jpg "Paper Trimmer [ 152392 ]")
![Simply Scored [ 122334 ]](https://assets1.tamsnetwork.com/images/EC042017NF/122334s.jpg "Simply Scored [ 122334 ]")
CLICK HERE TO SHOP STAMPIN’ UP!
CLICK HERE to SHOP LAST CHANCE PRODUCTS
Click HERE TO SHOP KITS COLLECTION
CLICK HERE TO VIEW CURRENT ONLINE EXCLUSIVES
CLICK HERE TO SUBSCRIBE TO PAPER PUMPKIN
CLICK HERE FOR INFORMATION ABOUT JOINING STAMPIN’ UP!
CLICK HERE TO JOIN MY STAMPIN’ UP! Team
CLICK HERE TO VIEW MY TUTORIALS
CLICK HERE TO VIEW PREVIOUS MYSTERY STAMPIN’ CARDS-FREE PDF’S!


![Perfectly Pears Bundle (English) [ 166154 ]](https://assets1.tamsnetwork.com/images/EC042017NF/166154s.jpg "Perfectly Pears Bundle (English) [ 166154 ]")
![Perfectly Pears Photopolymer Stamp Set (English) [ 166147 ]](https://assets1.tamsnetwork.com/images/EC042017NF/166147s.jpg "Perfectly Pears Photopolymer Stamp Set (English) [ 166147 ]")
![Perfectly Pears Dies [ 166153 ]](https://assets1.tamsnetwork.com/images/EC042017NF/166153s.jpg "Perfectly Pears Dies [ 166153 ]")
![Painterly Pears 12" X 12" (30.5 X 30.5 Cm) Designer Series Paper [ 166146 ]](https://assets1.tamsnetwork.com/images/EC042017NF/166146s.jpg "Painterly Pears 12\" X 12\" (30.5 X 30.5 Cm) Designer Series Paper [ 166146 ]")
![Mossy Meadow 8-1/2" X 11" Cardstock [ 133676 ]](https://assets1.tamsnetwork.com/images/EC042017NF/133676s.jpg "Mossy Meadow 8-1/2\" X 11\" Cardstock [ 133676 ]")
![Old Olive 8-1/2" X 11" Cardstock [ 100702 ]](https://assets1.tamsnetwork.com/images/EC042017NF/100702s.jpg "Old Olive 8-1/2\" X 11\" Cardstock [ 100702 ]")
![Secret Sea 8 1/2" X 11" Cardstock [ 165624 ]](https://assets1.tamsnetwork.com/images/EC042017NF/165624s.jpg "Secret Sea 8 1/2\" X 11\" Cardstock [ 165624 ]")
![Basic White 8 1/2" X 11" Cardstock [ 166780 ]](https://assets1.tamsnetwork.com/images/EC042017NF/166780s.jpg "Basic White 8 1/2\" X 11\" Cardstock [ 166780 ]")
![Basic Beige 8 1/2" X 11" Cardstock [ 164511 ]](https://assets1.tamsnetwork.com/images/EC042017NF/164511s.jpg "Basic Beige 8 1/2\" X 11\" Cardstock [ 164511 ]")
![Mossy Meadow Classic Stampin' Pad [ 147111 ]](https://assets1.tamsnetwork.com/images/EC042017NF/147111s.jpg "Mossy Meadow Classic Stampin' Pad [ 147111 ]")
![Calypso Coral Classic Stampin' Pad [ 147101 ]](https://assets1.tamsnetwork.com/images/EC042017NF/147101s.jpg "Calypso Coral Classic Stampin' Pad [ 147101 ]")
![Lemon Lolly Classic Stampin' Pad [ 161666 ]](https://assets1.tamsnetwork.com/images/EC042017NF/161666s.jpg "Lemon Lolly Classic Stampin' Pad [ 161666 ]")
![Blending Brushes [ 153611 ]](https://assets1.tamsnetwork.com/images/EC042017NF/153611s.jpg "Blending Brushes [ 153611 ]")
![Linen Thread [ 104199 ]](https://assets1.tamsnetwork.com/images/EC042017NF/104199s.jpg "Linen Thread [ 104199 ]")
![Tear & Tape Adhesive [ 154031 ]](https://assets1.tamsnetwork.com/images/EC042017NF/154031s.jpg "Tear & Tape Adhesive [ 154031 ]")
![Mini Glue Dots [ 103683 ]](https://assets1.tamsnetwork.com/images/EC042017NF/103683s.jpg "Mini Glue Dots [ 103683 ]")
![Stampin' Dimensionals [ 104430 ]](https://assets1.tamsnetwork.com/images/EC042017NF/104430s.jpg "Stampin' Dimensionals [ 104430 ]")
![Stampin' Cut & Emboss Machine [ 149653 ]](https://assets1.tamsnetwork.com/images/EC042017NF/149653s.jpg "Stampin' Cut & Emboss Machine [ 149653 ]")


")
")


