I love to make fun fold cards and this one is quick & easy!
The inspiration for today’s card came from this week’s Tic Tac Toe Challenge board.
I chose 5 of the elements which made Tic Tac Toe two ways: across the bottom with Flowers, Stripes, Green and down the middle with Die Cut or Punch, Lucky Symbol, Stripes or Dots. The Designer Series Paper I used is Stampin’ Up!’s Sunny Days (a FREE Gift during Sale-A-Bration). I created the shamrock (lucky symbol) using the Country Bouquet Punch. I simply punched 4 of the small hearts and adhered them to the circle die cut from Stylish Shapes.
The Sending Smiles Bundle provided the sentiment. I used the dies on the front and stamped on the inside.
I love how this card design showcases both sides of the patterned paper!
Here are the details to create this card:
Measurements:
Card base (Shaded Spruce): 4 1/4” x 5 1/2″
DSP (Sunny Days): 4 x 8 1/2 scored at 3 1/4, ~ 2 x 4 to die cut mat for Sending, 2 1/4 x 6 for envelope flap
Basic White: ~ 2 1/4″ die cut circle (Stylish Shapes Dies), 2 3/4″ x 3 1/2″(inside)
Shaded Spruce: scraps to punch 4 small hearts from Country Bouquet Punch, die cut Sending from Sending Dies
Directions:
Fold DSP and adhere to card base.
Adhere punched hearts and stem to die cut circle to create shamrock.
Adhere to card just along the left side. *Do not apply adhesive on right side (so you will be able to open the card).
Adhere Sending Die Cut to DSP mat then carefully add adhesive on part that overlaps Circle Die and left side.
Stamp inside sentiment on White cardstock and Adhere white layer inside card.
Adhere DSP to envelope flap and trim to fit.
I can think of so many occasions to send a “Good Luck” card…upcoming surgery, interview or new job, someone having to take an exam, moving, etc. When would you send a Good Luck card to someone? I’d love to hear from you. Leave a comment below,
It’s fun and easy to create playing along with the Tic Tac Toe Challenge. I hope you will check out what the other designers created this week and then pick 3 and play along!!! I’d love to see what you create! (*Click on the image below to visit the site.)
Have you ordered this month’s Just Stampin’ Kit TO GO? Click HERE for all the details.
(I LOVE this month’s fun fold card!!! Can’t wait to share with you!!!)
Have a great day! Thanks for stopping by!
Just Stampin’
Jeanie
February Host Code: 4WEJ7SXF * If your order is under $150 be sure to add the host code to your order to receive a thank you gift from me. If your order is $150 or more, don’t use the host code. You will earn Stampin’ Rewards to spend as well as my thank you gift. All orders receive a handmade card in the mail from me.
Product List (*Click on image to shop my online store 24/7)
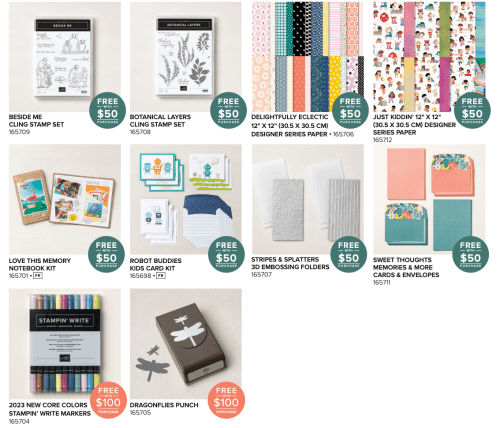
Sale-A-Bration ends February 29th! Don’t miss out on FREE product!
Get free items with each $50-100 you purchase!
10 New items added for February!
Click below to view/print the flyer. *The item numbers in this flyer MUST BE USED in order to redeem these products as Sale-A-Bration items. These products have different item numbers in the catalog, which won’t register as part of Sale-A-Bration. More To Sale-A-Brate flyer
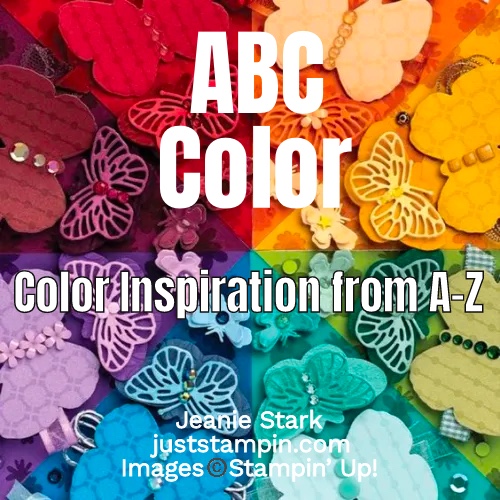
Happy Valentine’s Day! Welcome to my ABC Color Series! Stampin’ Up! offers so many great color choices! I love to combine different colors and patterns and hope to inspire you with some fun color combinations throughout this series. Today’s project features Sweet Sorbet (one of the 2022-2024 In Colors).
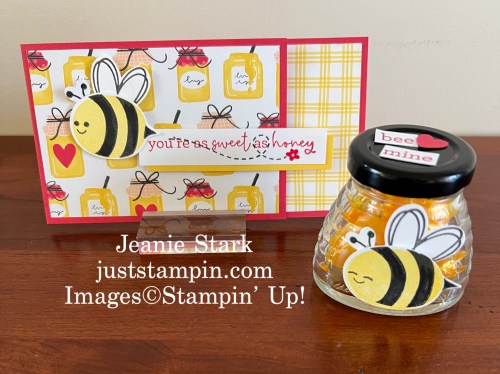
Here’s a look at the inside of this fun fold card.
I like how it stands for display.
I made this special valentine card for my husband using products from the Bee Mine Suite Collection. This suite is at the top of the list of My Favorite Things from the Mini Catalog.
Today’s color combination came from the Bee Mine Designer Series Paper in the suite. This is one of my favorite color combos!
Here are the details to create this quick & easy fun fold card:
Measurements:
Card base (Sweet Sorbet): 4 1/4” x 11” scored at 1 3/4” and 5 1/2″.
DSP (Bee Mine): 3 1/2″ x 4″, 2 @ 1 1/2″ x 4″, fussy cut bee
Basic White: 1 3/4″ punched circle for sentiment, 3 1/2″ x 4″ (inside)
Sweet Sorbet: 2″ punched circle
Directions:
Fold & burnish card base folding the 1 3/4″ section back.
Adhere DSP to front of card and along right edge on inside leaving a border.
Stamp and punch sentiment and cardstock layer. Adhere to card front only on right side or 1 3/4″ section.
Stamp inside sentiment and fussy cut bee from DSP or stamp and punch bee using Bee My Valentine Bundle. Adhere to inside of card.
Embellish with Adhesive-backed Hearts.
You can view the complete list of products I used below.
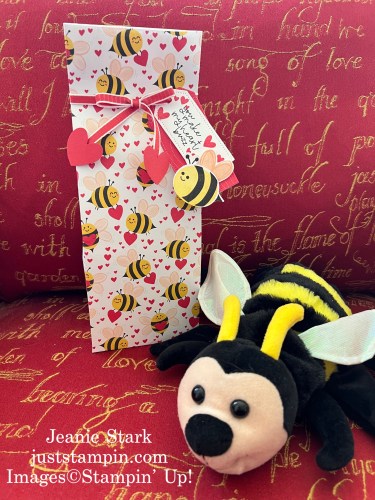
Here are two more projects I shared previously using the Bee Mine Suite. You can click on the image to view the original post.
Treat yourself for Valentine’s Day and SAVE 15%!!
Do you need help organizing your Stampin’ Up! supplies? I use Stamp-n-Storage to keep my craft space organized (which makes it easy to create). Stamp-n-Storage has everything you need for organizing and storing ink pads, paper, dies, ribbon, punches and more! Click on the image below to visit/shop their site for ideas and organization tips. Click HEREto see how I organize my craft space using Stamp-n-Storage products.
Hope your day is filled with love!
Just Stampin’
Jeanie
February Host Code: 4WEJ7SXF * If your order is under $150 be sure to add the host code to your order to receive a thank you gift from me. If your order is $150 or more, don’t use the host code. You will earn Stampin’ Rewards to spend as well as my thank you gift. All orders receive a handmade card in the mail from me.
Product List (*Click on image to shop my online store 24/7)
Sale-A-Bration ends February 29th! Don’t miss out on FREE product!
Get free items with each $50-100 you purchase!
10 New items added for February!
Click below to view/print the flyer. *The item numbers in this flyer MUST BE USED in order to redeem these products as Sale-A-Bration items. These products have different item numbers in the catalog, which won’t register as part of Sale-A-Bration. More To Sale-A-Brate flyer
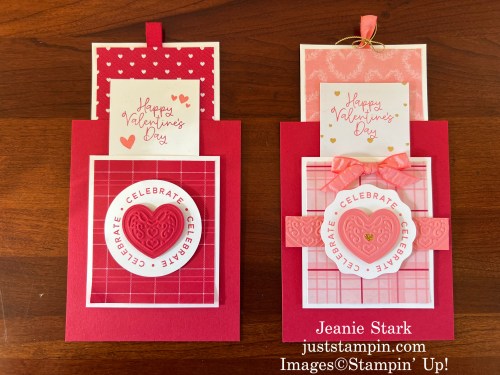
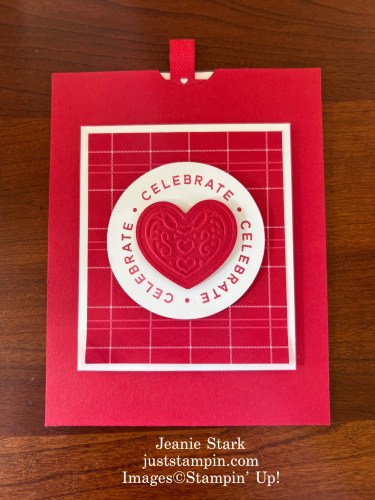
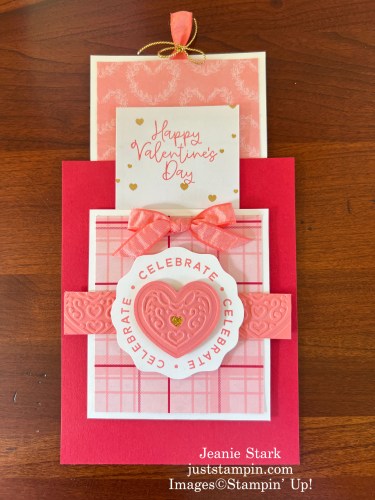
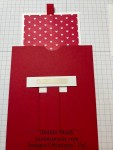
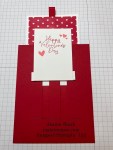
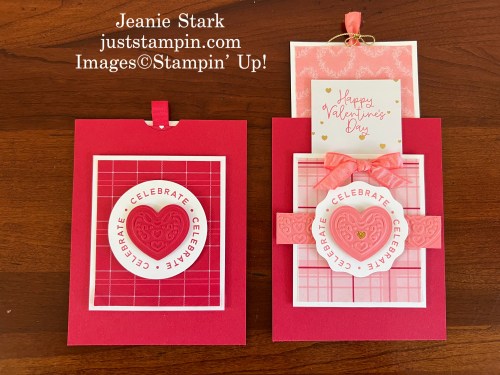
Welcome to my ABC Color Series! Stampin’ Up! offers so many great color choices! I love to combine different colors and patterns and hope to inspire you with some fun color combinations throughout this series. Today’s projects feature Real Red. I created two Double Slider Valentine cards; one could be considered masculine and the other very feminine.
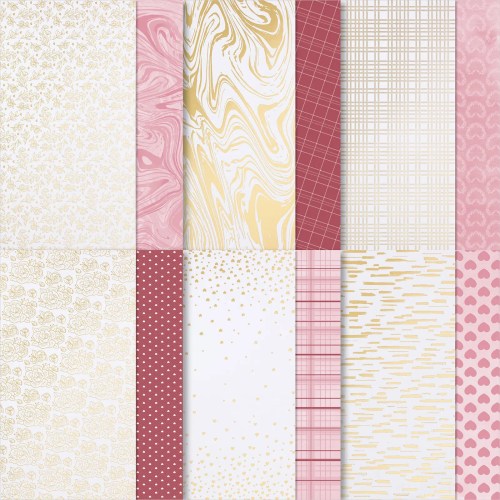
I created these cards with the Most Adored 12 x 12 Specialty Designer Series Paper (A FREE Gift during Sale-A-Bration with a $50 order.)
Product colors: Flirty Flamingo, gold, Real Red
One side of this DSP features red & pink designs while the other side is gilded gold! I love that Stampin’ Up! DSP is double-sided. The only problem is deciding which side to use! I really like this color combination.
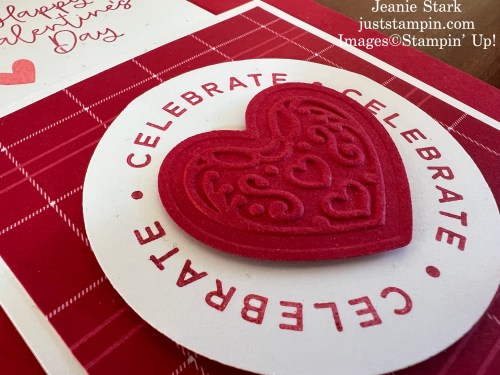
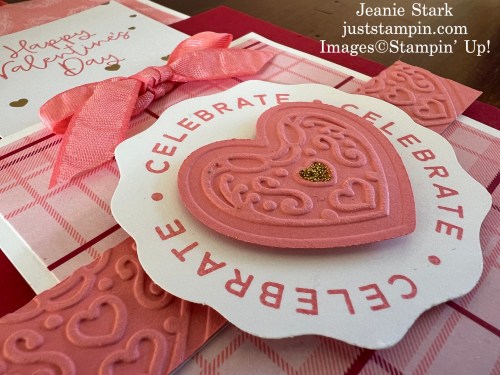
Here’s a closer look at each of today’s cards…
Here’s a close up of the heart from the Adoring Hearts Hybrid Embossing Folder.
I added a little Gold Glitz on the center heart and embossed a strip across with middle using the Adoring Hearts Hybrid Embossing Folder.
It’s been years since I made a double slider card and the punches I used previously (word window or classic label punch) are retired. I searched the web to see if anyone created an updated version but could not find anything. I figured out how to create the slider with just a couple measurements and a few cuts. Here are the details:
Measurements:
Card base (Real Red): 4 1/4 x 11, score @ 5 1/2
Basic White: 3 3/4 x 3 1/4 (front of card), 2 1/4 x 3 1/4 (middle slider piece), 4 1/2 x 3 1/4 (back layer), 3×3 to punch 2 3/8 Circle or Decorative Circle (front of card), 2 @ 1/2 x 2 1/2 (slider pieces)
DSP (Most Adored): 3 1/2 x 3 (front), 3 x 3 (back)
Cardstock (Real Red/Flirty Flamingo): scrap to die cut/emboss heart with Adoring Hearts Hybrid Embossing Folder, *optional 3/4 strip across front
Directions:
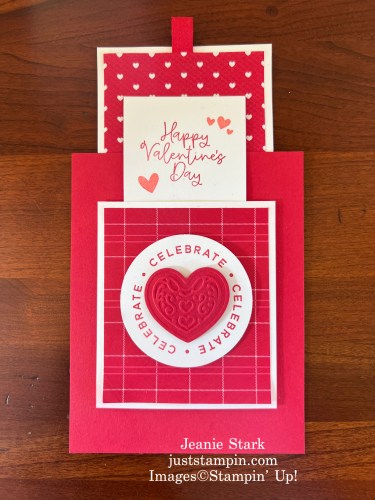
Fold & burnish card base. *Note- for this card the fold is at the bottom and the top of the card is open. *Cut a notch at the top of the front of the card using a 1″ circle punch/die. (I did not do this step until later; however, it would be helpful to mark the top front of your card to start for marking & cutting in the next few steps.)
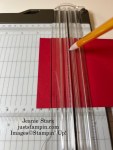
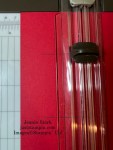
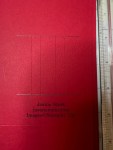
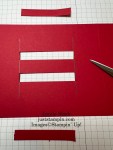
To create the opening for the slider on the front of the card: Place the top section of your cardstock in the Paper Trimmer at 1 3/4 and draw a line with a pencil. Move your cardstock over to 4 1/4 and draw another line.
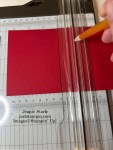
Next, you will turn the cardstock in the other direction (so the top is at the top) and put back in the trimmer. You will make 4 cuts between the pencil lines. Line your cardstock up at 1 1/2″ and cut from the top pencil line to the bottom line. Move your cardtock to 1 3/4″ and make another cut from the top pencil line to the bottom pencil line. Repeat at 2″ and 2 1/4″.
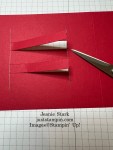
Use Paper Snips to cut the ends of each strip and remove completely.
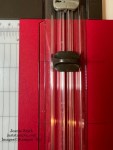
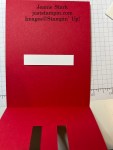
To make the sliding piece, place one of the 1/2 x 2 1/2 white strips centered inside the card. Close the card and add dimensionals through the openings. Adhere the other 1/2 x 2 1/2 white strip on top to create a sandwich. This piece will now slide up and down. Move slider piece all the way to the bottom. Add a piece of Tear & Tape to both sides of this moveable piece. (*Notice the notch at the top in the photo.)
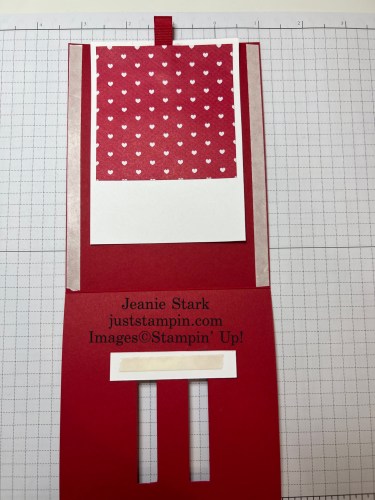
Add a folded piece of ribbon to the 4 1/2 x 3 1/4 piece of white cardstock and secure with Tear & Tape. Then adhere the 3 x 3 DSP to the top portion. *You will not see the lower portion once the slider is in place so you don’t need to waste DSP to cover the whole piece.
Open the card. Add Tear & Tape on the inside of the card along the sides. Center the back slider piece (layer with the ribbon pull) in the middle of the card and line it up at the top of the card. *Note the position of the white slider below the score line. Remove the Tear & tape from each side and the slider before closing the card to secure.
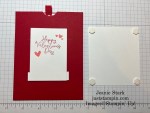
Stamp the middle piece (2 1/4 x 3 1/3).
Pull the back slider all the way up and center middle slider before removing Tear & Tape to secure to front of slider.
Adhere 3 1/2 x 3 DSP to 3 3/4 x 3 1/4 white piece for front layer. Stamp sentiment from Circle Sayings and punch with 2 3/8″ Circle Punch or Decorative Circle Punch. Adhere with Stampin’ Dimensionals.
Cut embossed heart using Adoring Hearts Hybrid Embossing folder. To die cut & emboss at the same time, place the dies inside the embossing folder with the cutting edge up. You will be able to feel them fit in place. Add your cardstock on top of the die and close the EF. You will run this through the Stampin’ Cut & Emboss Machine using just the platform base (#1) and the #4 plate. (*There’s visual reminders right on the base plate.) Adhere to circle piece with Stampin’ Dimensionals. *You can Click HERE for tips and more cards I created with this embossing folder.
Add Dimensionals on the back only on the 4 corners. Position the main image over the front slider. Make sure the slider won’t be stopped by one of the dimensionals.
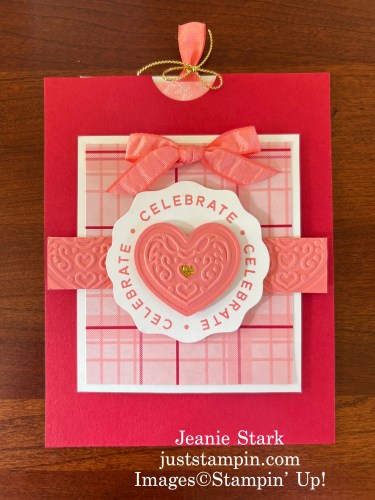
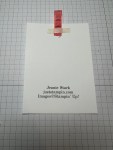
Your card will now slide up and down. I added a few more elements to the feminine version with a ribbon bow and gold trim.
What do you think of these double-slider cards? Are you ready to give this fun fold a try? Like so many fun fold cards, they are much easier than they look!! Feel free to contact me if you have any questions.
Congratulations to….Stacy O’Dell! Stacy is the winner of the “color buddy kit” to create an adoring hearts card. *Email me (j.stark@goeaston.net) your address and I will put your kit in the mail. Many thanks to everyone who left comments! I am so glad you were inspired by the color buddy cards! *If you missed that post, Click HERE.
Have a great day! Thanks for stopping by!
Just Stampin’,
Jeanie
It’s Sale-A-Bration Time!!!!!
Get free items with each $50-$100 you purchase!
You can purchase any of the products used to make today’s project from my online store. CLICK HERE TO SHOP (or on the products listed below) and earn FREE Sale-A-Bration items!
Current Host Code: CFUENJND * If your order is under $150 be sure to add the host code to your order to receive a thank you gift from me. If your order is $150 or more, don’t use the host code. You will earn Stampin’ Rewards to spend as well as my thank you gift. All orders receive a handmade card in the mail from me.
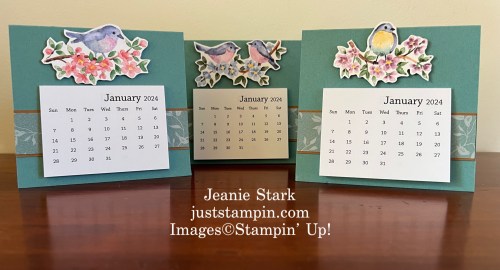
Today is the last day for January’s thank you gift…a calendar kit with your order of $50 or more! (Plus you will earn a FREE Sale-A-Bration product!!!) Product List (Click on image to shop my online store.)
Love being creative? Become a Stampin’ Up! demonstrator and start your own journey. I’d love to have you on my team! Stampin’ Up! is offering TWO options to join during Sale-a-Bration:
OPTION ONE – Your choice of $125 of FREE product for $99 with free shipping PLUS Stampin’ Up!’s Glass Mat Studio (a retail value of $60). The studio includes a 17″ x 14″ glass mat, an 8-3/8″ x 6″ silicone mat and an 8-1/4″ square cleaning cloth. Here’s a look at the Stampin’ Glass Mat Studio:
OPTION TWO – Your choice of an additional $30 in FREE products to add to your Starter Kit. That’s $155 of your choice of products for just $99. PLUS free shipping.
Both options include FREE SHIPPING, a FREE Paper Pumpkin Kit, and More!
If you have thought about joining and want to be a part of an amazing online community of stampers, feel free to email me (j.stark@goeaston.net). I’d love to answer your questions or set up a time to chat with you. *Team members receive my kit tutorials (and more) for FREE. Check out more details and how to Join HERE.


")
")
")
 Designer Series Paper")


")
")
 Designer Series Paper")


 Circle Punch")
 Circle Punch")


")
")
 Circle Punch")

 Specialty Designer Series Paper")