
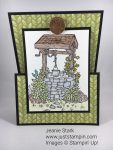
Welcome to my ABC with Fun Folds series. Today’s card features the new Bright Wishes Stamp Set. It is an Upright Z-Fold which is quite unique.

The wishing well reminds me of my childhood. We had a wishing well in the middle of our side lawn and it served as second base for many kickball and softball games. I remember tossing pennies in the well and making a wish! Here’s a photo of me standing by our wishing well when I was 5.

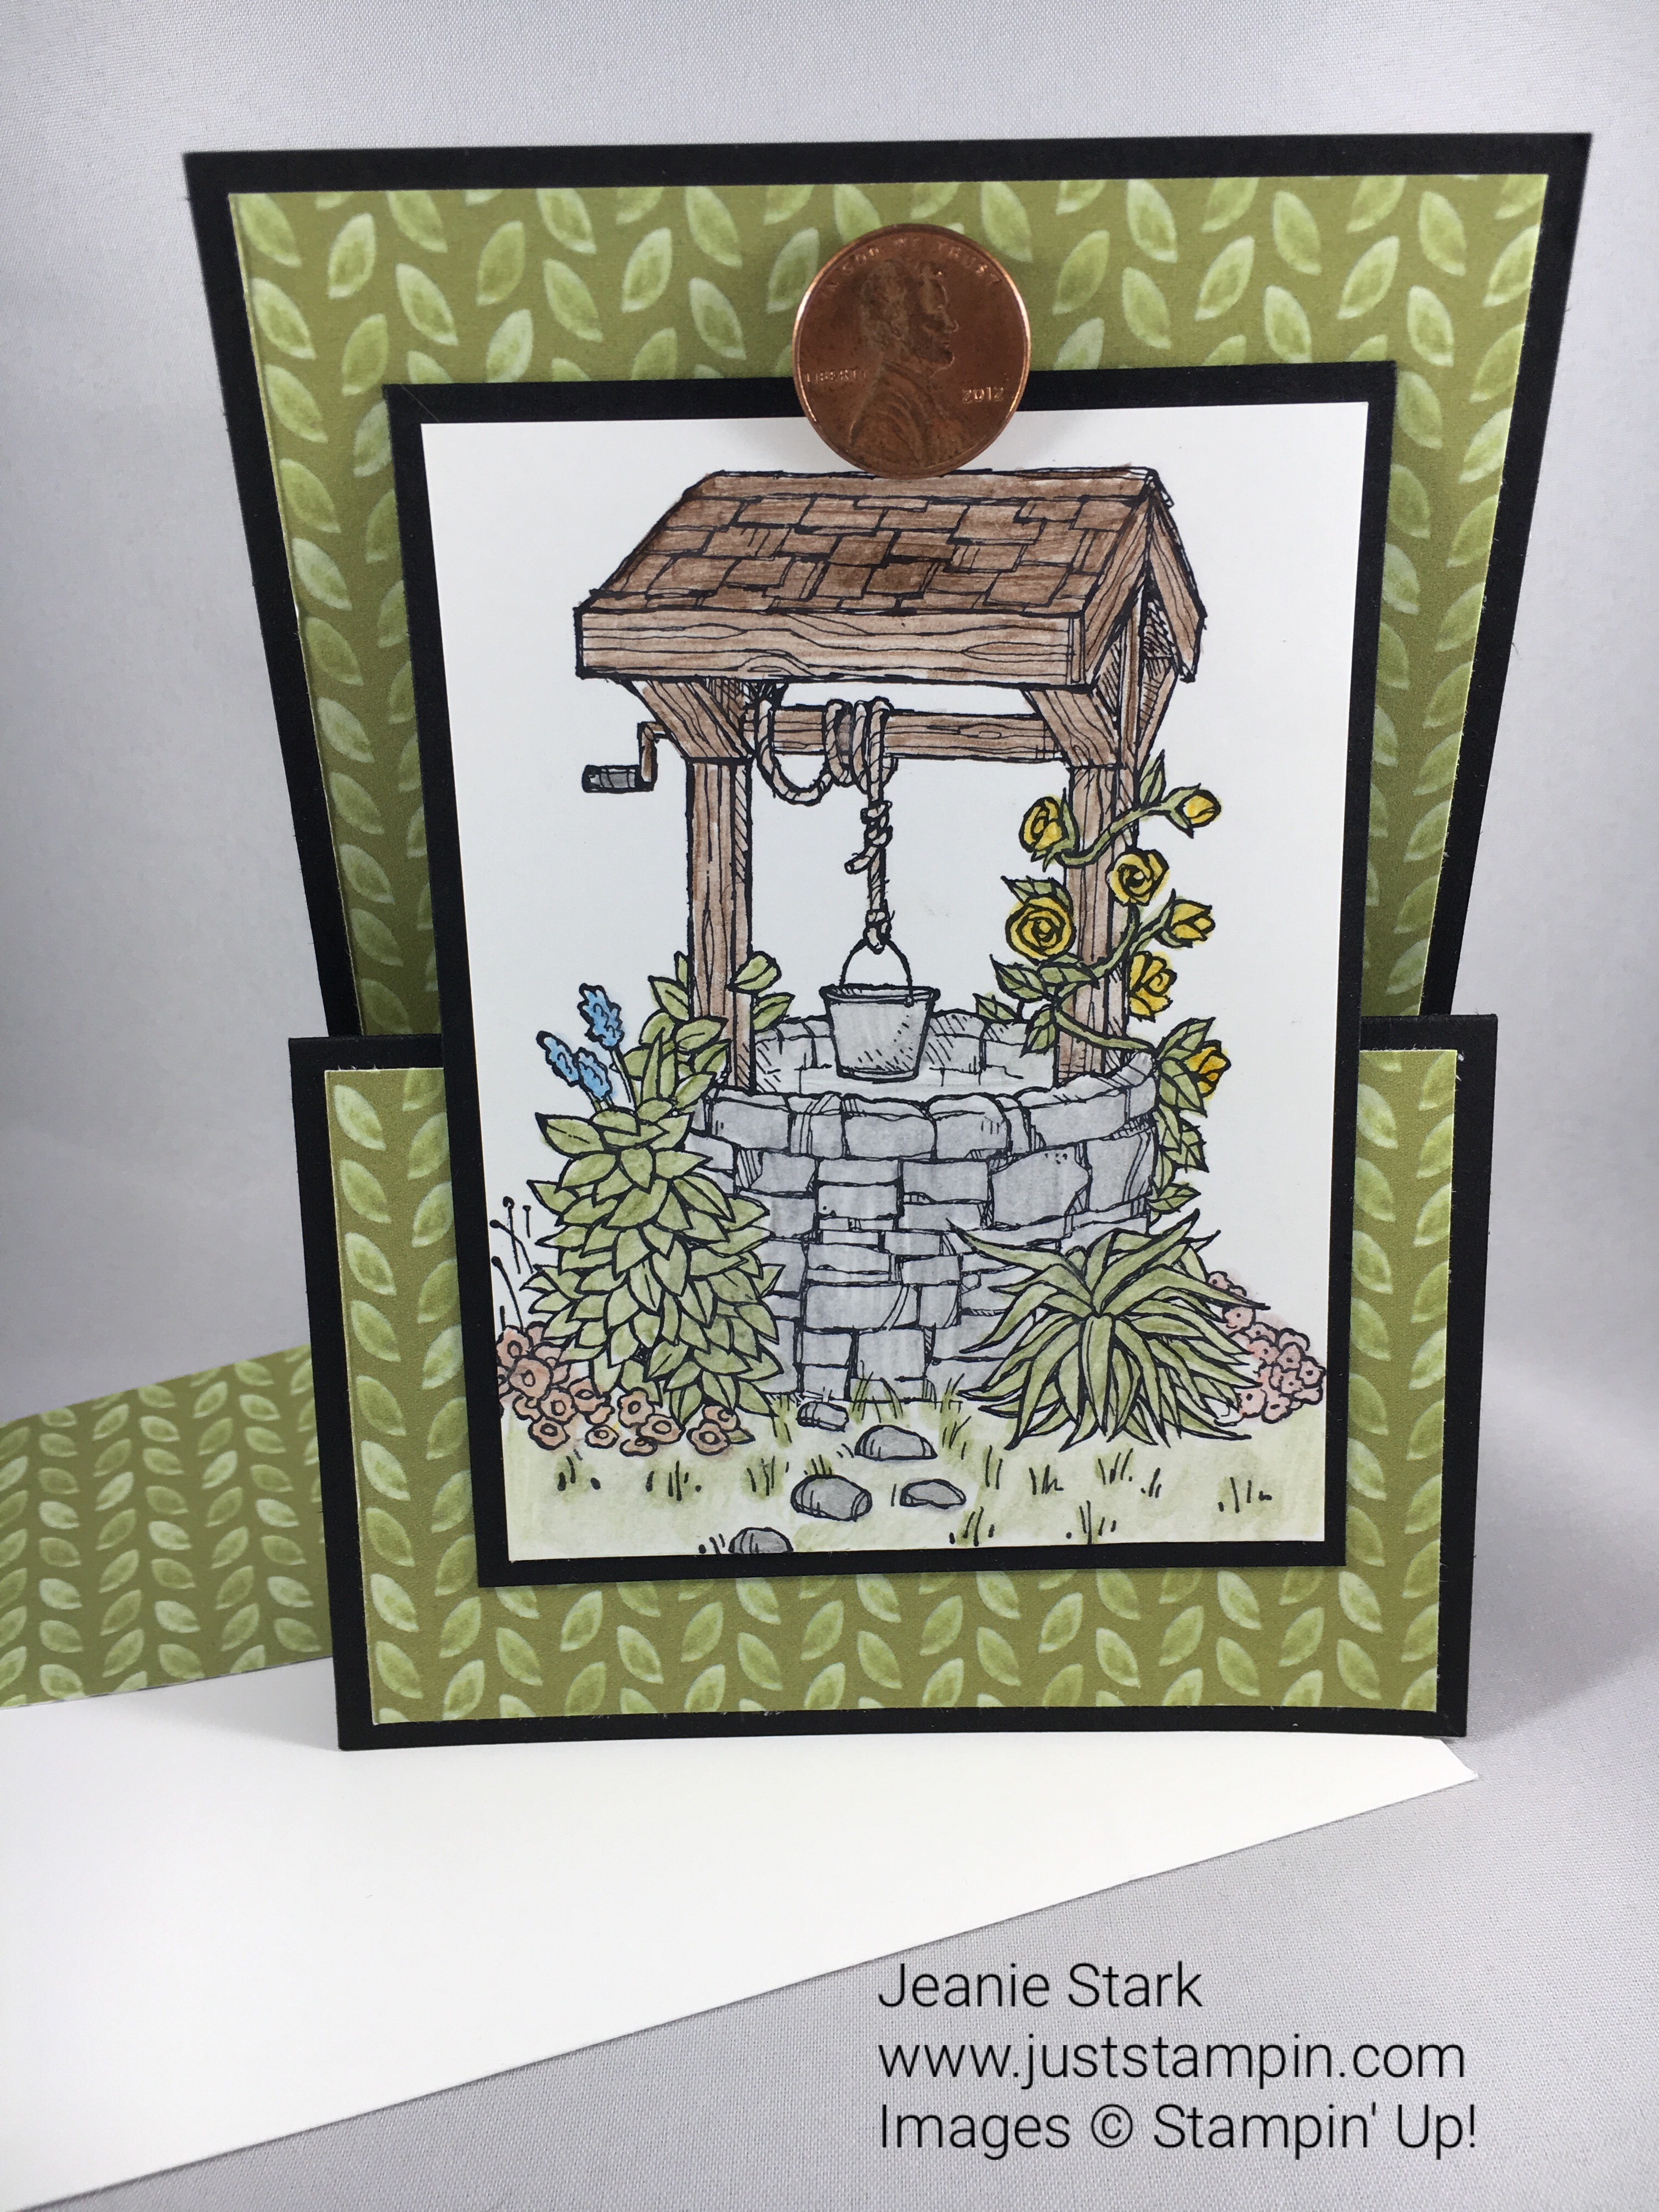
I couldn’t resist using a penny to hold my card “upright”. Here’s the details how to make this unique fun fold.
My card base is 4 1/4 x 11 scored at 2 3/4 and 5 1/2. The DSP is from Delightful Daisy. My pieces measure 4 x 5 1/4 and 4 x 2 1/2. The stamped panel is 3 x 4 layered with 3 1/4 x 4 1/4 Basic Black.

I liked it in the black and white but then decided to color it using the watercolor pencils and blender pen.

Which way do you like it…black & white or colored?

Here’s the side view.


This really is quick & easy to make. Just make sure when adhering your stamped panel you only put adhesive on the bottom half. I attached the penny with a Stampin’ Dimensional to hold the card upright. You could easily stamp a sentiment and pop it up to hold your panel. I chose to stamp my sentiment on the back for this card.
I really like the sentiments in this set…the different choices make it versatile for many occasions.

Here’s more inspiration found on page 91 in the catalog.

Stamp Set: Bright Wishes (143827) Ink: Basic Black Archival Stampin’ Pad (140931) Papers: Basic Black, Old Olive, Whisper White, Delightful Daisy Designer Series Paper (144137) Tools & Accessories: Watercolor Pencils (141709), Blender Pen (102845), Stampin’ Dimensionals (104430)
You can purchase any of the products used on today’s project from my online store. Click HERE to shop. *All orders placed through my online store are eligible for my FREE monthly gifts (card kits and more!). Earn Free In Color ribbon in June. Please use the current host code below.
Today is the last day to get 25% off your first 3 months of Paper Pumpkin!

Stampin’ Up! has a great promotion for first time Paper Pumpkin subscribers…You can SAVE 25% on your first three months! Paper Pumpkin is great for all ages and all levels of stampers from beginners to advanced.
Here are the details:
- For first-time subscribers only.
- Subscribers must join between Thursday May, 11 and Saturday, June 10, 2017; 11:50 PM (MT) .
- Available for month-to-month subscriptions, not prepaid subscriptions.
- Discount applied to one kit per month for the first three months of a new subscription. After that, the price for each month’s kit will return to the regular price of $19.95.
- Enter the promo code, STARTHERE, at PaperPumpkin.com to subscribe.
- Keep in mind that unless you cancel, your membership will continue at full price after the first three discounted months.
Feel free to contact me if you want or need more information (j.stark@myactv.net).
Yesterday was the debut of the Tic Tac Toe Challenge. You can see that post HERE. I hope you will play along! You have until Sunday to enter. Just pick 3 and play! You have 8 different choices…across, down, or diagonal.

![]()
Just click the graphic above to go to the challenge website! You can also see what others have created and enter your card!
Have an Unbelievable creative day!
Just Stampin’
Jeanie
Current Host Code: E4KWM7WD
Click on the image below to view the catalog.


Ask me how! I would love to help you earn FREE product and exclusive rewards! (j.stark@myactv.net).

“U” are so creative. This is a really neat card. I’ve never seen this type of fold. “U” we’re also an adorable 5 year old!
THAT IS SO SWEET JEANIE AND I AM SURE YOU BELIEVED YOUR DREAMS WOULD COME TRUE. I LOVE YOUR BLOG. I LOOK SO FWD TO GETTING YOUR EMAILS AND YOU TRULY INSPIRE ME.
BLESSINGS, FROM BETTY KINGSTON.
Undeniably clever. Love both the orientation of the upright “Z” & the beautiful coloring with the pencils on the stamped design. Super card!
This card is so gorgeous and I adore your childhood pic….. what great memories!
So clever with the penny. Your card is beautiful and fun and what fond memories you had when you made it….double whammy! Smiles all around. 🤗
Super cute and creative design. Thanks for sharing such a sweet memory with us.
SUper UniqUe! Love yoUr Use of the penny–clever for sUre! I favor the colored version–adds jUst the right amoUnt of color to match the pretty paper. Love yoUr pictUre in front of yoUr family’s wishing well–how sweet! I’m hating to get close to the end of the fUn fold series!
A penny for your thoughts! This is such a fun card. I love the colored version though I have seen a sepia version of the well done in browns and it looked great. The fold is unanimously unique and undeniably fun. I am feeling a bit under the weather again, but then again it is so hot maybe that is the problem but my blood sugars were really wacky and I feel like someone knocked my socks off. But, they are still on so who knows? I am sure this too will pass. Maybe I need to start over on the Tic Tac Toe challenge.
Love this card Jeannie, is there a knack to making the stamped panel stand up underneath the embellishment
I attach my Stampin Dimensional near the very top of the penny and because it pops out your panel will slide under it. I have done it with layering ovals as well and it works either way. I also lay my panel out flat with it tucked under the embellishment so I know where to adhere it on the bottom. You want to make sure it isn’t too low that it won’t fit under the embellishment. Hope that helps!