
Yesterday I shared a card I made with a triple bow. Several people asked about how I made the bow so I thought I would attempt to share the details. First of all, I have a little wooden bow maker that a husband of one the ladies in card club made for everyone. Here’s a picture of mine.

This little gadget makes bow making a breeze! You just spread out the pegs for larger bows or bring them closer for thin ribbon and/or tiny bows. It’s quick and easy! I did a little research and found one similar from Amazon but it was expensive and from reading the reviews it seems the pegs didn’t stay in the holes. Fortunately, two of my blog followers, Sonny and Nancy, shared information from a fellow demonstrator, Debbie Henderson, who sells them. (Thank you ladies for sharing! I love how we help each other!!) Here is the link:
https://debbiesdesignsblog.blogspot.com/p/daves-stamping-tools-for-sale.html
To make the triple bow on yesterday’s card, I just wrapped the ribbon around the pegs three times. Cross the ribbon over in front (like an X) and take the top ribbon and bring it under and over through the center of the pegs. Then wrap it under the ribbon in front and tie it in a knot. My photos aren’t great but hopefully you get the idea.


Then you just slide it up and off the pegs and cut the ends.The back is facing you so when you turn it around you have a perfect bow. (*I have a pair of scissors that I use just for cutting ribbon. Believe me, it is worth the investment to get a good pair of ribbon scissors!)


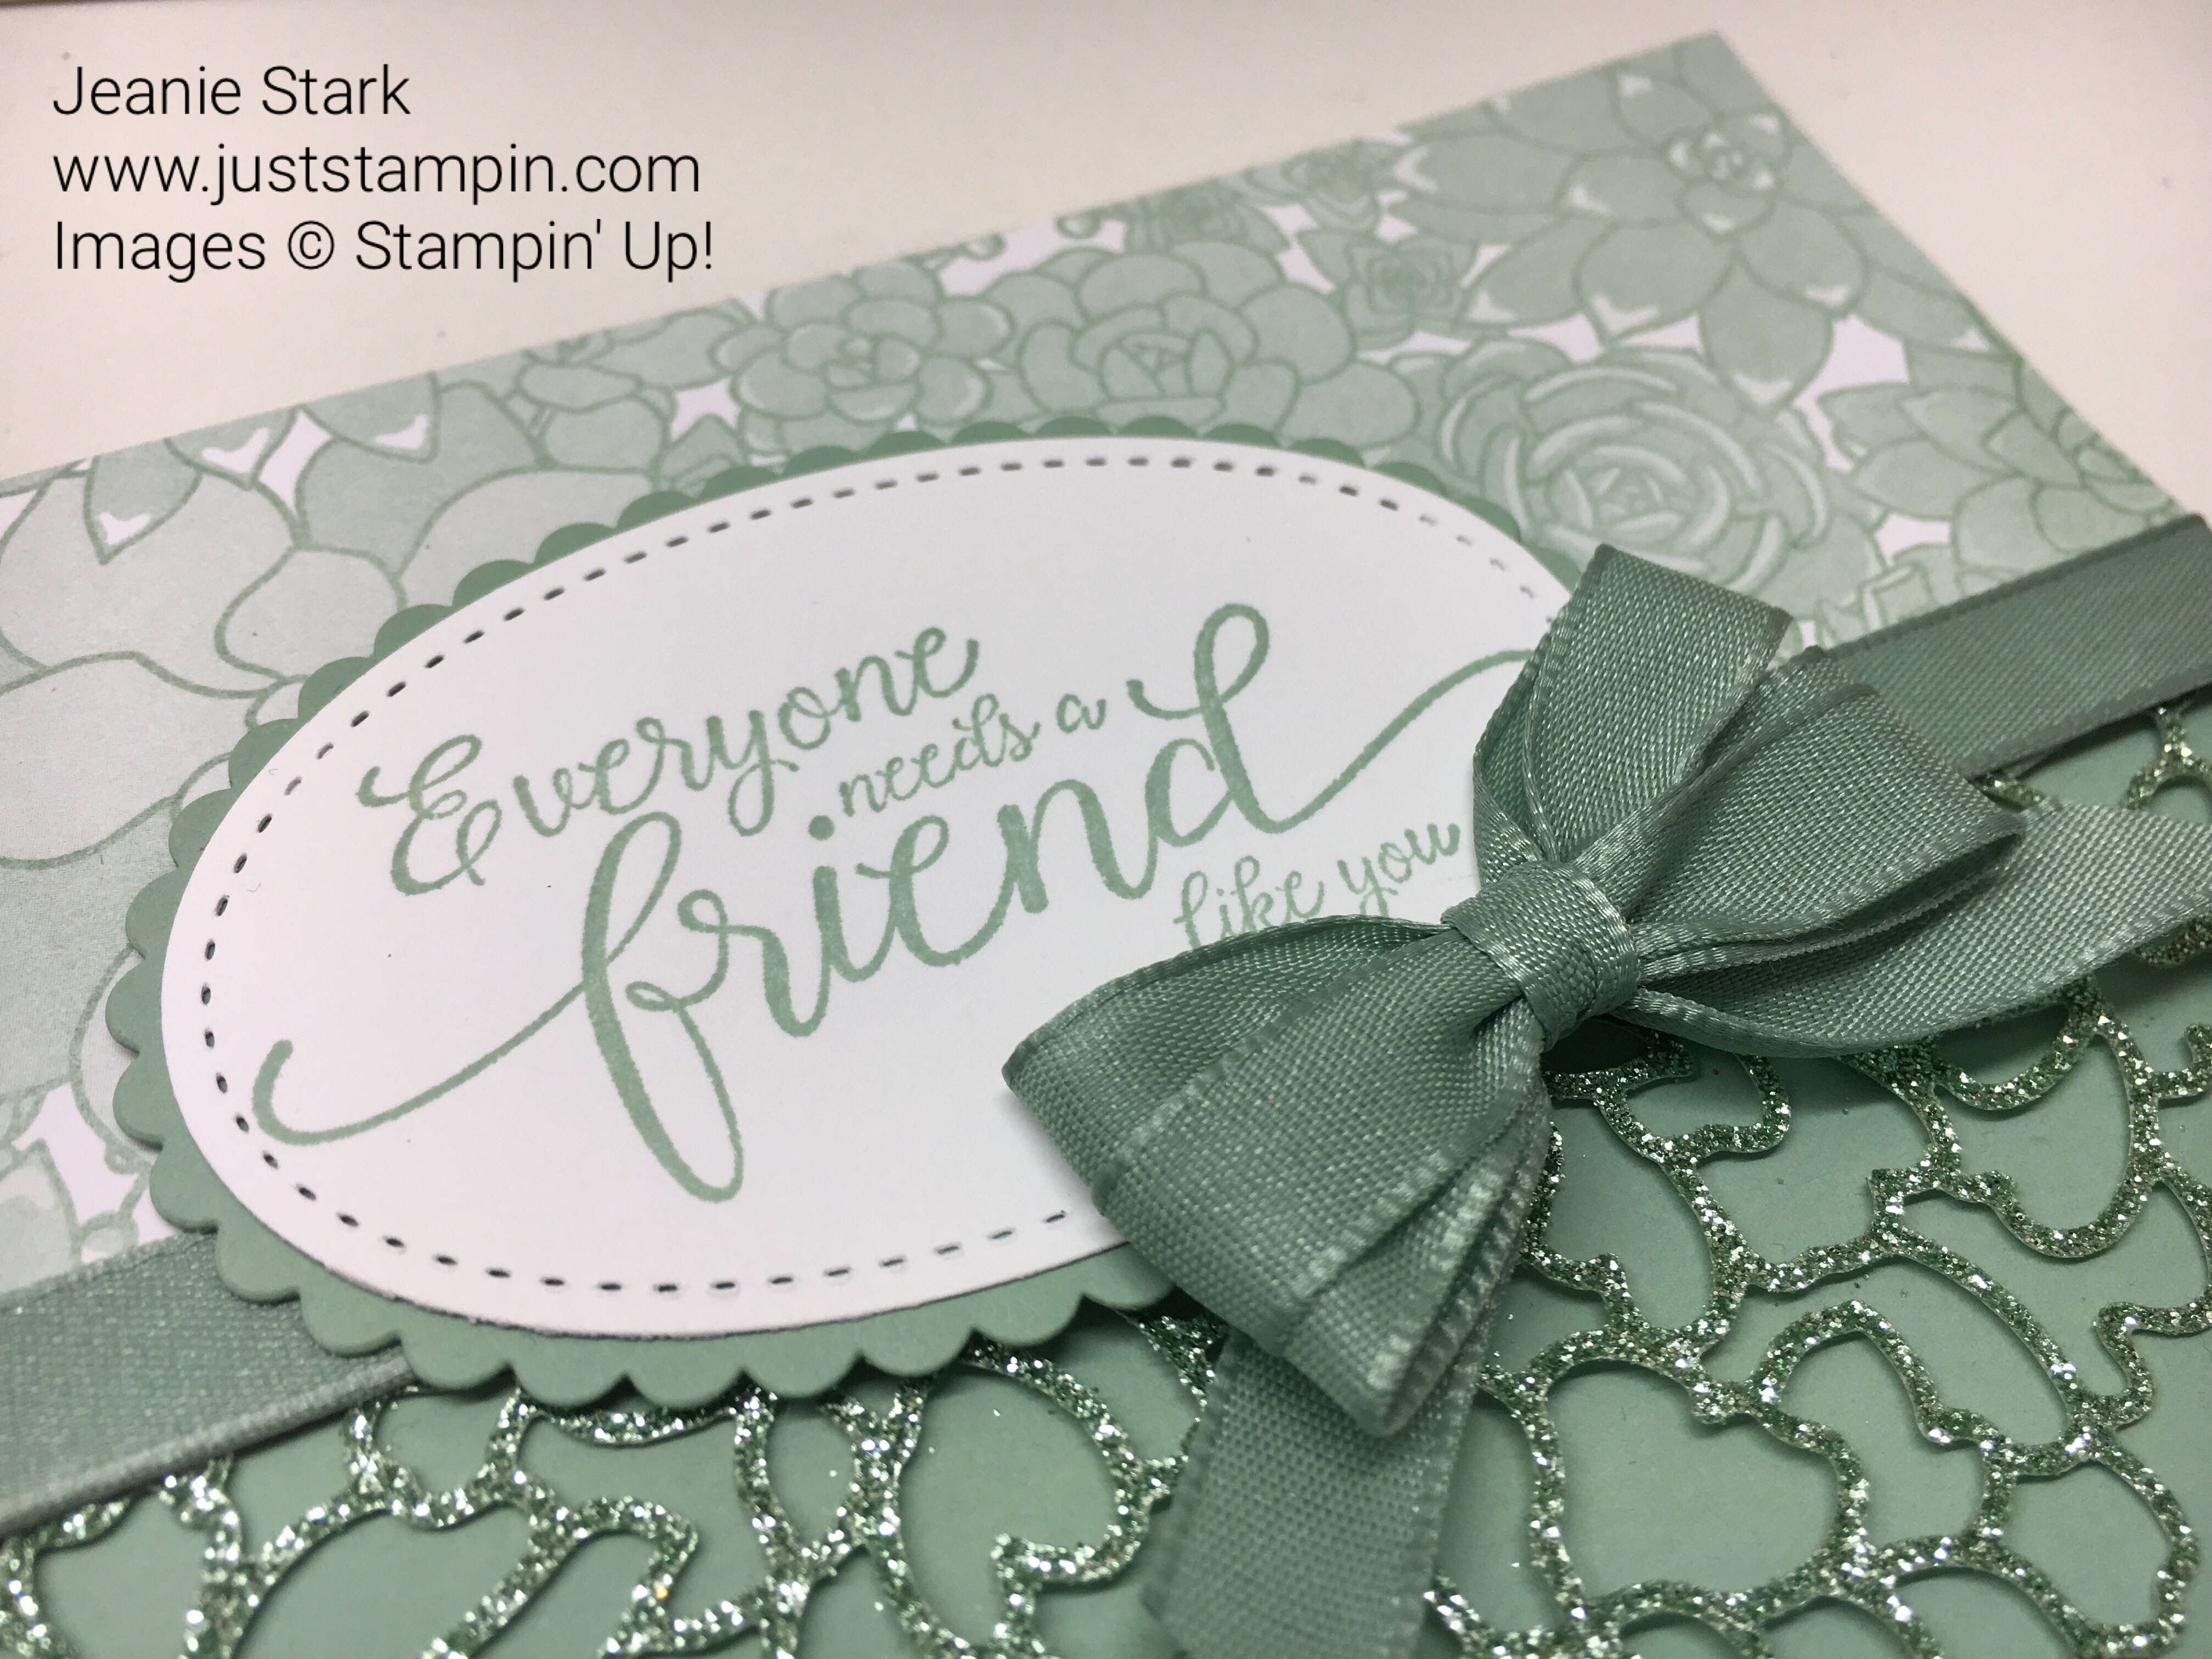
I use glue dots to attach the bows to my projects. Here’s a close up of yesterdays card with the bow. You can click HERE to see the full post.
Here’s some bows I made using the organza ribbon. What do you think I’m doing with all these bows?

These bows are some of the ones I made to go with one of the project kits I’m sending out to everyone who placed orders with me in February. Click HERE to find out more about my “Just Stampin’ Card Kit and 3D Project Buffet” TO GO!

Get one FREE Sale-A-Bration product for every $50 you order.
3 new items were added to Sale-A-Bration on February 21st.***These are WHILE SUPPLIES LAST so get the glimmer paper quickly!****


Click HERE to shop.
February Hostess Code: K3VM6YBW
Use the Hostess code when placing your online order to receive my Just Stampin’ Card Buffet Kit with an online order of $50 or more.
Have a wonderful day!
Just Stampin’
Jeanie

Stampin’ Up!’s Sale-A-Bration 2017 is going on now through March 31!!

Shop!
For every $50 you spend (before tax and shipping), you get a FREE Sale-A-Bration product. That means it’s the perfect time to purchase those products you’ve had your eye on while earning more products for free. As an added bonus, Stampin’ Up! added three new Sale-a-bration products on February 21!
VIEW: Sale-A-Bration – release 1
VIEW: Sale-A-Bration – release 2 (new)
Host!
Place an order of $250 or greater or host a party with at least $250 in sales during Sale-A-Bration and you’ll earn $25 more in Stampin’ Rewards/Host Cash!! You can even apply your Stampin’ Rewards toward a Starter Kit and become a demonstrator yourself!
Join!
It’s the best time of year to join Stampin’ Up! During Sale-A-Bration, you can become a demonstrator for just $99 and choose TWO additional stamp sets for your Starter Kit—any stamp set, any price! (Excludes Sale-A-Bration sets and bundles.) Plus, the kit ships for free! Send me an email (j.stark@myactv.net) if you have any questions or want to set up a time to chat. Click HERE and HERE for more information or click below to Join the Fun!
![]()

I have one of these but for big bows (wreath size) and it does its job. I really like this smaller version and your instructions (and visuals) are great. Thank’s Jeanie.
Jeanie, You are amazing! You are the best at explaining how to do things. This is perfect! Great pictures, great wording that is very clear!
Thanks Jeanie for the tip and the link for this ‘tool’ to make the bows!
Morn’ Jeanie! Had to stop in and say HI! Glad we all help each other. You are very good at explaining and photographing and posting. I hope you are feeling back to your old self now. Enjoy the weekend and the weather.
🙂
Well, you knocked it out of the park with these pictures !! WOW ! BTW ….did you color that ribbon ?
I bet I bought a ton of that ribbon to dye various colors ,but if something is messy or such I end up passing . Your ribbon is really pretty !
I saw your card some time ago and was going to make one today. But, I don’t have the sentiment in my collection. So sad, I love the font. The bow is what caught my eye for the card and I love the die set, it is so easy to use to make such beautiful cards.
Thank you for such a wonderful tutorial on the card and the bow it wonderful to have pictures. I have never used the organza ribbon I will be checking this out, ribbon also makes a difference for the outcome of a bow.
I thought perhaps you had used a bow maker. I had purchased one some years back from Glenda Calkins, SU her son Dean was making them for school money. They do make such beautiful bows.