
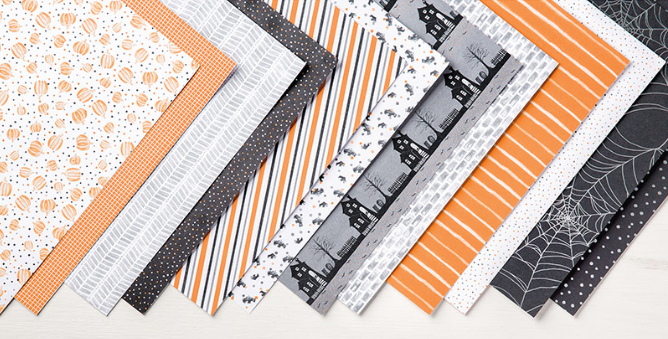
Welcome to my ABC’s with DSP! This month I am featuring projects showcasing Stampin’ Up! Designer Series Paper. The Halloween Night Specialty Designer Series Paper comes with 12 sheets: 2 each of 5 double-sided designs, 1 each of 2 single-sided designs with silver foil. Each sheet is 12 x 12. Look closely and you will see it’s not just for Halloween…you could use this paper for masculine cards, birthdays, etc. Any little Spiderman fan would love to get a card with the spider web DSP I’m sure! While one side may be Halloween themed, the other side is neutral to use for other types of projects.
I don’t make many Halloween cards but I do make lots of Halloween treats to give. I have been waiting to make this slider candy bar holder and this paper does the trick! These are so easy & fun to make.
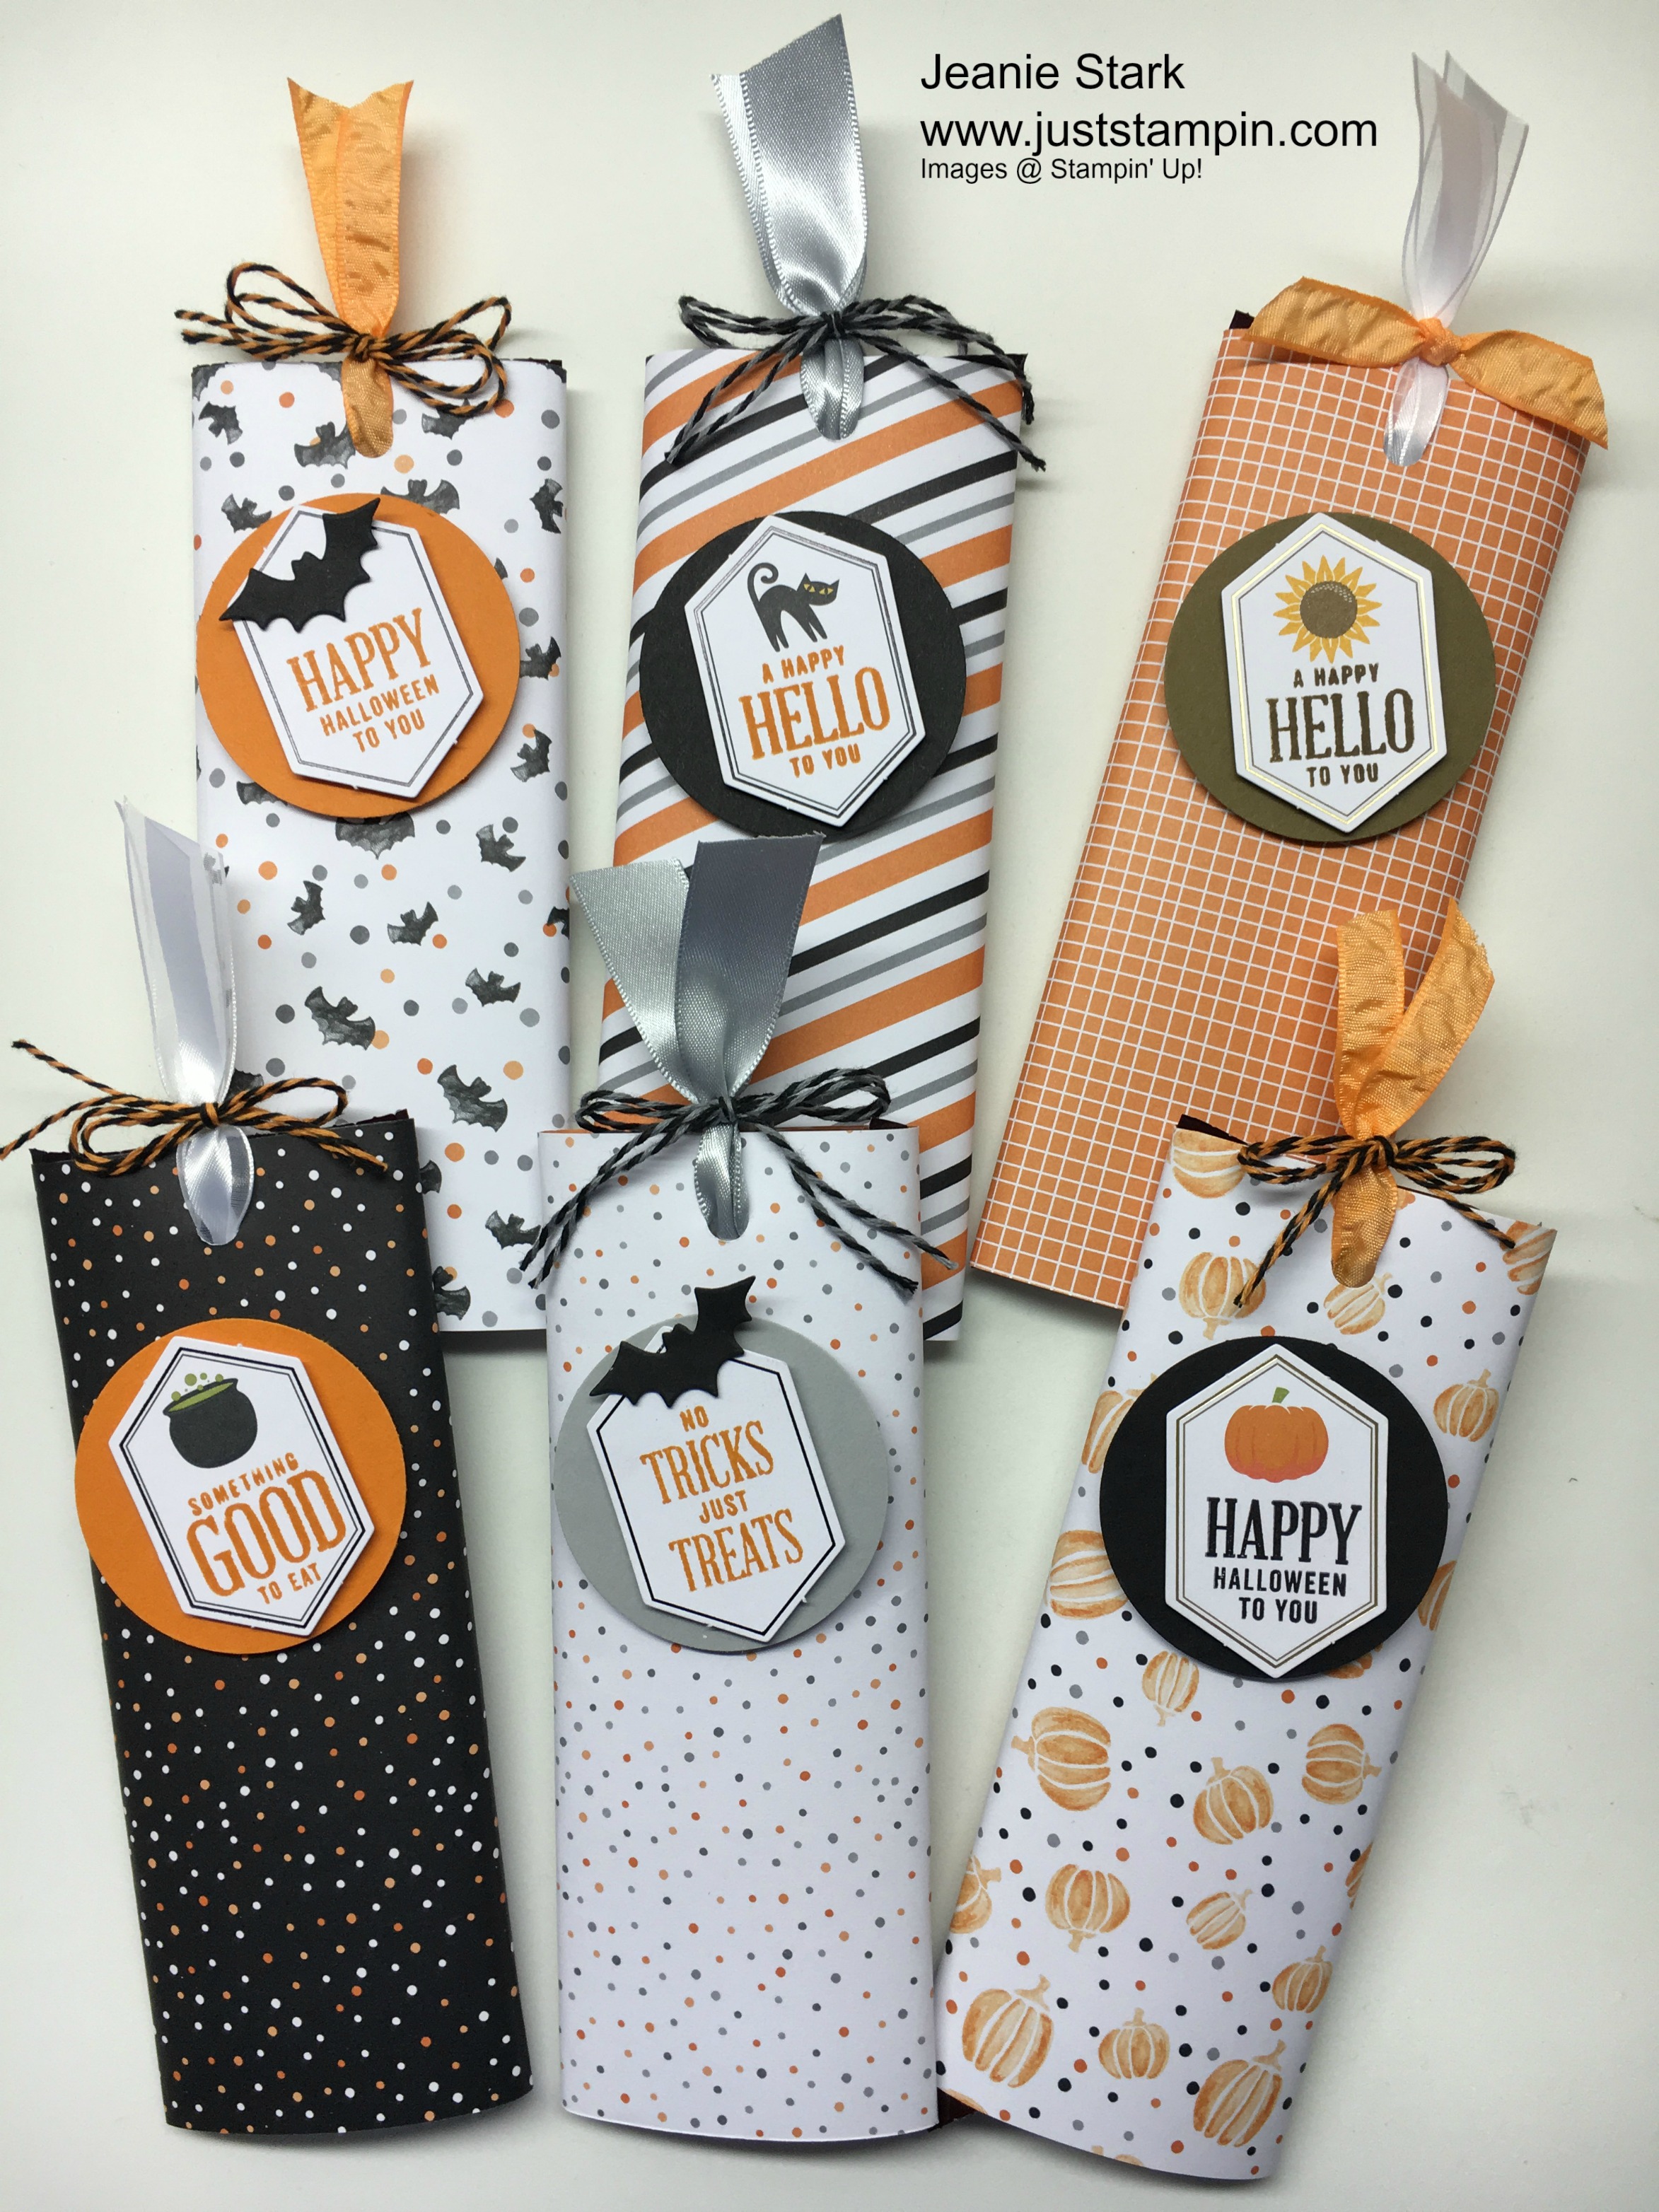
I used a 6 x 6 piece of DSP and put a strip of Tear & Tape down one side. I placed the candy bar in the middle and wrapped it like a present by bringing the side without adhesive up and over the candy then wrapping the adhesive over on top. Now comes the WOW part…take the candy bar out and punch a hole about 3/4″ from the top. (I used my 1/4″ hole punch.) Thread your ribbon through both holes then slide the candy bar in. (It will pull the ribbon down as it slides in.) You could tie a knot or a bow at the top. I just tied some twine around the ribbon because when I made it with a ribbon bow one time the recipient started to untie the ribbon and didn’t realize it was a slider treat holder. I’m hoping with the ribbon tab at the top it will make it easier to just pull the tab and the candy bar slides up. How cool is that?!


I used the stamp set and leftover tags from my Paper Pumpkin kit to add the sentiments on the front. (I had 32 extra tags and more extras in my kit after I finished putting together all 16 of my test tube treats!!! 🙂 ) I punched the circles out using my 2 inch circle punch. I adhered the tags with Stampin’ Dimensionals.
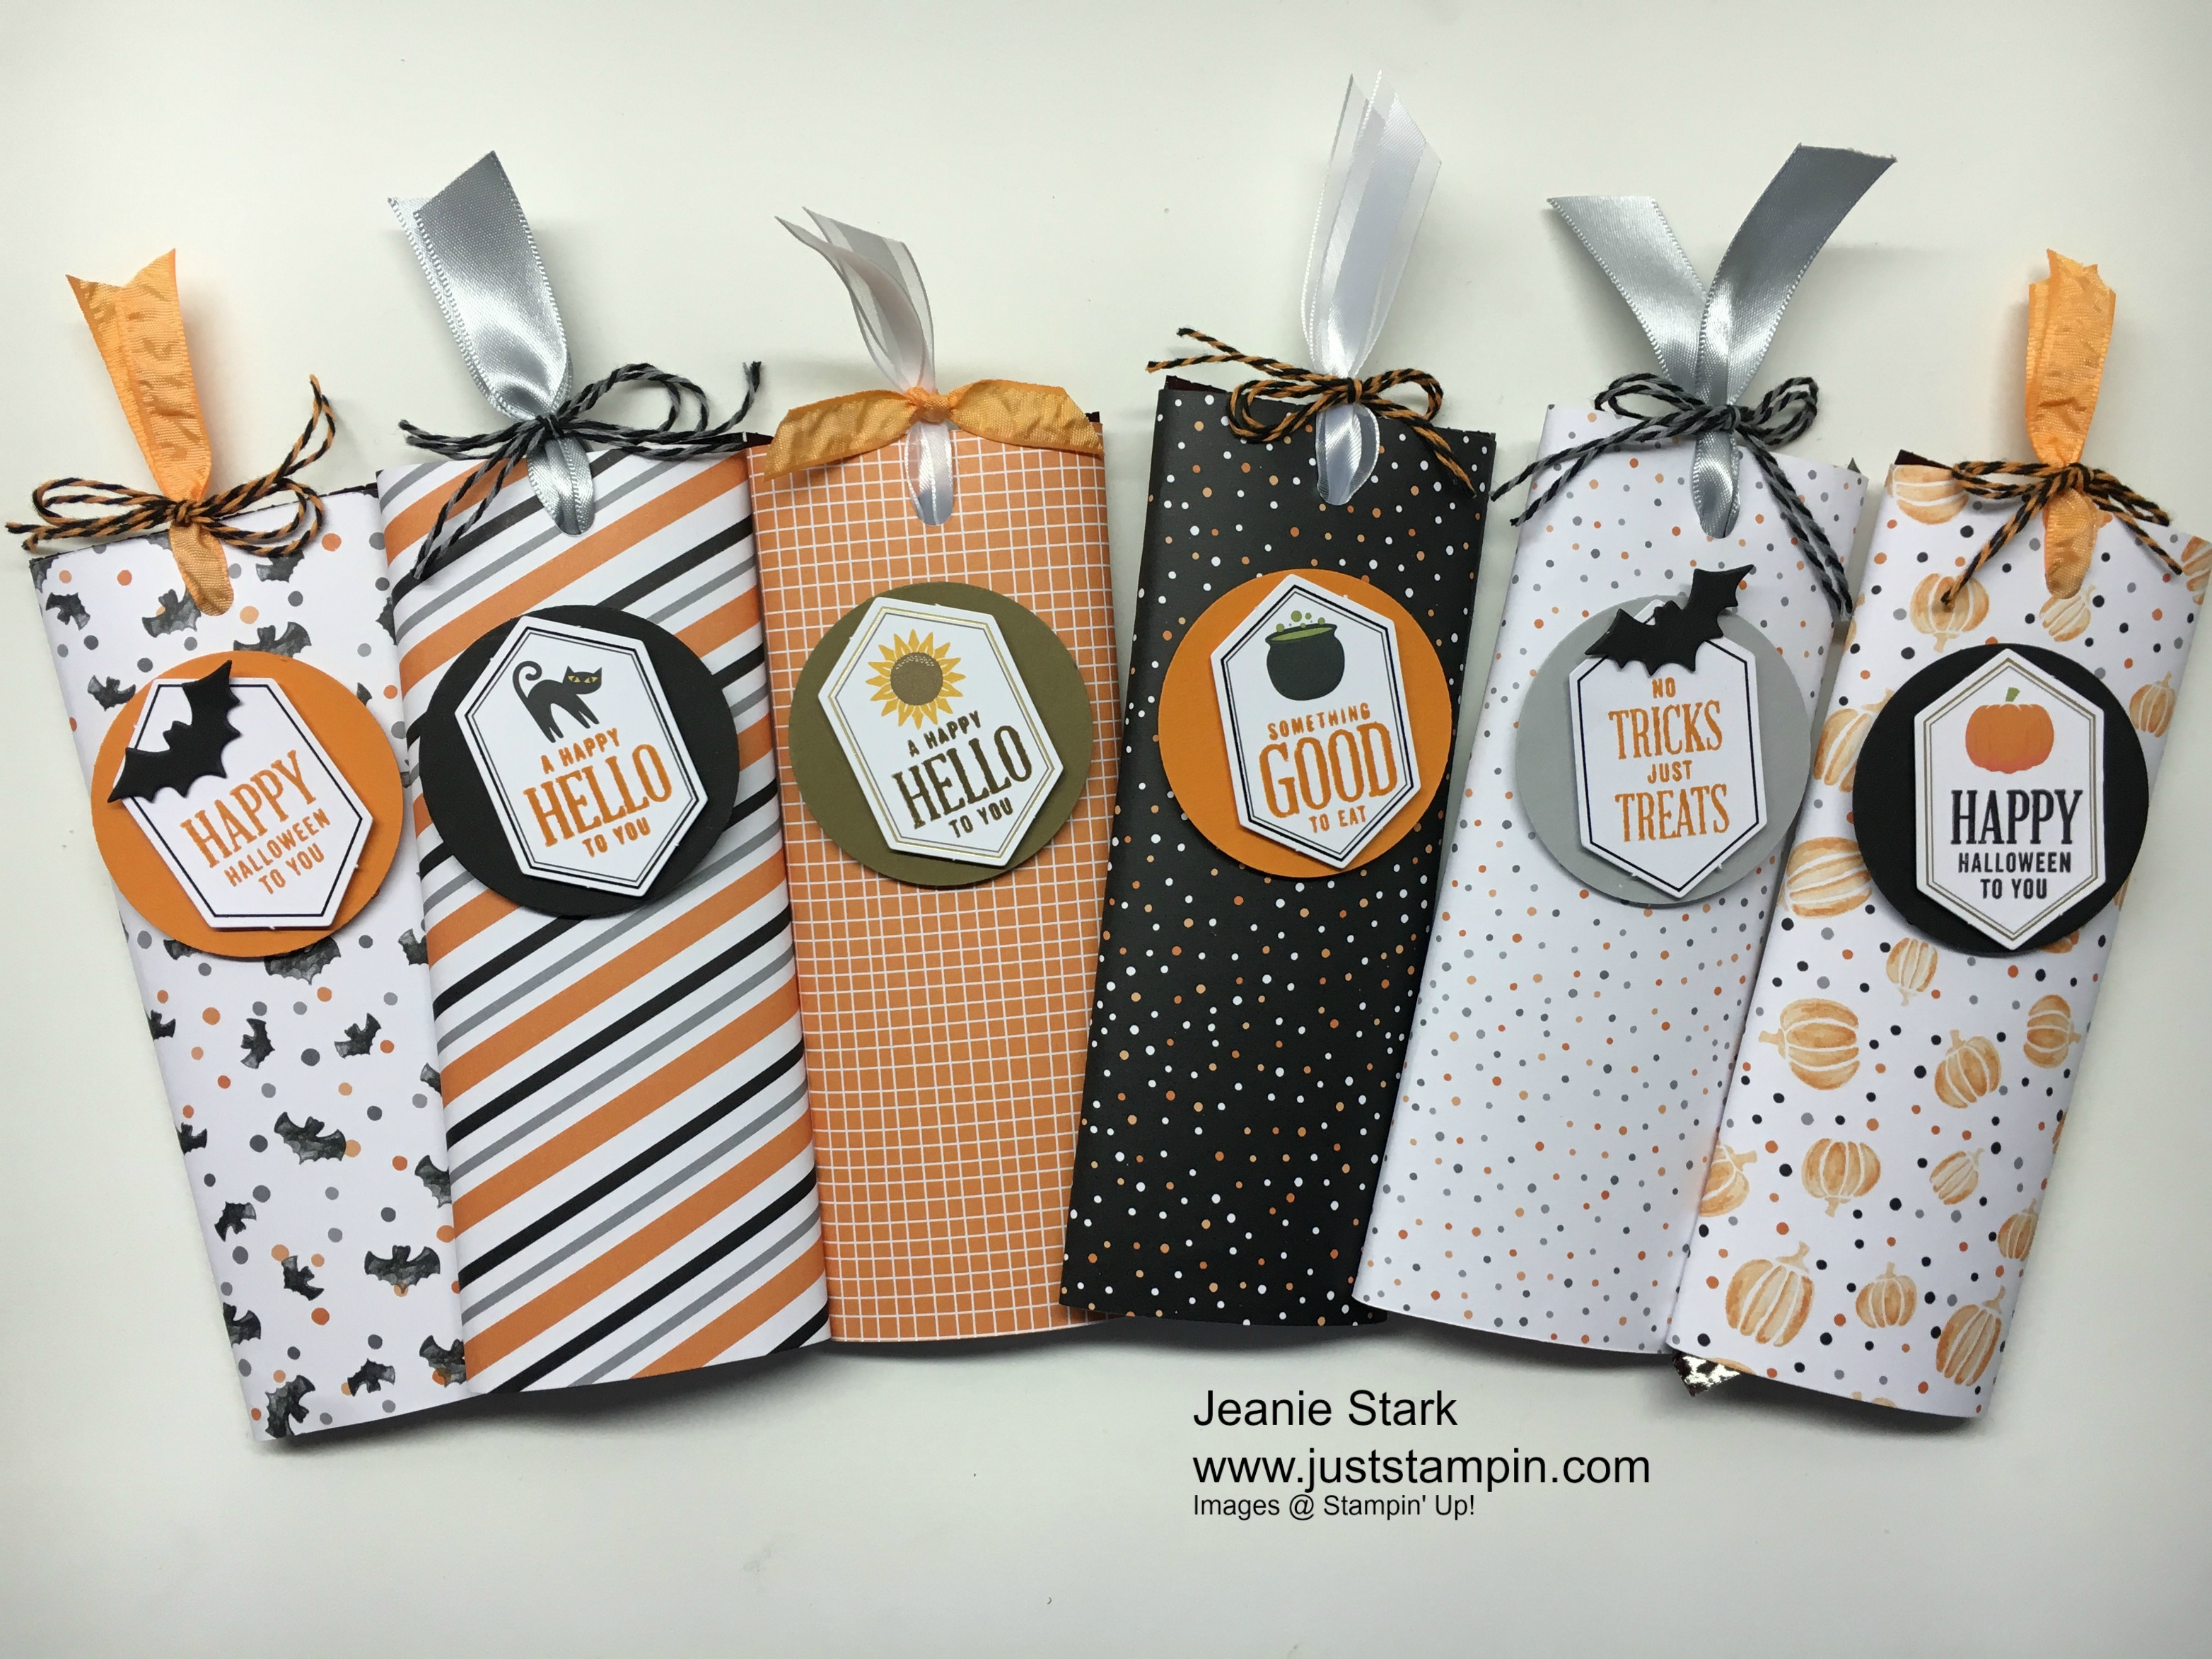
I love seeing the look of surprise when I give these out as the slider is unexpected. I also love that you can make these up so fast! You can change the DSP and make Christmas stocking stuffers, Valentine treats, party favors, etc. (*I’ve used this same concept with microwave popcorn bags.) This is another great way to use up that DSP stash you have!
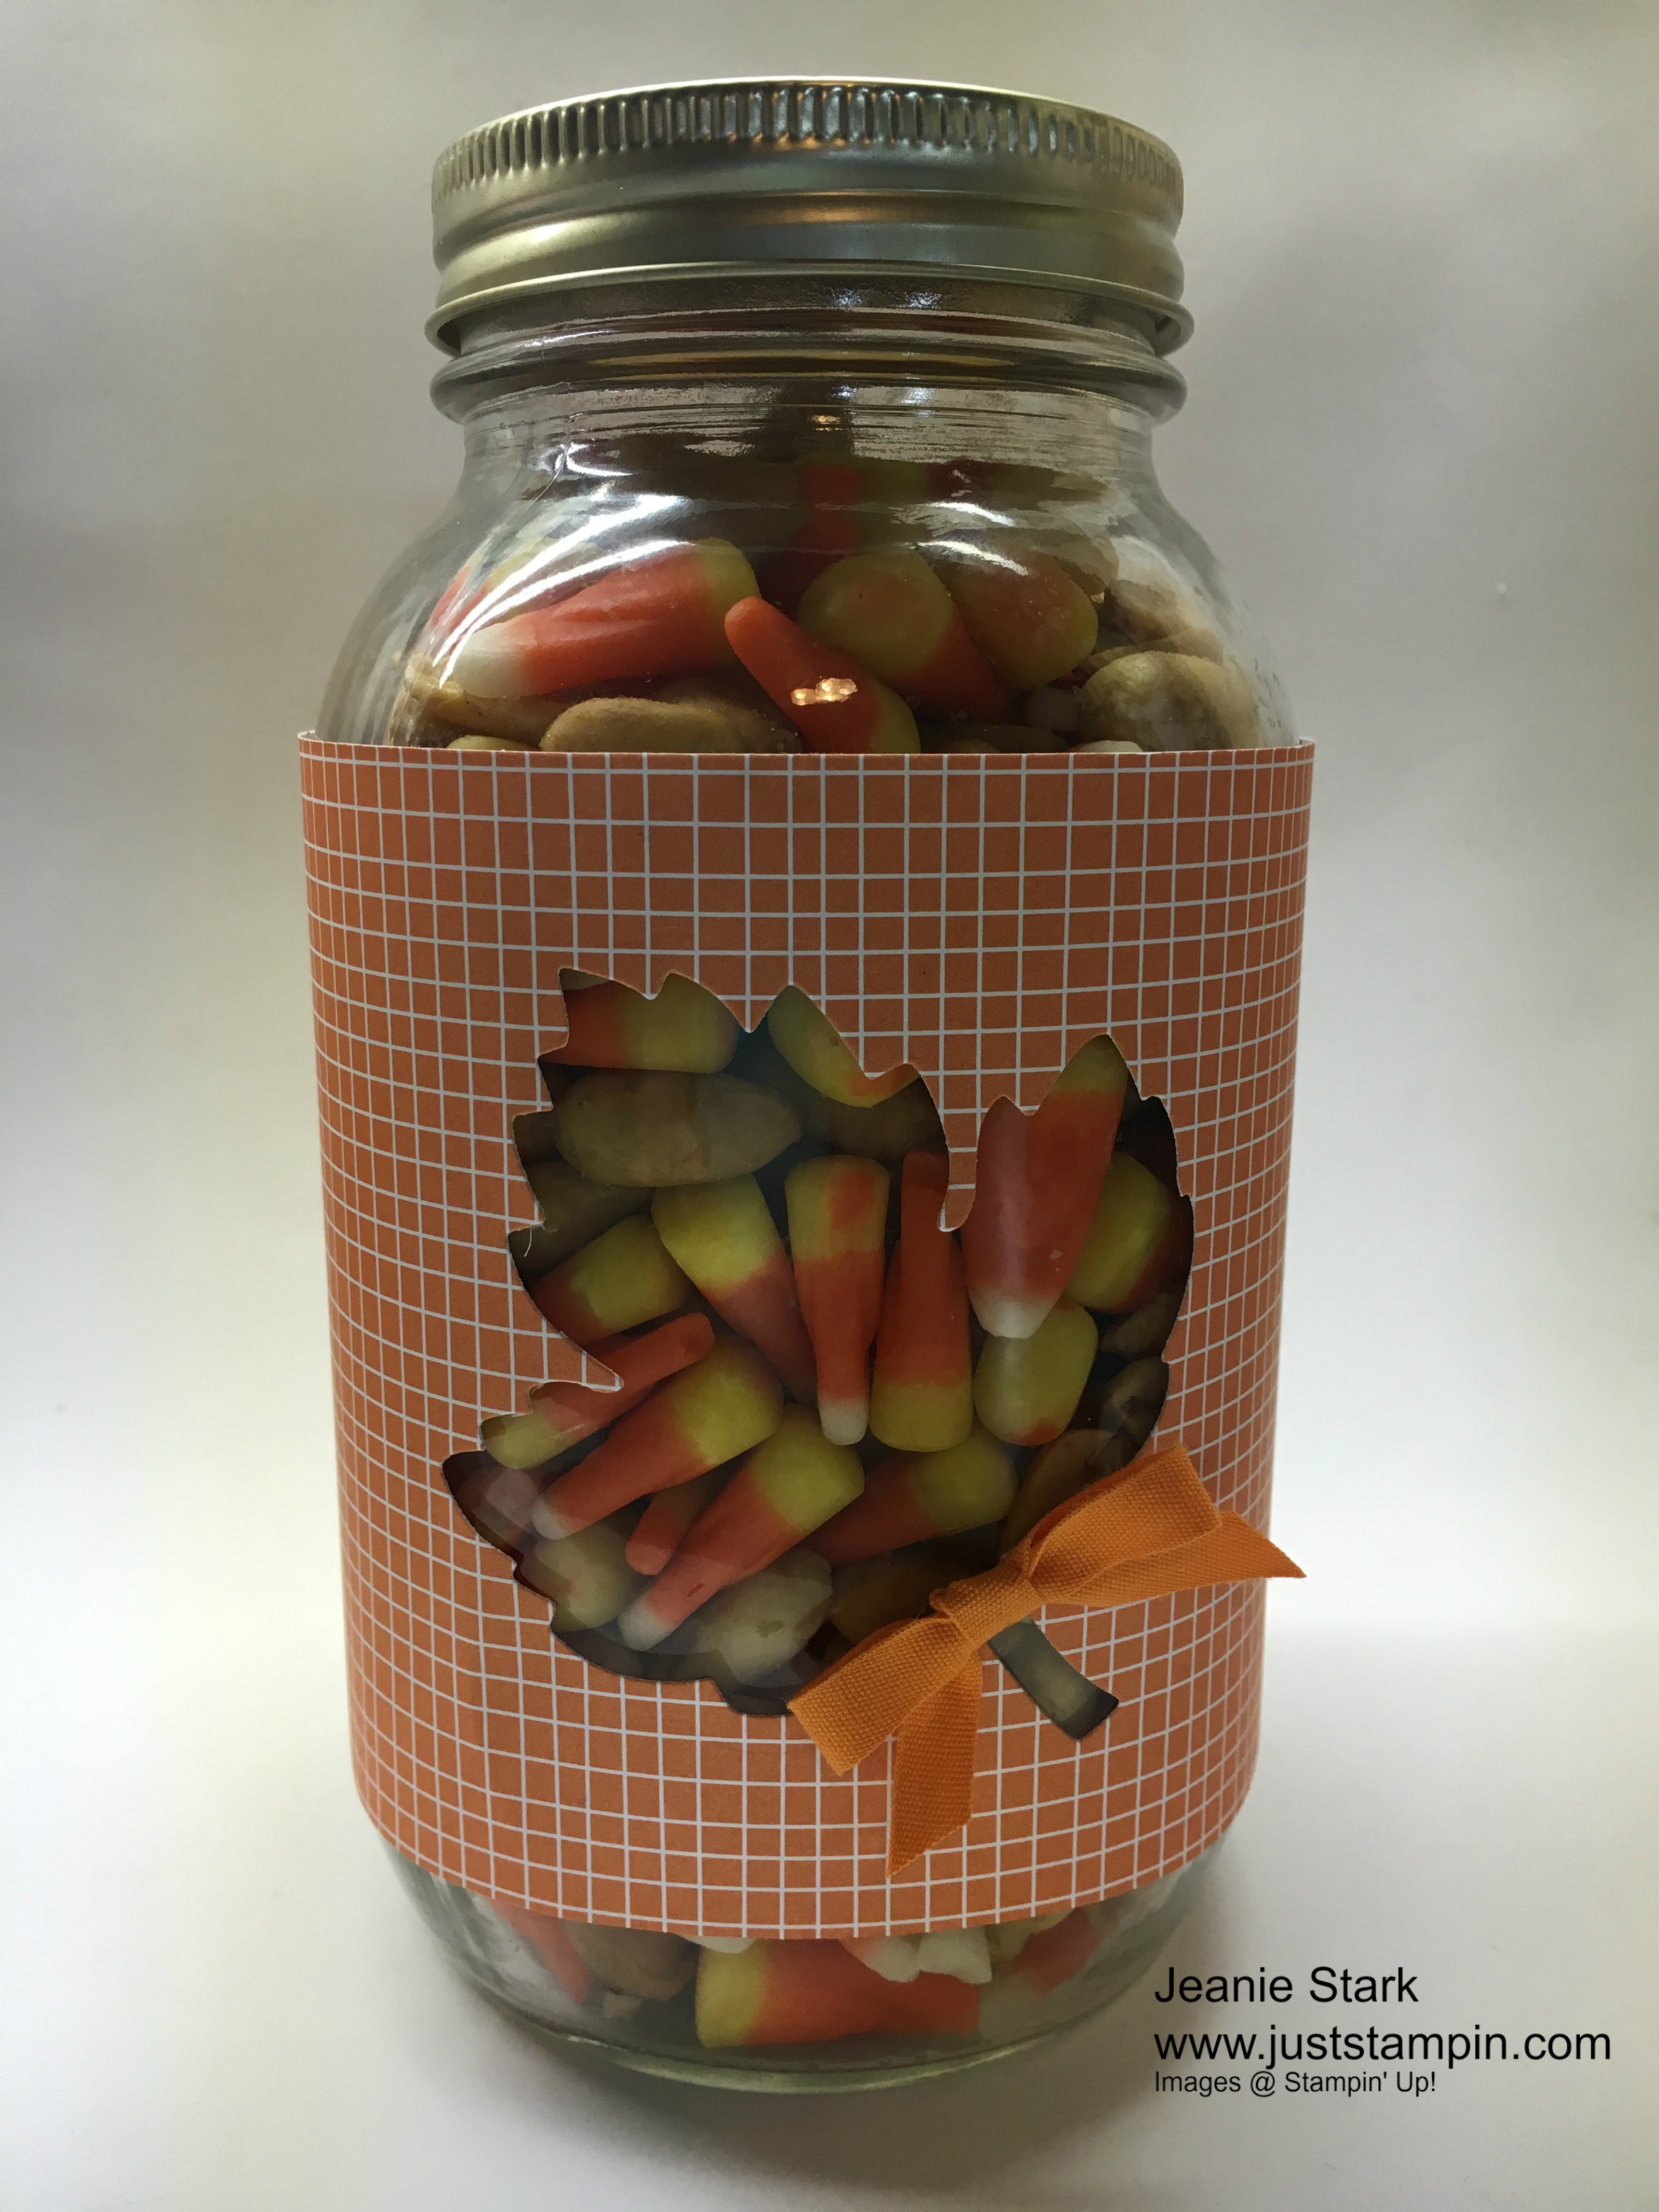
Here’s another quick candy gift idea I CASEd from Jessica Taylor. Fill a mason jar with candy corn and peanuts (Love that sweet & salty!). Cut a strip of DSP (I used the Halloween Night DSP) 4 x 12 and cut a die from the middle. Attach to jar with Tear & Tape and/or glue dots. Embellish as desired. (I added a ribbon bow to the Maple Leaf die cut). I’m bringing this to the hairdressers after school today. Who doesn’t love sweet & salty?!
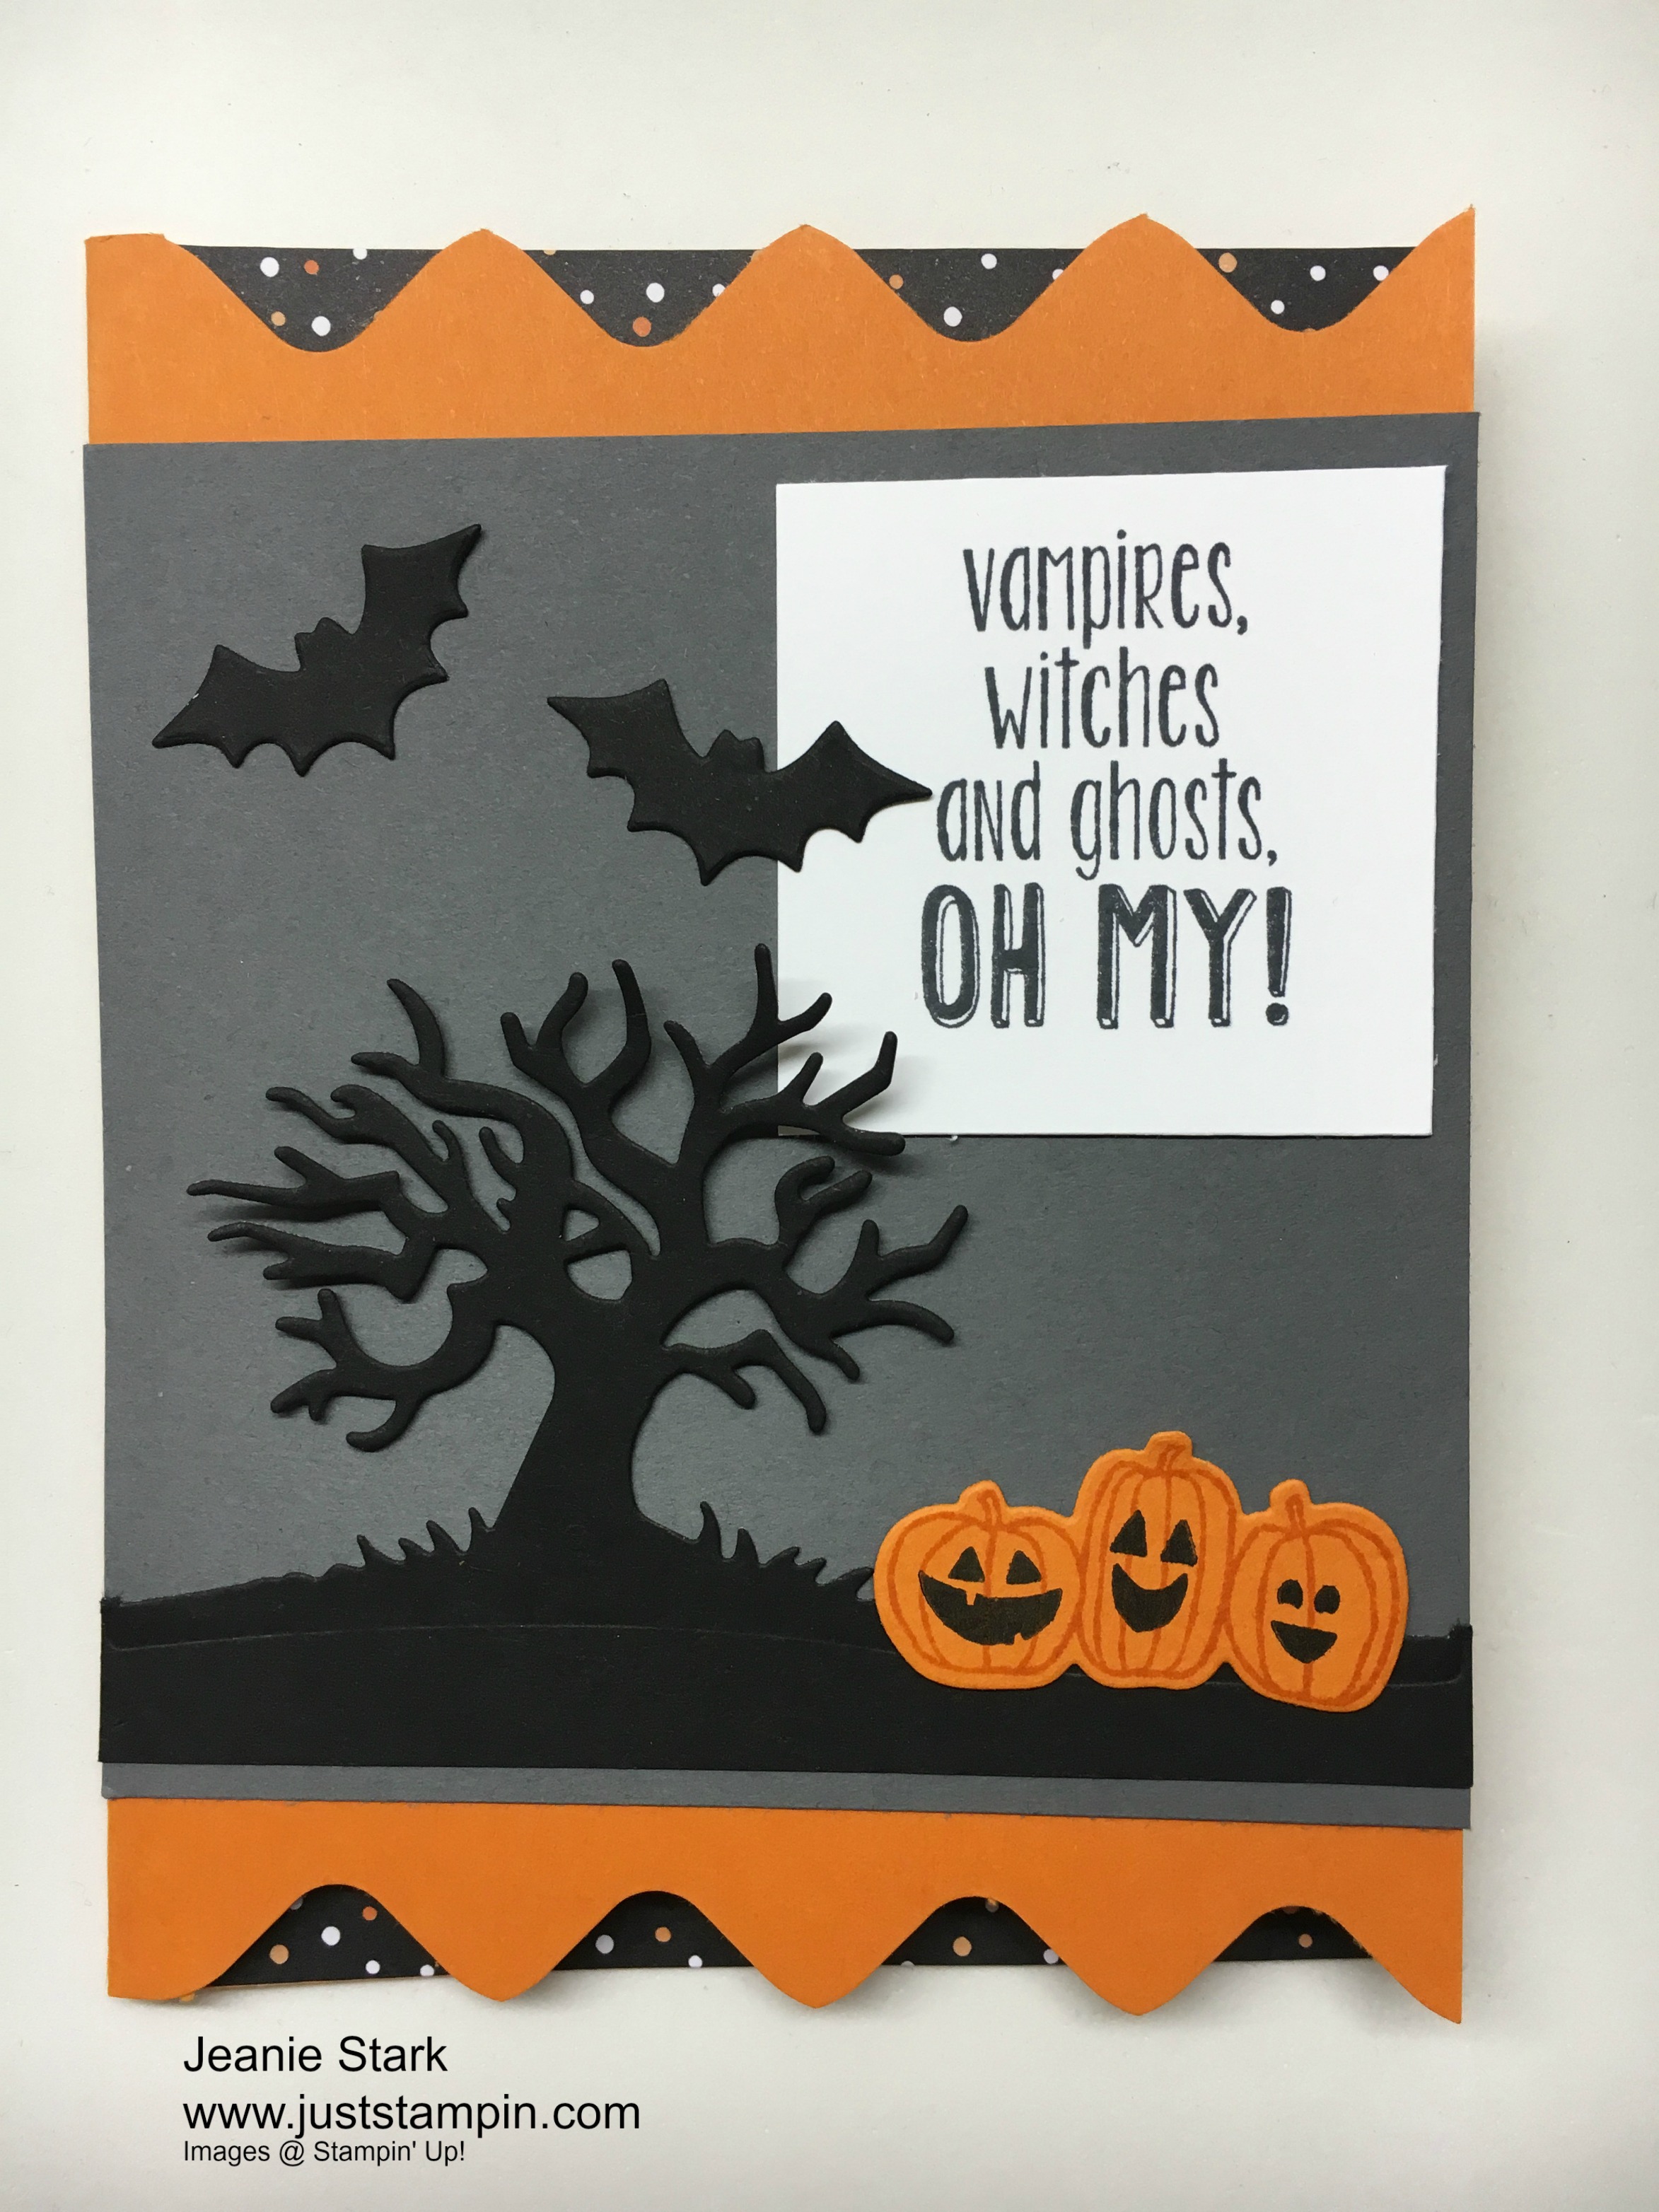
Here’s a zig zag card I made (and shared previously). I used the Halloween Night DSP. You can click on the image to see the original post and details how to make it using the Envelope Punch Board.
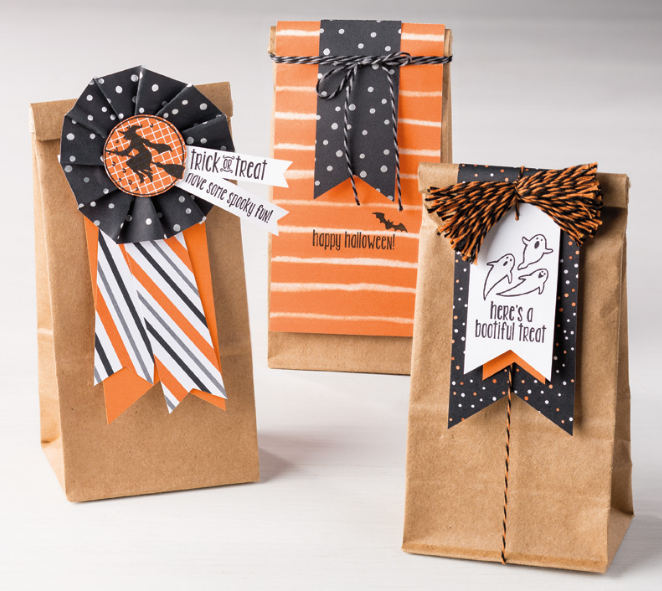
Here’s some projects featured in the catalog using the Halloween Night Specialty Designer Series Paper. You can create perfect packaging with the Spooky Night Stamp Set and products from the Halloween Night Suite.

Click HERE to see products from the Halloween Night Suite and shop from my online store. Please use the Hostess Code 7DB3CBKS when you check out. I’ve added a visual below to show where to enter the code. I always send a thank you gift each month when you order from me. I appreciate each and every order!
Have a Happy Day!
Just Stampin’
Jeanie


Love the jar idea! How simple and easy!
You are so clever Jeanie! And you have outdone yourself with so many fun projects!!!!
You certainly have made these look easy. I could not get the concept, but I got it now. Can’t wait to make some of these!
🙂
Love all of these ideas! Love the jar and leaf cut-out….clever. Can’t wait to try them all. Thanks, Jeanie!
so the sentiments are only available with the paper pumpkin kit? darn….